編輯:關於Android編程
首先給出跑馬燈效果圖

中間的色塊是因為視頻轉成GIF造成的失真,自動忽略哈。
大家知道,橫向的跑馬燈android自帶的TextView就可以實現,詳情請百度【Android跑馬燈效果】。但是豎直的跑馬燈效果原生Android是不支持的。網上也有很多網友實現了自定義的效果,但是我一貫是不喜歡看別人的代碼,所以這篇博客的思路完全是我自己的想法哈。
首先,我們需要給自定義的控件梳理一下格局,如下圖所示:

1、首先我們將控件分為三個區塊,上面綠色部分為消失不可見的塊,中間黑色部分為可見區域,下面紅色部分為欲出現不可見區域。藍色的線代表的是整個控件的上線和下線。
2、首先我們只給出兩個文字塊在內存中,分別是黑色部分的可見塊和紅色部分的欲出現塊。
3、求出這些塊的寬度、高度與中心點的坐標值。
4、滾動時,動態地改變每個塊的中心點y坐標,使之向上平移。
5、當平移結束後,可見塊位於欲消失的不可見塊,欲出現的可見塊位於可見區域的文字塊。此時將欲消失的文字塊移除List,並重新設置後一個索引的Text和重心坐標值,重新加入List中,刷新。
6、用一個Handler來處理動畫的間隔時間。用屬性動畫ValueAnimator來實現平移的動畫效果。
下面開始代碼講解,首先是用鏈式設置法設置一些常規屬性:
<span > public VerticalMarqueeView color(int color){
  this.color = color;
  return this;
 }

 public VerticalMarqueeView textSize(int textSize){
  this.textSize = textSize;
  return this;
 }

 public VerticalMarqueeView datas(String[] datas){
  this.datas = datas;
  return this;
 }

 public void commit(){
  if(this.datas == null || datas.length == 0){
   Log.e("VerticalMarqueeView", "the datas's length is illegal");
   throw new IllegalStateException("may be not invoke the method named datas(String[])");
  }
  paint.setColor(color);
  paint.setTextSize(textSize);
 }</span>
最後一定要調用commit方法進行提交,通過代碼可以看出來這裡除了有排空措施,還有最重要的一步:設置字體的大小。
然後我抽象出一個文字塊的bean類:
 public class TextBlock {
  private int width;
  private int height;
  private String text;
  private int drawX;
  private int drawY;
  private Paint paint;
  private int position;

  public TextBlock(int width, int height, Paint paint){
   this.width = width;
   this.height = height;
   this.paint = paint;
  }

  public void reset(int centerY){
   reset(text, centerX, centerY, position);
  }

  public void reset(String text, int centerY){
   reset(text, centerX, centerY, position);
  }

  public void reset(String text, int centerY, int position){
   reset(text, centerX, centerY, position);
  }

  public void reset(String text, int centerX, int centerY, int position){
   this.text = text;
   this.position = position;
   int measureWidth = (int)paint.measureText(text);
   drawX = (width - measureWidth) / 2;
   FontMetrics metrics = paint.getFontMetrics();
   drawY = (int)(centerY + (metrics.bottom - metrics.top) / 2 - metrics.bottom);
  }

  public int getPosition(){
   return position;
  }

  public void draw(Canvas canvas){
   canvas.drawText(text, drawX, drawY, paint);
  }
 }
這個bean類,最重要的方法就是幾個重載的reset方法,通過改變centerY的值,來動態得改變繪制文字的起點實現居中繪制。關於文字的居中繪制請參考百度【android canvas 居中繪制文本】。
然後是重寫onMeasure方法
 @Override
 protected void onMeasure(int widthMeasureSpec, int heightMeasureSpec){
  super.onMeasure(widthMeasureSpec, heightMeasureSpec);
  if(this.datas == null || this.datas.length == 0){
   Log.e("VerticalMarqueeView", "the datas's length is illegal");
   return;
  }
  width = MeasureSpec.getSize(widthMeasureSpec) - getPaddingLeft() - getPaddingRight();
  height = MeasureSpec.getSize(heightMeasureSpec) - getPaddingTop() - getPaddingBottom();
  centerX = width / 2;
  centerY = height / 2;
  blocks.clear();
  //添加顯示區域的文字塊
  TextBlock block1 = new TextBlock(width, height, paint);
  block1.reset(datas[0], centerX, centerY, 0);
  blocks.add(block1);
  if(datas.length > 1){
   TextBlock block2 = new TextBlock(width, height, paint);
   block2.reset(datas[1], centerX, centerY + height, 1);
   blocks.add(block2);
  }
 }
在這個方法中,首先進行非空判斷以免出現致命邏輯錯誤。然後得到整個控件的寬高和重心坐標。然後實例化兩個文字塊TextBlock,第一個文字塊通過reset設置中點y坐標為整個控件的中點y坐標,第二個文字塊通過reset設置中點y坐標為centerY+height,意思就是置於下一個文字塊的不可見區域內。
然後是onDraw方法,這個方法非常簡單,已經將業務邏輯轉交給TextBlock的draw方法了。
 @Override
 protected void onDraw(Canvas canvas){
  for(int i = 0; i < blocks.size(); i++){
   blocks.get(i).draw(canvas);
  }
 }
最關鍵的就是滾動效果的實現了,首先我們給出兩個方法,開始滾動和結束滾動。
 public void startScroll(){
  isStopScroll = false;
  if(datas == null || datas.length == 0 || datas.length == 1){
   Log.e("VerticalMarqueeView", "the datas's length is illegal");
   return;
  }
  if(!isStopScroll){
   handler.postDelayed(new Runnable(){

    @Override
    public void run(){
     scroll();
     if(!isStopScroll){
      handler.postDelayed(this, DURATION_SCROLL);
     }
    }
   }, DURATION_SCROLL);
  }
 }

 public void stopScroll(){
  this.isStopScroll = true;
 }
原理很簡單,首先給出一個boolean標志isStopScroll。然後用Handler的postDelayed方法進行循環延遲得調用scroll方法進行滾動。接下來給出全文最重要的方法,scroll方法。
private void scroll(){
  ValueAnimator animator = ValueAnimator.ofPropertyValuesHolder(PropertyValuesHolder.ofInt("scrollY", centerY, centerY - height));
  animator.setDuration(DURATION_ANIMATOR);
  animator.addUpdateListener(new AnimatorUpdateListener(){

   @Override
   public void onAnimationUpdate(ValueAnimator animation){
    int scrollY = (int)animation.getAnimatedValue("scrollY");
    blocks.get(0).reset(scrollY);
    blocks.get(1).reset(scrollY + height);
    invalidate();
   }
  });
  animator.addListener(new AnimatorListener(){

   @Override
   public void onAnimationStart(Animator animation){
   }

   @Override
   public void onAnimationRepeat(Animator animation){
   }

   @Override
   public void onAnimationEnd(Animator animation){
    //移除第一塊
    int position = blocks.get(1).getPosition();
    TextBlock textBlock = blocks.remove(0);
    //最後一個
    if(position == datas.length - 1){
     position = 0;
    }else{
     position ++;
    }
    textBlock.reset(datas[position], centerY + height, position);
    blocks.add(textBlock);
    invalidate();
   }

   @Override
   public void onAnimationCancel(Animator animation){
   }
  });
  animator.start();
 }
首先采用ValueAnimator類進行屬性動畫,開始值為控件的中點y坐標,結束值為centerY-height,意味著要從下往上移動一個文字塊的距離。然後在動畫更新回調方法中,進行對文字塊的reset方法。當動畫結束後,得到第二個文字塊的position值,然後移除第一個文字塊,重新reset這個文字塊的索引值,再加入到List的容器中。如此循壞。
最後給一個get方法返回position吧。
 public int getCurrentPosition(){
  if(datas == null || datas.length == 0){
   return -1;
  }
  if(datas.length == 1 && blocks.size() == 1){
   return 0;
  }
  return blocks.get(0).getPosition();
 }
上述就將這個自定義控件的所有代碼都呈現出來了,考慮到比較零散,這裡講所有代碼都打印出來:
/**
 * @FileName: VerticalMarqueeView.java
 * @Author
 * @Description:
 * @Date 2016年7月13日 上午9:32:27
 * @CopyRight CNP Corporation
 */
package cc.wxf.component;

import android.animation.Animator;
import android.animation.Animator.AnimatorListener;
import android.animation.PropertyValuesHolder;
import android.animation.ValueAnimator;
import android.animation.ValueAnimator.AnimatorUpdateListener;
import android.content.Context;
import android.graphics.Canvas;
import android.graphics.Color;
import android.graphics.Paint;
import android.graphics.Paint.FontMetrics;
import android.os.Handler;
import android.util.AttributeSet;
import android.util.Log;
import android.view.View;

import java.util.ArrayList;
import java.util.List;

public class VerticalMarqueeView extends View{

 public static final int DURATION_SCROLL = 3000;
 public static final int DURATION_ANIMATOR = 1000;
 private int color = Color.BLACK;
 private int textSize = 30;
 private String[] datas = null;

 private int width;
 private int height;
 private int centerX;
 private int centerY;

 private List<TextBlock> blocks = new ArrayList<TextBlock>(2);
 private Paint paint = new Paint(Paint.ANTI_ALIAS_FLAG);
 private Handler handler = new Handler();
 private boolean isStopScroll = false;

 public VerticalMarqueeView(Context context, AttributeSet attrs, int defStyleAttr){
  super(context, attrs, defStyleAttr);
 }

 public VerticalMarqueeView(Context context, AttributeSet attrs){
  super(context, attrs);
 }

 public VerticalMarqueeView(Context context){
  super(context);
 }

 public VerticalMarqueeView color(int color){
  this.color = color;
  return this;
 }

 public VerticalMarqueeView textSize(int textSize){
  this.textSize = textSize;
  return this;
 }

 public VerticalMarqueeView datas(String[] datas){
  this.datas = datas;
  return this;
 }

 public void commit(){
  if(this.datas == null || datas.length == 0){
   Log.e("VerticalMarqueeView", "the datas's length is illegal");
   throw new IllegalStateException("may be not invoke the method named datas(String[])");
  }
  paint.setColor(color);
  paint.setTextSize(textSize);
 }

 @Override
 protected void onMeasure(int widthMeasureSpec, int heightMeasureSpec){
  super.onMeasure(widthMeasureSpec, heightMeasureSpec);
  if(this.datas == null || this.datas.length == 0){
   Log.e("VerticalMarqueeView", "the datas's length is illegal");
   return;
  }
  width = MeasureSpec.getSize(widthMeasureSpec) - getPaddingLeft() - getPaddingRight();
  height = MeasureSpec.getSize(heightMeasureSpec) - getPaddingTop() - getPaddingBottom();
  centerX = width / 2;
  centerY = height / 2;
  blocks.clear();
  //添加顯示區域的文字塊
  TextBlock block1 = new TextBlock(width, height, paint);
  block1.reset(datas[0], centerX, centerY, 0);
  blocks.add(block1);
  if(datas.length > 1){
   TextBlock block2 = new TextBlock(width, height, paint);
   block2.reset(datas[1], centerX, centerY + height, 1);
   blocks.add(block2);
  }
 }

 @Override
 protected void onDraw(Canvas canvas){
  for(int i = 0; i < blocks.size(); i++){
   blocks.get(i).draw(canvas);
  }
 }

 public void startScroll(){
  isStopScroll = false;
  if(datas == null || datas.length == 0 || datas.length == 1){
   Log.e("VerticalMarqueeView", "the datas's length is illegal");
   return;
  }
  if(!isStopScroll){
   handler.postDelayed(new Runnable(){

    @Override
    public void run(){
     scroll();
     if(!isStopScroll){
      handler.postDelayed(this, DURATION_SCROLL);
     }
    }
   }, DURATION_SCROLL);
  }
 }

 public void stopScroll(){
  this.isStopScroll = true;
 }

 private void scroll(){
  ValueAnimator animator = ValueAnimator.ofPropertyValuesHolder(PropertyValuesHolder.ofInt("scrollY", centerY, centerY - height));
  animator.setDuration(DURATION_ANIMATOR);
  animator.addUpdateListener(new AnimatorUpdateListener(){

   @Override
   public void onAnimationUpdate(ValueAnimator animation){
    int scrollY = (int)animation.getAnimatedValue("scrollY");
    blocks.get(0).reset(scrollY);
    blocks.get(1).reset(scrollY + height);
    invalidate();
   }
  });
  animator.addListener(new AnimatorListener(){

   @Override
   public void onAnimationStart(Animator animation){
   }

   @Override
   public void onAnimationRepeat(Animator animation){
   }

   @Override
   public void onAnimationEnd(Animator animation){
    //移除第一塊
    int position = blocks.get(1).getPosition();
    TextBlock textBlock = blocks.remove(0);
    //最後一個
    if(position == datas.length - 1){
     position = 0;
    }else{
     position ++;
    }
    textBlock.reset(datas[position], centerY + height, position);
    blocks.add(textBlock);
    invalidate();
   }

   @Override
   public void onAnimationCancel(Animator animation){
   }
  });
  animator.start();
 }

 public int getCurrentPosition(){
  if(datas == null || datas.length == 0){
   return -1;
  }
  if(datas.length == 1 && blocks.size() == 1){
   return 0;
  }
  return blocks.get(0).getPosition();
 }

 public class TextBlock {
  private int width;
  private int height;
  private String text;
  private int drawX;
  private int drawY;
  private Paint paint;
  private int position;

  public TextBlock(int width, int height, Paint paint){
   this.width = width;
   this.height = height;
   this.paint = paint;
  }

  public void reset(int centerY){
   reset(text, centerX, centerY, position);
  }

  public void reset(String text, int centerY){
   reset(text, centerX, centerY, position);
  }

  public void reset(String text, int centerY, int position){
   reset(text, centerX, centerY, position);
  }

  public void reset(String text, int centerX, int centerY, int position){
   this.text = text;
   this.position = position;
   int measureWidth = (int)paint.measureText(text);
   drawX = (width - measureWidth) / 2;
   FontMetrics metrics = paint.getFontMetrics();
   drawY = (int)(centerY + (metrics.bottom - metrics.top) / 2 - metrics.bottom);
  }

  public int getPosition(){
   return position;
  }

  public void draw(Canvas canvas){
   canvas.drawText(text, drawX, drawY, paint);
  }
 }

}
最後給出使用的方法,很簡單。
package cc.wxf.androiddemo;

import android.app.Activity;
import android.content.Context;
import android.os.Bundle;
import android.view.View;
import android.widget.Toast;

import cc.wxf.component.VerticalMarqueeView;

public class MainActivity extends Activity {

 private VerticalMarqueeView vmView;

 @Override
 public void onCreate(Bundle savedInstanceState) {
  super.onCreate(savedInstanceState);
  setContentView(R.layout.activity_main);

  vmView = (VerticalMarqueeView)findViewById(R.id.vmView);
  String[] datas = new String[]{
    "南海又開始動蕩了","菲律賓到處都在肇事","這次為了一張審判廢紙,菲律賓投入了多少成本呢","測試數據4","測試數據5為了長度不一樣","就把這條當做測試數據吧"
  };
  vmView.color(getResources().getColor(android.R.color.black))
    .textSize(sp2px(this, 15))
    .datas(datas).commit();
  vmView.startScroll();
  vmView.setOnClickListener(new View.OnClickListener(){

   @Override
   public void onClick(View v){
    Toast.makeText(MainActivity.this, "當前的索引為:" + vmView.getCurrentPosition(), Toast.LENGTH_SHORT).show();
   }
  });
 }

 private int sp2px(Context context, int sp){
  float density = context.getResources().getDisplayMetrics().scaledDensity;
  return (int) (sp * density + 0.5f);
 }

 @Override
 protected void onDestroy() {
  super.onDestroy();
  //必須要調用,否則內存中會一直無限循環
  vmView.stopScroll();
 }
}
demo就不提供了,自定義View就只有上面一個文件。
以上就是本文的全部內容,希望對大家的學習有所幫助,也希望大家多多支持本站。
 Android網絡編程之傳遞數據給服務器(二)
Android網絡編程之傳遞數據給服務器(二) 請尊重他人的勞動成果,轉載請注明出處:Android網絡編程之傳遞數據給服務器(二) 我曾在《Andr
 Android之用PopupWindow實現彈出菜單的方法詳解
在使用UC-WebBrowser時,你會發現它的彈出菜單跟系統自帶的菜單不一樣。它實現更多菜單選項的顯示和分欄。其實,它的本身是PopupWindow或者是AlertDi
 [Android]內存洩露排查手記
內存洩露排查手記 Time:2013.09.02 Author:sodino 問題現象: 這裡內存洩露是指已實例化的對象長期被hold住且無法釋放或不能
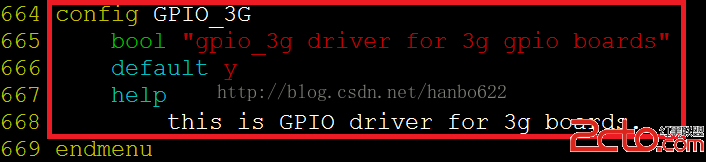 android下調試3G之gpio控制3G上電
如果是自己開發的板子,需要用GPIO引腳控制3G模塊開機/關機時,下面的文章會對你有所幫助,是以處理器IMX6和中興MG3732模塊為例介紹。 一、引腳連接