編輯:Android資訊
做過android動畫的人對Interpolator應該不會陌生,這個類主要是用來控制android動畫的執行速率,一般情況下,如果我們不設置,動畫都不是勻速執行的,系統默認是先加速後減速這樣一種動畫執行速率。
android通過Interpolator類來讓我們自己控制動畫的執行速率,還記得上一篇博客中我們使用屬性動畫實現的旋轉效果嗎?在不設置Interpolator的情況下,這個動畫是先加速後減速,我們現在使用android系統提供的類LinearInterpolator來設置動畫的執行速率,LinearInterpolator可以讓這個動畫勻速執行,我們來看一個案例,我們有兩個TextView重疊放在一起,點擊旋轉按鈕後這兩個TextView同時執行旋轉動畫,不同的是一個設置了LinearInterpolator,而另外一個什麼都沒有設置,代碼如下:
LinearInterpolator ll = new LinearInterpolator();
ObjectAnimator animator = ObjectAnimator.ofFloat(tv, "rotation",
                    0f, 360f);
animator.setInterpolator(ll);
animator.setDuration(5000);
animator.start();
ObjectAnimator animator2 = ObjectAnimator.ofFloat(tv2, "rotation",
                    0f, 360f);
animator2.setDuration(5000);
animator2.start();
效果圖如下:
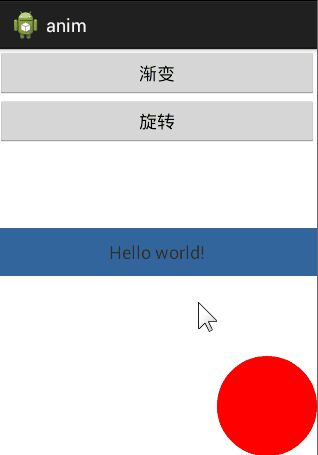
現在我們可以很清楚的看到這裡的差異,一個TextView先加速後減速,一個一直勻速運動。
這就引起了我的好奇,究竟LinearInterpolator做了什麼,改變了動畫的執行速率。這裡我們就要看看源碼了。
當我們調用animator.setInterpolator(ll);的時候,調用的是ValueAnimator方法中的setInterpolator方法,源碼如下:
    public void setInterpolator(TimeInterpolator value) {
        if (value != null) {
            mInterpolator = value;
        } else {
            mInterpolator = new LinearInterpolator();
        }
    }
我們看到這裡有一個mInterpolator變量,如果我們不執行這個方法,那麼mInterpolator 的默認值是多少呢?
我們找到了這樣兩行代碼:
    // The time interpolator to be used if none is set on the animation
    private static final TimeInterpolator sDefaultInterpolator =
            new AccelerateDecelerateInterpolator();
private TimeInterpolator mInterpolator = sDefaultInterpolator;
這下明朗了,如果我們不設置,那麼系統默認使用AccelerateDecelerateInterpolator,AccelerateDecelerateInterpolator又是什麼呢?繼續看源碼:
public class AccelerateDecelerateInterpolator extends BaseInterpolator
        implements NativeInterpolatorFactory {
    public AccelerateDecelerateInterpolator() {
    }

    @SuppressWarnings({"UnusedDeclaration"})
    public AccelerateDecelerateInterpolator(Context context, AttributeSet attrs) {
    }

    public float getInterpolation(float input) {
        return (float)(Math.cos((input + 1) * Math.PI) / 2.0f) + 0.5f;
    }

    /** @hide */
    @Override
    public long createNativeInterpolator() {
        return NativeInterpolatorFactoryHelper.createAccelerateDecelerateInterpolator();
    }
}
這裡的一個核心函數就是getInterpolation,使用了反余弦函數,input傳入的值在0-1之間,因此這裡返回值的變化速率就是先增加後減少,對應的動畫執行速率就是先增加後減速。有興趣的童鞋可以使用MatLab來畫一下這個函數的圖像。而當我們實現了LinearInterpolator之後,情況發生了變化:
public class LinearInterpolator extends BaseInterpolator implements NativeInterpolatorFactory {

    public LinearInterpolator() {
    }

    public LinearInterpolator(Context context, AttributeSet attrs) {
    }

    public float getInterpolation(float input) {
        return input;
    }

    /** @hide */
    @Override
    public long createNativeInterpolator() {
        return NativeInterpolatorFactoryHelper.createLinearInterpolator();
    }
}
這裡干淨利落直接返回了input,沒有經過任何計算。input返回的值是均勻的,因此動畫得以勻速執行。
看到這裡,大家應該就明白了,如果我們想要控制動畫的執行速率,應該重寫getInterpolation方法就能實現。為了證實我們的猜想,我們繼續看源碼。
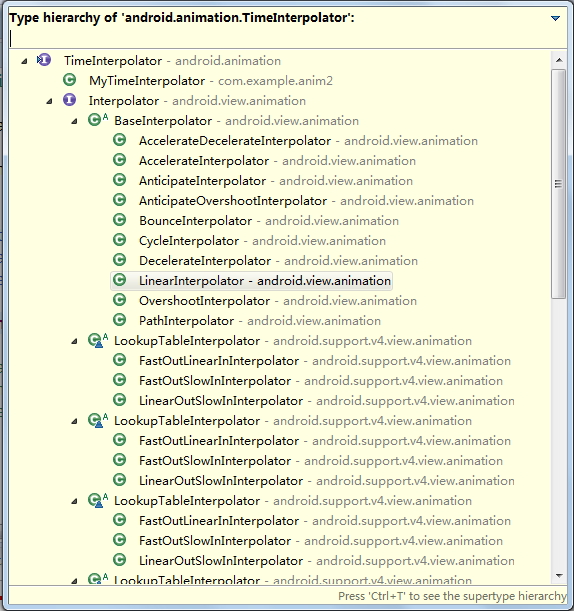
大部分時候,我們使用的系統提供的各種各樣的**Interpolator,比如上文說的LinearInterpolator,這些類都是繼承自Interpolator,而Interpolator則實現了TimeInterpolator接口,我們來看看一個繼承結構圖:
那麼這個終極大Boss TimeInterpolator究竟是什麼樣子呢?
package android.animation;

/**
 * A time interpolator defines the rate of change of an animation. This allows animations
 * to have non-linear motion, such as acceleration and deceleration.
 */
public interface TimeInterpolator {

    /**
     * Maps a value representing the elapsed fraction of an animation to a value that represents
     * the interpolated fraction. This interpolated value is then multiplied by the change in
     * value of an animation to derive the animated value at the current elapsed animation time.
     *
     * @param input A value between 0 and 1.0 indicating our current point
     *        in the animation where 0 represents the start and 1.0 represents
     *        the end
     * @return The interpolation value. This value can be more than 1.0 for
     *         interpolators which overshoot their targets, or less than 0 for
     *         interpolators that undershoot their targets.
     */
    float getInterpolation(float input);
}
源碼還是很簡單的,只有一個方法,就是getInterpolation,看來沒錯,就是它了,如果我們想要自定義Interpolator,只需要實現TimeInterpolator接口的getInterpolation方法就可以了,getInterpolation方法接收的參數是動畫執行的百分比,這個值是均勻的。
我們來個簡單的案例:
public class TanInterpolator implements TimeInterpolator {

    @Override
    public float getInterpolation(float t) {
        return (float) Math.sin((t / 2) * Math.PI);
    }
}
在動畫中使用:
TanInterpolator tl = new TanInterpolator();
ObjectAnimator animator = ObjectAnimator.ofFloat(tv, "rotation", 0f, 360f);
animator.setInterpolator(tl);
animator.setDuration(5000);
animator.start();
咦?這是什麼效果?這是一開始速度很大,然後逐漸減小到0的動畫效果.
原因如下:
看下圖,這是sin函數圖象:
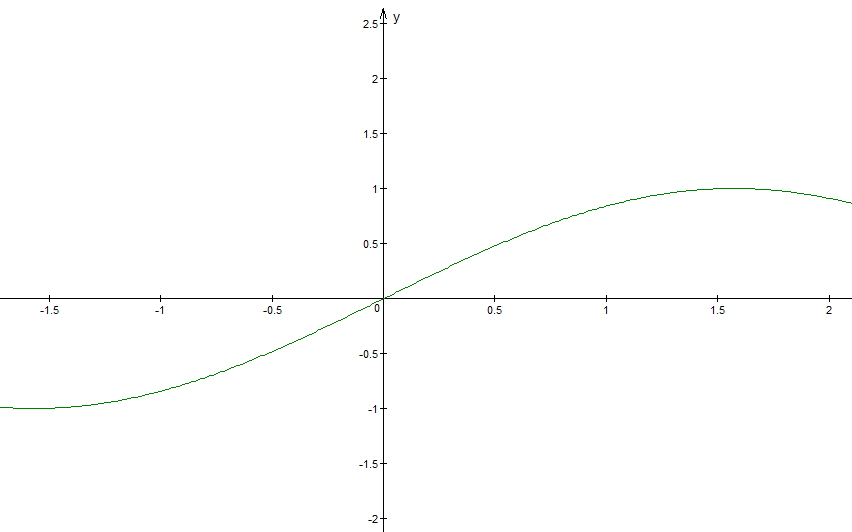
x取0-0.5PI,y值則為0-1,這一段曲線的斜率逐漸減小至0,這也是為什麼我們的動畫一開始執行很快,後來速度逐漸變為0.
好了,看完這些,想必大家已經理解了這個類的使用了吧。
 Android HandlerThread使用總結
簡介 首先我們看到HandlerThread很快就會聯想到Handler。Android中Handler的使用,一般都在UI主線程中執行,因此在Handler接收
 Android UI控件系列:TabWidget(切換卡)
Tab選項卡類似與電話本的界面,通過多個標簽切換不同的內容,要實現這個效果,首先要知道TabHost,它是一個用來存放多個Tab標簽的容器,每一個Tab都可以對應
 Android左右滑動效果的代碼實現
我們經常會在Android應用中看到左右滑動的效果,那麼這種左右滑動效果是如何實現的呢?本文通過對Android代碼的講解,來分析Android中左右滑動效果的代
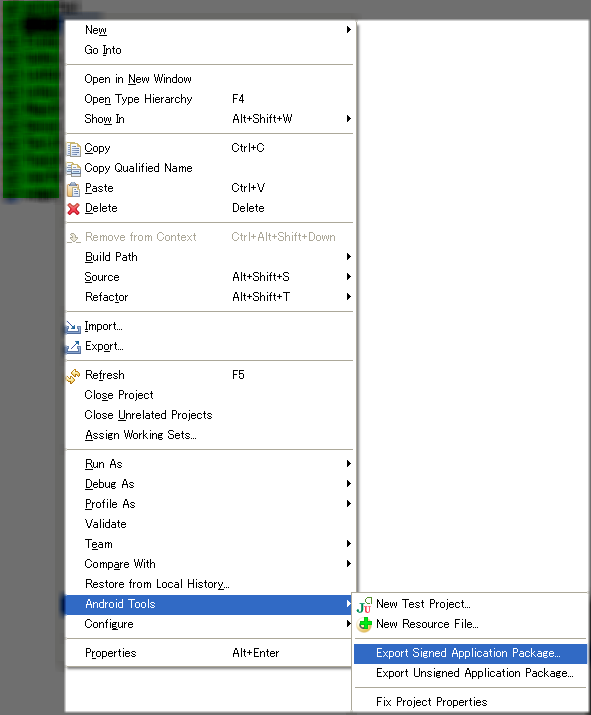 Android APK簽名原理和過程詳解
在Android 系統中,所有安裝 到 系統的應用程序都必有一個數字證書,此數字證書用於標識應用程序的作者和在應用程序之間建立信任關系,如果一個 permissi