編輯:Android開發實例
ListActivity是一個專門顯示ListView的Activity類,它內置了ListView對象,只要我們設置了數據源,就會自動地顯示出來。
雖然ListActivity內置了ListView對象,但我們依然可以使用custom view,通過在onCreate()裡面調用setContentView(resources id)。
不過要注意的是,在自定義的Layout裡面,要設置ListView對象的id為"@android:id/list";在Java代碼裡使用android.R.id.list。
下面的例子,通過添加一個id為android:empty的TextView,當ListView裡面沒有data的時候,就會顯示"No data"。
自定義的View (listview.xml):
<?xml version="1.0" encoding="utf-8"?>加載Layout:
@Override官方提供了多種ListItem的Layout (R.layout),以下是較為常用的,更多的請查看API DOC的R.layout http://androidappdocs.appspot.com/reference/android/R.layout.html:
我們可以自定義自己的Layout (list_item.xml):
<?xml version="1.0" encoding="utf-8"?>使用時,以R.layout.list_item引用就行了。可以參考http://androidappdocs.appspot.com/resources/tutorials/views/hello-listview.html。
通過調用SetListAdapter(ListAdapter adapter)就可實現。我們可以implements ListAdapter來自定義自己的數據源。API內置了幾個implements ListAdapter的Adapter:BaseAdapter,SimpleAdapter (以Map的形式存儲靜態數據),SimpleCursorAdapter (用於游標查詢的結果)等等。通常我們更多地extends BaseAdapter來編寫自己的Adapter類,因為BaseAdapter類是其他Apdater類的基類。擴展BaseAdapter類一般都需要重寫以下方法:
int getCount() 獲取當前Adapter的Items數目
Object getItem(int position) 獲取相應position的Item
long getItemId(int position) 獲取相應position的Item在List中的row id
View getView(int position, View convertView, ViewGroup parent) 獲取在指定position所要顯示的data的View
詳細內容可以查看BaseAdapter類的繼承android.widget.Adapter的方法,有時也需要重寫ListAdapter的boolean isEnabled(int position)來實現某些效果。
接下來看看幾個綁定數據的例子:
1. 使用ArrayAdapter
public void onCreate(Bundle savedInstanceState) {
2. 使用SimpleCursorAdapter
這是Sample裡面List3例子,通過讀取通訊錄android.provider.Contacts.Phones的資料,顯示出來。 protected void onCreate(Bundle savedInstanceState) {3. ListItem為單選按鈕
public void onCreate(Bundle savedInstanceState) {
4. ListItem為多選按鈕
把例子3的設置為android.R.layout.simple_list_item_multiple_choice以及選擇模式ListView.CHOICE_MODE_MULTIPLE。
更多的例子可以參考官方的Sample,在此列出相關List的示例說明:
List1 - 使用ArrayAdapter並setTextFilterEnabled(true)
List2 - 使用SimpleCursorAdapter讀取通訊錄People.NAME
List3 - 使用SimpleCursorAdapter讀取通訊錄Phones,兩行顯示Item
List4 - 使用自定義Adapter以及自定義ItemView
List5 - 帶有separator的ListView,通過自定義Adapter,重寫boolean isEnabled(int position)
List6 - 使用自定義Adapter以及自定義ItemView,可伸展隱藏內容
List7 - 使用SimpleCursorAdapter讀取數據
List8 - 展現使用setEmptyView效果
List9 - 涉及OnScrollListener
List10 - ListItem為單選按鈕
List11 - ListItem為多選按鈕
List12 - 可以動態添加ListItem
List13 - 如何加快操作顯示,during scrolls or flings的時候
List14 - 如何編寫高效的List Adapter
其中List14,官方告訴我們:
To work efficiently the adapter implemented here uses two techniques:
* - It reuses the convertView passed to getView() to avoid inflating View when it is not necessary
* - It uses the ViewHolder pattern to avoid calling findViewById() when it is not necessary
還告訴了我們ViewHolder類的作用:* The ViewHolder pattern consists in storing a data structure in the tag of the view returned by
* getView(). This data structures contains references to the views we want to bind data to, thus
* avoiding calls to findViewById() every time getView() is invoked.
另外在以上的例子裡面了解到,使用自定義Adapter,當數據發生變化後需要調用notifyDataSetChanged()來刷新ListView,但在List12的例子,使用ArrayAdapter卻沒有調用這方法,而隨後自己寫代碼,在發生的異常裡面了解到BaseAdapter,ArrayAdapter是會調用自己的notifyDataSetChanged()。可以查看後面的文章《有關Android線程的學習》裡面的例子!
通常我們響應ListItem的點擊事件:protected void onListItemClick(ListView l, View v, int position, long id) ,在此不詳細講了,理解該函數裡面的參數意義就行了。
本文出自 “學習Android” 博客,請務必保留此出處http://android.blog.51cto.com/268543/336162
 基於Android 實現圖片平移、縮放、旋轉同時進行
前言 之前因為項目需求,其中使用到了圖片的單擊顯示取消,圖片平移縮放功能,昨天突然想再加上圖片的旋轉功能,在網上看了很多相關的例子,可是沒看到能同時實現我想要的功
 Android ApiDemo示例解讀系列之十:App
QuickContactsDemo示例介紹了如果使用Content Provider來訪問Android系統的Contacts 數據庫。 Cont
 Android登錄實例
登錄應用程序的屏幕,詢問憑據登錄到一些特定的應用。可能需要登錄到Facebook,微博等本章介紹了,如何創建一個登錄界面,以及如何管理安全問題和錯誤嘗試。首先,必須定義兩
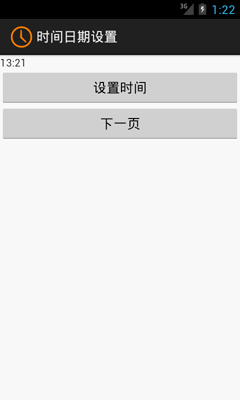 Android開發之時間日期操作實例
相信對於手機的時間日期設置大家一定都不陌生吧,今天舉一個關於時間日期設置的示例,其中有些許不完善之處,例如如何使設置的時間日期和手機系統同步等。感興趣的讀者可以根