編輯:Android開發實例
本文將告訴你如何讓你的應用程序支持各種不同屏幕大小,主要通過以下幾種辦法:
為了確保你的布局能夠自適應各種不同屏幕大小,你應該在布局的視圖中使用"wrap_content"和"match_parent"來確定它的寬和高。如果你使用了"wrap_content",相應視圖的寬和高就會被設定成剛好能夠包含視圖中內容的最小值。而如果你使用了"match_parent"(在Android API 8之前叫作"fill_parent"),就會讓視圖的寬和高延伸至充滿整個父布局。
通過使用"wrap_content"和"match_parent"來替代硬編碼的方式定義視圖大小,你的視圖要麼僅僅使用了需要的那邊一點空間,要麼就會充滿所有可用的空間。例如:
- <LinearLayout xmlns:android="http://schemas.android.com/apk/res/android"
- android:orientation="vertical"
- android:layout_width="match_parent"
- android:layout_height="match_parent">
- <LinearLayout android:layout_width="match_parent"
- android:id="@+id/linearLayout1"
- android:gravity="center"
- android:layout_height="50dp">
- <ImageView android:id="@+id/imageView1"
- android:layout_height="wrap_content"
- android:layout_width="wrap_content"
- android:src="@drawable/logo"
- android:paddingRight="30dp"
- android:layout_gravity="left"
- android:layout_weight="0" />
- <View android:layout_height="wrap_content"
- android:id="@+id/view1"
- android:layout_width="wrap_content"
- android:layout_weight="1" />
- <Button android:id="@+id/categorybutton"
- android:background="@drawable/button_bg"
- android:layout_height="match_parent"
- android:layout_weight="0"
- android:layout_width="120dp"
- style="@style/CategoryButtonStyle"/>
- </LinearLayout>
- <fragment android:id="@+id/headlines"
- android:layout_height="fill_parent"
- android:name="com.example.android.newsreader.HeadlinesFragment"
- android:layout_width="match_parent" />
- </LinearLayout>
注意上面的例子中是如何使用"wrap_content"和"match_parent"來給控件定義寬高的,這讓整個布局可以正確地適應不同屏幕的大小,甚至是橫屏。
下圖是這個布局分別在豎屏和橫屏時顯示的結果,注意控件的寬和高是根據屏幕自適應的。
通過多層嵌套LinearLayout和組合使用"wrap_content"和"match_parent"已經可以構建出足夠復雜的布局。但是LinearLayout無法允許你准確地控制子視圖之前的位置關系,所有LinearLayout中的子視圖只能簡單的一個挨著一個地排列。如果你需要讓子視圖能夠有更多的排列方式,而不是簡單地排成一行或一列,使用RelativeLayout將會是更好的解決方案。RelativeLayout允許布局的子控件之間使用相對定位的方式控制控件的位置,比如你可以讓一個子視圖居屏幕左側對齊,讓另一個子視圖居屏幕右側對齊。
例如:
- <?xml version="1.0" encoding="utf-8"?>
- <RelativeLayout xmlns:android="http://schemas.android.com/apk/res/android"
- android:layout_width="match_parent"
- android:layout_height="match_parent">
- <TextView
- android:id="@+id/label"
- android:layout_width="match_parent"
- android:layout_height="wrap_content"
- android:text="Type here:"/>
- <EditText
- android:id="@+id/entry"
- android:layout_width="match_parent"
- android:layout_height="wrap_content"
- android:layout_below="@id/label"/>
- <Button
- android:id="@+id/ok"
- android:layout_width="wrap_content"
- android:layout_height="wrap_content"
- android:layout_below="@id/entry"
- android:layout_alignParentRight="true"
- android:layout_marginLeft="10dp"
- android:text="OK" />
- <Button
- android:layout_width="wrap_content"
- android:layout_height="wrap_content"
- android:layout_toLeftOf="@id/ok"
- android:layout_alignTop="@id/ok"
- android:text="Cancel" />
- </RelativeLayout>
下圖展示了這個布局在QVGA屏幕上顯示的結果。
下圖展示了這個布局在一個更大的屏幕上顯示的結果。
可以注意到,即使屏幕的大小改變,視圖之前的相對位置都沒有改變。
雖然使用以上幾種方式可以解決屏幕適配性的問題,但是那些通過伸縮控件來適應各種不同屏幕大小的布局,未必就是提供了最好的用戶體驗。你的應用程序應該不僅僅實現了可自適應的布局,還應該提供一些方案根據屏幕的配置來加載不同的布局,可以通過配置限定符(configuration qualifiers)來實現。配置限定符允許程序在運行時根據當前設備的配置自動加載合適的資源(比如為不同尺寸屏幕設計不同的布局)。
現在有很多的應用程序為了支持大屏設備,都會實現“two pane”模式(程序會在左側的面板上展示一個包含子項的List,在右側面板上展示內容)。平板和電視設備的屏幕都很大,足夠同時顯示兩個面板,而手機屏幕一次只能顯示一個面板,兩個面板需要分開顯示。所以,為了實現這種布局,你可能需要以下文件:
res/layout/main.xml,single-pane(默認)布局:
- <LinearLayout xmlns:android="http://schemas.android.com/apk/res/android"
- android:orientation="vertical"
- android:layout_width="match_parent"
- android:layout_height="match_parent">
- <fragment android:id="@+id/headlines"
- android:layout_height="fill_parent"
- android:name="com.example.android.newsreader.HeadlinesFragment"
- android:layout_width="match_parent" />
- </LinearLayout>
res/layout-large/main.xml,two-pane布局:
- <LinearLayout xmlns:android="http://schemas.android.com/apk/res/android"
- android:layout_width="fill_parent"
- android:layout_height="fill_parent"
- android:orientation="horizontal">
- <fragment android:id="@+id/headlines"
- android:layout_height="fill_parent"
- android:name="com.example.android.newsreader.HeadlinesFragment"
- android:layout_width="400dp"
- android:layout_marginRight="10dp"/>
- <fragment android:id="@+id/article"
- android:layout_height="fill_parent"
- android:name="com.example.android.newsreader.ArticleFragment"
- android:layout_width="fill_parent" />
- </LinearLayout>
請注意第二個布局的目錄名中包含了large限定符,那些被定義為大屏的設備(比如7寸以上的平板)會自動加載此布局,而小屏設備會加載另一個默認的布局。
使用Size限定符有一個問題會讓很多程序員感到頭疼,large到底是指多大呢?很多應用程序都希望能夠更自由地為不同屏幕設備加載不同的布局,不管它們是不是被系統認定為"large"。這就是Android為什麼在3.2以後引入了"Smallest-width"限定符。
Smallest-width限定符允許你設定一個具體的最小值(以dp為單位)來指定屏幕。例如,7寸的平板最小寬度是600dp,所以如果你想讓你的UI在這種屏幕上顯示two pane,在更小的屏幕上顯示single pane,你可以使用sw600dp來表示你想在600dp以上寬度的屏幕上使用two pane模式。
res/layout/main.xml,single-pane(默認)布局:
- <LinearLayout xmlns:android="http://schemas.android.com/apk/res/android"
- android:orientation="vertical"
- android:layout_width="match_parent"
- android:layout_height="match_parent">
- <fragment android:id="@+id/headlines"
- android:layout_height="fill_parent"
- android:name="com.example.android.newsreader.HeadlinesFragment"
- android:layout_width="match_parent" />
- </LinearLayout>
res/layout-sw600dp/main.xml,two-pane布局:
- <LinearLayout xmlns:android="http://schemas.android.com/apk/res/android"
- android:layout_width="fill_parent"
- android:layout_height="fill_parent"
- android:orientation="horizontal">
- <fragment android:id="@+id/headlines"
- android:layout_height="fill_parent"
- android:name="com.example.android.newsreader.HeadlinesFragment"
- android:layout_width="400dp"
- android:layout_marginRight="10dp"/>
- <fragment android:id="@+id/article"
- android:layout_height="fill_parent"
- android:name="com.example.android.newsreader.ArticleFragment"
- android:layout_width="fill_parent" />
- </LinearLayout>
這意味著,那些最小屏幕寬度大於600dp的設備會選擇layout-sw600dp/main.xml(two-pane)布局,而更小屏幕的設備將會選擇layout/main.xml(single-pane)布局。
然而,使用早於Android 3.2系統的設備將無法識別sw600dp這個限定符,所以你還是同時需要使用large限定符。這樣你就需要在res/layout-large和res/layout-sw600dp目錄下都添加一個相同的main.xml。下節你將會看到如何避免重復定義這種布局的技巧。
Smallest-width限定符僅在Android 3.2及之後的系統中有效。因而,你也需要同時使用Size限定符(small, normal, large和xlarge)來兼容更早的系統。例如,你想手機上顯示single-pane界面,而在7寸平板和更大屏的設備上顯示multi-pane界面,你需要提供以下文件:
最後的兩個文件是完全相同的,為了要解決這種重復,你需要使用別名技巧。例如,你可以定義以下布局:
加入以下兩個文件:
res/values-large/layout.xml:
- <resources>
- <item name="main" type="layout">@layout/main_twopanes</item>
- </resources>
res/values-sw600dp/layout.xml:
- <resources>
- <item name="main" type="layout">@layout/main_twopanes</item>
- </resources>
最後兩個文件有著相同的內容,但是它們並沒有真正去定義布局,它們僅僅只是給main定義了一個別名main_twopanes。這樣兩個layout.xml都只是引用了@layout/main_twopanes,就避免了重復定義布局文件的情況。
有些布局會在橫屏和豎屏的情況下都顯示的很好,但是多數情況下這些布局都可以再調整的。在News Reader示例程序中,布局在不同屏幕尺寸和不同屏幕方向中是這樣顯示的:
所有這些布局都是定義在 res/layout/ 這個目錄下,為了要讓設備根據屏幕配置來加載正確的布局,程序需要使用布局別名來實現。
res/layout/onepane.xml:
- <LinearLayout xmlns:android="http://schemas.android.com/apk/res/android"
- android:orientation="vertical"
- android:layout_width="match_parent"
- android:layout_height="match_parent">
- <fragment android:id="@+id/headlines"
- android:layout_height="fill_parent"
- android:name="com.example.android.newsreader.HeadlinesFragment"
- android:layout_width="match_parent" />
- </LinearLayout>
res/layout/onepane_with_bar.xml:
- <LinearLayout xmlns:android="http://schemas.android.com/apk/res/android"
- android:orientation="vertical"
- android:layout_width="match_parent"
- android:layout_height="match_parent">
- <LinearLayout android:layout_width="match_parent"
- android:id="@+id/linearLayout1"
- android:gravity="center"
- android:layout_height="50dp">
- <ImageView android:id="@+id/imageView1"
- android:layout_height="wrap_content"
- android:layout_width="wrap_content"
- android:src="@drawable/logo"
- android:paddingRight="30dp"
- android:layout_gravity="left"
- android:layout_weight="0" />
- <View android:layout_height="wrap_content"
- android:id="@+id/view1"
- android:layout_width="wrap_content"
- android:layout_weight="1" />
- <Button android:id="@+id/categorybutton"
- android:background="@drawable/button_bg"
- android:layout_height="match_parent"
- android:layout_weight="0"
- android:layout_width="120dp"
- style="@style/CategoryButtonStyle"/>
- </LinearLayout>
- <fragment android:id="@+id/headlines"
- android:layout_height="fill_parent"
- android:name="com.example.android.newsreader.HeadlinesFragment"
- android:layout_width="match_parent" />
- </LinearLayout>
res/layout/twopanes.xml:
- <LinearLayout xmlns:android="http://schemas.android.com/apk/res/android"
- android:layout_width="fill_parent"
- android:layout_height="fill_parent"
- android:orientation="horizontal">
- <fragment android:id="@+id/headlines"
- android:layout_height="fill_parent"
- android:name="com.example.android.newsreader.HeadlinesFragment"
- android:layout_width="400dp"
- android:layout_marginRight="10dp"/>
- <fragment android:id="@+id/article"
- android:layout_height="fill_parent"
- android:name="com.example.android.newsreader.ArticleFragment"
- android:layout_width="fill_parent" />
- </LinearLayout>
res/layout/twopanes_narrow.xml:
- <LinearLayout xmlns:android="http://schemas.android.com/apk/res/android"
- android:layout_width="fill_parent"
- android:layout_height="fill_parent"
- android:orientation="horizontal">
- <fragment android:id="@+id/headlines"
- android:layout_height="fill_parent"
- android:name="com.example.android.newsreader.HeadlinesFragment"
- android:layout_width="200dp"
- android:layout_marginRight="10dp"/>
- <fragment android:id="@+id/article"
- android:layout_height="fill_parent"
- android:name="com.example.android.newsreader.ArticleFragment"
- android:layout_width="fill_parent" />
- </LinearLayout>
現在所有需要的布局都已經定義好了,剩下的只要使用限定符來讓各個設備根據屏幕配置加載正確的布局了。你現在就可以使用布局別名技術:
res/values/layouts.xml:
- <resources>
- <item name="main_layout" type="layout">@layout/onepane_with_bar</item>
- <bool name="has_two_panes">false</bool>
- </resources>
res/values-sw600dp-land/layouts.xml:
- <resources>
- <item name="main_layout" type="layout">@layout/twopanes</item>
- <bool name="has_two_panes">true</bool>
- </resources>
res/values-sw600dp-port/layouts.xml:
- <resources>
- <item name="main_layout" type="layout">@layout/onepane</item>
- <bool name="has_two_panes">false</bool>
- </resources>
res/values-large-land/layouts.xml:
- <resources>
- <item name="main_layout" type="layout">@layout/twopanes</item>
- <bool name="has_two_panes">true</bool>
- </resources>
res/values-large-port/layouts.xml:
- <resources>
- <item name="main_layout" type="layout">@layout/twopanes_narrow</item>
- <bool name="has_two_panes">true</bool>
- </resources>
支持不同屏幕大小通常情況下也意味著,你的圖片資源也需要有自適應的能力。例如,一個按鈕的背景圖片必須能夠隨著按鈕大小的改變而改變。
如果你想使用普通的圖片來實現上述功能,你很快就會發現結果是令人失望的,因為運行時會均勻地拉伸或壓縮你的圖片。解決方案是使用nine-patch圖片,它是一種被特殊處理過的PNG圖片,你可以指定哪些區域可以拉伸而哪些區域不可以。
因而,當你設計需要在不同大小的控件中使用的圖片時,最好的方法就是用nine-patch圖片。為了將圖片轉換成nine-patch圖片,你可以從一張普通的圖片開始:
然後通過SDK中帶有的draw9patch工具打開這張圖片(工具位置在SDK的tools目錄下),你可以在圖片的左邊框和上邊框繪制來標記哪些區域可以被拉伸。你也可以在圖片的右邊框和下邊框繪制來標記內容需要放置在哪個區域。結果如下圖所示:
注意圖片邊框上的黑色像素,在上邊框和左邊框的部分表示當圖片需要拉伸時就拉伸黑點標記的位置。在下邊框和右邊框的部分表示內容將會被放置的區域。
同時需要注意,這張圖片的後綴名是 .9.png。你必須要使用這個後綴名,因為系統就是根據這個來區別nine-patch圖片和普通的PNG圖片的。
當你需要在一個控件中使用nine-patch圖片時(如android:background="@drawable/button"),系統就會根據控件的大小自動地拉伸你想要拉伸的部分,效果如下圖所示:
 Android開發之時間日期操作實例
相信對於手機的時間日期設置大家一定都不陌生吧,今天舉一個關於時間日期設置的示例,其中有些許不完善之處,例如如何使設置的時間日期和手機系統同步等。感興趣的讀者可以根
 Android RSS客戶端開發實例之二:如何解析XML文件
在RSS概述中簡單介紹了RSS,本節將為大家講解RSS文件的解析,而又因為RS
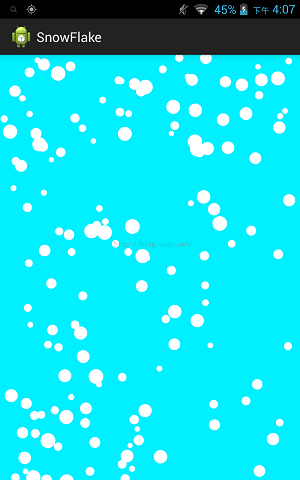 Android 實現漫天飛舞雪花以及下雨天的效果
前言: 這個效果實現的原作者是國外一位大神。我在其基礎上測試,以及在代碼上加了不少注釋,以及局部修改。後面我有根據漫天飛舞雪花,實現下雨天場景的效
 Android開發實例之多點觸控程序
智能終端設備的多點觸控操作為我們帶來了種種炫酷體驗,這也使得很多Android