編輯:關於android開發
昨天的(今天凌晨)的博文《Android中Fragment和ViewPager那點事兒》中,我們通過使用Fragment和ViewPager模仿實現了微信的布局框架。今天我們來通過使用ListView實現其中聯系人一欄的基本視圖,效果如下:
要實現上圖的效果,我們要用到兩個知識點:
通過繼承BaseAdapter(抽象類)自定義適配器可以實現更靈活更復雜的列表。
自定義適配器ListView的優化:
(1)使用固定寬高(match_parent)的ListView,有助於在填充item(ListView中每行的布局)時避免重復渲染ListView組件,導致重復多次調用getView方法。
(2)Convertview用來重復使用已被影藏的item對象,從而避免重復創建每個item的view對象。
(3)使用ViewHolder優化提高容器中查找組件的效率。
ListView中默認添加分割線(Divider),但這個默認分割線太丑,我們往往需要自定義分割線樣式提升用戶體驗,這裡介紹兩種方法
(1)在layout中的ListView組件中添加android:divider ="#FFFFFF",然後在ListView對應的item布局中使用View組件添加分割線(後面代中會演示)
(2)在drawable建立inset文件來定義分割線的位置以及顏色,在values下的diments.xml中添加屬性定義分割線的粗細(dp)
1 <?xml version="1.0" encoding="utf-8"?>
2 <inset xmlns:android="http://schemas.android.com/apk/res/android"
3     android:insetLeft="5dp"
4     android:insetRight="5dp"
5     android:drawable="@color/colorline">
6 </inset>
inset屬性:定義嵌入的可繪制資源。它必須是根元素。屬性如下(ATTRIBUTES):
xmlns:android 字符串值,必須的。它定義了XML的命名空間,必須是:http://schemas.android.com/apk/res/android
android:drawable :要繪制的資源,必須的,它指向一個要嵌入的可繪制資源。
android:insetTop :尺寸值。用尺寸值或Dimension資源定義頂部的嵌入位置。
android:insetRight :尺寸值。用尺寸值或Dimension資源定義右邊的嵌入位置。
android:insetBottom :尺寸值。用尺寸值或Dimension資源定義底部的嵌入位置。
android:insetLeft :尺寸值。用尺寸值或Dimension資源定義左邊的嵌入位置。
1 <resources>
2     <!-- Default screen margins, per the Android Design guidelines. -->
3     <dimen name="activity_horizontal_margin">16dp</dimen>
4     <dimen name="activity_vertical_margin">16dp</dimen>
5     <dimen name="list_item_line">1dp</dimen>
6 </resources>
1 <ListView
2     android:id="@+id/contact_list"
3     android:layout_width="wrap_content"
4     android:layout_height="wrap_content"
5     android:layout_alignParentTop="true"
6     android:layout_alignParentStart="true"
7     android:divider="@drawable/list_item_divider"
8     android:dividerHeight="@dimen/list_item_line"/>
以上就是我們本次主要使用的知識點,下面我們繼續昨天的代碼,做整體效果演示:
ListView組件中添加android:divider ="#FFFFFF",使默認分割線不可見
 1 <?xml version="1.0" encoding="utf-8"?>
 2 <LinearLayout xmlns:android="http://schemas.android.com/apk/res/android"
 3     android:layout_width="match_parent"
 4     android:layout_height="match_parent"
 5     android:orientation="vertical">
 6     <TextView
 7         android:layout_width="match_parent"
 8         android:layout_height="wrap_content"
 9         android:text="聯系人管理"
10         android:textSize="30sp"/>
11     <ListView
12         android:id="@+id/contact_list"
13         android:layout_width="wrap_content"
14         android:layout_height="wrap_content"
15         android:layout_alignParentTop="true"
16         android:layout_alignParentStart="true"
17         android:divider ="#FFFFFF"/>
18 </LinearLayout>
後面添加了View組件用於自定義分割線
 1 <?xml version="1.0" encoding="utf-8"?>
 2 <LinearLayout xmlns:android="http://schemas.android.com/apk/res/android"
 3     android:orientation="vertical" android:layout_width="match_parent"
 4     android:layout_height="match_parent">
 5     <LinearLayout
 6         android:layout_width="match_parent"
 7         android:layout_height="wrap_content"
 8         android:padding="5dp"
 9         android:orientation="horizontal">
10         <ImageView
11             android:id="@+id/friend_iv"
12             android:layout_width="40dp"
13             android:layout_height="40dp"
14             android:background="@mipmap/ic_launcher" />
15         <TextView
16             android:id="@+id/friend_tv"
17             android:layout_width="match_parent"
18             android:layout_height="40dp"
19             android:layout_marginLeft="10dp"
20             android:gravity="center_vertical"
21             android:text="wu"
22             android:textSize="15dp" />
23     </LinearLayout>
24     <View
25         android:layout_width="match_parent"
26         android:layout_height="1dp"
27         android:layout_marginLeft="5dp"
28         android:layout_marginRight="5dp"
29         android:background="@color/colorline"/>
30 </LinearLayout>
 1 import android.content.Context;
 2 import android.os.Bundle;
 3 import android.support.annotation.Nullable;
 4 import android.support.v4.app.Fragment;
 5 import android.view.LayoutInflater;
 6 import android.view.View;
 7 import android.view.ViewGroup;
 8 import android.widget.BaseAdapter;
 9 import android.widget.ImageView;
10 import android.widget.ListView;
11 import android.widget.TextView;
12 /**
13  * Created by panchengjia on 2016/12/25.
14  */
15 public class ContactListFragment extends Fragment {
16     ListView contact_list;
17     String[] names = {"郭嘉", "黃月英", "華佗", "劉備", "陸遜", "呂布", "呂蒙", "馬超", "司馬懿", "孫權", "孫尚香", "夏侯惇",
18             "許褚", "楊修", "張飛", "趙雲", "甄姬", "周瑜", "諸葛亮"};
19     int[] icons = {R.mipmap.guojia, R.mipmap.huangyueying, R.mipmap.huatuo,
20             R.mipmap.liubei, R.mipmap.luxun, R.mipmap.lvbu, R.mipmap.lvmeng,
21             R.mipmap.machao, R.mipmap.simayi, R.mipmap.sunquan, R.mipmap.sunshangxiang,
22             R.mipmap.xiahoudun, R.mipmap.xuchu, R.mipmap.yangxiu, R.mipmap.zhangfei,
23             R.mipmap.zhaoyun, R.mipmap.zhenji, R.mipmap.zhouyu, R.mipmap.zhugeliang};
24     @Nullable
25     @Override
26     public View onCreateView(LayoutInflater inflater, ViewGroup container, Bundle savedInstanceState) {
27         View view = inflater.inflate(R.layout.contactlist_fragment,container,false);
28         contact_list= (ListView) view.findViewById(R.id.contact_list);
29         contact_list.setAdapter(new MyListViewAdapter(getContext()));
30         return view;
31     }
32     class MyListViewAdapter extends BaseAdapter{
33         Context context;
34         public MyListViewAdapter(Context context) {
35             this.context = context;
36         }
37         @Override
38         public int getCount() {
39             return names.length;
40         }
41         @Override
42         public Object getItem(int position) {
43             return names[position];
44         }
45         @Override
46         public long getItemId(int position) {
47             return position;
48         }
49         @Override
50         public View getView(int position, View convertView, ViewGroup parent) {
51             ViewHold vh;
52             if (convertView == null) {
53                 convertView = LayoutInflater.from(context).inflate(R.layout.contactlist_item, null);
54                 vh = new ViewHold();
55                 vh.iv = (ImageView) convertView.findViewById(R.id.friend_iv);
56                 vh.tv = (TextView) convertView.findViewById(R.id.friend_tv);
57                 convertView.setTag(vh);
58             }
59             vh = (ViewHold) convertView.getTag();
60             vh.iv.setImageResource(icons[position]);
61             vh.tv.setText(names[position]);
62             return convertView;
63         }
64         class ViewHold {
65             ImageView iv;
66             TextView tv;
67         }
68     }
69 }
今天就到這了,明天我們繼續對此布局功能進行擴展,睡覺啦。
 關於使用底部菜單欄的使用。。。,使用底部菜單欄..
關於使用底部菜單欄的使用。。。,使用底部菜單欄..要使用它的話, 首先, 你要引用你的庫 到你的當前工程裡面, 操作方式如下,右鍵你當前的工程, build
 android 常用的listview管理示例
android 常用的listview管理示例 listview作為一個常用控件,對listview的操作都應該滾瓜爛熟了。對listview 的數據管理也很熟悉。包括l
 Android基礎部分再學習---activity的生命周期
Android基礎部分再學習---activity的生命周期 關於activity的生命周期:要知道的知識點 1.每個生命活動執行的順序、 2.每個生命周期我們應該做怎麼
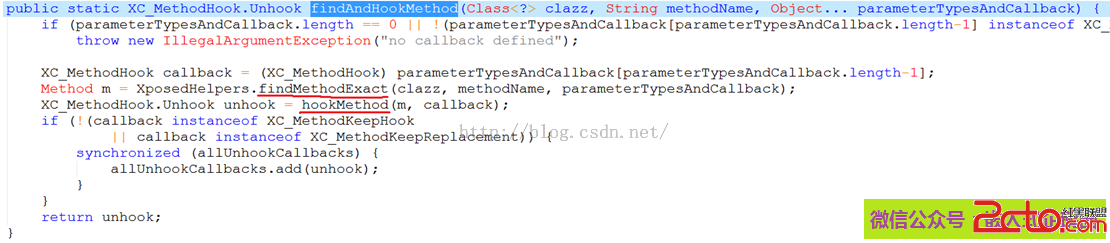 Android熱補丁技術—dexposed原理簡析(手機淘寶采用方案)
Android熱補丁技術—dexposed原理簡析(手機淘寶采用方案) 本文由嵌入式企鵝圈原創團隊成員、阿裡資深工程師Hao分享。 上篇文章《Android無線開發的幾種