EditText在API中的結構
java.lang.Object
android.view.View
android.widget.TextView
android.widget.EditText
已知直接子類:
AutoCompleteTextView, ExtractEditText
已知間接子類:
MultiAutoCompleteTextView
EditText是TextView的直接子類 所以EditText會繼承父類TextView的一些方法。下面我用自己寫的一個Demo 和大家詳細的說明一下EditView的使用方法。
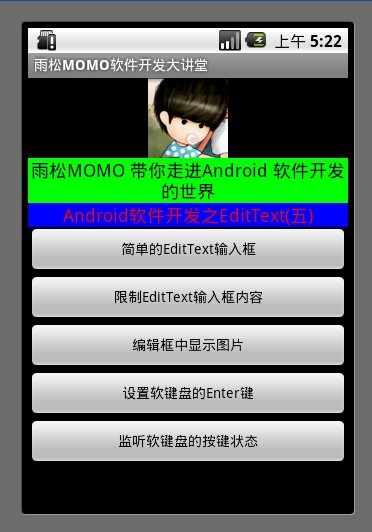
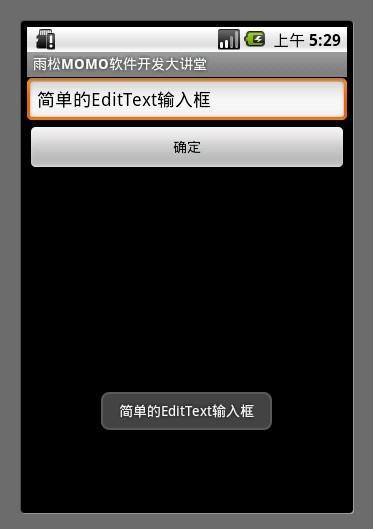
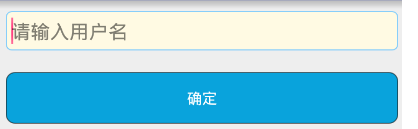
1.簡單的EditText輸入框
非常簡單,在layout布局中配置一下EditText 在配置一個Button 在代碼中監聽Button 的事件 獲取當前EditView中輸入的內容並且顯示出來。
XML/HTML代碼
- <?xml version="1.0" encoding="utf-8"?>
- <LinearLayout xmlns:android="http://schemas.android.com/apk/res/android"
- android:id="@+id/textviewll"
- android:orientation="vertical" android:layout_width="fill_parent"
- android:layout_height="fill_parent">
- <EditText
- android:id="@+id/sample_edit_text0"
- android:layout_width="fill_parent"
- android:layout_height="wrap_content"
- android:text="簡單的EditText輸入框"/>
- <Button
- android:id="@+id/sample_button0"
- android:layout_width="fill_parent" android:layout_height="wrap_content"
- android:text="確定"/>
- </LinearLayout>
Java代碼
- public class SampleActivity extends Activity {
- @Override
- protected void onCreate(Bundle savedInstanceState) {
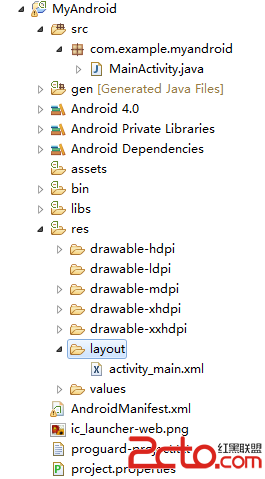
- setContentView(R.layout.sample);
-
- final EditText editText0 = (EditText)findViewById(R.id.sample_edit_text0);
-
- Button button0 = (Button)findViewById(R.id.sample_button0);
-
- button0.setOnClickListener(new OnClickListener() {
-
- @Override
- public void onClick(View arg0) {
- String str = editText0.getText().toString();
- Toast.makeText(SampleActivity.this,str, Toast.LENGTH_LONG).show();
- }
- });
-
- super.onCreate(savedInstanceState);
- }
- }
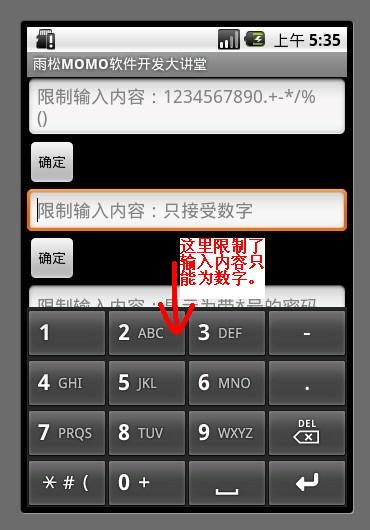
2.限制EditText輸入框的內容
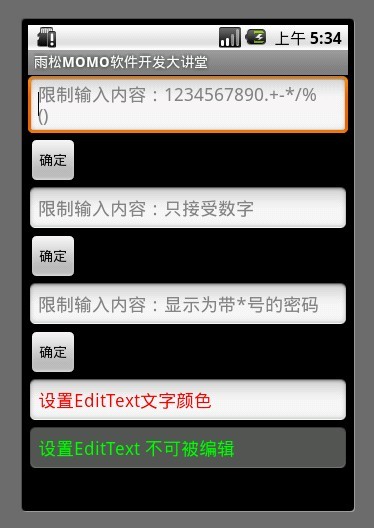
在layout中配置信息
android:digits=”1234567890.+-*/%\n()”
限制輸入框中只能輸入自己定義的這些字符串 如果輸入其它將不予以顯示
android:phoneNumber=”true”
限制輸入框中只能輸入手機號碼
android:password=”true”
限制輸入框中輸入的任何內容將以”*”符號來顯示
android:hint=”默認文字”
輸入內容前默認顯示在輸入框中的文字
android:textColorHint=”#FF0000″
設置文字內容顏色
android:enabled=”false”
設置輸入框不能被編輯
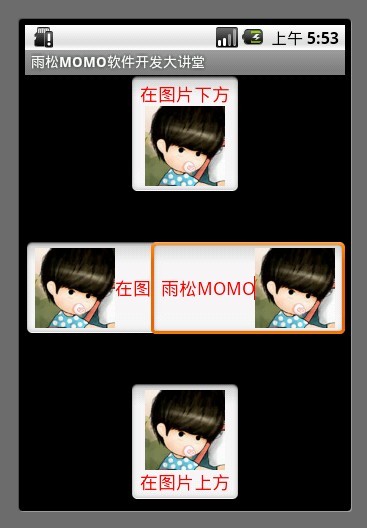
3.編輯框中顯示圖片
上一篇講TextView中就講過在TextView中添加圖片的方法,因為EditText是TextView的子類, 所以當然也可以添加圖片了,只是一旦在EditText中添加圖片以後是不能刪除的,如圖所示我可以編輯圖片旁邊的內容,寫入文字。
XML/HTML代碼
- <?xml version="1.0" encoding="utf-8"?>
- <RelativeLayout xmlns:android="http://schemas.android.com/apk/res/android"
- android:id="@+id/textviewll"
- android:orientation="vertical"
- android:layout_width="fill_parent"
- android:layout_height="fill_parent"
- >
- <EditText
- android:layout_width="wrap_content"
- android:layout_height="wrap_content"
- android:text="在圖片下方"
- android:textColor="#FF0000"
- android:drawableBottom="@drawable/jay"
- android:layout_alignParentTop="true"
- android:layout_centerHorizontal="true"
- >
- </EditText>
-
- <EditText
- android:layout_width="wrap_content"
- android:layout_height="wrap_content"
- android:text="在圖片上方"
- android:textColor="#FF0000"
- android:drawableTop="@drawable/jay"
- android:layout_alignParentBottom="true"
- android:layout_centerHorizontal="true"
- >
- </EditText>
- <EditText
- android:layout_width="wrap_content"
- android:layout_height="wrap_content"
- android:text="在圖片左邊"
- android:textColor="#FF0000"
- android:drawableLeft="@drawable/jay"
- android:layout_alignParentLeft="true"
- android:layout_centerVertical="true"
- >
- </EditText>
- <EditText
- android:layout_width="wrap_content"
- android:layout_height="wrap_content"
- android:text="在圖片右邊"
- android:textColor="#FF0000"
- android:drawableRight="@drawable/jay"
- android:layout_alignParentRight="true"
- android:layout_centerVertical="true"
- >
- </EditText>
-
- </RelativeLayout >
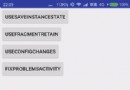
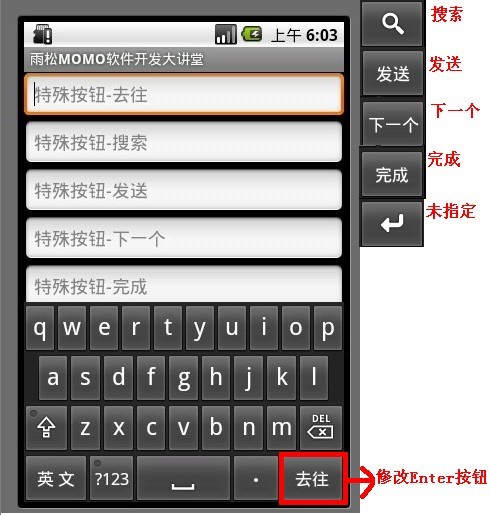
4.設置軟鍵盤的Enter鍵
如圖所示我們可以修改軟鍵盤的Enter按鈕的樣式,可以在代碼中監聽 按鈕點擊事件。
Java代碼
- package cn.m15.xys;
-
- import android.app.Activity;
- import android.os.Bundle;
- import android.view.KeyEvent;
- import android.view.inputmethod.EditorInfo;
- import android.widget.EditText;
- import android.widget.TextView;
- import android.widget.Toast;
- import android.widget.TextView.OnEditorActionListener;
-
- public class KeyBoardActivity extends Activity {
- @Override
- protected void onCreate(Bundle savedInstanceState) {
- setContentView(R.layout.keyboard);
-
- EditText editText0 = (EditText)findViewById(R.id.txtTest0);
-
- editText0.setOnEditorActionListener(new OnEditorActionListener() {
-
- @Override
- public boolean onEditorAction(TextView arg0, int arg1, KeyEvent arg2) {
- if (arg1 == EditorInfo.IME_ACTION_GO) {
- Toast.makeText(KeyBoardActivity.this, "你點了軟鍵盤'去往'按鈕",
- Toast.LENGTH_SHORT).show();
- }
- return false;
- }
- });
- EditText editText1 = (EditText)findViewById(R.id.txtTest1);
-
- editText1.setOnEditorActionListener(new OnEditorActionListener() {
-
- @Override
- public boolean onEditorAction(TextView arg0, int arg1, KeyEvent arg2) {
- if (arg1 == EditorInfo.IME_ACTION_SEARCH) {
- Toast.makeText(KeyBoardActivity.this, "你點了軟鍵盤'搜索'按鈕",
- Toast.LENGTH_SHORT).show();
- }
- return false;
- }
- });
- EditText editText2 = (EditText)findViewById(R.id.txtTest2);
-
- editText2.setOnEditorActionListener(new OnEditorActionListener() {
-
- @Override
- public boolean onEditorAction(TextView arg0, int arg1, KeyEvent arg2) {
- if (arg1 == EditorInfo.IME_ACTION_SEND) {
- Toast.makeText(KeyBoardActivity.this, "你點了軟鍵盤'發送'按鈕",
- Toast.LENGTH_SHORT).show();
- }
- return false;
- }
- });
- EditText editText3 = (EditText)findViewById(R.id.txtTest3);
-
- editText3.setOnEditorActionListener(new OnEditorActionListener() {
-
- @Override
- public boolean onEditorAction(TextView arg0, int arg1, KeyEvent arg2) {
- if (arg1 == EditorInfo.IME_ACTION_NEXT) {
- Toast.makeText(KeyBoardActivity.this, "你點了軟鍵盤'下一個'按鈕",
- Toast.LENGTH_SHORT).show();
- }
- return false;
- }
- });
- EditText editText4 = (EditText)findViewById(R.id.txtTest4);
-
- editText4.setOnEditorActionListener(new OnEditorActionListener() {
-
- @Override
- public boolean onEditorAction(TextView arg0, int arg1, KeyEvent arg2) {
- if (arg1 == EditorInfo.IME_ACTION_DONE) {
- Toast.makeText(KeyBoardActivity.this, "你點了軟鍵盤'完成'按鈕",
- Toast.LENGTH_SHORT).show();
- }
- return false;
- }
- });
- EditText editText5 = (EditText)findViewById(R.id.txtTest5);
-
- editText5.setOnEditorActionListener(new OnEditorActionListener() {
-
- @Override
- public boolean onEditorAction(TextView arg0, int arg1, KeyEvent arg2) {
- if (arg1 == EditorInfo.IME_ACTION_UNSPECIFIED) {
- Toast.makeText(KeyBoardActivity.this, "你點了軟鍵盤'未指定'按鈕",
- Toast.LENGTH_SHORT).show();
- }
- return false;
- }
- });
- super.onCreate(savedInstanceState);
- }
- }
監聽軟鍵盤的點擊事件
XML/HTML代碼
- <?xml version="1.0" encoding="utf-8"?>
- <LinearLayout xmlns:android="http://schemas.android.com/apk/res/android"
- android:id="@+id/textviewll"
- android:orientation="vertical" android:layout_width="fill_parent"
- android:layout_height="fill_parent">
- <EditText android:id="@+id/txtTest0"
- android:imeOptions="actionGo"
- android:layout_width="fill_parent"
- android:layout_height="wrap_content"
- android:hint="特殊按鈕-去往"
- ></EditText>
- <EditText android:id="@+id/txtTest1"
- android:imeOptions="actionSearch"
- android:layout_width="fill_parent"
- android:layout_height="wrap_content"
- android:hint="特殊按鈕-搜索"
- ></EditText>
- <EditText android:id="@+id/txtTest2"
- android:imeOptions="actionSend"
- android:layout_width="fill_parent"
- android:layout_height="wrap_content"
- android:hint="特殊按鈕-發送"
- ></EditText>
- <EditText android:id="@+id/txtTest3"
- android:imeOptions="actionNext"
- android:layout_width="fill_parent"
- android:layout_height="wrap_content"
- android:hint="特殊按鈕-下一個"
- ></EditText>
- <EditText android:id="@+id/txtTest4"
- android:imeOptions="actionDone"
- android:layout_width="fill_parent"
- android:layout_height="wrap_content"
- android:hint="特殊按鈕-完成"
- ></EditText>
- <EditText android:id="@+id/txtTest5"
- android:imeOptions="actionUnspecified"
- android:layout_width="fill_parent"
- android:layout_height="wrap_content"
- android:hint="特殊按鈕-未指定"
- ></EditText>
-
- </LinearLayout>
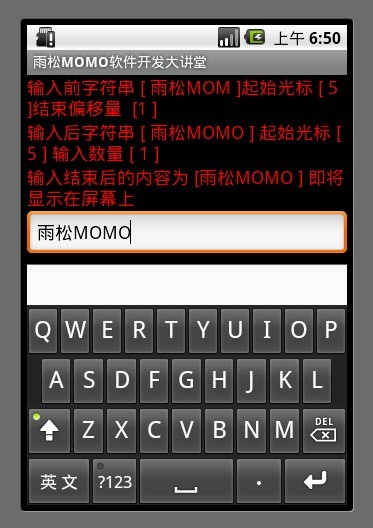
5.監聽軟鍵盤的按鍵事件
做項目的時候 有時候須要在用戶輸入內容時做檢測,比如如果用戶輸入不合法的內容不予以顯示在EditText中, 這時候我就要用到addTextChangedListener 用它來監聽用戶輸入狀態。可以在監聽中改變用戶輸入的內容或者提示用戶輸入內容不合法等等。 如圖所示我的每次輸入操作都可以被正常的監聽出來,用戶輸入內容的正常流程 beforeTextChanged() -》onTextChanged() -》afterTextChanged()然後是通知屏幕繪制 顯示在屏幕上 所以我們可以在這三個方法中來修改用戶輸入內容 或者截取用戶輸入的內容。
Java代碼
- package cn.m15.xys;
-
- import android.app.Activity;
- import android.os.Bundle;
- import android.text.Editable;
- import android.text.TextWatcher;
- import android.widget.EditText;
- import android.widget.TextView;
-
- public class MonitorKeyActivity extends Activity {
- @Override
- protected void onCreate(Bundle savedInstanceState) {
- setContentView(R.layout.monitorkey);
- EditText editText = (EditText)findViewById(R.id.monitor_edit_text0);
- final TextView textView0 = (TextView)findViewById(R.id.monitor_text0);
- final TextView textView1 = (TextView)findViewById(R.id.monitor_text1);
- final TextView textView2 = (TextView)findViewById(R.id.monitor_text2);
-
- editText.addTextChangedListener(new TextWatcher() {
-
- @Override
- public void onTextChanged(CharSequence text, int start, int before, int count) {
- //text 輸入框中改變後的字符串信息
- //start 輸入框中改變後的字符串的起始位置
- //before 輸入框中改變前的字符串的位置 默認為0
- //count 輸入框中改變後的一共輸入字符串的數量
- textView1.setText("輸入後字符串 [ " + text.toString() + " ] 起始光標 [ " + start + " ] 輸入數量 [ " + count+" ]");
-
- }
-
- @Override
- public void beforeTextChanged(CharSequence text, int start, int count,int after) {
- //text 輸入框中改變前的字符串信息
- //start 輸入框中改變前的字符串的起始位置
- //count 輸入框中改變前後的字符串改變數量一般為0
- //after 輸入框中改變後的字符串與起始位置的偏移量
- System.out.println(text.toString());
- textView0.setText("輸入前字符串 [ " + text.toString() + " ]起始光標 [ " + start + " ]結束偏移量 [" + after + " ]");
- }
-
- @Override
- public void afterTextChanged(Editable edit) {
- //edit 輸入結束呈現在輸入框中的信息
- textView2.setText("輸入結束後的內容為 [" + edit.toString()+" ] 即將顯示在屏幕上");
- }
- });
-
- super.onCreate(savedInstanceState);
- }
- }
XML/HTML代碼
- <?xml version="1.0" encoding="utf-8"?>
- <LinearLayout xmlns:android="http://schemas.android.com/apk/res/android"
- android:id="@+id/textviewll"
- android:orientation="vertical" android:layout_width="fill_parent"
- android:layout_height="fill_parent">
- <TextView
- android:id="@+id/monitor_text0"
- android:layout_width="fill_parent"
- android:layout_height="wrap_content"
- android:textSize="18dip"
- android:textColor="#FF0000"/>
- <TextView
- android:id="@+id/monitor_text1"
- android:layout_width="fill_parent"
- android:layout_height="wrap_content"
- android:textSize="18dip"
- android:textColor="#FF0000"
- />
- <TextView
- android:id="@+id/monitor_text2"
- android:layout_width="fill_parent"
- android:layout_height="wrap_content"
- android:textSize="18dip"
- android:textColor="#FF0000"
- />
- <EditText
- android:id="@+id/monitor_edit_text0"
- android:layout_width="fill_parent"
- android:layout_height="wrap_content"
- android:hint="監聽軟鍵盤按鍵的輸入狀態"/>
- </LinearLayout>
最後如果你還是覺得我寫的不夠詳細 看的不夠爽 不要緊我把源代碼的下載地址貼出來 歡迎大家一起討論學習
下載地址:http://vdisk.weibo.com/s/a9lpP
 Android中的 Multiple dex files define 編譯錯誤引發的思考
 安卓--selector簡單使用,安卓--selector
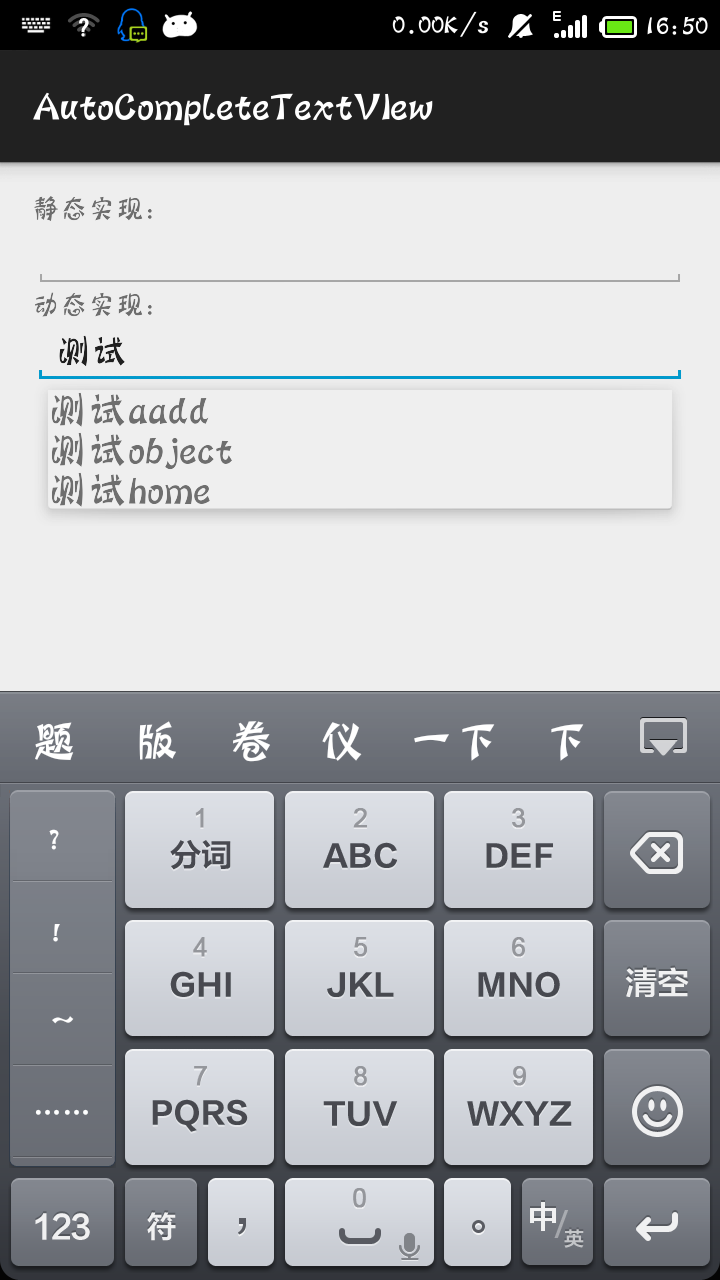 Android 之 自動匹配字符AutoCompleteTextView,android正則匹配
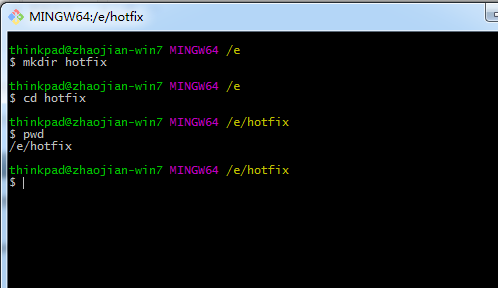 安卓熱更新之Nuwa實現步驟,安卓nuwa實現步驟