編輯:Android技術基礎
准備工作:
(1)第一步,下載定位Android locSDK3.3。
下載地址:http://developer.baidu.com/map/static/doc/locSDK3.3.zip
(2)第二步,解壓縮Android locSDK3.3
准備工作至此已經結束。
一、工程配置
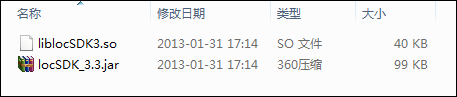
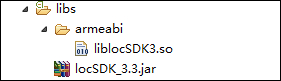
1、第一步,在工程裡新建libs文件夾,將開發包裡的locSDK_3.3.jar拷貝到libs根目錄下,將liblocSDK3.so拷貝到libs\armeabi目錄下,拷貝完成後的工程目錄如下圖所示;
2、第二步:在工程屬性->Java Build Path->Libraries中選擇“Add External JARs”,選定locSDK_3.3.jar,確定後返回。
通過以上兩步操作後,您就可以正常使用百度地圖定位SDK為您提供的全部功能了。
二、設計界面
1、布局文件
打開res/layout/activity_main.xml文件。
輸入以下代碼:
三、程序文件
1、Location.java
打開“src/com.genwoxue.baidulocation/Location.java”文件。
然後輸入以下代碼:
2、MainActivity.java
打開“src/com.genwoxue.baidumap/MainActivity.java”文件。
然後輸入以下代碼:
四、配置文件
打開“AndroidManifest.xml”文件。
注意:
由於Location.java繼承自Application,所以需要在配置文件中<application android:name="com.genwoxue.baidulocation.Location" ……>節中需要加android:name,其中com.genwoxue.baidulocation為我們的包名稱,Location為繼承Application的類名稱。
<service android:name="com.baidu.location.f" android:enabled="true" android:process=":remote"> </service>這個是來自百度定位中的服務,不可更改其中內容。
五、運行結果
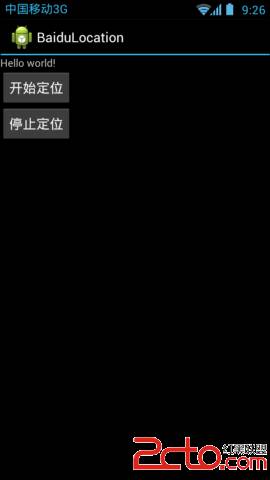
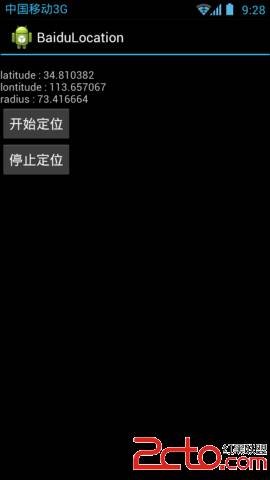
我們已經輕而易舉地獲得了經緯路,那麼如果你想在百度地圖的位置,那麼把這個經緯度放在上一章《百度地圖》中,是不是很簡單呢?
 8.3.17 Canvas API詳解(Part 2)剪切方法合集
本節引言:本節繼續帶來Android繪圖系列詳解之Canvas API詳解(Part 2),今天要講解的是Canvas中的ClipXxx方法族!我們
 8.2.2 Bitmap引起的OOM問題
本節引言:上節,我們已經學習了Bitmap的基本用法,而本節我們要來探討的Bitmap的OOM問題,大家在實際開發中可能遇到過,或者沒遇到過因為Bi
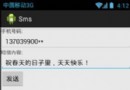 第89章、系統服務之SMS服務(從零開始學Android)
每逢佳節,中國移動、電信、聯通都是偷偷笑的日子,又不知道多少短信費用納入囊中,盡管微信、QQ、飛信漫天飛,但仍然阻擋不了節日祝福短信的火爆,但群發實在沒有意義,你是不是想
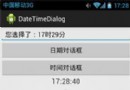 第32章、日期對話框DatePickerDialog(從零開始學Android)
在Android應用中,設置日期和時間是非常簡單的事,由日期和時間對話框控件搞定。 一、界面 1、打開“src/com.genwoxue.datetime