編輯:關於Android編程
當Android項目越來越龐大的時候,應用的各個部件之間的通信變得越來越復雜,例如:當某一條件發生時,應用中有幾個部件對這個消息感興趣,那麼我們通常采用的就是觀察者模式,使用觀察者模式有一個弊病就是部件之間的耦合度太高,在這裡我將會詳細介紹Android中的解耦組建EventBus的使用。
一、使用EventBus的步驟:
1、下載EventBus
2、讓自己的項目以來EventBus
3、自定義一個事件(不需要繼承任何類),通常我比較喜歡定義一個Message類
4、定義回調函數,相當於觀察者模式中的on***Listener函數,在EventBus中可以定義四種類型的回調函數:
a、onEvent 它和ThreadModel中的PostThread對應,這個也是默認的類型,當使用這種類型時,回調函數和發起事件的函數會在同一個線程中執行
b、onEventMainThread,當使用這種類型時,回調函數會在主線程中執行,這個在Android中非常有用,因為在Android中禁止在子線程中修改UI
c、onEventBackgroundThread,當使用這種類型時,如果事件發起函數在主線程中執行,那麼回調函數另啟動一個子線程,如果事件發起函數在子線程執行,那麼 回調函數就在這個子線程執行。
d、onEventBusAsync,當使用這種類型時,不管事件發起函數在哪裡執行,都會另起一個線程去執行回調。
public class MainActivity extends Activity {
	private ImageView img1;
	private ImageView img2;

	@Override
	protected void onCreate(Bundle savedInstanceState) {
		super.onCreate(savedInstanceState);
		setContentView(R.layout.activity_main);
//		img1=(ImageView)this.findViewById(R.id.img1);
//		img2=(ImageView)this.findViewById(R.id.img2);
		Log.v(EventBus1, Thread.currentThread().getId()++++);

		//注冊
		EventBus.getDefault().register(this);
		EventBus.getDefault().register(new MyClass());

	}

	@Override
	public boolean onCreateOptionsMenu(Menu menu) {
		// Inflate the menu; this adds items to the action bar if it is present.
		getMenuInflater().inflate(R.menu.main, menu);
		return true;
	}

	//分發
	public void postEvent(View view)
	{


					EventBus.getDefault().post(new ChangeImgEvent(1));

	}

	@Override
	protected void onStop() {
		// TODO Auto-generated method stub
		super.onStop();
		EventBus.getDefault().unregister(this);
	}

	public void onEventAsync(ChangeImgEvent event)
	{
		Log.v(EventBus1, Thread.currentThread().getId()+----);
		if(event.getType()==1)
		{
			System.out.println(-------------+++++++++++);
			try {
				Thread.sleep(10000);
			} catch (InterruptedException e) {
				// TODO Auto-generated catch block
				e.printStackTrace();
			}

		}
	}


}
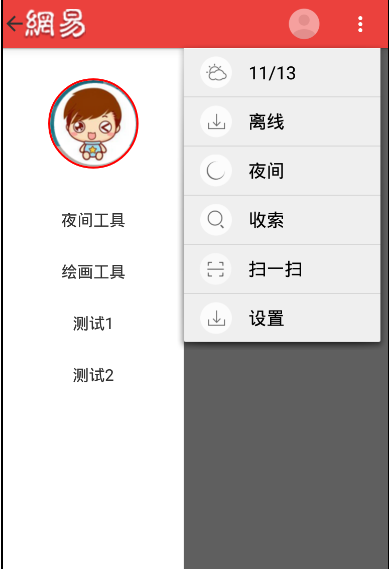 Android實現仿網易新聞主界面設計
下面先來一張效果圖 根據圖片分析,要實現的有側邊欄DrawerLayout,ActionBar的顏色和菜單以及ActionBarDrawerTogg
 Android引導頁設計
現在幾乎所有的APP在首次使用的時候都會有引導頁,引導頁的內容也都是和App相關的內容。如何去簡單去設計擴展性好的引導頁是很重要的。今天就為大家提供一種結合ViewPag
 智能手機“偷”流量怎麼辦?四招幫你阻止
通過央視報道,曝光了2個跟智能手機有關的內容,一個是手機偷跑流量,另外一個則是預裝軟件難卸載問題。通過測試獲取到實際數據對比,最後結果顯示,有9款手機的流量
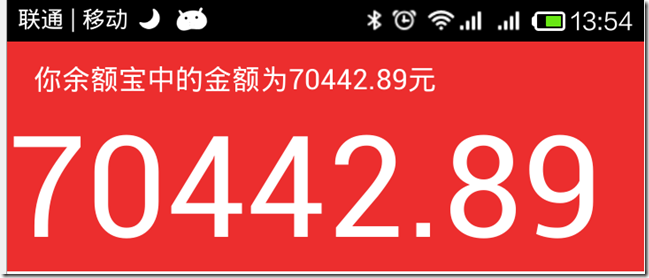 android編程實現類似於支付寶余額快速閃動效果的方法
本文實例講述了android編程實現類似於支付寶余額快速閃動效果的方法。分享給大家供大家參考,具體如下:效果如下:此圖片不會動,但實際上是會快速跳動的。之前看到有支付寶的