編輯:關於Android編程
關於桌面widget的動態刷新有這樣一個配置,
在res/xml下<appwiget-provider>下有一個屬性
android:updatePeriodMillis="86400000"
官方的注釋是:
[plain]
The updatePeriodMillis attribute defines how often the App Widget framework should request an update from the AppWidgetProvider by calling the onUpdate() callback method. The actual update is not guaranteed to occur exactly on time with this value and we suggest updating as infrequently as possible—perhaps no more than once an hour to conserve the battery. You might also allow the user to adjust the frequency in a configuration—some people might want a stock ticker to update every 15 minutes, or maybe only four times a day.
中文翻譯:
updatePeriodMillis這個屬性規定了AppWiget框架應該多久發送一次請求通過調用AppwidgetProvider的onUpdate()方法來更新,實際的更新並不能保證根據這個值准時的更新,我們建議盡可能頻率少的進行更新操作,最好不要超過1個小時更新一次,為了保存電池的電量。你頁可以給出配置允許用戶來調整更新的頻率,就像一些人希望股票行情追蹤器每15分鐘更新一次,或者僅僅一天更新4次
另外還給出了一個備注:
[plain]
Note: If the device is asleep when it is time for an update (as defined by updatePeriodMillis), then the device will wake up in order to perform the update. If you don't update more than once per hour, this probably won't cause significant problems for the battery life. If, however, you need to update more frequently and/or you do not need to update while the device is asleep, then you can instead perform updates based on an alarm that will not wake the device. To do so, set an alarm with an Intent that your AppWidgetProvider receives, using the AlarmManager. Set the alarm type to either ELAPSED_REALTIME or RTC, which will only deliver the alarm when the device is awake. Then set updatePeriodMillis to zero ("0").
中文翻譯:
如果屏幕是睡眠的,用updatePeriodMillis更新widget時,會喚醒屏幕。如果你不是每一次小時更新一次,那麼你就有可能為電池的待機時間帶來嚴重的影響。然而,如果你需要頻繁的進行更新操作,但是或許你並不需要更新時喚醒屏幕,那麼你可以在alarm的基礎上進行更新操作而不用喚醒設備。像這樣做,用AlarmManager設置一個攜帶intent的鬧鐘讓你的AppwidgetProvider接受更新操作。將alarm的類型設置為ELAPSED_REALTIME或者RTC,這樣就會僅僅在設備處於喚醒狀態下才會傳遞alarm的intent。然後設置updatePeriodMillis=0.
在實際的操作中會出現一些問題,
1、SDK在1.6以上時,當updatePeriodMillis的設置的值小於半個小時時,就會失效。
2、使用service更新,或者alarm更新時也會出現一些問題
下面說一下我個人的理解,有不對的地方,歡迎提出。
先說appwidget創建的過程。
1、長按桌面會出現一個列表,這個列表應該就是在manifest注冊了AppWidgetProvider的應用列表
[html]
<receiver android:name="com.test.TestAppWidgetProvider" >
<intent-filter>
<action android:name="android.appwidget.action.APPWIDGET_UPDATE" />
</intent-filter>
<meta-data
android:name="android.appwidget.provider"
android:resource="@xml/test_appwidget_info" />
</receiver>
2、點擊圖標時候會觸發android.appwidget.action.APPWIDGET_UPDATE這個intent,
AppWidgetProvider的onReceive()方法執行。
然後onUpdate()方法執行,這時會為該appWidget分配id。
然後會調用AppWidgetConfigure這個Activity並且讓你配置widget的大小。
[html]
<activity android:name=".test.TestAppWidgetConfigure">
<intent-filter>
<action android:name="android.appwidget.action.APPWIDGET_CONFIGURE"/>
</intent-filter>
</activity>
然後就是刷新的方法了,我先後試過幾個方法都說一說。
1、我最先用的是是在AppWidgetProvider的onUpate方法中用handler刷新,開一個線程10秒一次發消息
這個方法有幾個問題:1>應用升級時會發現問題。2>線程會掛掉
2、用service,將appWidgetManager, appWidgetIds傳給service然後在service內刷新,結果不行。不知道為什麼。
3、通過發android.appwidget.action.APPWIDGET_UPDATE這個廣播刷新。用service發或者alarm發,相比較alarm更好,也是官方推薦的。下面就說用alarm做的過程
這個方法刷新時最開始也出現了問題,我一直想的是在onUpdate方法裡刷新,但事實是錯誤的。1>在onUpdate裡面創建一個alarm然後每10秒發一次intent,那麼每次onUpate刷新時又都會創建一個alarm發intent這樣就是出問題了
2>刷新時我都會將這個appwidget的id獲取到然後appWidgetManager.updateAppWidget(appWidgetIds[0], views);刷新,結果出現了一個變態的情況我自己的widget和系統的桌面渲染的一個widget來回切換。沒搞清楚什麼情況。
最後說下我現在在用的方法:
在onUpdate中設置alarm
[java]
AlarmManager alarmMgr = (AlarmManager) context.getSystemService(Context.ALARM_SERVICE);
Intent intent = new Intent(AppWidgetManager.ACTION_APPWIDGET_UPDATE);
int requestCode = 0;
PendingIntent pendIntent = PendingIntent.getBroadcast(context, requestCode, intent, PendingIntent.FLAG_UPDATE_CURRENT);
// 5秒後發送廣播,然後每個10秒重復發廣播。廣播都是直接發到AlarmReceiver的
long triggerAtTime = SystemClock.elapsedRealtime() + 10 * 1000;
int interval = 10 * 1000;
alarmMgr.setRepeating(AlarmManager.RTC, triggerAtTime, interval, pendIntent);
然後在onReceive中刷新AppWidgetId是從AppWidgetConfigure裡面拿的,把mAppWidgetId設為靜態的了。
[java]
Intent intent = getIntent();
Bundle extras = intent.getExtras();
if (extras != null) {
mAppWidgetId = extras.getInt(
AppWidgetManager.EXTRA_APPWIDGET_ID,
AppWidgetManager.INVALID_APPWIDGET_ID);
}
[java]
AppWidgetManager.getInstance(context).updateAppWidget(TestAppWidgetConfigure.mAppWidgetId, views);
關鍵:
看一下TestAppWidgetProvider父類中的onReceive方法,在onUpdate中設置alarm時intent不用帶參數,這樣每次alarm刷新時只會調用onReceive方法也不會調用onUpate方法
[java]
/**
* Implements {@link BroadcastReceiver#onReceive} to dispatch calls to the various
* other methods on AppWidgetProvider.
*
* @param context The Context in which the receiver is running.
* @param intent The Intent being received.
*/
// BEGIN_INCLUDE(onReceive)
public void onReceive(Context context, Intent intent) {
// Protect against rogue update broadcasts (not really a security issue,
// just filter bad broacasts out so subclasses are less likely to crash).
String action = intent.getAction();
if (AppWidgetManager.ACTION_APPWIDGET_UPDATE.equals(action)) {
Bundle extras = intent.getExtras();
if (extras != null) {
int[] appWidgetIds = extras.getIntArray(AppWidgetManager.EXTRA_APPWIDGET_IDS);
if (appWidgetIds != null && appWidgetIds.length > 0) {
this.onUpdate(context, AppWidgetManager.getInstance(context), appWidgetIds);
}
}
}
else if (AppWidgetManager.ACTION_APPWIDGET_DELETED.equals(action)) {
Bundle extras = intent.getExtras();
if (extras != null && extras.containsKey(AppWidgetManager.EXTRA_APPWIDGET_ID)) {
final int appWidgetId = extras.getInt(AppWidgetManager.EXTRA_APPWIDGET_ID);
this.onDeleted(context, new int[] { appWidgetId });
} www.2cto.com
}
else if (AppWidgetManager.ACTION_APPWIDGET_ENABLED.equals(action)) {
this.onEnabled(context);
}
else if (AppWidgetManager.ACTION_APPWIDGET_DISABLED.equals(action)) {
this.onDisabled(context);
}
}
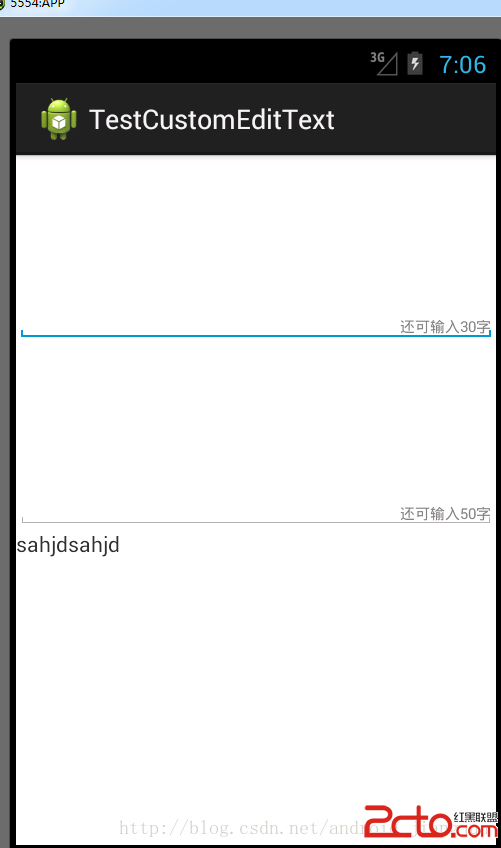 Android 中自定義控件之判斷還剩多少可輸入字符的EditText
最近做的項目有個需求就是判斷一下還 剩多少字符可輸入,也就是對EditText 的文本變化做監聽 ,功能實現了,但是感覺使用組合方式,每次都要編寫,還不如寫
 Android向服務器端發送json數據
android 向服務器端發送json數據,本文講解的知識點比較基礎,如果你是大神,請直接關閉該網頁,免得浪費你寶貴時間。 1.向服務器端發送json數據 關鍵代碼:
 Android程序版本更新之通知欄更新下載安裝
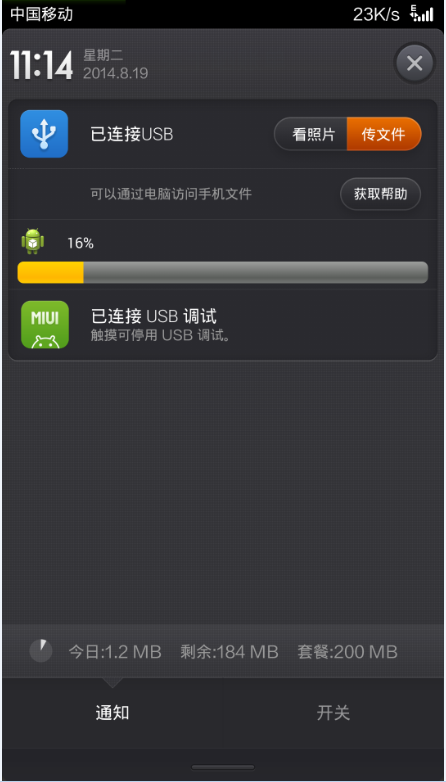
Android應用檢查版本更新後,在通知欄下載,更新下載進度,下載完成自動安裝,效果圖如下:•檢查當前版本號AndroidManifest文件中的versio
 Android自定義WebView網絡視頻播放控件
實現效果: 因為業務需要,以下代碼均以Youtube網站在線視頻為例 實現功能: 1、初始化的時候顯示標題和視頻封面 2、初始化的時候顯示一個play按鈕 3、不需