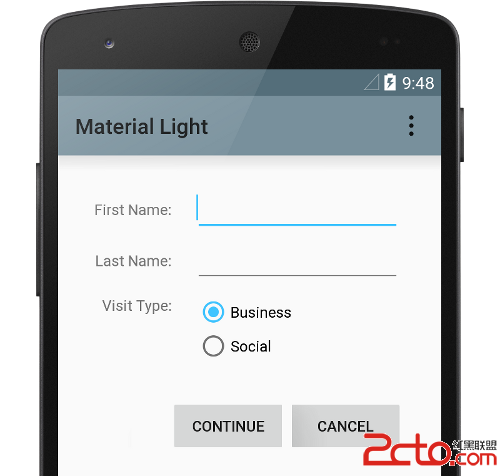
編輯:關於Android編程
總的頁面:
注意:按鈕間方法的改變需要: android:onClick="clearNoti" 添加相應的方法即可
1.點擊狀態欄按鈕時:
public void Notification(View v){
showNotification("親來短信了","5557","我喜歡你", R.drawable.ic_launcher, R.drawable.ic_launcher);
}
public void showNotification(String tickerText,String contentTitle,String contentText ,int iconId,int notiId ){
notificationManager = (NotificationManager) getSystemService(NOTIFICATION_SERVICE);
//創建一個Notification
Notification notification = new Notification();
//設置發出信息的內容
notification.icon =iconId;
//設置發出的信息
notification.tickerText=tickerText;
//設置發出通知的時間
notification.when=System.currentTimeMillis();
//設置顯示通知的默認的發聲或者振動,Light效果
notification.defaults=Notification.DEFAULT_VIBRATE;//振動的效果
//3步: PendingIntent Android系統負責維護
PendingIntent pendingIntent = PendingIntent.getActivity(this, 0,getIntent() ,0);
//Notification notification = new Notification(R.drawable.ic_launcher, "有新的消息", System.currentTimeMillis());
//4步;設置更加詳細的信息
notification.setLatestEventInfo(this, contentTitle,contentText,pendingIntent);
//5步:使用notificationManager對象的notify方法 顯示Notification消息 需要制定 Notification的標識
notificationManager.notify(notiId,notification);
} 效果圖:
2.點擊清楚狀態按鈕時:
//清除的操作
public void clearNoti(View v ){
notificationManager.cancelAll();//清除所有
}
3點擊創建對對話框時: public void DiaLog(){
AlertDialog alertDialog = new AlertDialog.Builder(this)
.setIcon(R.drawable.mw)
.setTitle("DiaLog").setMessage("是否創建文件")
.setPositiveButton("確認",new DialogInterface.OnClickListener() {
@Override
public void onClick(DialogInterface dialog, int which) {
new AlertDialog.Builder(MainActivity.this).setMessage("您點擊了確認按鈕,文件已經被創建").show();
}
})
.setNegativeButton("取消",new DialogInterface.OnClickListener() {
@Override
public void onClick(DialogInterface dialog, int which) {
new AlertDialog.Builder(MainActivity.this)
.setMessage("您已經選擇了取消的按鈕,該文件不會被創建").create()
.show();
}
}).show();
}
4。點擊簡單列表對話框
public void Simplelistdialog(View v){
final String items[] = {"java","php","3g",".net"};
AlertDialog alertDialog = new AlertDialog.Builder(this)
.setTitle("簡單列表對話框").setItems(items, new DialogInterface.OnClickListener() {
@Override
public void onClick(DialogInterface dialog, int which) {
Toast.makeText(getApplicationContext(), "親,你喜歡的科目是:"+items[which],Toast.LENGTH_LONG).show();
}
}).show();
}
5.點擊單選列表對話框
public void Radiolistdialog(View v){
final String items[] = {"java","php","3g",".net"};
AlertDialog alertDialog = new AlertDialog.Builder(this).setTitle("單選列表對話框")
//.setSingleChoiceItems(items, checkedItem, listener)
// .setSingleChoiceItems(itemsId, checkedItem, listener)
//.setSingleChoiceItems(cursor, checkedItem, labelColumn, listener) labelColumn如果數據源是數據集
//數據集中的某一列會作為列表對話框的數據加載的列表框中,該參數表示該列的名稱(字段名稱)
.setSingleChoiceItems(items,1, new DialogInterface.OnClickListener() {
@Override
public void onClick(DialogInterface dialog, int which) {
Toast.makeText(getApplicationContext(), "親,你喜歡的科目是:"+items[which],Toast.LENGTH_LONG).show();
}
}).show();
}
7.點擊多選列表對話框
public void Multiselectlistdialog(View v){
final String items[]={"Java","PHP","3G",".NET"};
new AlertDialog.Builder(this).setTitle("多選列表對話框")
//.setMultiChoiceItems(itemsId, checkedItems, listener)
//.setMultiChoiceItems(cursor, isCheckedColumn, labelColumn, listener)
.setMultiChoiceItems(items, new boolean[]{false,true,true,false}, new DialogInterface.OnMultiChoiceClickListener() {
@Override
public void onClick(DialogInterface dialog, int which, boolean isChecked) {
if(isChecked){
Toast.makeText(getApplicationContext(), "親,你選中的科目是:"+items[which], Toast.LENGTH_LONG).show();
}
}
}).setPositiveButton("確認", new DialogInterface.OnClickListener() {
@Override
public void onClick(DialogInterface dialog, int which) {
Toast.makeText(getApplicationContext(), "親,你喜歡的科目有:", Toast.LENGTH_LONG).show();
}
}).show();
}
8.點擊進度條
public void ProgressDialog(View v){
handler = new Handler(){
@Override
public void handleMessage(Message msg) {
super.handleMessage(msg);
switch(msg.what){
case PRO:
if(PRO>=MAX_PROGRESS){
//重新設置
progress=0;
progressDialog.dismiss();//銷毀對話框
}else{
progress++;
progressDialog.incrementProgressBy(1);
//延遲發送消息
handler.sendEmptyMessageDelayed(PRO,100);
}
break;
default:
break;
}
}
};
progressDialog = new ProgressDialog(this);
progressDialog.setIcon(R.drawable.mw);
progressDialog.setTitle("正在處理數據......");
progressDialog.setMessage("請稍後.....");
progressDialog.setProgressStyle(ProgressDialog.STYLE_SPINNER); //設置進度條對話框 (水平,旋體)
//設置最大值
progressDialog.setMax(MAX_PROGRESS);
progressDialog.setButton("暫停",new DialogInterface.OnClickListener() {
@Override
public void onClick(DialogInterface dialog, int which) {
handler.removeMessages(PRO);
}
});
progressDialog.setButton2("取消", new DialogInterface.OnClickListener() {
@Override
public void onClick(DialogInterface dialog, int which) {
//刪除消息隊列
handler.removeMessages(PRO);
//恢復進度初始值
progress=0;
progressDialog.setProgress(progress);
}
});
//顯示
progressDialog.show();
//必須設置到show之後,show之前可能bug
progress = (progress>0) ?progress:0;
progressDialog.setProgress(progress);
//線程
handler.sendEmptyMessage(PRO);
}
還有一種效果是:
9.點擊自定義表對話框
public void MyDialog(View v){
LayoutInflater layoutInflater = getLayoutInflater();
View view = layoutInflater.inflate(R.layout.activity_main, null); //R.layout.activty_main自定義的布局文件這裡可以是自己隨意定義的
new AlertDialog.Builder(this).setView(view).setTitle("自定義的對話框").setPositiveButton("確認按鈕", new DialogInterface.OnClickListener() {
@Override
public void onClick(DialogInterface dialog, int which) {
//處理
}
}).show();
}

 Android WebP 圖片壓縮與傳輸
1. 簡介直到4g時代,流量依然是寶貴的東西。而移動網絡傳輸中,最占流量的一種載體:圖片,成為了我們移動開發者不得不關注的一個問題。我們關注的問題,無非是圖片體積和質量如
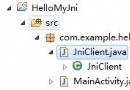 Android - Android調用JNI方法 及 代碼
Android調用JNI方法 及 代碼 JNI: Java Native Interface, 實現Java和C/C++的互通. 在Andro
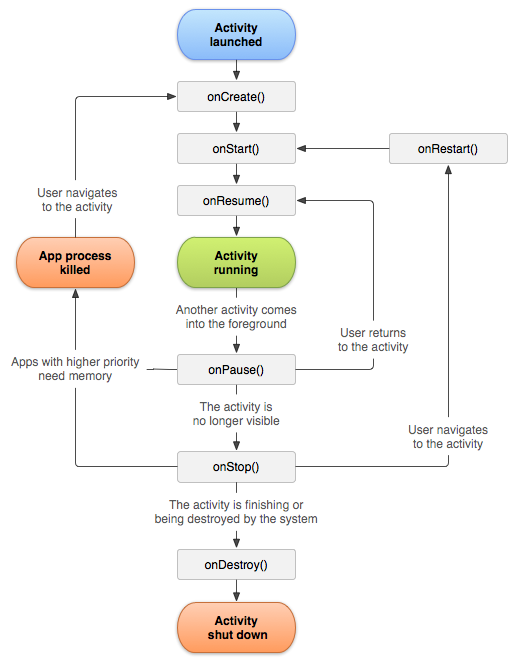 Android Activity
Activity本質是什麼 Activity生命周期 Activity啟動模式 Activity直接的數據交互 如何啟動系統的Activity Activity啟動模
 Android 圖片開發內幕第一篇
前言:本來我是做電視應用的,但是因為公司要出手機,人員緊張,所以就抽調我去支援一下,誰叫俺是雷鋒呢!我做的一個功能就是處理手機中的應用ICON,處理無非就是美化一下,重新