編輯:關於Android編程
MainActivity如下:
package cn.testfixmargin;

import android.os.Bundle;
import android.util.DisplayMetrics;
import android.view.View;
import android.view.View.OnClickListener;
import android.widget.Button;
import android.widget.RelativeLayout;
import android.widget.TextView;
import android.app.Activity;
/**
 * Demo描述:
 * 在代碼中設置布局的屬性
 * 比如Margin和居中
 *
 * 注意事項:
 * 參見代碼中的詳細注釋
 */
public class MainActivity extends Activity {
    private TextView mTextView;
    private Button mButton;
    @Override
    protected void onCreate(Bundle savedInstanceState) {
        super.onCreate(savedInstanceState);
        setContentView(R.layout.main);
        init();
    }
    private void init(){
        DisplayMetrics displayMetrics = new DisplayMetrics();
        getWindowManager().getDefaultDisplay().getMetrics(displayMetrics);
        float density=displayMetrics.density;
        float fontScale = displayMetrics.scaledDensity;
        System.out.println("density="+density+",fontScale="+fontScale);

        mTextView=(TextView) findViewById(R.id.textView);
        mButton=(Button) findViewById(R.id.button);
        mButton.setOnClickListener(new OnClickListenerImpl());


    }

    private class OnClickListenerImpl implements OnClickListener {
        @Override
        public void onClick(View v) {
//         //--------以下為測試1 在代碼中為控件設置Margin--------
//         //注意:
//         //1  此處的new RelativeLayout.LayoutParams(int w, int h)參數w,h指的是
//         //  該控件的父控件的在布局文件中所設置的寬和高
//         //2  此處必須使用RelativeLayout.LayoutParams.FILL_PARENT()
//         //  因為其父類為RelativeLayout所以是其父類的布局參數即RelativeLayout.LayoutParams.XXX
//         //  注意其官方文檔的描述:
//         //  Set the layout parameters associated with this view.
//         //  These supply parameters to the parent of this view specifying how it should be arranged.
//         //  也就是說這個setLayoutParams()是給其父控件看的
//         //  其實這也好理解:只有父類可以改變子View的位置布局.而不是說子View可以隨意
//         //  按照自己的想法擺放自己的位置,而不受父控件控制
//           RelativeLayout.LayoutParams layoutParams
//           =new RelativeLayout.LayoutParams(RelativeLayout.LayoutParams.FILL_PARENT, RelativeLayout.LayoutParams.FILL_PARENT);
//           layoutParams.setMargins(280, 0, 0, 0);
//           mTextView.setLayoutParams(layoutParams);
//           //--------以上為測試1--------


            //--------以下為測試2 在代碼中設置控件居中--------
            //注意:
            //1  此處的new RelativeLayout.LayoutParams(int w, int h)參數w,h指的是
            //  該控件在布局文件中所設置的寬和高
            //2  同測試1中的描述
            RelativeLayout.LayoutParams layoutParams=
            new RelativeLayout.LayoutParams(RelativeLayout.LayoutParams.WRAP_CONTENT, RelativeLayout.LayoutParams.WRAP_CONTENT);
            layoutParams.addRule(RelativeLayout.CENTER_IN_PARENT);
            mTextView.setLayoutParams(layoutParams);
            //--------以下為測試2--------

        }

    }
}

package cn.testfixmargin;

import android.os.Bundle;
import android.util.DisplayMetrics;
import android.view.View;
import android.view.View.OnClickListener;
import android.widget.Button;
import android.widget.RelativeLayout;
import android.widget.TextView;
import android.app.Activity;
/**
 * Demo描述:
 * 在代碼中設置布局的屬性
 * 比如Margin和居中
 *
 * 注意事項:
 * 參見代碼中的詳細注釋
 */
public class MainActivity extends Activity {
    private TextView mTextView;
    private Button mButton;
 @Override
 protected void onCreate(Bundle savedInstanceState) {
  super.onCreate(savedInstanceState);
  setContentView(R.layout.main);
  init();
 }
    private void init(){
  DisplayMetrics displayMetrics = new DisplayMetrics();
     getWindowManager().getDefaultDisplay().getMetrics(displayMetrics);
     float density=displayMetrics.density;
     float fontScale = displayMetrics.scaledDensity;
     System.out.println("density="+density+",fontScale="+fontScale);

     mTextView=(TextView) findViewById(R.id.textView);
     mButton=(Button) findViewById(R.id.button);
     mButton.setOnClickListener(new OnClickListenerImpl());


    }

 private class OnClickListenerImpl implements OnClickListener {
  @Override
  public void onClick(View v) {
//     //--------以下為測試1 在代碼中為控件設置Margin--------
//     //注意:
//     //1  此處的new RelativeLayout.LayoutParams(int w, int h)參數w,h指的是
//     //  該控件的父控件的在布局文件中所設置的寬和高
//     //2  此處必須使用RelativeLayout.LayoutParams.FILL_PARENT()
//     //  因為其父類為RelativeLayout所以是其父類的布局參數即RelativeLayout.LayoutParams.XXX
//     //  注意其官方文檔的描述:
//     //  Set the layout parameters associated with this view.
//     //  These supply parameters to the parent of this view specifying how it should be arranged.
//     //  也就是說這個setLayoutParams()是給其父控件看的
//     //  其實這也好理解:只有父類可以改變子View的位置布局.而不是說子View可以隨意
//     //  按照自己的想法擺放自己的位置,而不受父控件控制
//           RelativeLayout.LayoutParams layoutParams
//           =new RelativeLayout.LayoutParams(RelativeLayout.LayoutParams.FILL_PARENT, RelativeLayout.LayoutParams.FILL_PARENT);
//           layoutParams.setMargins(280, 0, 0, 0);
//           mTextView.setLayoutParams(layoutParams);
//           //--------以上為測試1--------


            //--------以下為測試2 在代碼中設置控件居中--------
   //注意:
   //1  此處的new RelativeLayout.LayoutParams(int w, int h)參數w,h指的是
   //  該控件在布局文件中所設置的寬和高
   //2  同測試1中的描述
   RelativeLayout.LayoutParams layoutParams=
      new RelativeLayout.LayoutParams(RelativeLayout.LayoutParams.WRAP_CONTENT, RelativeLayout.LayoutParams.WRAP_CONTENT);
   layoutParams.addRule(RelativeLayout.CENTER_IN_PARENT);
   mTextView.setLayoutParams(layoutParams);
            //--------以下為測試2--------

  }

 }
}
main.xml如下:
<RelativeLayout xmlns:android="http://schemas.android.com/apk/res/android"
    xmlns:tools="http://schemas.android.com/tools"
    android:layout_width="fill_parent"
    android:layout_height="fill_parent"
     >

    <TextView
        android:id="@+id/textView"
        android:layout_width="wrap_content"
        android:layout_height="wrap_content"
        android:text="@string/hello_world"
        android:textSize="25sp"
        android:layout_marginLeft="20dip"
    />
    <Button
        android:id="@+id/button"
        android:layout_width="wrap_content"
        android:layout_height="wrap_content"
        android:text="Click"
        android:textSize="25sp"
        android:layout_centerInParent="true"
     />

</RelativeLayout>
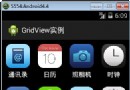 Android:控件GridView的使用實例
如果是列表(單列多行形式)的使用ListView,如果是多行多列網狀形式的優先使用GridView。<?xml version=1.0 encoding=u
 Android4.4 SystemUI分析之DessertCase
在SystemUI中有一個Activity可以顯示所有的Logo這個Activity涉及到的圖標存放在SystemUI/res/drawable-nodpi目錄下在這裡我
 Android 5.0新特性
Android 5.0 是 Google 於 2014 年 10 月 15 日(美國太平洋時間)發布的全新 Android 操作系統,英文名為Lollipop,翻譯過來就
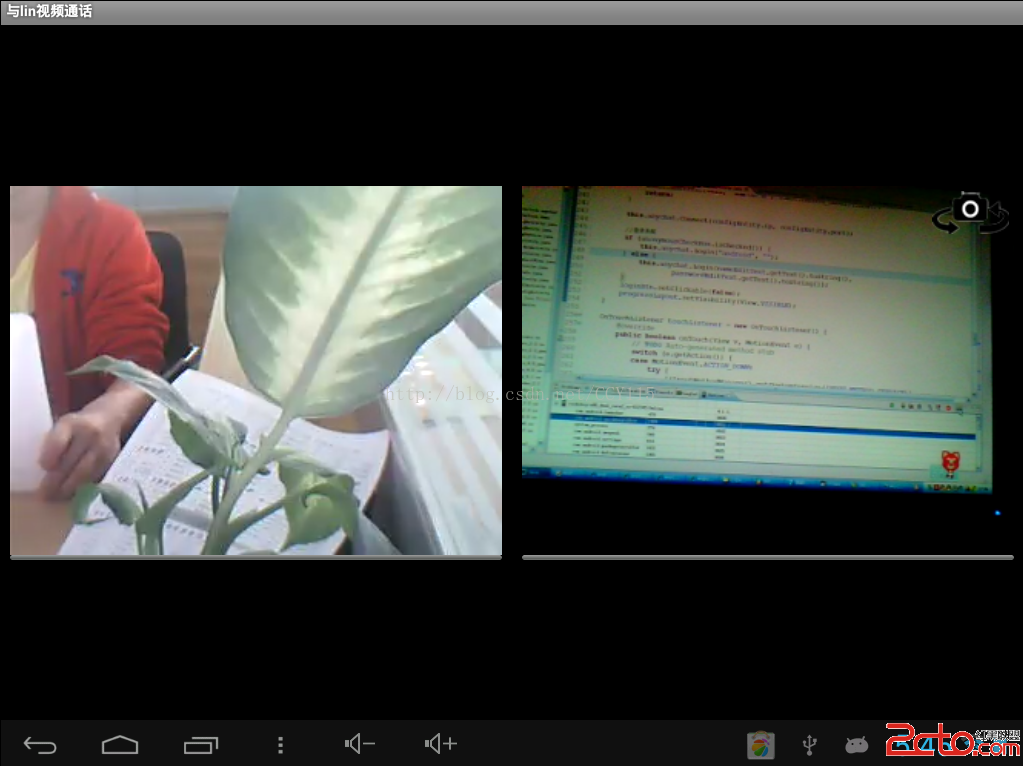 Android平台下通過JNI快速實現音視頻通信
作為獨立開發者或想縮短音視頻開發周期的公司來說,想要在Android平台下實現音視頻通信,最快捷的方法是尋找開源項目或調用其他公司API。之所以這麼說是因為音視頻通信技術