編輯:關於Android編程
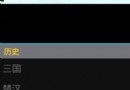
在網上在到一個登錄界面感覺挺不錯的,給大家分享一下~先看效果圖:
這個Demo除了按鈕、小貓和Logo是圖片素材之外,其余的UI都是通過代碼實現的。
一、背景
背景藍色漸變,是通過一個xml文件來設置的。代碼如下:
background_login.xml
[html]
<?xml version="1.0" encoding="utf-8"?>
<shape xmlns:android="http://schemas.android.com/apk/res/android">
<gradient
android:startColor="#FFACDAE5"
android:endColor="#FF72CAE1"
android:angle="45"
/>
</shape>
startColor是漸變開始的顏色值,endColor是漸變結束的顏色值,angle是漸變的角度。其中#FFACDAE5中,FF是Alpha值,AC是RGB的R值,DA是RGB的G值,E5是RGB的B值,每個值在00~FF取值,即透明度、紅、綠、藍有0~255的分值,像要設置具體的顏色,可以在PS上的取色器上查看設置。
二、圓角白框
效果圖上面的並不是白框,其實框是白色的,只是設置了透明值,也是靠一個xml文件實現的。
background_login_div.xml
[html]
<?xml version="1.0" encoding="UTF-8"?>
<shape xmlns:android="http://schemas.android.com/apk/res/android">
<solid android:color="#55FFFFFF" />
<!-- 設置圓角
注意: bottomRightRadius是左下角而不是右下角 bottomLeftRadius右下角-->
<corners android:topLeftRadius="10dp" android:topRightRadius="10dp"
android:bottomRightRadius="10dp" android:bottomLeftRadius="10dp"/>
</shape>
三、界面的布局
界面的布局挺簡單的,就直接貼代碼啦~
login.xml
[html]
<?xml version="1.0" encoding="utf-8"?>
<LinearLayout
xmlns:android="http://schemas.android.com/apk/res/android"
android:orientation="vertical"
android:layout_width="fill_parent"
android:layout_height="fill_parent"
android:background="@drawable/background_login">
<!-- padding 內邊距 layout_margin 外邊距
android:layout_alignParentTop 布局的位置是否處於頂部 -->
<RelativeLayout
android:id="@+id/login_div"
android:layout_width="fill_parent"
android:layout_height="wrap_content"
android:padding="15dip"
android:layout_margin="15dip"
android:background="@drawable/background_login_div_bg" >
<!-- 賬號 -->
<TextView
android:id="@+id/login_user_input"
android:layout_width="wrap_content"
android:layout_height="wrap_content"
android:layout_alignParentTop="true"
android:layout_marginTop="5dp"
android:text="@string/login_label_username"
style="@style/normalText"/>
<EditText
android:id="@+id/username_edit"
android:layout_width="fill_parent"
android:layout_height="wrap_content"
android:hint="@string/login_username_hint"
android:layout_below="@id/login_user_input"
android:singleLine="true"
android:inputType="text"/>
<!-- 密碼 text -->
<TextView
android:id="@+id/login_password_input"
android:layout_width="wrap_content"
android:layout_height="wrap_content"
android:layout_below="@id/username_edit"
android:layout_marginTop="3dp"
android:text="@string/login_label_password"
style="@style/normalText"/>
<EditText
android:id="@+id/password_edit"
android:layout_width="fill_parent"
android:layout_height="wrap_content"
android:layout_below="@id/login_password_input"
android:password="true"
android:singleLine="true"
android:inputType="textPassword" />
<!-- 登錄button -->
<Button
android:id="@+id/signin_button"
android:layout_width="wrap_content"
android:layout_height="wrap_content"
android:layout_below="@id/password_edit"
android:layout_alignRight="@id/password_edit"
android:text="@string/login_label_signin"
android:background="@drawable/blue_button" />
</RelativeLayout>
<RelativeLayout
android:layout_width="fill_parent"
android:layout_height="wrap_content" >
<TextView android:id="@+id/register_link"
android:text="@string/login_register_link"
android:layout_width="wrap_content"
android:layout_height="wrap_content"
android:layout_marginLeft="15dp"
android:textColor="#888"
android:textColorLink="#FF0066CC" />
<ImageView android:id="@+id/miniTwitter_logo"
android:src="@drawable/cat"
android:layout_width="wrap_content"
android:layout_height="wrap_content"
android:layout_alignParentRight="true"
android:layout_alignParentBottom="true"
android:layout_marginRight="25dp"
android:layout_marginLeft="10dp"
android:layout_marginBottom="25dp" />
<ImageView android:src="@drawable/logo"
android:layout_width="wrap_content"
android:layout_height="wrap_content"
android:layout_toLeftOf="@id/miniTwitter_logo"
android:layout_alignBottom="@id/miniTwitter_logo"
android:paddingBottom="8dp"/>
</RelativeLayout>
</LinearLayout>
四、Java源文件
Java源文件比較簡單,只是實例化Activity,去掉標題欄。
[java]
package com.mytwitter.acitivity;
import android.app.Activity;
import android.os.Bundle;
import android.view.Window;
public class LoginActivity extends Activity {
@Override
public void onCreate(Bundle savedInstanceState) {
super.onCreate(savedInstanceState);
requestWindowFeature(Window.FEATURE_NO_TITLE);
setContentView(R.layout.login);
}
}
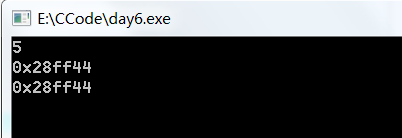
 Android 得到控件在屏幕中的坐標
package xiaosi.location; import android.app.Activity; import android.os.Bund
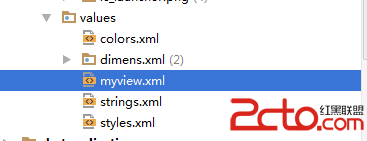 android圖像圖像處理——自定義組件的屬性
自定義組件的屬性步驟如下【1】在Values資源文件下新建myview.xml 自定義兩個屬性背景圖、畫筆筆觸大小;【2】在
 android中activity可以響應外部的action的例子(可以用這個來導入外部文件)
如果我們在文件浏覽器中點擊一個文件,然後點擊它,會彈出一個列表給你選擇 如果使自己的應用也出現在這個列表上,必須在menifest的這個act
 Android開發之使用sqlite3工具操作數據庫的兩種方式
使用 sqlite3 工具操作數據庫的兩種方式 請尊重他人的勞動成果,轉載請注明出處:Android開發之使用sqlite3工具操作數據庫的兩種方式 http://bl