編輯:關於Android編程
一開始,先對昨晚在昆明市火車站遇難的同胞表示默哀,並對惡勢力進行譴責,你們如果有再大的冤情也不要對平民下手,所謂冤有頭債有主,該弄誰弄誰去啊,欺負百姓算是怎麼回事,所以在遇到突發情況下,首先要有泰山崩於前而面不改色的鎮定,其次要麼能像成龍大哥那樣以一抵十的身手,要麼就是跑得快,第一項技能好像普通人是無法學會的,那我們只能學習第二項技能——跑得快,當然冰凍三尺非一日寒,這就需要大家平時多多鍛煉,怎麼記錄提醒自己鍛煉了,就和我們今天要說這個計步器APP有關了。
上次我已經和大家基本介紹了下各種傳感器,今天就是傳感器的實際應用,由於商業運作的原因,還暫時不能開源我做的app,文章末尾會有上傳個pedometer計步器,供大家學習。
首先問下大家覺得計步器應該是用什麼傳感器了,其實就是利用方向傳感器,根據上次說的Value的那個值進行判斷,計步器原理就是人拿著手機走,走一步會產生振蕩,從而方向傳感獲得參數Value,通過兩次Value[1]的變化值之差來判斷人是否走路,從而達到計步效果。核心代碼如下:
public void onSensorChanged(SensorEvent event)
{
    //  當兩個values[1]值之差的絕對值大於8時認為走了一步

    if (Math.abs(event.values[1] - lastPoint) > 8)
    {
 lastPoint = event.values[1];
count++;
    }
}
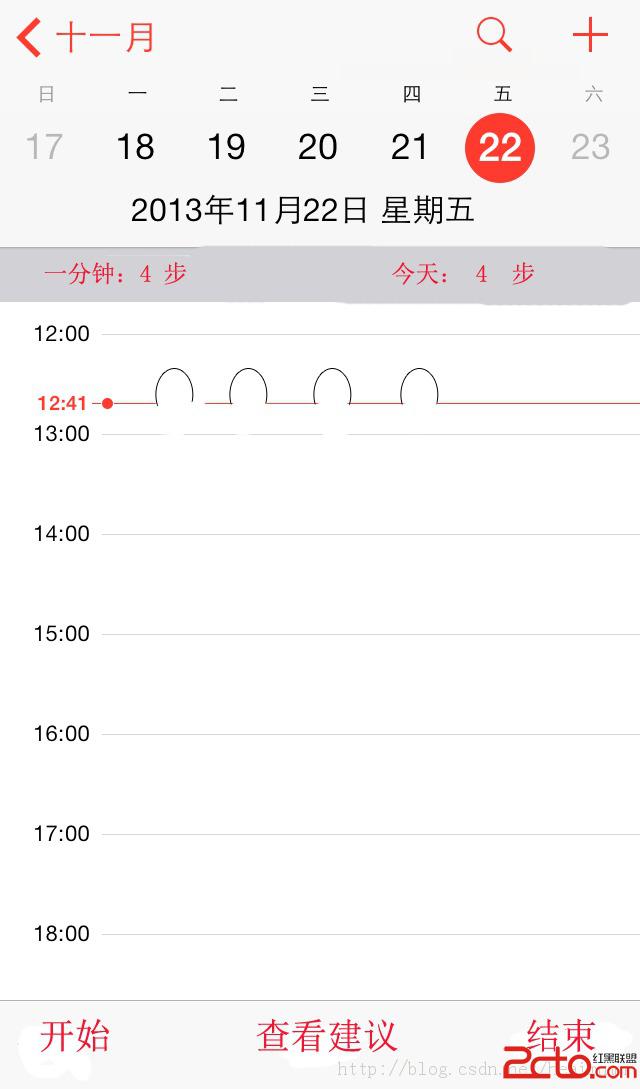
然後如何完整的實現這個APP了,首先我們應該構思用戶界面上這個功能需要些什麼,下圖是我設計的主要界面:
界面看起來很復雜,其實很簡單,需要一張表記錄用戶的記錄,然後顯示出來,點擊開始啟稓喎?/kf/ware/vc/" target="_blank" class="keylink">vc2VydmljZaOsw7/Su7fW1tPLotDCz8K958Pmo6y7rbP20ru49tDEtefNvKOsteO7973hyvi52LHVc2VydmljZaGjPC9wPgo8cD7K18/IztLDx8C00LRzZXJ2aWNlo6y12tK7uPZzZXJ2aWNltNPX7rzytaXLotDCvefD5nNlcnZpY2W/qsq8o6zV4rj2c2VydmljZbrcvPK1paOstbG908rVtb2547KltcTKsbryo6y78bXDz+C52LLOyv29+NDQy6LQwqGjPHByZSBjbGFzcz0="brush:java;">public class StepUpdateReceiver extends BroadcastReceiver{ public void onReceive(Context context, Intent intent) { Bundle bundle = intent.getExtras();//獲得Bundle int steps = bundle.getInt("step");//讀取步數 view1.stepsPerMin = steps+PerMin;//view1是讀取了MainActivity裡面的view,PerMin是記錄每分鐘走了幾步 view1.stepsToday = steps+Today;//Today是記錄今天走了幾步 view1.isMoving = true;//表示用戶走路 view1.updateView(); //刷新界面,重畫界面 } } 然後我們來寫一個ManagerSerivce,用戶通過點擊按鈕傳過來廣播消息,通過這個類去判斷用戶是進行啟動還是結束,代碼如下:
class ManagerReceiver extends BroadcastReceiver{

public void onReceive(Context context, Intent intent) {

int result = intent.getIntExtra("result");
switch(result){
case WalkingService.CMD_STOP://停止服務
stopSelf();
break;
case WalkingService.CMD_START: //SERVICE啟動
isActivityOn = true;
Intent i = new Intent();
i.setAction("MainActivity");i.putExtra("step", steps);
sendBroadcast(i);
break;
}
}
}
寫完ManagerService我們開始寫最關鍵的WalkingService:
public class WalkingService extends Service{

SensorManagerSimulator mySensorManager;
WalkingListener wl;  //這裡自己寫了個接聽類
int steps=0;
boolean isActivityOn = false; //Activity 是否運行
boolean isServiceOn = false;
NotificationManager nm;//聲明NotificationManager
long timeInterval = 60*1000;
final static int CMD_STOP = 0;
final static int CMD_START = 1;
ManagerReceiver receiver; //聲明BroadcastReceiver
Handler myHandler = new Handler(){//定時上傳數據
public void handleMessage(Message msg) {
uploadData();
super.handleMessage(msg);
}
};
public void onCreate() {
super.onCreate();
wl = new WalkingListener(this); //創建監聽器類
//初始化傳感器
mySensorManager = SensorManagerSimulator.getSystemService(this, SENSOR_SERVICE);
mySensorManager.connectSimulator();
//注冊監聽器
mySensorManager.registerListener(wl,SensorManager.SENSOR_ACCELEROMETER,SensorManager.SENSOR_DELAY_UI);
nm = (NotificationManager)
getSystemService(NOTIFICATION_SERVICE);
}
public void onStart(Intent intent, int startId) {
super.onStart(intent, startId);
isServiceOn = true;
showNotification();//添加Notification
receiver = new ManagerReceiver();
IntentFilter filter1 = new IntentFilter();
filter1.addAction("WalkingService");
registerReceiver(receiver, filter1);
//每分鐘刷新一次界面
if(isServiceOn){
Message msg =myHandler.obtainMessage();
myHandler.sendMessageDelayed(msg,
timeInterval);
}
}
public void onDestroy() {
mySensorManager.unregisterListener(wl);
wl = null;
mySensorManager = null;
nm.cancel(0);
unregisterReceiver(receiver);
super.onDestroy();
}
private void showNotification() {
Intent intent = new Intent(this,WalkingActivity.class);
PendingIntent pi = PendingIntent.getActivity(this,
0, intent, 0);
Notification myNotification = new Notification();
myNotification.icon = R.drawable.icon;
myNotification.defaults = otification.DEFAULT_ALL;
myNotification.setLatestEventInfo(this,
"計步器運行中", "點擊查看", pi);
nm.notify(0,myNotification);
}
public void uploadData(){
對數據庫進行操作,並發送廣播給StepUpdateSerivce
}
}
這裡主要有幾個重點,第一在oncreate裡面初始化傳感器,和上一節的方法一致,第二在onstart注冊接聽器,第三在ondestory方法裡面取消接聽器,有些細節需要的解釋的,什麼是NotificatonMangager,這是一個公用類,用於在android通知欄顯示app信息和手機狀態信息,自己寫了一個show方法用於,最小化APP的時候,用戶可以在通知欄裡面看到該app;為什麼不時時刷新,太吃機子性能,用戶體驗性不好,只能改成每分鐘刷新,因為需要畫圖。
最後我們在把核心代碼寫在WalkingListener裡面就可以了。
public class WalkingListener implements SensorListener

{

WalkingService father; // WalkingService 引用
float [] preCoordinate;
double currentTime=0,lastTime=0; //記錄時間
float WALKING_THRESHOLD = 20;
public WalkingListener(WalkingService father){
this.father = father;
}
public void onAccuracyChanged(int arg0, int arg1) {}
//傳感器發生變化後調用該方法
public void onSensorChanged(int sensor, float[] values) {
if(sensor ==SensorManager.SENSOR_ACCELEROMETER){
analyseData(values);//調用方法分析數據
}
}
public void analyseData(float[] values){
currentTime=System.currentTimeMillis();
//每隔200MS 取加速度力和前一個進行比較
if(currentTime - lastTime >200){
if(preCoordinate == null){//還未存過數據
preCoordinate = new float[3];
for(int i=0;i<3;i++){
preCoordinate = values;
}
}
else{ //進行比較
int angle= calculateAngle(values,preCoordinate);
if(angle >=WALKING_THRESHOLD){
father.steps++; //步數增加
updateData(); //更新步數,並且向walkingService發送消息
}
for(int i=0;i<3;i++){
preCoordinate=values;
}}
lastTime = currentTime;//重新計時
}
}
public void updateData(){
Intent intent = new Intent(); //創建Intent 對象 intent.setAction("MainActivity"); intent.putExtra("step", father.steps);//添加步數
father.sendBroadcast(intent); //發出廣播
}
public int calculateAngle(float[] newPoints,float[] oldPoints){
int angle=0;
float vectorProduct=0; //向量積
float newMold=0; //新向量的模
float oldMold=0; //舊向量的模
for(int i=0;i<3;i++){
vectorProduct +=newPoints*oldPoints;
newMold += newPoints*newPoints;
oldMold += oldPoints*oldPoints;
}
newMold = (float)Math.sqrt(newMold);
oldMold = (float)Math.sqrt(oldMold);
//計算夾角的余弦
float cosineAngle=(float)(vectorProduct/(newMold*oldMold));
//通過余弦值求角度
float fangle = (float)
Math.toDegrees(Math.acos(cosineAngle));
angle = (int)fangle;
return angle; //返回向量的夾角
}
關於算法,因為需要精確,所以我進行的是向量夾角的判斷,當夾角大於20的時候就證明用戶走了一步,其實算法多樣,你可以自己選擇,這也是我百度到的算法,至此一個計步器就完成了。
最後希望大家能踴躍評論,大家可以說下自己想實現什麼app,我先去試試,然後做成教程來寫出,不然我一個人做過的app也很少,下面是網上開源的demo,我的demo等後續再上傳。
源碼下載
 ScrollView嵌套ListView滑動沖突的解決方法
ScrollView和ListView這兩個控件想必大家都不會陌生,但是這兩者嵌套使用的時候就會出現麻煩。比如,我們如果想在ListView下面添加其他的布局或者控件,然
 Android基礎入門教程——10.8 LayoutInflater(布局服務)
Android基礎入門教程——10.8 LayoutInflater(布局服務)標簽(空格分隔): Android基礎入門教程本節引言: 本節繼
 Android Studio的中文亂碼問題解決方法
Android Studio安裝後發現所有的中文,不管是界面上的還是輸出的log中的中文都變成小框框 可以肯定是字體的問題 解決:菜單File->set
 Android--BroadcastReceiver應用詳解
今天我們來講一下Android中BroadcastReceiver的相關知識。BroadcastReceiver也就是“廣播接收者”的意思,顧名思