最經面試中,技術面試中有一個是Handler的消息機制,細細想想,我經常用到的Handler無非是在主線程(或者說Activity)新建一個Handler對象,另外一個Thread是異步加載數據,同時當他加載完數據後就send到主線程中的那個Handler對象,接著Handler來處理,剛才發送的一些消息。
復制代碼
1 public class HandlerTestActivity extends Activity {
2 private TextView tv;
3 private static final int UPDATE = 0;
4 private Handler handler = new Handler() {
5
6 @Override
7 public void handleMessage(Message msg) {
8 // TODO 接收消息並且去更新UI線程上的控件內容
9 if (msg.what == UPDATE) {
10 // Bundle b = msg.getData();
11 // tv.setText(b.getString("num"));
12 tv.setText(String.valueOf(msg.obj));
13 }
14 super.handleMessage(msg);
15 }
16 };
17
18 /** Called when the activity is first created. */
19 @Override
20 public void onCreate(Bundle savedInstanceState) {
21 super.onCreate(savedInstanceState);
22 setContentView(R.layout.main);
23 tv = (TextView) findViewById(R.id.tv);
24
25 new Thread() {
26 @Override
27 public void run() {
28 // TODO 子線程中通過handler發送消息給handler接收,由handler去更新TextView的值
29 try {
30 for (int i = 0; i < 100; i++) {
31 Thread.sleep(500);
32 Message msg = new Message();
33 msg.what = UPDATE;
34 // Bundle b = new Bundle();
35 // b.putString("num", "更新後的值:" + i);
36 // msg.setData(b);
37 msg.obj = "更新後的值:" + i;
38 handler.sendMessage(msg);
39 }
40 } catch (InterruptedException e) {
41 e.printStackTrace();
42 }
43 }
44 }.start();
45 }
46
47 }
復制代碼
如圖所示,每個Thread都一個Looper,這個Looper類是用於管理其中的消息隊列(MessageQueue)的,那Handler是干嘛的呢,他是用來傳遞消息隊列的。
那下面就分析Looper、Hanlder方法吧。
Looper方法是用來處理消息隊列的,注意了,它和線程是綁定的。
要是想在子線程中獲取一個Looper該怎麼做呢:
Looper.prepare();
Looper looper = Looper.myLooper();
那麼這些都干了哪些工作呢???
來看下它的源碼吧:
Looper:
復制代碼
……
//准備Looper相關事宜
public static void prepare() {
//只能有一個對象哦
if (sThreadLocal.get() != null) {
throw new RuntimeException("Only one Looper may be created per thread");
}
sThreadLocal.set(new Looper());
}
//構造函數
/*新建一個消息隊列
* 把當前運行的線程作為運行線程
*/
private Looper() {
mQueue = new MessageQueue();
mRun = true;
mThread = Thread.currentThread();
}
public static final Looper myLooper() {
//這個方法是從當前線程的ThreadLocal中拿出設置的looper
return (Looper)sThreadLocal.get();
}
/**
* Run the message queue in this thread. Be sure to call
* {@link #quit()} to end the loop.
*/
public static void loop() {
Looper me = myLooper();
if (me == null) {
throw new RuntimeException("No Looper; Looper.prepare() wasn't called on this thread.");
}
MessageQueue queue = me.mQueue;
// Make sure the identity of this thread is that of the local process,
// and keep track of what that identity token actually is.
Binder.clearCallingIdentity();
final long ident = Binder.clearCallingIdentity();
while (true) {
Message msg = queue.next(); // might block
if (msg != null) {
if (msg.target == null) {
// No target is a magic identifier for the quit message.
return;
}
long wallStart = 0;
long threadStart = 0;
// This must be in a local variable, in case a UI event sets the logger
Printer logging = me.mLogging;
if (logging != null) {
logging.println(">>>>> Dispatching to " + msg.target + " " +
msg.callback + ": " + msg.what);
wallStart = SystemClock.currentTimeMicro();
threadStart = SystemClock.currentThreadTimeMicro();
}
msg.target.dispatchMessage(msg);
if (logging != null) {
long wallTime = SystemClock.currentTimeMicro() - wallStart;
long threadTime = SystemClock.currentThreadTimeMicro() - threadStart;
logging.println("<<<<< Finished to " + msg.target + " " + msg.callback);
if (logging instanceof Profiler) {
((Profiler) logging).profile(msg, wallStart, wallTime,
threadStart, threadTime);
}
}
// Make sure that during the course of dispatching the
// identity of the thread wasn't corrupted.
final long newIdent = Binder.clearCallingIdentity();
if (ident != newIdent) {
Log.wtf(TAG, "Thread identity changed from 0x"
+ Long.toHexString(ident) + " to 0x"
+ Long.toHexString(newIdent) + " while dispatching to "
+ msg.target.getClass().getName() + " "
+ msg.callback + " what=" + msg.what);
}
msg.recycle();
}
}
}
復制代碼
下面就來看下Handler:
復制代碼
public Handler() {
if (FIND_POTENTIAL_LEAKS) {
final Class<? extends Handler> klass = getClass();
if ((klass.isAnonymousClass() || klass.isMemberClass() || klass.isLocalClass()) &&
(klass.getModifiers() & Modifier.STATIC) == 0) {
Log.w(TAG, "The following Handler class should be static or leaks might occur: " +
klass.getCanonicalName());
}
}
//先獲得一個Looper對象,這個要是在子線程裡,是需要先prepare()的
mLooper = Looper.myLooper();
if (mLooper == null) {
throw new RuntimeException(
"Can't create handler inside thread that has not called Looper.prepare()");
}
mQueue = mLooper.mQueue;
mCallback = null;
}
/**
* Returns a new {@link android.os.Message Message} from the global message pool. More efficient than
* creating and allocating new instances. The retrieved message has its handler set to this instance (Message.target == this).
* If you don't want that facility, just call Message.obtain() instead.
會從消息池裡面取得消息隊列
*/
public final Message obtainMessage()
{
return Message.obtain(this);
}
復制代碼
那我現在寫個小例子,是在子線程實現的消息的傳遞。
復制代碼
@Override
public void onClick(View v) {
int id = v.getId();
if (id == R.id.btn1) {
new Thread() {
public void run() {
Log.i("log", "run");
Looper.prepare();
// Looper looper = Looper.myLooper();
Toast.makeText(MainActivity.this, "toast", 1).show();
Handler h = new Handler() {
@Override
public void handleMessage(Message msg) {
// TODO Auto-generated method stub
super.handleMessage(msg);
if (msg != null) {
String strMsg = (String) msg.obj;
System.out.println(strMsg);
}
}
};
//獲取到Handler對象的消息
Message msg = h.obtainMessage();
msg.obj = "add";
msg.sendToTarget();
Looper.loop();// 進入loop中的循環,查看消息隊列
};
}.start();
}
}
復制代碼
不知你是否理解,這個小Demo中,我們需要注意:
1 子線程也是可以有Handler的,其實Handler只是從當前的線程中獲取到Looper來監聽和操作MessageQueue的。
2 子線程需要先prepare()才能獲取到Looper的,是因為在子線程只是一個普通的線程,其ThreadLoacl中沒有設置過Looper,所以會拋出異常,而在Looper的prepare()方法中sThreadLocal.set(new Looper())是設置了Looper的。
 Android so 庫加載符號找不到的問題解決
 AndroidUI組件之ActionBar--基於下拉的導航方式
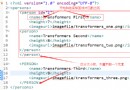
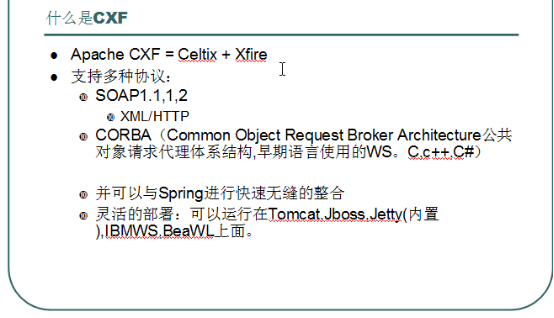 cxf 介紹 以及ant 工具的使用/cxf總結
 android 4.0 USB Camera實例(二)應用層