編輯:關於Android編程
前段時間,有一位網友發私信給我(@伍歌),問我做過磁場傳感器可以做過指南針嗎?其實我第一節裡面已經說過了,磁場傳感器可以做,只是算法比較麻煩,最簡單的指南針使用方向傳感器做出,但是由於工作關系,一直沒有來得及幫助他,現在就寫一份簡單指南針教程吧,先貼圖:
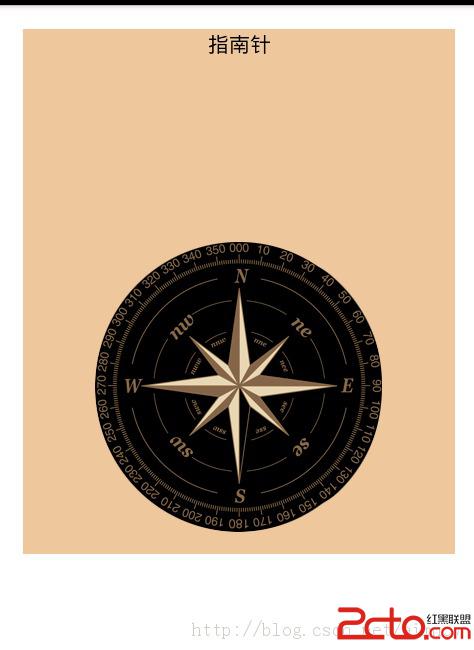
布局文件很簡單,就一張指南針的平面圖片。
具體方法代碼
public void onSensorChanged(SensorEvent event) {

		// 如果真機上觸發event的傳感器類型為水平傳感器類型
		if (event.sensor.getType() == Sensor.TYPE_ORIENTATION) {
			// 獲取繞Z軸旋轉的角度
			float degree = event.values[0];
			// 創建旋轉動畫(反向轉過degree度)
			RotateAnimation ra = new RotateAnimation(currentDegree, -degree, Animation.RELATIVE_TO_SELF, 0.5f,Animation.RELATIVE_TO_SELF, 0.5f);
			// 設置動畫的持續時間
			ra.setDuration(200);
			// 設置動畫結束後的保留狀態
			ra.setFillAfter(true);
			// 啟動動畫
			image.startAnimation(ra);
			currentDegree = -degree;
		}

	}
思路就是獲取了values[0],根據values[0]的值去旋轉圖片。所有代碼如下:
public class OrientationActivity extends Activity implements
		SensorEventListener {

	public static final String TAG = "OrientationActivity方向傳感器";

	private TextView tv_context;

	private Sensor mAccelerometer;

	private SensorManager mSensorManager;
	// 記錄指南針圖片轉過的角度
	private float currentDegree = 0f;

	private ImageView image;

	@Override
	protected void onCreate(Bundle savedInstanceState) {

		super.onCreate(savedInstanceState);
		setContentView(R.layout.activity_main_orien);
		infoViews();// 初始化控件

	}

	private void infoViews() {

		// btn = (Button) findViewById(R.id.btn_sensor);
		tv_context = (TextView) findViewById(R.id.tv_context);
		tv_context.setText("指南針");
		mSensorManager = (SensorManager) getSystemService(Context.SENSOR_SERVICE);
		mAccelerometer = mSensorManager
				.getDefaultSensor(Sensor.TYPE_ORIENTATION);
		image = (ImageView) findViewById(R.id.main_iv);
	}

	@Override
	protected void onResume() {

		if (mAccelerometer != null) {
			mSensorManager.registerListener(this, mAccelerometer,
					SensorManager.SENSOR_DELAY_NORMAL);
			Toast.makeText(getApplicationContext(), "此設備有方向傳感器", 0).show();
		} else {
			Toast.makeText(getApplicationContext(), "此設備沒有方向傳感器", 0).show();
		}

		super.onResume();
	}

	protected void onPause() {

		super.onPause();
		mSensorManager.unregisterListener(this);
	}

	public void onAccuracyChanged(Sensor sensor, int accuracy) {

	}

	public void onSensorChanged(SensorEvent event) {

		// 如果真機上觸發event的傳感器類型為水平傳感器類型
		if (event.sensor.getType() == Sensor.TYPE_ORIENTATION) {
			// 獲取繞Z軸旋轉的角度
			float degree = event.values[0];
			// 創建旋轉動畫(反向轉過degree度)
			RotateAnimation ra = new RotateAnimation(currentDegree, -degree,
					Animation.RELATIVE_TO_SELF, 0.5f,
					Animation.RELATIVE_TO_SELF, 0.5f);
			// 設置動畫的持續時間
			ra.setDuration(200);
			// 設置動畫結束後的保留狀態
			ra.setFillAfter(true);
			// 啟動動畫
			image.startAnimation(ra);
			currentDegree = -degree;
		}

	}
}LocationManager locationManager = (LocationManager) getSystemService(Context.LOCATION_SERVICE);
Criteria criteria = new Criteria();
criteria.setAccuracy(Criteria.ACCURACY_FINE);//設置為最大精度
criteria.setAltitudeRequired(false);//不要求海拔信息
criteria.setBearingRequired(false);//不要求方位信息
criteria.setCostAllowed(true);//是否允許付費
criteria.setPowerRequirement(Criteria.POWER_LOW);//對電量的要求
location = locationManager.getLastKnownLocation(locationManager.getBestProvider(criteria, true));
然後去寫location:
 UI - UISearchController&UISearchDisplayController
簡介系統自帶的搜索頁面類 — UISearchDisplayController和UISearchController, 讓你更方便快捷的進行搜索功能開發.
 Android項目之HomeHealth基礎學習1:Service
一、 Service簡介 Service是android 系統中的四大組件之一(Activity、Service、BroadcastReceiver、ContentP
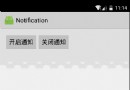 Android Notification通知解析
Notification是顯示在手機狀態欄的通知,Notification通知是具有全局性的通知,一般通過NotificationManager來進行管理.一般運用Not
 Android手機如何獲取power_profile.xml文件
最近在做關於能耗方面的測試,看了一個月時間的論文,終於找到了一些新的思路,但是一個問題出現了,以至於 工作無法再進行下去。 在Android手機中,對於手機