之前給公司做了一個攝影相關的應用,現在要添加二維碼掃描的功能,網上找資料後,雖然已經成功集成到app裡面,但是總感覺心裡沒底兒。所以趁這段時間不是很忙,總結一下。
首先是啟動掃描的UI類:
1,Activity啟動,當然是onCreate方法
private CaptureActivityHandler handler;
private ViewfinderView viewfinderView;
private boolean hasSurface;
private Vector<BarcodeFormat> decodeFormats;
private String characterSet;
private InactivityTimer inactivityTimer;
private MediaPlayer mediaPlayer;
private boolean playBeep;
private static final float BEEP_VOLUME = 0.10f;
private boolean vibrate;
/** Called when the activity is first created. */
@Override
public void onCreate(Bundle savedInstanceState) {
super.onCreate(savedInstanceState);
setContentView(R.layout.activity_capture);
// ViewUtil.addTopView(getApplicationContext(), this,
// R.string.scan_card);
CameraManager.init(getApplication());
viewfinderView = (ViewfinderView) findViewById(R.id.viewfinder_view);
Button mButtonBack = (Button) findViewById(R.id.button_back);
mButtonBack.setOnClickListener(new OnClickListener() {
@Override
public void onClick(View v) {
Scaner.this.finish();
}
});
hasSurface = false;
inactivityTimer = new InactivityTimer(this);
}
@Override
protected void onResume() {
super.onResume();
SurfaceView surfaceView = (SurfaceView) findViewById(R.id.preview_view);
SurfaceHolder surfaceHolder = surfaceView.getHolder();
if (hasSurface) {
initCamera(surfaceHolder);
} else {
surfaceHolder.addCallback(this);
surfaceHolder.setType(SurfaceHolder.SURFACE_TYPE_PUSH_BUFFERS);
}
decodeFormats = null;
characterSet = null;
playBeep = true;
AudioManager audioService = (AudioManager) getSystemService(AUDIO_SERVICE);
if (audioService.getRingerMode() != AudioManager.RINGER_MODE_NORMAL) {
playBeep = false;
}
initBeepSound();
vibrate = true;
}
@Override
protected void onPause() {
super.onPause();
if (handler != null) {
handler.quitSynchronously();
handler = null;
}
CameraManager.get().closeDriver();
}
@Override
protected void onDestroy() {
inactivityTimer.shutdown();
super.onDestroy();
}
/**
*
*
*
* @param @param result
* @param @param barcode
* @author Administrator
* @return void
*/
public void handleDecode(Result result, Bitmap barcode) {
inactivityTimer.onActivity();
playBeepSoundAndVibrate();
String resultString = result.getText();
if (resultString.equals("")) {
Toast.makeText(Scaner.this, "Scan failed!",3000).show();
} else {
//查詢keycode 本地數據庫 1,優先查詢本地庫,2,沒有本地庫,直接跳到知道鏈接
//分析出keyCode
Log.i("testMain","scan_result=====>"+resultString);
String keyCode="";
String[] split1;
if(resultString.lastIndexOf("?")<0){
Intent intent = new Intent(this, InnerBrowser.class);
Bundle bundle = new Bundle();
bundle.putString("result", resultString);
//bundle.putParcelable("bitmap", barcode);
intent.putExtras(bundle);
startActivity(intent);Scaner.this.finish();return;
}
String[] attr = resultString.substring(resultString.lastIndexOf("?")-1, resultString.length()).split("&");
for (String string : attr) {
split1 = string.split("=");
if(split1[0].equalsIgnoreCase("keycode")){
//找到
if(split1.length==2){
keyCode=split1[1];
}
}
}
Log.i("testMain","keyCode=====>"+keyCode);
if(!StringUtils.isBlank(keyCode)){
AttractionDAO dao=new AttractionDAO(Scaner.this);
Attraction a=dao.findAttrByKeyCode(keyCode);
Log.i("testMain","a=====>"+a);
if(a!=null){
Intent it=new Intent();
it.setClass(Scaner.this, UIAttractionDetail.class);
it.putExtra("a", a);
startActivity(it);
}else{
Intent intent = new Intent(this, InnerBrowser.class);
Bundle bundle = new Bundle();
bundle.putString("result", resultString);
//bundle.putParcelable("bitmap", barcode);
intent.putExtras(bundle);
startActivity(intent);
//this.setResult(RESULT_OK, resultIntent);
//使用內置浏覽器打開網站內容
}
}else{
Intent intent = new Intent(this, InnerBrowser.class);
Bundle bundle = new Bundle();
bundle.putString("result", resultString);
//bundle.putParcelable("bitmap", barcode);
intent.putExtras(bundle);
startActivity(intent);
//this.setResult(RESULT_OK, resultIntent);
//使用內置浏覽器打開網站內容
}
}
Scaner.this.finish();
}
private void initCamera(SurfaceHolder surfaceHolder) {
try {
CameraManager.get().openDriver(surfaceHolder);
} catch (IOException ioe) {
return;
} catch (RuntimeException e) {
return;
}
if (handler == null) {
handler = new CaptureActivityHandler(this, decodeFormats,
characterSet);
}
}
@Override
public void surfaceChanged(SurfaceHolder holder, int format, int width,
int height) {
}
@Override
public void surfaceCreated(SurfaceHolder holder) {
if (!hasSurface) {
hasSurface = true;
initCamera(holder);
}
}
@Override
public void surfaceDestroyed(SurfaceHolder holder) {
hasSurface = false;
}
public ViewfinderView getViewfinderView() {
return viewfinderView;
}
public Handler getHandler() {
return handler;
}
public void drawViewfinder() {
viewfinderView.drawViewfinder();
}
private void initBeepSound() {
if (playBeep && mediaPlayer == null) {
// The volume on STREAM_SYSTEM is not adjustable, and users found it
// too loud,
// so we now play on the music stream.
setVolumeControlStream(AudioManager.STREAM_MUSIC);
mediaPlayer = new MediaPlayer();
mediaPlayer.setAudioStreamType(AudioManager.STREAM_MUSIC);
mediaPlayer.setOnCompletionListener(beepListener);
AssetFileDescriptor file = getResources().openRawResourceFd(
R.raw.beep);
try {
mediaPlayer.setDataSource(file.getFileDescriptor(),
file.getStartOffset(), file.getLength());
file.close();
mediaPlayer.setVolume(BEEP_VOLUME, BEEP_VOLUME);
mediaPlayer.prepare();
} catch (IOException e) {
mediaPlayer = null;
}
}
}
private static final long VIBRATE_DURATION = 200L;
private void playBeepSoundAndVibrate() {
if (playBeep && mediaPlayer != null) {
mediaPlayer.start();
}
if (vibrate) {
Vibrator vibrator = (Vibrator) getSystemService(VIBRATOR_SERVICE);
vibrator.vibrate(VIBRATE_DURATION);
}
}
/**
* When the beep has finished playing, rewind to queue up another one.
*/
private final OnCompletionListener beepListener = new OnCompletionListener() {
public void onCompletion(MediaPlayer mediaPlayer) {
mediaPlayer.seekTo(0);
}
};
從上面代碼可以看出,做了三件事兒:加載布局文件;初始化了一個相機管理器;設置按鈕監聽,初始化了一個InactivityTimer實例;
然後,最重要的是他實現了一個CallBack函數:具體參見:
SurfaceHolder.Callback 譯文
此時,
1
surfaceCreated
這個方法會調用然後就初始化相機的一些參數:
前兩個我們好理解,第三個是干嘛的?
我們先看布局文件:
<?xml version="1.0" encoding="utf-8"?>
<FrameLayout xmlns:android="http://schemas.android.com/apk/res/android"
android:layout_width="fill_parent"
android:layout_height="fill_parent" >
<RelativeLayout
android:layout_width="fill_parent"
android:layout_height="fill_parent" >
<SurfaceView
android:id="@+id/preview_view"
android:layout_width="fill_parent"
android:layout_height="fill_parent"
android:layout_gravity="center" />
<com.euc.app.scan.view.ViewfinderView
android:id="@+id/viewfinder_view"
android:layout_width="wrap_content"
android:layout_height="wrap_content" />
<include
android:id="@+id/include1"
android:layout_width="fill_parent"
android:layout_height="wrap_content"
android:layout_alignParentTop="true"
layout="@layout/activity_title" />
</RelativeLayout>
</FrameLayout>
可以看到裡面有一個自定義的View及surfaceView,
對於我這樣的初學者來說,surfaceView 是什麼東西?
csdn上看到這個文章
Android中SurfaceView的使用詳解
雖然不是很明白,但是大致明白這是個什麼東西了。
了解了生命周期之後,我們來看他執行的方法:
private void initCamera(SurfaceHolder surfaceHolder) {
try {
CameraManager.get().openDriver(surfaceHolder);//配置攝像頭
} catch (IOException ioe) {
return;
} catch (RuntimeException e) {
return;
}
if (handler == null) {
handler = new CaptureActivityHandler(this, decodeFormats,
characterSet);//初始化方法裡面開啟攝像頭預覽界面。
}
}
@Override
public void surfaceChanged(SurfaceHolder holder, int format, int width,
int height) {
}
@Override
public void surfaceCreated(SurfaceHolder holder) {
if (!hasSurface) {
hasSurface = true;
initCamera(holder);
}
}
@Override
public void surfaceDestroyed(SurfaceHolder holder) {
hasSurface = false;
}
這個surfaceView 創建出來之後,其實也把攝像頭的配置信息以及硬件信息初始化好了。
OK,經過上面一個oncreate以及布局文件的加載,我們已經知道,攝像頭預覽成功,
這個自定義的View又是干嘛的?我們繼續看源碼:
private final int maskColor;
private final int resultColor;
private final int resultPointColor;
private Collection<ResultPoint> possibleResultPoints;
private Collection<ResultPoint> lastPossibleResultPoints;
boolean isFirst;
public ViewfinderView(Context context, AttributeSet attrs) {
super(context, attrs);
density = context.getResources().getDisplayMetrics().density;
//將像素轉換成dp
ScreenRate = (int)(20 * density);
paint = new Paint();
Resources resources = getResources();
maskColor = resources.getColor(R.color.viewfinder_mask);
resultColor = resources.getColor(R.color.result_view);
resultPointColor = resources.getColor(R.color.possible_result_points);
possibleResultPoints = new HashSet<ResultPoint>(5);
}
@Override
public void onDraw(Canvas canvas) {
//中間的掃描框,你要修改掃描框的大小,去CameraManager裡面修改
Rect frame = CameraManager.get().getFramingRect();
if (frame == null) {
return;
}
//初始化中間線滑動的最上邊和最下邊
if(!isFirst){
isFirst = true;
slideTop = frame.top;
slideBottom = frame.bottom;
}
//獲取屏幕的寬和高
int width = canvas.getWidth();
int height = canvas.getHeight();
paint.setColor(resultBitmap != null ? resultColor : maskColor);
//畫出掃描框外面的陰影部分,共四個部分,掃描框的上面到屏幕上面,掃描框的下面到屏幕下面
//掃描框的左邊面到屏幕左邊,掃描框的右邊到屏幕右邊
canvas.drawRect(0, 0, width, frame.top, paint);
canvas.drawRect(0, frame.top, frame.left, frame.bottom + 1, paint);
canvas.drawRect(frame.right + 1, frame.top, width, frame.bottom + 1,
paint);
canvas.drawRect(0, frame.bottom + 1, width, height, paint);
if (resultBitmap != null) {
// Draw the opaque result bitmap over the scanning rectangle
paint.setAlpha(OPAQUE);
canvas.drawBitmap(resultBitmap, frame.left, frame.top, paint);
} else {
//畫掃描框邊上的角,總共8個部分
paint.setColor(Color.GREEN);
canvas.drawRect(frame.left, frame.top, frame.left + ScreenRate,
frame.top + CORNER_WIDTH, paint);
canvas.drawRect(frame.left, frame.top, frame.left + CORNER_WIDTH, frame.top
+ ScreenRate, paint);
canvas.drawRect(frame.right - ScreenRate, frame.top, frame.right,
frame.top + CORNER_WIDTH, paint);
canvas.drawRect(frame.right - CORNER_WIDTH, frame.top, frame.right, frame.top
+ ScreenRate, paint);
canvas.drawRect(frame.left, frame.bottom - CORNER_WIDTH, frame.left
+ ScreenRate, frame.bottom, paint);
canvas.drawRect(frame.left, frame.bottom - ScreenRate,
frame.left + CORNER_WIDTH, frame.bottom, paint);
canvas.drawRect(frame.right - ScreenRate, frame.bottom - CORNER_WIDTH,
frame.right, frame.bottom, paint);
canvas.drawRect(frame.right - CORNER_WIDTH, frame.bottom - ScreenRate,
frame.right, frame.bottom, paint);
//繪制中間的線,每次刷新界面,中間的線往下移動SPEEN_DISTANCE
slideTop += SPEEN_DISTANCE;
if(slideTop >= frame.bottom){
slideTop = frame.top;
}
canvas.drawRect(frame.left + MIDDLE_LINE_PADDING, slideTop - MIDDLE_LINE_WIDTH/2, frame.right - MIDDLE_LINE_PADDING,slideTop + MIDDLE_LINE_WIDTH/2, paint);
//畫掃描框下面的字
paint.setColor(Color.WHITE);
paint.setTextSize(TEXT_SIZE * density);
paint.setAlpha(0x40);
paint.setTypeface(Typeface.create("System", Typeface.BOLD));
canvas.drawText(getResources().getString(R.string.scan_text), frame.left, (float) (frame.bottom + (float)TEXT_PADDING_TOP *density), paint);
Collection<ResultPoint> currentPossible = possibleResultPoints;
Collection<ResultPoint> currentLast = lastPossibleResultPoints;
if (currentPossible.isEmpty()) {
lastPossibleResultPoints = null;
} else {
possibleResultPoints = new HashSet<ResultPoint>(5);
lastPossibleResultPoints = currentPossible;
paint.setAlpha(OPAQUE);
paint.setColor(resultPointColor);
for (ResultPoint point : currentPossible) {
canvas.drawCircle(frame.left + point.getX(), frame.top
+ point.getY(), 6.0f, paint);
}
}
if (currentLast != null) {
paint.setAlpha(OPAQUE / 2);
paint.setColor(resultPointColor);
for (ResultPoint point : currentLast) {
canvas.drawCircle(frame.left + point.getX(), frame.top
+ point.getY(), 3.0f, paint);
}
}
//只刷新掃描框的內容,其他地方不刷新
postInvalidateDelayed(ANIMATION_DELAY, frame.left, frame.top,
frame.right, frame.bottom);
}
}
public void drawViewfinder() {
resultBitmap = null;
invalidate();
}
/**
* Draw a bitmap with the result points highlighted instead of the live
* scanning display.
*
* @param barcode
* An image of the decoded barcode.
*/
public void drawResultBitmap(Bitmap barcode) {
resultBitmap = barcode;
invalidate();
}
public void addPossibleResultPoint(ResultPoint point) {
possibleResultPoints.add(point);
}
哦,這個就是定義了一個有動態效果的掃描界面
上面的雖然代碼不多,當時我們現在回憶一下步驟:
1,啟動activity,加載布局文件,初始化surfaceView,初始化自定義的View(動態界面),
2,在初始化surfaceView的時候,同時初始化了攝像頭的參數,初始化的handler處理器,啟動了攝像頭預覽。
問題:那什麼時候開始監聽掃描二維碼的呢?
初始化handler 的時候就開始監聽了,看一下其構造函數:
public CaptureActivityHandler(Scaner activity, Vector<BarcodeFormat> decodeFormats,
String characterSet) {
this.activity = activity;
decodeThread = new DecodeThread(activity, decodeFormats, characterSet,
new ViewfinderResultPointCallback(activity.getViewfinderView()));
decodeThread.start();
state = State.SUCCESS;
// Start ourselves capturing previews and decoding.
CameraManager.get().startPreview();
restartPreviewAndDecode();
}
再來一個:上面構造函數new了一個對象,這個對象就是用來監聽獲取掃描的圖像的。
直到獲取了二維碼圖像,調用回調函數就結束。
final class DecodeThread extends Thread {
public static final String BARCODE_BITMAP = "barcode_bitmap";
private final Scaner activity;
private final Hashtable<DecodeHintType, Object> hints;
private Handler handler;
private final CountDownLatch handlerInitLatch;
DecodeThread(Scaner activity,
Vector<BarcodeFormat> decodeFormats,
String characterSet,
ResultPointCallback resultPointCallback) {
this.activity = activity;
handlerInitLatch = new CountDownLatch(1);
hints = new Hashtable<DecodeHintType, Object>(3);
if (decodeFormats == null || decodeFormats.isEmpty()) {
decodeFormats = new Vector<BarcodeFormat>();
decodeFormats.addAll(DecodeFormatManager.ONE_D_FORMATS);
decodeFormats.addAll(DecodeFormatManager.QR_CODE_FORMATS);
decodeFormats.addAll(DecodeFormatManager.DATA_MATRIX_FORMATS);
}
hints.put(DecodeHintType.POSSIBLE_FORMATS, decodeFormats);
if (characterSet != null) {
hints.put(DecodeHintType.CHARACTER_SET, characterSet);
}
hints.put(DecodeHintType.NEED_RESULT_POINT_CALLBACK, resultPointCallback);
}
Handler getHandler() {
try {
handlerInitLatch.await();
} catch (InterruptedException ie) {
// continue?
}
return handler;
}
@Override
public void run() {
Looper.prepare();
handler = new DecodeHandler(activity, hints);
handlerInitLatch.countDown();
Looper.loop();
}
}
回調函數:
public void handleDecode(Result result, Bitmap barcode) {
inactivityTimer.onActivity();
playBeepSoundAndVibrate();
String resultString = result.getText();
if (resultString.equals("")) {
Toast.makeText(Scaner.this, "Scan failed!",3000).show();
} else {
//掃描結果的處理。
}
Scaner.this.finish();
}
 [Android] IntentService使用詳解和實例介紹
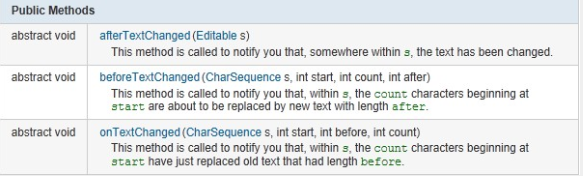 Android編程實現監聽EditText變化的方法
 android TabHost(選項卡)的使用方法
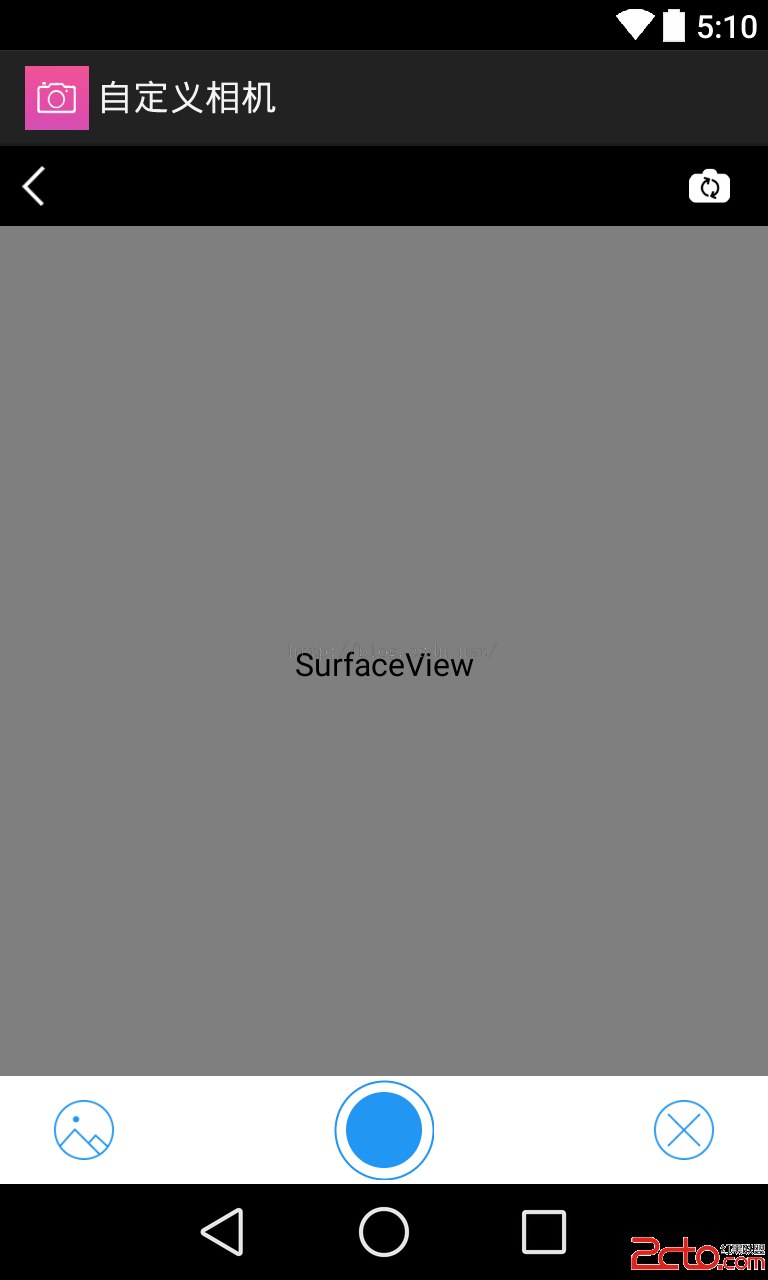 Android實現一個自定義相機的界面