編輯:關於Android編程
一般相機拍攝的照片大小為3-4M左右,這裡因為需要完成將拍攝好的照片上傳到服務器功能,所以需要將得到的照片進行壓縮。這裡演示就直接存放在SD卡中。
網上搜索了不少資料,得知可以使用:inSampleSize 設置圖片的縮放比例。
但是,這裡需要注意:
1)inJustDecodeBounds = true; 需要先設置為真,表示只獲得圖片的資料信息。如果此時檢驗bitmap會發現bitmap==null;
2)如果需要加載圖片的時候,必須重新設置inJustDecodeBounds = false;
一、實現圖片壓縮(網上看到別人的,自己稍微修改了一下):
//壓縮圖片尺寸
    public Bitmap compressBySize(String pathName, int targetWidth,
            int targetHeight) {
        BitmapFactory.Options opts = new BitmapFactory.Options();
        opts.inJustDecodeBounds = true;// 不去真的解析圖片,只是獲取圖片的頭部信息,包含寬高等;
        Bitmap bitmap = BitmapFactory.decodeFile(pathName, opts);
        // 得到圖片的寬度、高度;
        float imgWidth = opts.outWidth;
        float imgHeight = opts.outHeight;
        // 分別計算圖片寬度、高度與目標寬度、高度的比例;取大於等於該比例的最小整數;
        int widthRatio = (int) Math.ceil(imgWidth / (float) targetWidth);
        int heightRatio = (int) Math.ceil(imgHeight / (float) targetHeight);
        opts.inSampleSize = 1;
        if (widthRatio > 1 || widthRatio > 1) {
            if (widthRatio > heightRatio) {
                opts.inSampleSize = widthRatio;
            } else {
                opts.inSampleSize = heightRatio;
            }
        }
        //設置好縮放比例後,加載圖片進內容;
        opts.inJustDecodeBounds = false;
        bitmap = BitmapFactory.decodeFile(pathName, opts);
        return bitmap;
    }
二、將壓縮後的圖片存儲於SD卡:
//存儲進SD卡
    public void saveFile(Bitmap bm, String fileName) throws Exception {
        File dirFile = new File(fileName);
        //檢測圖片是否存在
        if(dirFile.exists()){
            dirFile.delete();  //刪除原圖片
        }
        File myCaptureFile = new File(fileName);
        BufferedOutputStream bos = new BufferedOutputStream(new FileOutputStream(myCaptureFile));
        //100表示不進行壓縮,70表示壓縮率為30%
        bm.compress(Bitmap.CompressFormat.JPEG, 100, bos);
        bos.flush();
        bos.close();
    }
這裡注意,由於需要寫SD卡,要添加一個權限:
三、附上一個完整的小Demo:
1)MainActivity.java
package com.face.sendwinrar;

import java.io.BufferedOutputStream;
import java.io.File;
import java.io.FileOutputStream;

import android.app.Activity;
import android.graphics.Bitmap;
import android.graphics.BitmapFactory;
import android.os.Bundle;
import android.view.Menu;
import android.view.MenuItem;


public class MainActivity extends Activity {

	//照片保存地址
	private static final String FILE_PATH = /sdcard/gone.jpg;

    @Override
    protected void onCreate(Bundle savedInstanceState) {
        super.onCreate(savedInstanceState);
        setContentView(R.layout.activity_main);

        try {
        	 //壓縮圖片
        	Bitmap bitmap = compressBySize(FILE_PATH,150,200);
        	//保存圖片
        	saveFile(bitmap, FILE_PATH);

		} catch (Exception e) {
			e.printStackTrace();
		}

    }

    //壓縮圖片尺寸
    public Bitmap compressBySize(String pathName, int targetWidth,
            int targetHeight) {
        BitmapFactory.Options opts = new BitmapFactory.Options();
        opts.inJustDecodeBounds = true;// 不去真的解析圖片,只是獲取圖片的頭部信息,包含寬高等;
        Bitmap bitmap = BitmapFactory.decodeFile(pathName, opts);
        // 得到圖片的寬度、高度;
        float imgWidth = opts.outWidth;
        float imgHeight = opts.outHeight;
        // 分別計算圖片寬度、高度與目標寬度、高度的比例;取大於等於該比例的最小整數;
        int widthRatio = (int) Math.ceil(imgWidth / (float) targetWidth);
        int heightRatio = (int) Math.ceil(imgHeight / (float) targetHeight);
        opts.inSampleSize = 1;
        if (widthRatio > 1 || widthRatio > 1) {
            if (widthRatio > heightRatio) {
                opts.inSampleSize = widthRatio;
            } else {
                opts.inSampleSize = heightRatio;
            }
        }
        //設置好縮放比例後,加載圖片進內容;
        opts.inJustDecodeBounds = false;
        bitmap = BitmapFactory.decodeFile(pathName, opts);
        return bitmap;
    }
    //存儲進SD卡
    public void saveFile(Bitmap bm, String fileName) throws Exception {
        File dirFile = new File(fileName);
        //檢測圖片是否存在
        if(dirFile.exists()){
            dirFile.delete();  //刪除原圖片
        }
        File myCaptureFile = new File(fileName);
        BufferedOutputStream bos = new BufferedOutputStream(new FileOutputStream(myCaptureFile));
        //100表示不進行壓縮,70表示壓縮率為30%
        bm.compress(Bitmap.CompressFormat.JPEG, 100, bos);
        bos.flush();
        bos.close();
    }


    @Override
    public boolean onCreateOptionsMenu(Menu menu) {
        // Inflate the menu; this adds items to the action bar if it is present.
        getMenuInflater().inflate(R.menu.main, menu);
        return true;
    }

    @Override
    public boolean onOptionsItemSelected(MenuItem item) {
        // Handle action bar item clicks here. The action bar will
        // automatically handle clicks on the Home/Up button, so long
        // as you specify a parent activity in AndroidManifest.xml.
        int id = item.getItemId();
        if (id == R.id.action_settings) {
            return true;
        }
        return super.onOptionsItemSelected(item);
    }
}
2)mainfest
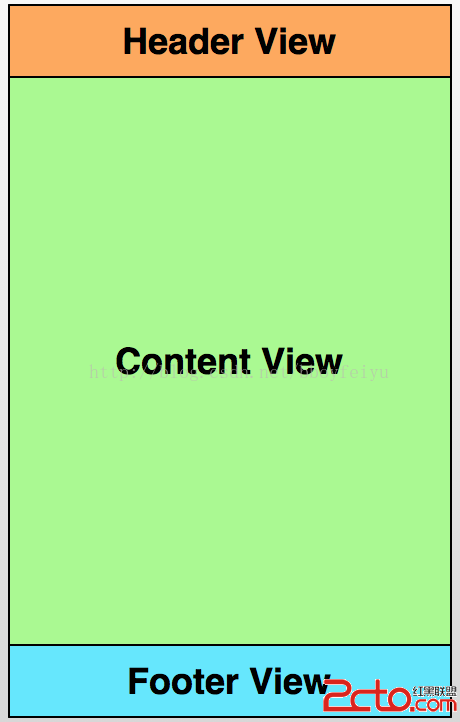 Android打造(ListView、GridView等)通用的下拉刷新、上拉自動加載的組件
前言 下拉刷新組件在開發中使用率是非常高的,基本上聯網的APP都會采用這種方式。對於開發效率而言,使用獲得大家認可的開源庫必然是效率最高的,但是不重復發明輪子的
 Android-基本控件(Ratingbar 實現)
1.回顧上篇學習 Android 布局 優化的知識 ,和 SeekBar (可拖動 滾動條)的理解與學習2.重點(1)RatingBar 的實現(2)OnRatingBa
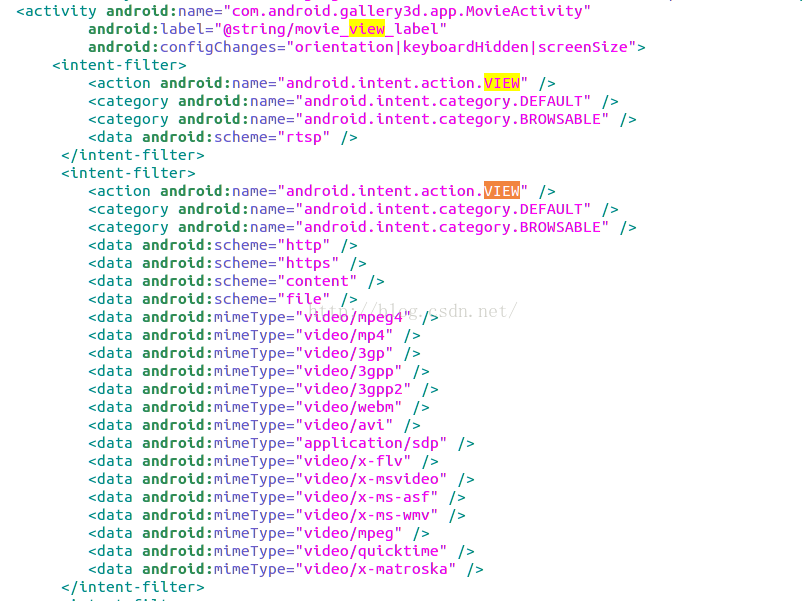 Android播放視頻之VideoView
目前很多app都會有短視頻內容,這裡就來講一下android中播放視頻的幾種方式。Android播放視頻有三種方式:1,調用系統已有的播放軟件播放視頻。2,使用andro
 從java到C解析Binder機制
Binder機制是一種C/S結構,主要包括三部分,分別為Client、Server、ServiceManager。ServiceManager是谷歌設計的,它是一段簡潔的