【正文】
一、ListFragement的介紹:
ListFragment繼承於Fragment。因此它具有Fragment的特性,能夠作為activity中的一部分,目的也是為了使頁面設計更加靈活。相比Fragment,ListFragment的內容是以列表(list)的形式顯示的。
1、ListFragment布局:
ListFragment的默認布局包含一個list view。因此,在ListFragment對應的布局文件中,必須指定一個 android:id 為 “@android:id/list” 的ListView控件! 若用戶想修改listview,可以在onCreateView(LayoutInflater, ViewGroup, Bundle)中進行修改。當然,用戶也可以在ListFragment的布局中包含其它的控件。
下面是官方文檔中ListFragment對應的一個layout示例:
復制代碼
<?xml version="1.0" encoding="utf-8"?>
<LinearLayout xmlns:android="http://schemas.android.com/apk/res/android"
android:orientation="vertical"
android:layout_width="match_parent"
android:layout_height="match_parent"
android:paddingLeft="8dp"
android:paddingRight="8dp">
<ListView android:id="@id/android:list"
android:layout_width="match_parent"
android:layout_height="match_parent"
android:background="#00FF00"
android:layout_weight="1"
android:drawSelectorOnTop="false"/>
<TextView android:id="@id/android:empty"
android:layout_width="match_parent"
android:layout_height="match_parent"
android:background="#FF0000"
android:text="No data"/>
</LinearLayout>
復制代碼
ListView中每一行的顯示內容,是通過設置適配器ListAdapter來實現的。我們既可以自定義,也可以采用系統默認的layout。後面的應用實例中,會分別列舉2種情況下的顯示
2、綁定數據:
ListFragment綁定ListView的數據(即綁定適配器)時,必須通過ListFragment.setListAdapter()接口來綁定數據,而不是使用ListView.setAdapter() 或其它方法
二、通過ArrayAdapter來加載ListFragment的舉例:
【舉例】現在將平板電腦分成三部分:點擊左側的按鈕,出現中間的新聞標題列表(ListFragment),點擊中間ListFragment的某個item,在最右側的fragment中顯示詳情。
新建工程文件m01_ListFragment01:
(1)定義activity_main.xml的布局:
activity_main.xml的代碼如下:
復制代碼
<LinearLayout xmlns:android="http://schemas.android.com/apk/res/android"
xmlns:tools="http://schemas.android.com/tools"
android:layout_width="match_parent"
android:layout_height="match_parent"
tools:context=".MainActivity" >
<LinearLayout
android:id="@+id/left"
android:layout_width="0dp"
android:layout_height="match_parent"
android:layout_weight="1"
android:background="#cccccc"
android:orientation="horizontal" >
<Button
android:id="@+id/button1"
android:layout_width="match_parent"
android:layout_height="wrap_content"
android:textSize="14sp"
android:text="show ListFragment" />
</LinearLayout>
<LinearLayout
android:id="@+id/center"
android:layout_width="0dp"
android:layout_height="match_parent"
android:layout_weight="2"
android:background="#AFEEEE"
android:orientation="vertical" >
</LinearLayout>
<LinearLayout
android:id="@+id/center"
android:layout_width="0dp"
android:layout_height="match_parent"
android:layout_weight="2"
android:background="#00FFFF"
android:orientation="vertical" >
</LinearLayout>
</LinearLayout>
復制代碼
實際上分配了三個線性布局,左側顯示按鈕,中間顯示標題,右側顯示詳情。這個布局文件對應的可視化界面如下:
(2)定義中間的ListFragment,即新建文件ArticleListFragment.java:
ArticleListFragment.java的代碼如下:
復制代碼
1 package com.example.m01_listfragment01;
2
3 import java.util.ArrayList;
4 import java.util.List;
5
6 import android.app.ListFragment;
7 import android.os.Bundle;
8 import android.view.LayoutInflater;
9 import android.view.View;
10 import android.view.ViewGroup;
11 import android.widget.ArrayAdapter;
12
13 public class ArticleListFragment extends ListFragment {
14
15 private ArrayAdapter<String> adapter;
16
17 @Override
18 public void onCreate(Bundle savedInstanceState) {
19 // TODO Auto-generated method stub
20 super.onCreate(savedInstanceState);
21
22 //定義一個數組
23 List<String> data = new ArrayList<String>();
24 for (int i = 0; i < 30; i++) {
25 data.add("smyh" + i);
26 }
27 //將數組加到ArrayAdapter當中
28 adapter = new ArrayAdapter<String>(getActivity(),
29 android.R.layout.simple_list_item_1, data);
30 //綁定適配器時,必須通過ListFragment.setListAdapter()接口,而不是ListView.setAdapter()或其它方法
31 setListAdapter(adapter);
32 }
33
34 @Override
35 public View onCreateView(LayoutInflater inflater, ViewGroup container,
36 Bundle savedInstanceState) {
37 // TODO Auto-generated method stub
38 return super.onCreateView(inflater, container, savedInstanceState);
39 }
40
41 @Override
42 public void onPause() {
43 // TODO Auto-generated method stub
44 super.onPause();
45 }
46 }
復制代碼
核心代碼是22至32行:我們讓這個Fragment繼承ListFragment,然後在onCreate()方法中定義一個ArrayAdapter,將數據放進去,最後綁定適配器就行了。需要注意的是,由於我們繼承的是ListFragment,這個Fragment默認自帶了一個布局,所以我們不需要重新新建布局文件了。
(3)將中間的ListFragment加載到Activity當中去。當我們點擊按鈕時,就開始加載這個Fragment:
MainActivity.java的代碼如下:
復制代碼
1 package com.example.m01_listfragment01;
2
3 import android.app.Activity;
4 import android.app.FragmentManager;
5 import android.app.FragmentTransaction;
6 import android.os.Bundle;
7 import android.view.Menu;
8 import android.view.View;
9 import android.view.View.OnClickListener;
10 import android.widget.Button;
11
12 public class MainActivity extends Activity {
13
14 private FragmentManager manager;
15 private FragmentTransaction transaction;
16 @Override
17 protected void onCreate(Bundle savedInstanceState) {
18 super.onCreate(savedInstanceState);
19 setContentView(R.layout.activity_main);
20 Button button = (Button) findViewById(R.id.button1);
21 button.setOnClickListener(new OnClickListener() {
22
23 //點擊按鈕,加載ListFragment
24 @Override
25 public void onClick(View v) {
26 // TODO Auto-generated method stub
27 manager = getFragmentManager();
28 transaction = manager.beginTransaction();
29 ArticleListFragment articleListFragment = new ArticleListFragment();
30 transaction.add(R.id.center, articleListFragment, "article");
31 transaction.commit();
32 }
33 });
34
35 }
36
37 @Override
38 public boolean onCreateOptionsMenu(Menu menu) {
39 // Inflate the menu; this adds items to the action bar if it is present.
40 getMenuInflater().inflate(R.menu.main, menu);
41 return true;
42 }
43 }
復制代碼
這個代碼比較簡單,就不多解釋了。
現在運行程序,初始界面如下:
點擊左側的按鈕後,顯示如下:
注:如果想實現:點擊中間的某個item,彈出吐司顯示那個item中的內容,可以在上方的ArticleListFragment.java中的監聽事件裡添加如下代碼:
(代碼放置的位置是:讓它和Fragment的生命周期方法並列就行了)
復制代碼
1 @Override
2 public void onListItemClick(ListView l, View v, int position, long id) {
3 // TODO Auto-generated method stub
4 super.onListItemClick(l, v, position, id);
5 String item = adapter.getItem(position);
6 Toast.makeText(getActivity(), item, 1).show();
7 }
復制代碼
由此我們可以看到,監聽事件的函數為onListItemClick(),可以直接寫,不需要set。
這裡面關鍵代碼在第05行,通過getItem()接收那個item,然後用字符串來接收。
我們先去掉這部分的監聽事件代碼,繼續往下看。
(4)點擊中間ListFragment的item,加載右邊的DetailFragment:
我們在中間ListFragment中添加一個按鈕的監聽事件,監聽事件的函數為onListItemClick(),ArticleListFragment.java在上面代碼的基礎之上,添加的代碼如下:
(代碼放置的位置是:讓它和Fragment的生命周期方法並列就行了)
復制代碼
1 //點擊按鈕,加載最右側的Fragment
2 @Override
3 public void onListItemClick(ListView l, View v, int position, long id) {
4 // TODO Auto-generated method stub
5 super.onListItemClick(l, v, position, id);
6
7 //點擊按鈕後,加載右邊的Fragment
8 FragmentManager manager = getFragmentManager();
9 FragmentTransaction transaction = manager.beginTransaction();
10 DetailFragment detailFragment = new DetailFragment();
11 //記住:這個地方必須用replace,而不是用add
12 transaction.replace(R.id.right, detailFragment, "detailFragment");
13
14 //將中間的item的內容放到Bundle對象當中,然後放到最右側Frament的參數當中
15 String item = adapter.getItem(position);
16 Bundle args = new Bundle();
17 args.putString("item",item);
18 detailFragment.setArguments(args);
19 //Toast.makeText(getActivity(), item, 1).show();
20
21 transaction.commit();
22 }
復制代碼
上面的代碼中,我們是在中間的Fragment中點擊按鈕,然後加載右邊的Fragment,然後要注意14至18行的核心代碼,看一下它是如何通過bundle來傳遞數據的。
需要注意的是,第12行代碼必須用replace的方式加載右側的fragment,而不是add;如果用add,運行的錯誤稍後將展示出來。
(5)定義右邊的DetailFragment:
先定義布局文件,在裡面加一個TextView,fragment_detail.xml的代碼如下:
復制代碼
<?xml version="1.0" encoding="utf-8"?>
<LinearLayout xmlns:android="http://schemas.android.com/apk/res/android"
android:layout_width="match_parent"
android:layout_height="match_parent"
android:orientation="vertical" >
<TextView
android:id="@+id/textView1"
android:layout_width="wrap_content"
android:layout_height="wrap_content"
android:text="TextView" />
</LinearLayout>
復制代碼
然後新建文件,DetailFragment.java的代碼如下:
package com.example.m01_listfragment01;
復制代碼
1 package com.example.m01_listfragment01;
2
3 import android.app.Fragment;
4 import android.os.Bundle;
5 import android.view.LayoutInflater;
6 import android.view.View;
7 import android.view.ViewGroup;
8 import android.widget.TextView;
9
10 public class DetailFragment extends Fragment {
11
12
13 @Override
14 public void onCreate(Bundle savedInstanceState) {
15 // TODO Auto-generated method stub
16 super.onCreate(savedInstanceState);
17 }
18
19 @Override
20 public View onCreateView(LayoutInflater inflater, ViewGroup container,
21 Bundle savedInstanceState) {
22 // TODO Auto-generated method stub
23 View view = inflater.inflate(R.layout.fragment_detail, null);
24 TextView textView = (TextView)view.findViewById(R.id.textView1);
25 textView.setText(""+getArguments().getString("item"));
26 return view;
27 }
28
29 @Override
30 public void onPause() {
31 // TODO Auto-generated method stub
32 super.onPause();
33 }
34 }
復制代碼
核心代碼是第25行,仔細看一下我們是怎麼通過鍵值對來拿到中間的Fragment傳遞過來的item的內容。
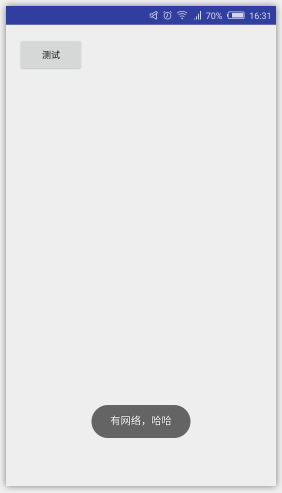 如何判斷軟件程序是否聯網 聯網狀態提示信息Android實現
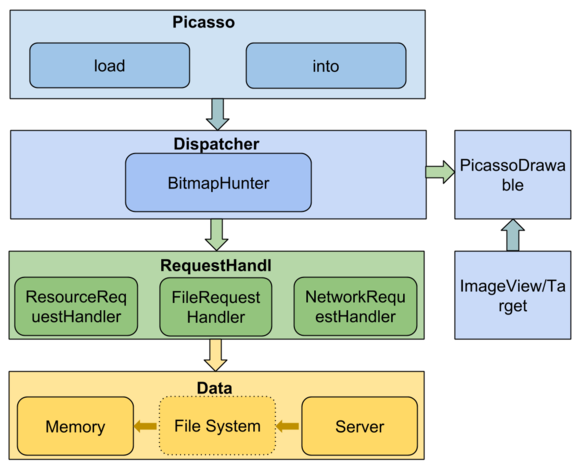 Picasso源碼分析
 Android四大組件之BroadcastReceiver
 android學習——文件下載遇到的問題及解決辦法