首先是開機自啟動的功能實現,代碼如下:
1. AndroidManifest.xml中添加如下代碼:
復制代碼
1 <!-- 抓取系統啟動事件 -->
2 <uses-permission android:name="android.permission.RECEIVE_BOOT_COMPLETED" />
3
4 <application>
5 …..
6 <service
7 android:name="com.demo.notification.NotificationService"
8 android:icon="@drawable/icon"
9 android:label="@string/app_name" >
10 </service>
11
12 <receiver android:name="com.demo.notification.MyScheduleReceiver" >
13 <intent-filter>
14 <action android:name="android.intent.action.BOOT_COMPLETED" />
15 </intent-filter>
16 </receiver>
17 </application>
復制代碼
2. 接著是實現MyScheduleReceiver代碼,這是當Android啟動後會自動啟動的程序。
復制代碼
1 public class MyScheduleReceiver extends BroadcastReceiver {
2
3 @Override
4 public void onReceive(Context context, Intent intent) {
5
6 Intent service = new Intent(context, NotificationService.class);
7 context.startService(service);
8 }
9 }
復制代碼
3. 實現NotificationService代碼,用來接收推送消息
復制代碼
1 public class NotificationService extends Service {
2 private final IBinder mBinder = new MyBinder();
3
4 @Override
5 public int onStartCommand(Intent intent, int flags, int startId) {
6 // 將接收推送消息任務放入後台執行
7 new ZeroMQMessageTask().execute();
8
9 return Service.START_STICKY;
10 }
11
12 @Override
13 public IBinder onBind(Intent arg0) {
14 return mBinder;
15 }
16
17 public class MyBinder extends Binder {
18 public NotificationService getService() {
19 return NotificationService.this;
20 }
21 }
22
23 private class ZeroMQMessageTask extends AsyncTask<String, Void, String> {
24
25 public ZeroMQMessageTask() {
26 }
27
28 @Override
29 protected String doInBackground(String... params) {
30
31 ZMQ.Context context = ZMQ.context(1);
32 ZMQ.Socket subscriber = context.socket(ZMQ.SUB);
33 subscriber.subscribe(ZMQ.SUBSCRIPTION_ALL);
34 subscriber.connect("tcp://x.x.x.x:xxxx");
35 while (true) { // 通過不終止的循環來保證接收消息
36 message = subscriber.recvStr();
37 if (!message.equals("0")) { // 0是由我自己定義的空消息標識,可以替換成自定義的其它標識
38
39 // 顯示推送消息
40 String ns = Context.NOTIFICATION_SERVICE;
41 NotificationManager mNotificationManager = (NotificationManager) getSystemService(ns);
42
43 int icon = R.drawable.icon;
44 CharSequence tickerText = "Demo - " + message;
45 long when = System.currentTimeMillis();
46
47 Notification notification = new Notification(icon,
48 tickerText, when);
49 notification.flags |= Notification.FLAG_AUTO_CANCEL;
50 Context uiContext = getApplicationContext();
51 CharSequence contentTitle = "Demo";
52 CharSequence contentText = message;
53 Intent notificationIntent = new Intent(uiContext,
54 NotificationService.class);
55 PendingIntent contentIntent = PendingIntent
56 .getActivity(uiContext, 0, notificationIntent, 0);
57
58 notification.setLatestEventInfo(uiContext, contentTitle,
59 contentText, contentIntent);
60
61 mNotificationManager.notify(1, notification);
62 }
63 }
64 }
65
66 @Override
67 protected void onPostExecute(String result) {
68 }
69 }
70 }
 解讀(五):分析KeyboardFragment, 帶文字和表情的評論發表面板
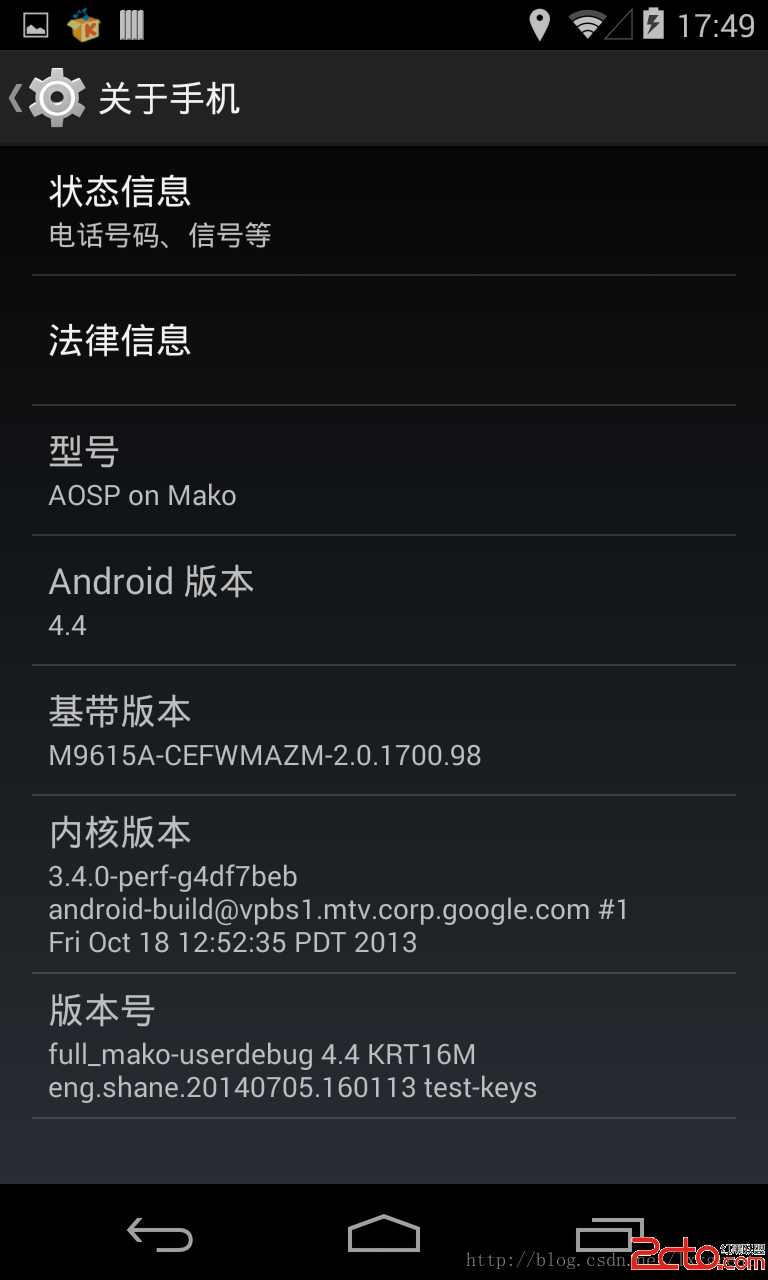 AOSP ON MAKO(在NEXUS 4上刷ANDROID 4.4 源碼包-下載/配置/編譯/刷機)
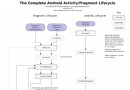 Android Activity Fragment 生命周期
 Android使用AChartEngine制作動態心電圖效果