編輯:關於Android編程
Android提供了用於構建UI的強大的組件模型。兩個基類:View和ViewGroup。
可用Widget的部分名單包括Button, TextView, EditText, ListView, CheckBox,RadioButton, Gallery, Spinner,以及一些有特別作用的組件: AutoCompleteTextView, ImageSwitcher和 TextSwitcher。
可用的布局有:LinearLayout,FrameLayout,RelativeLayout,AbsoluteLayout,GridLayout (later on api level 14 or v7-support)
1. 繼承自View或View的子類
2. 重寫父類的一些方法,如:onDraw(),onMeasure(),onLayout()等
3. 使用自定義的組件類。
1. 最普通的作法是,繼承自View,實現你的自定義組件
2. 提供一個構造函數,采用有屬性參數的,也可以使用自定義屬性
3. 你可能想在組件中創建自己的事件監聽器,屬性訪問器和修改器,或其他行為
4. 幾乎肯定要重寫onDraw(),onMeasure()。默認onDraw()什麼也沒作,onMeasure()則設置一個100x100的尺寸。
5. 根據需要重寫其他方法 ...
onDraw(),提供一個Canvas,可以繪制2D圖形。
若要繪制3D圖形,請繼承GLSurfaceView,參見,api-demo下的 GLSurfaceViewActivity
onMeasure() 測量組件
1. 寬度和高度在需要測量時調用該方法
2. 應該進行測量計算組件將需要呈現的寬度和高度。它應該盡量保持傳入的規格范圍內,盡管它可以選擇超過它們(在這種情況下,父視圖可以選擇做什麼,包括裁剪,滾動,拋出一個異常,或者要求onMeasure()再次嘗試,或使用不同的測量規格)
3. 寬高計算完畢後,必須調用用setMeasuredDimession(int width, int height),進行設置。否則將拋出一個異常
下面是一些View中可被調用的方法總結(未全部包含,可自行查看類似onXxx的方法):
onFinishInflate()onMeasure(int, int)onLayout(boolean, int, int, int, int)onSizeChanged(int, int, int, int)onDraw(Canvas)onKeyDown(int, KeyEvent)onKeyUp(int, KeyEvent)onTrackballEvent(MotionEvent)onTouchEvent(MotionEvent)onFocusChanged(boolean, int, Rect)onWindowFocusChanged(boolean)onAttachedToWindow()onDetachedFromWindow()onWindowVisibilityChanged(int)
adi-demo下的示例:LabelView
/*
 * Copyright (C) 2007 The Android Open Source Project
 *
 * Licensed under the Apache License, Version 2.0 (the License);
 * you may not use this file except in compliance with the License.
 * You may obtain a copy of the License at
 *
 *      http://www.apache.org/licenses/LICENSE-2.0
 *
 * Unless required by applicable law or agreed to in writing, software
 * distributed under the License is distributed on an AS IS BASIS,
 * WITHOUT WARRANTIES OR CONDITIONS OF ANY KIND, either express or implied.
 * See the License for the specific language governing permissions and
 * limitations under the License.
 */

package android.widget;

import android.content.Context;
import android.graphics.Canvas;
import android.graphics.Paint;
import android.view.View;

/**
 * Example of how to write a custom subclass of View. LabelView
 * is used to draw simple text views. Note that it does not handle
 * styled text or right-to-left writing systems.
 *
 */
public class LabelView extends View {
    /**
     * Constructor.  This version is only needed if you will be instantiating
     * the object manually (not from a layout XML file).
     * @param context the application environment
     */
    public LabelView(Context context) {
        super(context);
        initLabelView();
    }

    /**
     * Construct object, initializing with any attributes we understand from a
     * layout file. These attributes are defined in
     * SDK/assets/res/any/classes.xml.
     *
     * @see android.view.View#View(android.content.Context, android.util.AttributeSet)
    public LabelView(Context context, AttributeSet attrs) {
        super(context, attrs);
        initLabelView();

        Resources.StyledAttributes a = context.obtainStyledAttributes(attrs,
                R.styleable.LabelView);

        CharSequence s = a.getString(R.styleable.LabelView_text);
        if (s != null) {
            setText(s.toString());
        }

        ColorStateList textColor = a.getColorList(R.styleable.
                                                  LabelView_textColor);
        if (textColor != null) {
            setTextColor(textColor.getDefaultColor(0));
        }

        int textSize = a.getInt(R.styleable.LabelView_textSize, 0);
        if (textSize > 0) {
            setTextSize(textSize);
        }

        a.recycle();
    }

     */
    private void initLabelView() {
        mTextPaint = new Paint();
        mTextPaint.setAntiAlias(true);
        mTextPaint.setTextSize(16);
        mTextPaint.setColor(0xFF000000);

        mPaddingLeft = 3;
        mPaddingTop = 3;
        mPaddingRight = 3;
        mPaddingBottom = 3;
    }

    /**
     * Sets the text to display in this label
     * @param text The text to display. This will be drawn as one line.
     */
    public void setText(String text) {
        mText = text;
        requestLayout();
        invalidate();
    }

    /**
     * Sets the text size for this label
     * @param size Font size
     */
    public void setTextSize(int size) {
        mTextPaint.setTextSize(size);
        requestLayout();
        invalidate();
    }

    /**
     * Sets the text color for this label
     * @param color ARGB value for the text
     */
    public void setTextColor(int color) {
        mTextPaint.setColor(color);
        invalidate();
    }


    /**
     * @see android.view.View#measure(int, int)
     */
    @Override
    protected void onMeasure(int widthMeasureSpec, int heightMeasureSpec) {
        setMeasuredDimension(measureWidth(widthMeasureSpec),
                measureHeight(heightMeasureSpec));
    }

    /**
     * Determines the width of this view
     * @param measureSpec A measureSpec packed into an int
     * @return The width of the view, honoring constraints from measureSpec
     */
    private int measureWidth(int measureSpec) {
        int result;
        int specMode = MeasureSpec.getMode(measureSpec);
        int specSize = MeasureSpec.getSize(measureSpec);

        if (specMode == MeasureSpec.EXACTLY) {
            // We were told how big to be
            result = specSize;
        } else {
            // Measure the text
            result = (int) mTextPaint.measureText(mText) + mPaddingLeft
                    + mPaddingRight;
            if (specMode == MeasureSpec.AT_MOST) {
                // Respect AT_MOST value if that was what is called for by measureSpec
                result = Math.min(result, specSize);
            }
        }

        return result;
    }

    /**
     * Determines the height of this view
     * @param measureSpec A measureSpec packed into an int
     * @return The height of the view, honoring constraints from measureSpec
     */
    private int measureHeight(int measureSpec) {
        int result;
        int specMode = MeasureSpec.getMode(measureSpec);
        int specSize = MeasureSpec.getSize(measureSpec);

        mAscent = (int) mTextPaint.ascent();
        if (specMode == MeasureSpec.EXACTLY) {
            // We were told how big to be
            result = specSize;
        } else {
            // Measure the text (beware: ascent is a negative number)
            result = (int) (-mAscent + mTextPaint.descent()) + mPaddingTop
                    + mPaddingBottom;
            if (specMode == MeasureSpec.AT_MOST) {
                // Respect AT_MOST value if that was what is called for by measureSpec
                result = Math.min(result, specSize);
            }
        }
        return result;
    }

    /**
     * Render the text
     *
     * @see android.view.View#onDraw(android.graphics.Canvas)
     */
    @Override
    protected void onDraw(Canvas canvas) {
        super.onDraw(canvas);
        canvas.drawText(mText, mPaddingLeft, mPaddingTop - mAscent, mTextPaint);
    }

    private Paint mTextPaint;
    private String mText;
    private int mAscent;
}
應用該自定義組件的layout xml:
該示例演示了:
1. 繼承自View的完全自定義組件
2. 帶參數的構造函數(一些屬性參數在xml中設置)。還使用了自定義屬性 R.styleable.LabelView
3. 一些標准的public 方法,如setText()、setTextSize()、setTextColor()
4. onMeasure()測量組件尺寸,內部由measureWidth(int measureSpec) 和 measureHeight(int measureSpec)來測量。
5. onDraw()將Label繪制到畫面Canvas上
 private class SpeechView extends LinearLayout {
        public SpeechView(Context context, String title, String dialogue, boolean expanded) {
            super(context);

            this.setOrientation(VERTICAL);

            // Here we build the child views in code. They could also have
            // been specified in an XML file.

            mTitle = new TextView(context);
            mTitle.setText(title);
            addView(mTitle, new LinearLayout.LayoutParams(LayoutParams.MATCH_PARENT, LayoutParams.WRAP_CONTENT));

            mDialogue = new TextView(context);
            mDialogue.setText(dialogue);
            addView(mDialogue, new LinearLayout.LayoutParams(LayoutParams.MATCH_PARENT, LayoutParams.WRAP_CONTENT));

            mDialogue.setVisibility(expanded ? VISIBLE : GONE);
        }

        /**
         * Convenience method to set the title of a SpeechView
         */
        public void setTitle(String title) {
            mTitle.setText(title);
        }

        /**
         * Convenience method to set the dialogue of a SpeechView
         */
        public void setDialogue(String words) {
            mDialogue.setText(words);
        }

        /**
         * Convenience method to expand or hide the dialogue
         */
        public void setExpanded(boolean expanded) {//該方法在List4中沒有
            mDialogue.setVisibility(expanded ? VISIBLE : GONE);
        }

        private TextView mTitle;
        private TextView mDialogue;
    }
SpeachView,繼承了LinearLayout,縱向布局。內部有一個TextView的title,一個TextView的dialogue。List4完全展開兩個TextView;List6點擊title可以收縮/展開dialogue。
 public static class LinedEditText extends EditText {
        private Rect mRect;
        private Paint mPaint;

        // This constructor is used by LayoutInflater
        public LinedEditText(Context context, AttributeSet attrs) {
            super(context, attrs);

            // Creates a Rect and a Paint object, and sets the style and color of the Paint object.
            mRect = new Rect();
            mPaint = new Paint();
            mPaint.setStyle(Paint.Style.STROKE);
            mPaint.setColor(0x800000FF);
        }

        /**
         * This is called to draw the LinedEditText object
         * @param canvas The canvas on which the background is drawn.
         */
        @Override
        protected void onDraw(Canvas canvas) {

            // Gets the number of lines of text in the View.
            int count = getLineCount(); //edittext中有幾行,  edittext繼承textview

            // Gets the global Rect and Paint objects
            Rect r = mRect;
            Paint paint = mPaint;

            /*
             * Draws one line in the rectangle for every line of text in the EditText
             */
            for (int i = 0; i < count; i++) {

                // Gets the baseline coordinates for the current line of text
                int baseline = getLineBounds(i, r);//將一行的范圍坐標賦給矩形r;返回一行y方向上的基准線坐標

                /*
                 * Draws a line in the background from the left of the rectangle to the right,
                 * at a vertical position one dip below the baseline, using the paint object
                 * for details.
                 */
                canvas.drawLine(r.left, baseline + 1, r.right, baseline + 1, paint);//繪制一條線,寬度為原行的寬度,高度為從基線開始+1個像素
            }

            // Finishes up by calling the parent method
            super.onDraw(canvas);
        }
    }
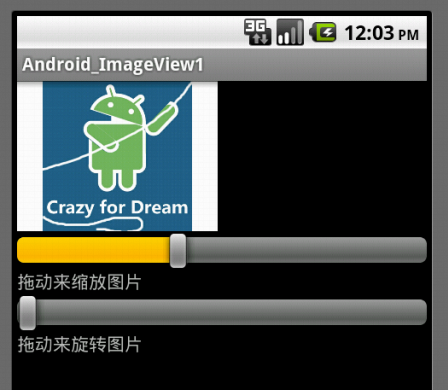 Android UI之ImageView實現圖片旋轉和縮放
這一篇,給大家介紹一下ImageView控件的使用,ImageView主要是用來顯示圖片,可以對圖片進行放大、縮小、旋轉的功能。android:sacleType屬性指定
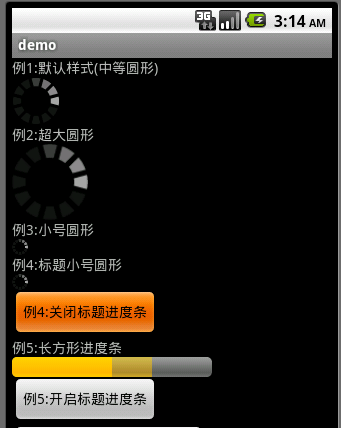 Android 七種進度條的樣式
當一個應用在後台執行時,前台界面就不會有什麼信息,這時用戶根本不知道程序是否在執行、執行進度如何、應用程序是否遇到錯誤終止等,這時需要使用進度條來提示用戶後台程序執行的進
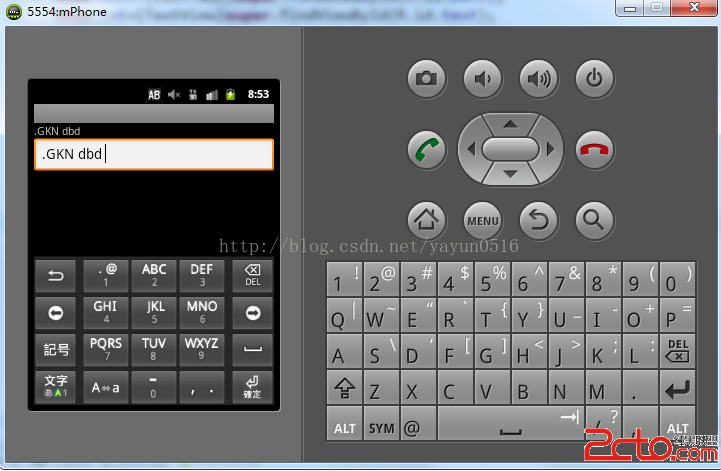 Android--OnKeyListner
main.xml代碼如下: .java代碼如下: package org.lxh.demo; import androi
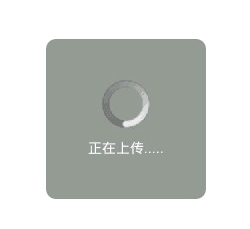 Android仿微信進度彈出框的實現方法
MainActivity:package com.ruru.dialogproject; import android.app.Activity; import andr