編輯:關於Android編程
1.使用內置Gallery應用程序選擇圖像:
package com.example.testphotoedit;

import java.io.FileNotFoundException;

import android.app.Activity;
import android.content.Intent;
import android.graphics.Bitmap;
import android.graphics.BitmapFactory;
import android.graphics.Canvas;
import android.graphics.Matrix;
import android.graphics.Paint;
import android.net.Uri;
import android.os.Bundle;
import android.view.Display;
import android.view.View;
import android.view.View.OnClickListener;
import android.widget.Button;
import android.widget.ImageView;

public class MainActivity extends Activity implements OnClickListener {

	private ImageView chosenImageView,copyPicture;
	private Button choosePicture;
	private Uri imageFileUri;

	@Override
	protected void onCreate(Bundle savedInstanceState) {
		super.onCreate(savedInstanceState);
		setContentView(R.layout.fragment_main);
		choosePicture = (Button) findViewById(R.id.button_chose);
		chosenImageView = (ImageView) findViewById(R.id.chose_picture);
		copyPicture=(ImageView) findViewById(R.id.copy_picture);
		choosePicture.setOnClickListener(this);
	}

	@Override
	public void onClick(View v) {
		// TODO Auto-generated method stub
		if (v.getId() == R.id.button_chose) {
			Intent chooseIntent = new Intent(
					Intent.ACTION_PICK,
					android.provider.MediaStore.Images.Media.EXTERNAL_CONTENT_URI);//啟動Gallery應用程序
			startActivityForResult(chooseIntent, 0);
		}
	}
	/* (non-Javadoc)
	 * @see android.app.Activity#onActivityResult(int, int, android.content.Intent)
	 *
	 * 在返回的意圖數據中,返回選擇的圖像的URI
	 */
	@Override
	protected void onActivityResult(int requestCode, int resultCode, Intent data) {
		// TODO Auto-generated method stub
		super.onActivityResult(requestCode, resultCode, data);
		if (resultCode == RESULT_OK) {
			imageFileUri = data.getData();

			Display currentDisply = getWindowManager().getDefaultDisplay();
			int dw = currentDisply.getWidth() / 2 - 100;
			int dh = currentDisply.getHeight() / 2 - 100;
try {
				BitmapFactory.Options bmpFactory = new BitmapFactory.Options();
				bmpFactory.inJustDecodeBounds = true;//加載圖像的尺寸而非圖像本身
				Bitmap bmp = BitmapFactory.decodeStream(getContentResolver()
						.openInputStream(imageFileUri), null, bmpFactory);

				int heightRatio = (int) Math.ceil(bmpFactory.outHeight
						/ (float) dh);
				int widthRatio = (int) Math.ceil(bmpFactory.outWidth
						/ (float) dw);

				if (heightRatio > 1 && widthRatio > 1) {
					if (heightRatio > widthRatio) {
						bmpFactory.inSampleSize = heightRatio;
					} else {
						bmpFactory.inSampleSize = widthRatio;
					}
				}

				bmpFactory.inJustDecodeBounds = false;//加載真實的圖像
				bmp = BitmapFactory.decodeStream(getContentResolver()
						.openInputStream(imageFileUri), null, bmpFactory);
				chosenImageView.setImageBitmap(bmp);

			} catch (FileNotFoundException e) {
				// TODO Auto-generated catch block
				e.printStackTrace();
			}

		}
	}
}
2.在位圖上繪制位圖
Bitmap alteredBitmap = Bitmap.createBitmap(bmp.getWidth(),bmp.getWidth(), bmp.getConfig());
Canvas canvas=new Canvas(alteredBitmap);
Paint  paint=new Paint();
canvas.drawBitmap(bmp, 0,0, paint);
copyPicture.setImageBitmap(alteredBitmap);
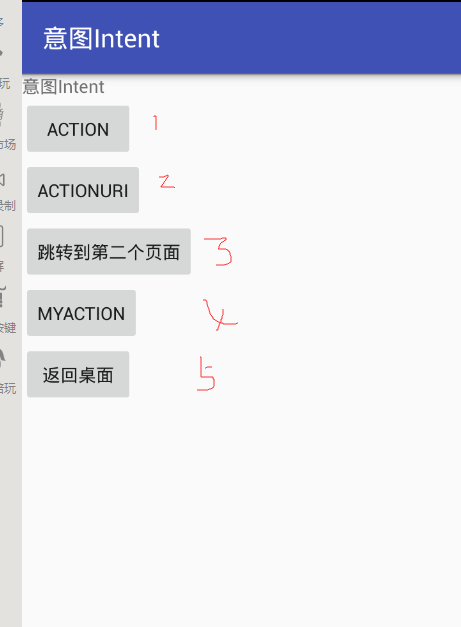 Android中的Intent和Intent-filter總結
一.相關概念(一)基本概念Intent中文意思指”意圖”,按照Android的設計理念,Android使用Intent來封裝程序的”調
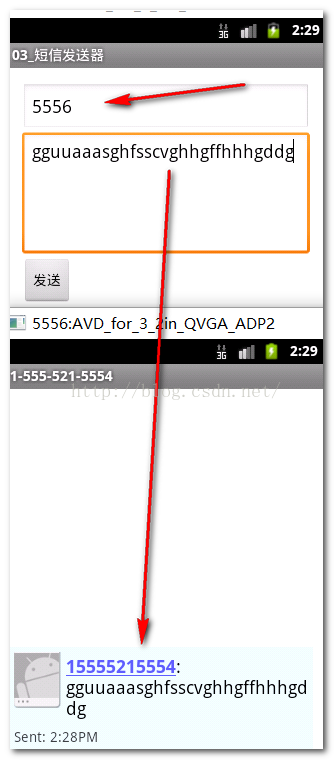 Android簡易實戰教程--第四話《最簡單的短信發送器》
首先配置一個布局: 然後在activity中把發短信的代碼寫出來: package com.ydl.smssender;i
 【Android】Listview返回頂部,快速返回頂部的功能實現,詳解代碼。
首先給大家看一下我們今天這個最終實現的效果圖:我這裡只是單純的實現了ListView返回頂部的功能。具體效果大家可以適當地美化在實際項目中可以換圖標,去掉右側滾動條等。具
 研究稱 Android 4.4 比 iOS 7.1 更穩定
根據Crittercism 發布的《移動體驗基准測試報告(需要注冊)》,研究人員在2582款設備上測試了106種操作系統和691個網絡運營商,結果顯示And