編輯:關於Android編程
在自定義View的時候,常常會用到一些Android系統提供的工具。這些工具封裝了我們經常會用到的方法,比如拖拽View,計算滑動速度,View的滾動,手勢處理等等。如果我們自己去實現這些方法會比較繁瑣,而且容易出一些bug。所以,作為自定義View系列教程的開端,先介紹一下這些常用的工具,以便在後續的學習和工作中使用。
Configuration ViewConfiguration GestureDetector VelocityTracker Scroller ViewDragHelper嗯哼,它們都已經躺在這裡了,我們就來挨個瞅瞅
Configuration
This class describes all device configuration information that can
impact the resources the application retrieves.
Configuration用來描述設備的配置信息。
比如用戶的配置信息:locale和scaling等等
比如設備的相關信息:輸入模式,屏幕大小, 屏幕方向等等
我們經常采用如下方式來獲取需要的相關信息:
Configuration configuration=getResources().getConfiguration();
//獲取國家碼
int countryCode=configuration.mcc;
//獲取網絡碼
int networkCode=configuration.mnc;
//判斷橫豎屏
if(configuration.orientation==Configuration.ORIENTATION_PORTRAIT){

   } else {

}
ViewConfiguration
看完Configuration再來瞅ViewConfiguration。這兩者的名字有些像,差了一個View;咋一看,還以為它倆是繼承關系,其實不然。
官方對於ViewConfiguration的描述是:
Contains methods to standard constants used in the UI for timeouts,
sizes, and distances.
ViewConfiguration提供了一些自定義控件用到的標准常量,比如尺寸大小,滑動距離,敏感度等等。
可以利用ViewConfiguration的靜態方法獲取一個實例
ViewConfiguration viewConfiguration=ViewConfiguration.get(context);
在此介紹ViewConfiguration的幾個對象方法。
ViewConfiguration  viewConfiguration=ViewConfiguration.get(context);
//獲取touchSlop。該值表示系統所能識別出的被認為是滑動的最小距離
int touchSlop = viewConfiguration.getScaledTouchSlop();
//獲取Fling速度的最小值和最大值
int minimumVelocity = viewConfiguration.getScaledMinimumFlingVelocity();
int maximumVelocity = viewConfiguration.getScaledMaximumFlingVelocity();
//判斷是否有物理按鍵
boolean isHavePermanentMenuKey=viewConfiguration.hasPermanentMenuKey();
ViewConfiguration還提供了一些非常有用的靜態方法,比如:
//雙擊間隔時間.在該時間內是雙擊,否則是單擊
int doubleTapTimeout=ViewConfiguration.getDoubleTapTimeout();
//按住狀態轉變為長按狀態需要的時間
int longPressTimeout=ViewConfiguration.getLongPressTimeout();
//重復按鍵的時間
int keyRepeatTimeout=ViewConfiguration.getKeyRepeatTimeout();
GestureDetector
大家都知道,我們可以在onTouchEvent()中自己處理手勢。其實Android系統也給我們提供了一個手勢處理的工具,這就是GestureDetector手勢監聽類。利用GestureDetector可以簡化許多操作,輕松實現一些常用的功能。
嗯哼,來吧,一起瞅瞅它是怎麼使用的。
第一步:實現OnGestureListener
private class GestureListenerImpl implements GestureDetector.OnGestureListener {
        //觸摸屏幕時均會調用該方法
        @Override
        public boolean onDown(MotionEvent e) {
            System.out.println("---> 手勢中的onDown方法");
            return false;
        }

        //手指在屏幕上拖動時會調用該方法
        @Override
        public boolean onFling(MotionEvent e1,MotionEvent e2, float velocityX,float velocityY) {
            System.out.println("---> 手勢中的onFling方法");
            return false;
        }

        //手指長按屏幕時均會調用該方法
        @Override
        public void onLongPress(MotionEvent e) {
            System.out.println("---> 手勢中的onLongPress方法");
        }

        //手指在屏幕上滾動時會調用該方法
        @Override
        public boolean onScroll(MotionEvent e1,MotionEvent e2, float distanceX,float distanceY) {
            System.out.println("---> 手勢中的onScroll方法");
            return false;
        }

        //手指在屏幕上按下,且未移動和松開時調用該方法
        @Override
        public void onShowPress(MotionEvent e) {
            System.out.println("---> 手勢中的onShowPress方法");
        }

        //輕擊屏幕時調用該方法
        @Override
        public boolean onSingleTapUp(MotionEvent e) {
            System.out.println("---> 手勢中的onSingleTapUp方法");
            return false;
        }
    }
第二步:生成GestureDetector對象
GestureDetector gestureDetector = new GestureDetector(context,new
GestureListenerImpl());
這裡的GestureListenerImpl就是GestureListener監聽器的實現。
第三步:將Touch事件交給GestureDetector處理
比如將Activity的Touch事件交給GestureDetector處理
@Override
public boolean onTouchEvent(MotionEvent event) {
     return mGestureDetector.onTouchEvent(event);
}
比如將View的Touch事件交給GestureDetector處理
mButton=(Button) findViewById(R.id.button);
mButton.setOnTouchListener(new OnTouchListener() {
   @Override
   public boolean onTouch(View arg0, MotionEvent event) {
          return mGestureDetector.onTouchEvent(event);
      }
});
VelocityTracker
這個玩意兒一看名字,大概就可以猜到意思了。嗯哼,速度追蹤。
VelocityTracker用於跟蹤觸摸屏事件(比如,Flinging及其他Gestures手勢事件等)的速率。
簡單說一下它的常用套路。
第一步:開始速度追蹤
private void startVelocityTracker(MotionEvent event) {
    if (mVelocityTracker == null) {
         mVelocityTracker = VelocityTracker.obtain();
     }
     mVelocityTracker.addMovement(event);
}
在這裡我們初始化VelocityTracker,並且把要追蹤的MotionEvent注冊到VelocityTracker的監聽中。
第二步:獲取追蹤到的速度
private int getScrollVelocity() {
     // 設置VelocityTracker單位.1000表示1秒時間內運動的像素
     mVelocityTracker.computeCurrentVelocity(1000);
     // 獲取在1秒內X方向所滑動像素值
     int xVelocity = (int) mVelocityTracker.getXVelocity();
     return Math.abs(xVelocity);
    }
同理可以獲取1秒內Y方向所滑動像素值
第三步:解除速度追蹤
private void stopVelocityTracker() {
      if (mVelocityTracker != null) {
          mVelocityTracker.recycle();
          mVelocityTracker = null;
      }
}
以上就是VelocityTracker的常用使用方式。
Scroller
Scroller挺常見的,用的比較多了。在此只強調幾個重要的問題,別的就不再贅述了。
第一點:scrollTo()和scrollBy()的關系
先看scrollBy( )的源碼
public void scrollBy(int x, int y) {
       scrollTo(mScrollX + x, mScrollY + y);
}
這就是說scrollBy( )調用了scrollTo( ),最終起作用的是scrollTo( )方法。
第二點:scroll的本質
scrollTo( )和scrollBy( )移動的只是View的內容,而且View的背景是不移動的。
第三點:scrollTo( )和scrollBy( )方法的坐標說明
比如我們對於一個TextView調用scrollTo(0,25) ;那麼該TextView中的content(比如顯示的文字:Hello)會怎麼移動呢?
向下移動25個單位?不!恰好相反!!這是為什麼呢?
因為調用該方法會導致視圖重繪,即會調用
public void invalidate(int l, int t, int r, int b)
此處的l,t,r,b四個參數就表示View原來的坐標.
在該方法中最終會調用:
tmpr.set(l - scrollX, t - scrollY, r - scrollX, b - scrollY);
p.invalidateChild(this, tmpr);
其中tmpr是一個Rect,this是原來的View;通過這兩行代碼就把View在一個Rect中重繪。
請注意第一行代碼:
原來的l和r均減去了scrollX
原來的t和b均減去了scrollY
就是說scrollX如果是正值,那麼重繪後的View的寬度反而減少了;反之同理
就是說scrollY如果是正值,那麼重繪後的View的高度反而減少了;反之同理
所以,TextView調用scrollTo(0,25)和我們的理解相反
scrollBy(int x,int y)方法與上類似,不再多說了.
ViewDragHelper
在項目中很多場景需要用戶手指拖動其內部的某個View,此時就需要在onInterceptTouchEvent()和onTouchEvent()這兩個方法中寫不少邏輯了,比如處理:拖拽移動,越界,多手指的按下,加速度檢測等等。
ViewDragHelper可以極大的幫我們簡化類似的處理,它提供了一系列用於處理用戶拖拽子View的輔助方法和與其相關的狀態記錄。比較常見的:QQ側滑菜單,Navigation Drawer的邊緣滑動,都可以由它實現。
ViewDragHelper的使用並不復雜,在此通過一個示例展示其常用的用法。
/**
 * ViewDragHelper使用示例
 * 原創作者:谷哥的小弟
 * 原創地址:http://blog.csdn.net/lfdfhl
 */
public class MyLinearLayout extends LinearLayout {
    private ViewDragHelper mViewDragHelper;

    public MyLinearLayout(Context context, AttributeSet attrs) {
        super(context, attrs);
        initViewDragHelper();
    }

    //初始化ViewDragHelper
    private void initViewDragHelper() {
        mViewDragHelper = ViewDragHelper.create(this, 1.0f, new ViewDragHelper.Callback() {
            @Override
            public boolean tryCaptureView(View child, int pointerId) {
                return true;
            }

            //處理水平方向的越界
            @Override
            public int clampViewPositionHorizontal(View child, int left, int dx) {
                int fixedLeft;
                View parent = (View) child.getParent();
                int leftBound = parent.getPaddingLeft();
                int rightBound = parent.getWidth() - child.getWidth() - parent.getPaddingRight();

                if (left < leftBound) {
                    fixedLeft = leftBound;
                } else if (left > rightBound) {
                    fixedLeft = rightBound;
                } else {
                    fixedLeft = left;
                }
                return fixedLeft;
            }

            //處理垂直方向的越界
            @Override
            public int clampViewPositionVertical(View child, int top, int dy) {
                int fixedTop;
                View parent = (View) child.getParent();
                int topBound = getPaddingTop();
                int bottomBound = getHeight() - child.getHeight() - parent.getPaddingTop();
                if (top < topBound) {
                    fixedTop = topBound;
                } else if (top > bottomBound) {
                    fixedTop = bottomBound;
                } else {
                    fixedTop = top;
                }
                return fixedTop;
            }

            //監聽拖動狀態的改變
            @Override
            public void onViewDragStateChanged(int state) {
                super.onViewDragStateChanged(state);
                switch (state) {
                    case ViewDragHelper.STATE_DRAGGING:
                        System.out.println("STATE_DRAGGING");
                        break;
                    case ViewDragHelper.STATE_IDLE:
                        System.out.println("STATE_IDLE");
                        break;
                    case ViewDragHelper.STATE_SETTLING:
                        System.out.println("STATE_SETTLING");
                        break;
                }
            }

            //捕獲View
            @Override
            public void onViewCaptured(View capturedChild, int activePointerId) {
                super.onViewCaptured(capturedChild, activePointerId);
                System.out.println("ViewCaptured");
            }

            //釋放View
            @Override
            public void onViewReleased(View releasedChild, float xvel, float yvel) {
                super.onViewReleased(releasedChild, xvel, yvel);
                System.out.println("ViewReleased");
            }
        });
    }

    //將事件攔截交給ViewDragHelper處理
    @Override
    public boolean onInterceptTouchEvent(MotionEvent ev) {
        return mViewDragHelper.shouldInterceptTouchEvent(ev);
    }


    //將Touch事件交給ViewDragHelper處理
    @Override
    public boolean onTouchEvent(MotionEvent ev) {
        mViewDragHelper.processTouchEvent(ev);
        return true;
    }
}
從這個例子可以看出來ViewDragHelper是作用在ViewGroup上的(比如LinearLayout)而不是直接作用到某個被拖拽的子View。其實這也不難理解,因為子View在布局中的位置是其所在的ViewGroup決定的。
在該例中ViewDragHelper做了如下主要操作:
(1) ViewDragHelper接管了ViewGroup的事件攔截,請參見代碼第91-94行
(2) ViewDragHelper接管了ViewGroup的Touch事件,請參見代碼第98-102行
(3) ViewDragHelper處理了拖拽子View時的邊界越界,請參見代碼第22-55行
(4) ViewDragHelper監聽拖拽子View時的狀態變化,請參見代碼第58-72行
除了這些常見的操作,ViewDragHelper還可以實現:抽屜拉伸,拖拽結束松手後子View自動返回到原位等復雜操作。
好了,了解完這些非常有用的工具,我們就正式進入自定義View。
 Android WebView使用方法詳解 附js交互調用方法
目前很多Android app都內置了可以顯示web頁面的界面,會發現這個界面一般都是由一個叫做WebView的組件渲染出來的,學習該組件可以為你的app開發提升擴展性。
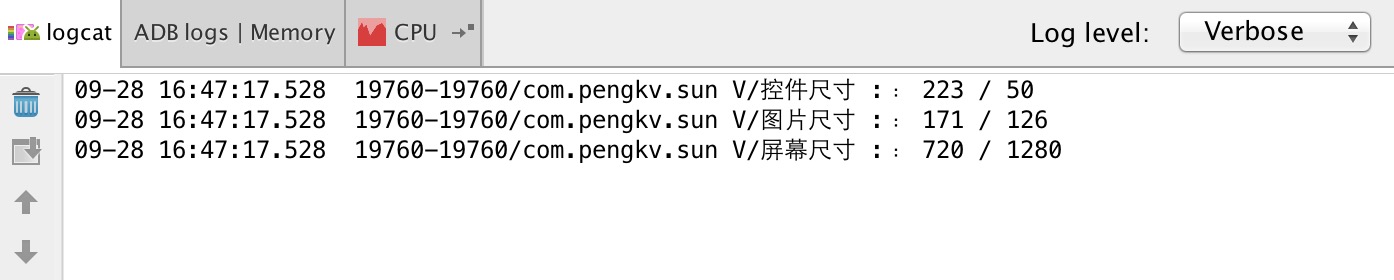 Android常見尺寸的獲取
代碼: //獲取控件尺寸(控件尺寸只有在事件裡面可以獲取到) TextView mTV = (TextView
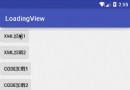 一個簡單到不行的loadingView加載控件小框架
基本框架類定義了一些公用方法來修改該控件的外觀,其中方法如下:setInitView(View view, LayoutParams layoutParams):設置初始
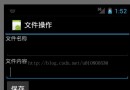 Android開發系列(五):Android應用中文件的保存與讀取
在本篇博客中,我們要實現在Android中“新建文件”和“讀取文件”: 目標界面: 在輸入文件名稱之後,輸入文件內容,點擊保存,可以保存成為一個文檔 He