編輯:關於Android編程
我們知道,在Activity#setContentView()中會調用PhoneWindow#setContentView()。而在PhoneWindow#setContentView()中有這麼一句mLayoutInflater.inflate(layoutResID, mContentParent)。這行代碼的作用是將我們的activity_main.xml填充到mContentParent中去。在寫adapter的時候,也經常寫mInflater.inflate(layoutResID, null)。那麼,這行代碼怎麼就將xml文件轉換成了View或者ViewGroup了呢?
獲取LayoutInflater對象無非以下兩種方式:
LayoutInflater.from(Context context); LayoutInflater LayoutInflater = (LayoutInflater) context.getSystemService(Context.LAYOUT_INFLATER_SERVICE); 其實這倆是同一種方式,首先看下LayoutInflater#from()
源碼位置:frameworks/base/core/java/android/view/LayoutInflater.java
LayoutInflater#from()
    public static LayoutInflater from(Context context) {
        LayoutInflater LayoutInflater =
                (LayoutInflater) context.getSystemService(Context.LAYOUT_INFLATER_SERVICE);
        if (LayoutInflater == null) {
            throw new AssertionError("LayoutInflater not found.");
        }
        return LayoutInflater;
    }
第一種獲取LayoutInflater對象的方式,不過就是對第二種方式的一個簡單封裝。實際上還是一回事。Context的實現類是ContextImpl,跟進。
源碼位置:frameworks/base/core/java/android/app/ContextImpl.java
ContextImpl#getSystemService()
    @Override
    public Object getSystemService(String name) {
        return SystemServiceRegistry.getSystemService(this, name);
    }
跟進。
源碼位置:frameworks/base/core/java/android/app/SystemServiceRegistry.java
SystemServiceRegistry#getSystemService()
    public static Object getSystemService(ContextImpl ctx, String name) {
        ServiceFetcher fetcher = SYSTEM_SERVICE_FETCHERS.get(name);
        return fetcher != null ? fetcher.getService(ctx) : null;
    }
直接從全局變量SYSTEM_SERVICE_FETCHERS中依據名字就get到了fetcher,之後依據fetcher直接get到了LayoutInflater對象。大寫的懵B~原來啊,在SystemServiceRegistry中有個靜態代碼塊,先看下這部分。
    static {
        ...
        registerService(Context.LAYOUT_INFLATER_SERVICE, LayoutInflater.class,
                new CachedServiceFetcher() {
            @Override
            public LayoutInflater createService(ContextImpl ctx) {
                return new PhoneLayoutInflater(ctx.getOuterContext());
        }});
        ...
    }

    private static  void registerService(String serviceName, Class serviceClass,
            ServiceFetcher serviceFetcher) {
        SYSTEM_SERVICE_NAMES.put(serviceClass, serviceName);
        SYSTEM_SERVICE_FETCHERS.put(serviceName, serviceFetcher);
    }

    static abstract class CachedServiceFetcher implements ServiceFetcher {
        private final int mCacheIndex;

        public CachedServiceFetcher() {
            mCacheIndex = sServiceCacheSize++;
        }

        @Override
        @SuppressWarnings("unchecked")
        public final T getService(ContextImpl ctx) {
            final Object[] cache = ctx.mServiceCache;
            synchronized (cache) {
                // Fetch or create the service.
                Object service = cache[mCacheIndex];
                if (service == null) {
                    service = createService(ctx);
                    cache[mCacheIndex] = service;
                }
                return (T)service;
            }
        }

        public abstract T createService(ContextImpl ctx);
    }
這裡連續貼了兩個方法和一個抽象內部類CachedServiceFetcher。由於在抽象方法CachedServiceFetcher#createService()的具體實現中返回的是PhoneLayoutInflater,所以後文中使用的一直是PhoneLayoutInflater的對象。獲取LayoutInflater對象(其實是其子類PhoneLayoutInflater對象)之後,調用LayoutInflater#inflate()。跟進。
源碼位置:frameworks/base/core/java/android/view/LayoutInflater.java
LayoutInflater#inflate()
    public View inflate(@LayoutRes int resource, @Nullable ViewGroup root) {
        return inflate(resource, root, root != null);
    }
這裡以setContentView中的mLayoutInflater.inflate(layoutResID, mContentParent)為例,順帶也會講解adapter中mInflater.inflate(layoutResID,null)這種情況。也就是root參數為null和不為null兩種情況。root==null,則第三個參數為false.root!=null,則第三個參數為true。跟進。
LayoutInflater#inflate()
    public View inflate(@LayoutRes int resource, @Nullable ViewGroup root, boolean attachToRoot) {
        final Resources res = getContext().getResources();
        final XmlResourceParser parser = res.getLayout(resource);
        try {
            return inflate(parser, root, attachToRoot);
        } finally {
            parser.close();
        }
    }
跟進。
LayoutInflater#inflate()
    public View inflate(XmlPullParser parser, @Nullable ViewGroup root, boolean attachToRoot) {
        synchronized (mConstructorArgs) {
            ...
            View result = root;
            try {
                ...
                // 獲取根節點的字符串,例如LinearLayout
                final String name = parser.getName();
                // 根節點merge開頭
                if (TAG_MERGE.equals(name)) {
                    ...
                } else {
                    // 創建根視圖View
                    final View temp = createViewFromTag(root, name, inflaterContext, attrs);
                    ViewGroup.LayoutParams params = null;
                    if (root != null) {
                        // 獲取LayoutParams
                        params = root.generateLayoutParams(attrs);
                        if (!attachToRoot) {
                            // 應用LayoutParams到根節點View
                            temp.setLayoutParams(params);
                        }
                    }
                    // 遍歷解析子View,並添加到根節點temp中
                    rInflateChildren(parser, temp, attrs, true);
                    // root不為空,直接將根節點View添加到root中
                    if (root != null && attachToRoot) {
                        root.addView(temp, params);
                    }
                    // root等於null,直接返回根節點temp
                    if (root == null || !attachToRoot) {
                        result = temp;
                    }
                }
            }catch (Exception e) {
                ...
            }
            return result;
        }
    }
上面每一步都有注釋,下面重點看下生成根節點View的createViewFromTag()和遍歷生成子View的rInflateChildren()方法。
LayoutInflater#createViewFromTag()
    private View createViewFromTag(View parent, String name, Context context, AttributeSet attrs) {
        return createViewFromTag(parent, name, context, attrs, false);
    }

    View createViewFromTag(View parent, String name, Context context, AttributeSet attrs,
            boolean ignoreThemeAttr) {
        ...
        if (-1 == name.indexOf('.')) {
            view = onCreateView(parent, name, attrs);
        } else {
            view = createView(name, null, attrs);
        }
        ...
        return view;
    }
跟進。
LayoutInflater#createView()
    public final View createView(String name, String prefix, AttributeSet attrs)
            throws ClassNotFoundException, InflateException {
        Constructor constructor = sConstructorMap.get(name);
        Class clazz = null;
        try {
            if (constructor == null) {
                clazz = mContext.getClassLoader().loadClass(
                        prefix != null ? (prefix + name) : name).asSubclass(View.class);
                ...
                constructor = clazz.getConstructor(mConstructorSignature);
                constructor.setAccessible(true);
                sConstructorMap.put(name, constructor);
            } else {
                ...
            }
            final View view = constructor.newInstance(args);
            return view;
        } catch (Exception e) {
            ...
        }
    }
sConstructorMap是個HashMapLinearLayout去查找緩存的構造器,如果是第一次執行,肯定返回null。如果返回為null,則通過反射出構造方法,並強制設置可訪問,之後存進sConstructorMap中。如果緩存中有構造器,那麼直接取出。最後調用newInstance反射出根節點View實例。得到根節點View實例之後,接著設置屬性,最後調用rInflateChildren()遍歷創建子View。跟進。
LayoutInflater#rInflateChildren()
    final void rInflateChildren(XmlPullParser parser, View parent, AttributeSet attrs,
            boolean finishInflate) throws XmlPullParserException, IOException {
        rInflate(parser, parent, parent.getContext(), attrs, finishInflate);
    }
parent參數是根節點View。這裡只是簡單轉發給rInflate()方法處理。跟進。
LayoutInflater#rInflateChildren()
    void rInflate(XmlPullParser parser, View parent, Context context,
            AttributeSet attrs, boolean finishInflate) throws XmlPullParserException, IOException {
        final int depth = parser.getDepth();
        int type;

        while (((type = parser.next()) != XmlPullParser.END_TAG ||
                parser.getDepth() > depth) && type != XmlPullParser.END_DOCUMENT) {

            if (type != XmlPullParser.START_TAG) {
                continue;
            }
            final String name = parser.getName();
            if (TAG_REQUEST_FOCUS.equals(name)) {
                ...
            }
            ...
            } else {
                final View view = createViewFromTag(parent, name, context, attrs);
                final ViewGroup viewGroup = (ViewGroup) parent;
                final ViewGroup.LayoutParams params = viewGroup.generateLayoutParams(attrs);
                rInflateChildren(parser, view, attrs, true);
                viewGroup.addView(view, params);
            }
        }
        if (finishInflate) {
            parent.onFinishInflate();
        }
    }
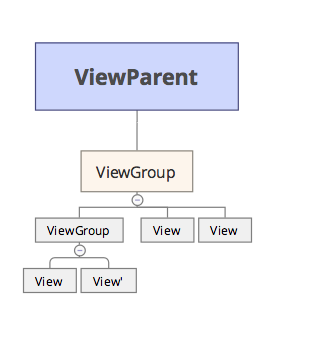
遍歷體現在While循環上,name為子節點View的名稱,例如:TextView,RelativeLayout等。幾個以tag、include等開頭的子節點走最上面幾個if的邏輯,我們的重點在於尋常View走的else邏輯。可以看到:首先,和創建根節點View調用同一個方法createViewFromTag()創建子View,緊接著設置子View的參數,然後調用遞歸調用rInflateChildren()方法再去測量子節點的所有View,最後才將子節點添加到父布局,這個父布局可能是根節點,也可能是某個子節點。遍歷結束之後,所有子View也添加到布局當中並設置好相應的布局參數。
至此,LayoutInflater.from().inflate()源碼解析結束~
 Android 仿QQ分組管理可拖動Item的ListView(附源碼)
趁著周一休息,更新一下博客。最近項目中使用到了分組管理,需要實現Listview的Item拖動處理。查略一下資料和借鑒了別人的代碼將功能實現了。現在整理一下代碼,方便自己
 Android基礎知識之tween動畫效果
Android中一共提供了兩種動畫,其一便是tween動畫,tween動畫通過對view的內容進行一系列的圖像變換(包括平移,縮放,旋轉,改變透明度)來實現動畫效果,動畫
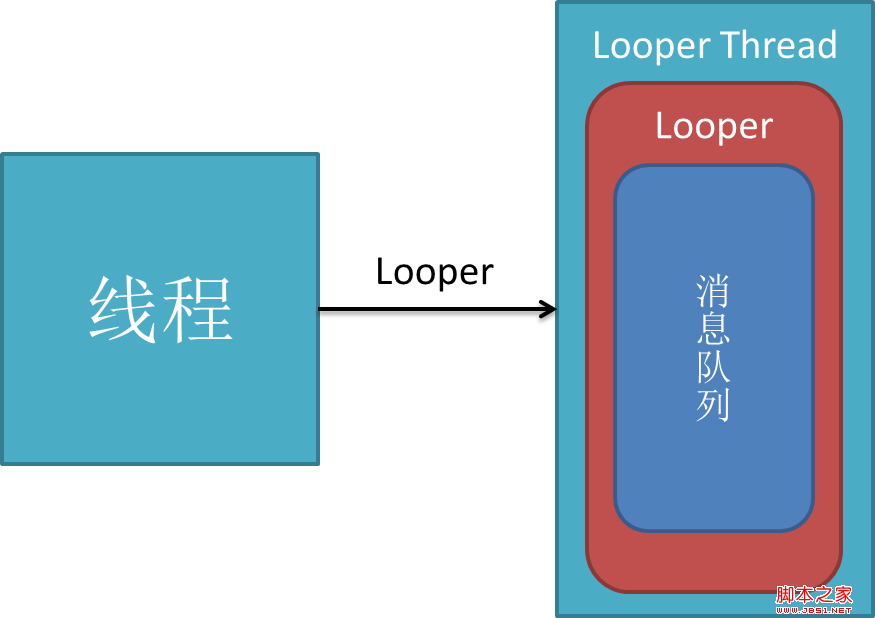 android的消息處理機制(圖文+源碼分析)—Looper/Handler/Message
這篇文章寫的非常好,深入淺出,關鍵還是一位大三學生自己剖析的心得。這是我喜歡此文的原因。下面請看正文:作為一個大三的預備程序員,我學習android的一大樂趣是可以通過源
 Android進階之事件攔截處理機制
1 Android控件架構1 簡單的總結(1)父View優先攔截當前事件,攔截不成功就讓子View對當前事件進行攔截。(2)如果攔截成功的話,就會沿著子view到父Vie