編輯:關於Android編程
刪除選中的短信:
我們刪除短信其實很簡單,但是我們要實現一個對話框去顯示,還需要一個對話框的進度條。
刪除短信操作就是操作數據庫就行了。使用內容解析者去操作,但是我們要去看看到底要刪除的uri是什麼。
我們發現我們要刪除一個就需要刪除一個聯系人,所以我們直接刪除這個人名下的所有短信就可以了。我們可以找到他的id去刪除。
對短信內容進行操作需要寫短信的權限。
Uri URI_SMS=Uri.parse("content://sms");
		case R.id.bt_conversation_delete:
			selectedConversationId = adapter.getSelectedConversationId();
    if(selectedConversationId.size()==0)
    {
    	return;
    }
    deleteAll();
然後如果不為空就調用刪除方法。
	public void deleteAll() {
		for (Integer integer : selectedConversationId) {
			String where = "thread_id=" + integer;
			getActivity().getContentResolver().delete(ConstantValues.URI_SMS,
					where, null);
		}

	}
——————————————————————————————
我們要自定義樣式,所以我們要先創建一個包dialog包。然後創建一個類。但是由於一個項目對話框有很多。所以我們也要創建一個基類。
public abstract class BaseDialog extends AlertDialog implements android.view.View.OnClickListener{

	public BaseDialog(Context context) {
		super(context);
	}

@Override
protected void onCreate(Bundle savedInstanceState) {
	super.onCreate(savedInstanceState);
	initView();
	initListener();
	initData();
}
public abstract void initView();
public abstract  void initListener();
public abstract void initData();
public abstract void processClick(View v);
@Override
public void onClick(View v) {
	processClick(v);

};

}
所以我們要使用View類的。
然後我們需要創建一個對話框的布局文件。
corners就是角:定義角的弧度為8dp
solid實體:顏色為xxxx:
這樣寫的話每一個對話框都需要家這樣一行代碼。
如果我們需要每一個對話框都是這種樣式。
我們就需要在style中去定義一個主題。
我們的BaseDialog繼承了AlertDialog他有一個構造方法:
	public BaseDialog(Context context) {

		super(context, R.style.BaseDialog);

	}
這裡注意由於AlertDialog有三個構造函數,其中有一個是可以接受 Theme參數的。
所以我們直接super(context,Theme)把Theme傳遞給他即可。
然後我們在我們自己定義的dialog文件中,把android:background=""刪除。因為你在baseDialog中已經定義了,如果你在布局文件中在定義就會被覆蓋。
然後我們在我們定義個Dialog類中 設置布局文件給他。
	@Override
	public void initView() {
		setContentView(R.layout.dialog_comfirm);

	}
	public void showDelete() {
		ComfirmDialog dialog = new ComfirmDialog(getActivity());
		dialog.show();
	}
確定取消對話框按鈕背景:
我們先給Button設置背景,同樣我們給他設置選擇器
android:background="@drawable/selector_bt_bg"
然後我們發現設置完之後左下角和右下角都不是圓角了。
所以我們要自己定義一個selector.
我們要單獨給他設置兩個shape.
然後給button設置 android:background="@drawable/bg_rigth_bt_sec"即可。
給確定取消對話框設置屬性和按鈕偵聽:
我們通過構造函數傳遞 Title 和Message 進來。
public class ComfirmDialog extends BaseDialog {

	private String title;

	public String getTitle() {
		return title;
	}

	public void setTitle(String title) {
		this.title = title;
	}

	public String getMessage() {
		return message;
	}

	public void setMessage(String message) {
		this.message = message;
	}

	private String message;
	private TextView tv_dialog_title;
	private TextView tv_dialog_msg;

	public ComfirmDialog(Context context, String title, String message) {
		super(context);
		this.title = title;
		this.message = message;
	}

	@Override
	public void initView() {
		setContentView(R.layout.dialog_comfirm);
		tv_dialog_title = (TextView) findViewById(R.id.tv_dialog_title);
		tv_dialog_msg = (TextView) findViewById(R.id.tv_dialog_msg);

	}

	@Override
	public void initListener() {

	}

	@Override
	public void initData() {
		tv_dialog_title.setText(getTitle());
		tv_dialog_msg.setText(getMessage());
	}

	@Override
	public void processClick(View v) {

	}

}
ComfirmDialog dialog = new ComfirmDialog(getActivity(),"提示","請確定是否要刪除");
設置好了之後我們要去設置 按鈕的監聽事件
為了讓我們這個對話框還能實現其他的點擊功能我們不能寫死 點擊按鈕的事件。
所以我們在定義一個用於監聽的接口。
public interface DialogBtListener {

	void onCancle();

	void onConfrim();

}
然後我們在自定義的Dialog類裡面的構造函數接收這個接口;
private String message;
	private TextView tv_dialog_title;
	private TextView tv_dialog_msg;
	private Button bt_dialog_cancel;
	private Button bt_dialog_confirm;
	private DialogBtListener onConfrimListener;

	public void setOnConfrimListener(DialogBtListener onConfrimListener) {
		this.onConfrimListener = onConfrimListener;
	}

	public ComfirmDialog(Context context, String title, String message,
			DialogBtListener onConfrimListener) {
		super(context);
		this.title = title;
		this.message = message;
		this.onConfrimListener = onConfrimListener;
	}

	@Override
	public void initView() {
		setContentView(R.layout.dialog_comfirm);
		tv_dialog_title = (TextView) findViewById(R.id.tv_dialog_title);
		tv_dialog_msg = (TextView) findViewById(R.id.tv_dialog_msg);
		bt_dialog_cancel = (Button) findViewById(R.id.bt_dialog_cancel);
		bt_dialog_confirm = (Button) findViewById(R.id.bt_dialog_confirm);
	}

	@Override
	public void initListener() {
		bt_dialog_cancel.setOnClickListener(this);
		bt_dialog_confirm.setOnClickListener(this);
	}

	@Override
	public void initData() {
		tv_dialog_title.setText(getTitle());
		tv_dialog_msg.setText(getMessage());
	}

	@Override
	public void processClick(View v) {
		switch (v.getId()) {
		case R.id.bt_dialog_cancel:
			if (onConfrimListener != null) {
				onConfrimListener.onCancle();
			 }
			break;
		case R.id.bt_dialog_confirm:
			if (onConfrimListener != null) {
				onConfrimListener.onConfrim();
			}
			break;

		}
		dismiss();
	}
然後我們可以判斷傳遞進來的這個監聽接口是不是空,不是空我們在調用。
如果我們要實現其他的監聽接口 我們可以調用set接口的方法去改變接口,然後去判斷就可以了。
然後我們在Fragment裡面去實現方法就可以了。
	public void showDelete() {
		ComfirmDialog dialog = new ComfirmDialog(getActivity(),"提示","請確定是否要刪除",new DialogBtListener() {

			@Override
			public void onConfrim() {
				deleteAll();
			}

			@Override
			public void onCancle() {
			}
		});
		dialog.show();
	}
刪除的優化:
我們還要注意一點:就是我們操作數據庫其實就是一個耗時操作。如果數據很多,我們很可能ANR所以我們需要在子線程進行。
還有一個注意要點就是,如果我們刪除了集合裡面選擇的短信,那麼這些id就沒用了。
所以我們必須清空集合,不然我們下次再去查的時候就會出問題。
	public void deleteAll() {
		new Thread(new Runnable() {

			@Override
			public void run() {

				for (Integer integer : selectedConversationId) {
					String where = "thread_id=" + integer;
					getActivity().getContentResolver().delete(ConstantValues.URI_SMS,
							where, null);
				}
				selectedConversationId.clear();

			}
		}).start();

	}
handler.sendEmptyMessage(WHAT_DELETE_COMPLETE);
所以我們需要更新UI,但是不能在子線程更新。所以我們在主線程new Handler來處理消息。
	private static final int WHAT_DELETE_COMPLETE = 0;
	private Handler handler = new Handler() {
		public void handleMessage(android.os.Message msg) {
			switch (msg.what) {
			case WHAT_DELETE_COMPLETE:
				adapter.setIsSelectMode(false);
				showEditMenu();
				break;

			}
		}
	};
然後判斷如果是這個常量就進行退出選擇模式。顯示編輯菜單。
——————————————————————————
刪除進度條對話框:
我們的刪除對話框其實和確定取消對話框是一樣的,所以我們只需要把中間的文本。
換成對話框。按鈕去掉一個,然後改成取消中斷。
我們把中間的textView改成:
所以我們需要去改變進度條的顏色,所以我們現在先去styles.xml文件中定義一個style.
item name="android:progressDrawable">@android:drawable/progress_horizontal
這一行就是和顏色相關的。
所以我們點進去看看源碼怎麼定義的。
所以我們自己也定義一個這樣的層,然後修改屬性,我們就可以直接使用它了。
老方法直接去drawable創建一個layer-list
注意,裡面有一個gradient屬性,這個屬性就是用來控制漸變的。進度條的顏色其實就是漸變的。
我們直接去progress裡面把gradient屬性刪除。創建一個
一個固定的顏色。
public class DeleteDialog extends BaseDialog {

	private ProgressBar pb_delete_;
	private TextView tv_delete_title;
	private Button bt_dialog_interrupe;
	private DeleteDialogListener onDeleteLintener;
	//最大值
	private int Maxprogerss;

	public DeleteDialog(Context context,int Maxprogerss,DeleteDialogListener onLintener) {
		super(context);
		this.onDeleteLintener=onLintener;
		this.Maxprogerss=Maxprogerss;
	}

	@Override
	public void initView() {
		setContentView(R.layout.dialog_delete);
		pb_delete_ = (ProgressBar) findViewById(R.id.pb_delete_);
		tv_delete_title = (TextView) findViewById(R.id.tv_delete_title);
		bt_dialog_interrupe = (Button) findViewById(R.id.bt_dialog_interrupe);
	}

	@Override
	public void initListener() {
		bt_dialog_interrupe.setOnClickListener(this);
	}

	@Override
	public void initData() {
		//初始化
		tv_delete_title.setText("正在刪除(0/"+Maxprogerss+")");
		pb_delete_.setMax(Maxprogerss);
	}

	@Override
	public void processClick(View v) {
		switch (v.getId()) {
		case R.id.bt_dialog_interrupe:
			if (onDeleteLintener!=null) {
				onDeleteLintener.interrupe();
			}
			dismiss();
			break;

		}
	}
	//暴露一個方法給外界調用這個方法設置進度條
	public void serProgress(int progerss){
		tv_delete_title.setText("正在刪除("+progerss+"/"+Maxprogerss+")");
		pb_delete_.setProgress(progerss);
	}

}
boolean isStop = false;
	public void deleteAll() {
		dialog = new DeleteDialog(getActivity(), selectedConversationId.size(),
				new DeleteDialogListener() {

					@Override
					public void interrupe() {
                        isStop=true;
					}
				});
dialog.show();
		new Thread(new Runnable() {

			@Override
			public void run() {
				for (Integer integer : selectedConversationId) {
					SystemClock.sleep(1000);
					if(isStop){
						isStop=false;
						break;
					}
					String where = "thread_id=" + integer;
					getActivity().getContentResolver().delete(
							ConstantValues.URI_SMS, where, null);
					Message msg = Message.obtain();
					msg.what = WHAT_UPDATA_PROGRESS;
					msg.arg1 = count++;
					handler.sendMessage(msg);
				}
				selectedConversationId.clear();
				handler.sendEmptyMessage(WHAT_DELETE_COMPLETE);
			}
		}).start();

	}
然後我們創建一個 標簽。。當我們點擊中斷的時候我們就把他設置為true。
然後在線程中,檢查標簽是否為true,如果是就直接跳出循環。
因為我們要修改 UI 。然後要獲取當前的進度條的當前進程。所以我們要攜帶數據去傳遞消息,那麼就不能使用空消息。
	private static final int WHAT_UPDATA_PROGRESS = 1;
	private int count = 1;
	private Handler handler = new Handler() {
		public void handleMessage(android.os.Message msg) {
			switch (msg.what) {
			case WHAT_DELETE_COMPLETE:
				adapter.setIsSelectMode(false);
				adapter.notifyDataSetChanged();
				showEditMenu();
				dialog.dismiss();
				break;
			case WHAT_UPDATA_PROGRESS:

				dialog.serProgress(msg.arg1);
				break;
			}
		}
	};
當我們完成的時候要關閉對話框。
————————————————————————
創建會話詳細Acticity並傳遞數據:
我們需要傳遞adress和會話id過去。因為每一個條目的數據都不一樣,所以我們應該在
會話詳情的activity在對這些數據在
	public void onItemClick(AdapterView parent, View view,
					int position, long id) {
				// 因為我們使用CursorAdapter這個類,他幫我們封裝好了getItem可以返回你指定的Cursor對象
				if (adapter.getIsSelectMode()) {
					adapter.SelectSingle(position);
				} else {
					//會話詳情
					Intent intent = new Intent(getActivity(),
							ConversationDataActivity.class);
					Cursor cursor = (Cursor) adapter.getItem(position);
					ConversationBean creatConversationCursor = ConversationBean
							.creatConversationCursor(cursor);

					intent.putExtra("address",
							creatConversationCursor.getAddress());
					intent.putExtra("thead_id",
							creatConversationCursor.getThread_id());
					startActivity(intent);
				}

			}
		});

	}
public class ConversationDataActivity extends BaseActivity {

	@Override
	public void initView() {

	}

	@Override
	public void initListener() {

	}

	@Override
	public void initData() {
		Intent intent = getIntent();
		if (intent != null) {
			String address = intent.getStringExtra("address");
			int thread_id = intent.getIntExtra("thread_id", -1);
			LogUtils.i("yss", address+thread_id);
		}
	}

	@Override
	public void progressClick(View v) {

	}

}
——————————————————————
定義ConversationDetailActivity的布局文件:
我們先要定義一個標題欄,因為標題欄我們可以復用,所以我們直接專門創建一個標題欄的XML.
然後我們在創建activity的xml.
我們可以直接使用
調用我們定義好的布局 標題欄文件。顯示到當前的布局文件中。
這裡注意一下我們要設置一個 minHeiget:這個屬性就是你的最低寬度是這麼多。
如果你的控件沒有其他東西的時候他就會變成minHeiget.
當我們的控件高要是其他控件占用完後,剩下的全部都是它的。那麼我們就需要設置權重。
——————————————————————————
初始化標題欄:
public class ConversationDataActivity extends BaseActivity {

	private String address;
	private int thread_id;

	@Override
	public void initView() {
		setContentView(R.layout.activity_desconversation);
	}

	@Override
	public void initListener() {

	}

	@Override
	public void initData() {
		Intent intent = getIntent();
		if (intent != null) {
			address = intent.getStringExtra("address");
			thread_id = intent.getIntExtra("thread_id", -1);
			initTitlebar();
		}
	}

	public void initTitlebar() {
		findViewById(R.id.iv_titlebar_back).setOnClickListener(this);
		String name = ContactDao.getNameforAddress(getContentResolver(),
				address);
		((TextView) findViewById(R.id.tv_titlebar_title)).setText(TextUtils
				.isEmpty(name) ? address : name);

	}

	@Override
	public void progressClick(View v) {
		switch (v.getId()) {
		case R.id.iv_titlebar_back:
			finish();
			break;

		}
	}

}
————————————————————————
異步查詢會話所屬的短信:
		String [] projection ={
			"_id",
			"body",
			"type",
			"date"
		};
		String selection="thread_id ="+thread_id;
		System.out.println(selection);
		Cursor cursor = getContentResolver().query(ConstantValues.URI_SMS, projection, selection, null, null);
		CursorUtils.printCursor(cursor);
	}
我們現在需要sms表裡面的這些數據,第一個是應為CursorAdapter必須要查的_id
剩下三個是我們在界面需要使用的數據。
但是我們這裡使用的是同步的查詢,所以下面我們用異步查詢來實現。
		String [] projection ={
			"_id",
			"body",
			"type",
			"date"
		};
		String selection="thread_id ="+thread_id;
//		System.out.println(selection);
		SimpleQueryHandler queryHandler = new SimpleQueryHandler(getContentResolver());
		queryHandler.startQuery(0, null, ConstantValues.URI_SMS, projection, selection, null, "date");
定義布局文件:
————————————————————————————
ConversationDetailActivity的listView內容顯示:
我們先創建了Adapter,這裡和昨天步驟都是一樣的。
public class DesConversaionAdapter extends CursorAdapter {

	public DesConversaionAdapter(Context context, Cursor c) {
		super(context, c);

	}

	@Override
	public View newView(Context context, Cursor cursor, ViewGroup parent) {

		return View.inflate(context, R.layout.desconversation, null);
	}

	@Override
	public void bindView(View view, Context context, Cursor cursor) {
          ViewHolder holder = getHolder(view);

	}
	public ViewHolder getHolder(View view){
		ViewHolder holder = (ViewHolder) view.getTag();
		if (holder==null) {
			 holder = new ViewHolder(view);
			 view.setTag(holder);
		}
		return holder;

	}

	class ViewHolder {
		private TextView tv_desconversation_date;
		private TextView tv_desconversation_receive;
		private TextView tv_desconversation_send;

		public ViewHolder(View view) {
			tv_desconversation_date = (TextView) view
					.findViewById(R.id.tv_desconversation_date);
			tv_desconversation_receive = (TextView) view
					.findViewById(R.id.tv_desconversation_receive);
			tv_desconversation_send = (TextView) view
					.findViewById(R.id.tv_desconversation_send);

		}
	}
}
	adapter = new DesConversaionAdapter(this, null);
		//顯示會話的所有短信。
		lv_desconversation.setAdapter(adapter);

		String[] projection = { "_id", "body", "type", "date" };

		String selection = "thread_id =" + thread_id;
		// System.out.println(selection);
		SimpleQueryHandler queryHandler = new SimpleQueryHandler(
				getContentResolver());
		//這裡cookie傳遞adapter過去
		queryHandler.startQuery(0, adapter, ConstantValues.URI_SMS, projection,
				selection, null, "date");
步驟和上一天的差不多 :
	public void bindView(View view, Context context, Cursor cursor) {
		ViewHolder holder = getHolder(view);

		// 這裡的cursor不需要移動,因為源代碼已經幫我們做了
		SmsBean smsBean = SmsBean.createFormCursor(cursor);
		if (DateUtils.isToday(smsBean.getDate())) {
			holder.tv_desconversation_date.setText(DateFormat.getTimeFormat(
					context).format(smsBean.getDate()));

		} else {
			holder.tv_desconversation_date.setText(DateFormat.getDateFormat(
					context).format(smsBean.getDate()));
		}
		holder.tv_desconversation_receive
				.setVisibility(smsBean.getType() == ConstantValues.TYPE_RECEIVE ? View.VISIBLE
						: View.GONE);
		holder.tv_desconversation_send
				.setVisibility(smsBean.getType() == ConstantValues.TYPE_SEND ? View.VISIBLE
						: View.GONE);
		if (smsBean.getType() == ConstantValues.TYPE_RECEIVE) {
			holder.tv_desconversation_receive.setText(smsBean.getBody());
		}
		holder.tv_desconversation_send.setText(smsBean.getBody());
	}
我們先把判斷時間顯示的函數,封裝成一個類,因為我們要多次調用。
	private void showDate(Context context, ViewHolder holder, SmsBean smsBean) {
		if (DateUtils.isToday(smsBean.getDate())) {
			holder.tv_desconversation_date.setText(DateFormat.getTimeFormat(
					context).format(smsBean.getDate()));

		} else {
			holder.tv_desconversation_date.setText(DateFormat.getDateFormat(
					context).format(smsBean.getDate()));
		}
	}
private static final int DURTION = 3 * 60 * 1000;
用來設置我們的時間間隔。
		// 先判斷是否是第一條,第一條沒有上一條應該直接顯示
		if (cursor.getPosition() == 0) {
			showDate(context, holder, smsBean);
		} else {
			// 判斷上一條短信和當前的短信是否相差三分鐘
			long date = getPreviousDate(cursor.getPosition());
			if (smsBean.getDate() - date > DURTION) {
				holder.tv_desconversation_date.setVisibility(View.VISIBLE);
				showDate(context, holder, smsBean);

			} else {
				holder.tv_desconversation_date.setVisibility(View.GONE);
			}
		}
	private long getPreviousDate(int postion) {
		//獲取上一條的內容所以需要減1
		Cursor cursor = (Cursor) getItem(postion-1);
		SmsBean smsBean = SmsBean.createFormCursor(cursor);

		return smsBean.getDate();
	}
一些小問題:
當我們進入會話詳情頁面的時候。發現短信不能移動到最下面要手動移。
解決:lv_desconversation.setSelection(cursor.getCount());
我們使用這個方法就可以讓ListView初始的位置在你指定的位置。我們使用cursor條目,是因為最大值就是他的條目數。
但是有一個問題就是,我們到底應該在哪調用這個方法,因為如果你的cursor沒有值。那麼這個方法就是無效的。
public class SimpleQueryHandler extends AsyncQueryHandler {

	public SimpleQueryHandler(ContentResolver cr) {
		super(cr);

	}
	//這個方法就是用來接收剛剛傳遞的兩個參數,當查詢完成的時候調用
     @Override
    protected void onQueryComplete(int token, Object cookie, Cursor cursor) {

    	super.onQueryComplete(token, cookie, cursor);
//    	CursorUtils.printCursor(cursor);
    	if(cookie!=null&& cookie instanceof CursorAdapter){
			//查詢得到的cursor,交給CursorAdapter,由它把cursor的內容顯示至listView
			((CursorAdapter)cookie).changeCursor(cursor);
    	}
    }
}
所以我們應該去重寫這個方法,然後在這個方法裡面加上。
所以我們就去繼承CursorAdatper的類裡面重寫這個方法。
第一步就是要將lv傳遞給Adapter.在構造函數的時候傳遞進來。
	@Override
	public void changeCursor(Cursor cursor) {
		super.changeCursor(cursor);
		lv.setSelection(cursor.getCount());

	}
所以:
問題2:
當我們點擊編輯框的時候想輸入字符。發現輸入法框擋住了我們的界面顯示的內容。
解決:
我們可以給listview設置
lv_desconversation.setTranscriptMode(AbsListView.TRANSCRIPT_MODE_ALWAYS_SCROLL
這個屬性可以讓listview在內容改變的時候 移動到最新的位置。
還有一個方法就是通過設置Activity的屬性來設置軟鍵盤和activity之間的一些屬性。
在清單文件中:
通常我們都是一個state和一個adjust 組合在一起使用。
各值的含義:
stateUnspecified:軟鍵盤的狀態並沒有指定,系統將選擇一個合適的狀態或依賴於主題的設置
stateUnchanged:當這個activity出現時,軟鍵盤將一直保持在上一個activity裡的狀態,無論是隱藏還是顯示
stateHidden:用戶選擇activity時,軟鍵盤總是被隱藏
stateAlwaysHidden:當該Activity主窗口獲取焦點時,軟鍵盤也總是被隱藏的
stateVisible:軟鍵盤通常是可見的
stateAlwaysVisible:用戶選擇activity時,軟鍵盤總是顯示的狀態
adjustUnspecified:默認設置,通常由系統自行決定是隱藏還是顯示
adjustResize:該Activity總是調整屏幕的大小以便留出軟鍵盤的空間
adjustPan:當前窗口的內容將自動移動以便當前焦點從不被鍵盤覆蓋和用戶能總是看到輸入內容的部分
————————————————————
發送短信:
我們創建一個SmsDao類,然後創建一個方法用來發送短信。
然後我們去實現發送短信的邏輯:
public class SmsDao {
	public static void sendSms(String address,String body){
		SmsManager manager = SmsManager.getDefault();
		ArrayList smss = manager.divideMessage(body);
		for (String text : smss) {
			manager.sendTextMessage(address, null, text, sentIntent, null);
		}

	}

}
對於pendingIntent的理解可以看下面這個博客。
http://blog.csdn.net/yuzhiboyi/article/details/8484771
public class SmsDao {
	public static void sendSms(String address,String body,Context context){
		SmsManager manager = SmsManager.getDefault();
		Intent intent = new Intent("com.chen.text.sendsms");
		ArrayList smss = manager.divideMessage(body);
		PendingIntent sentIntent=PendingIntent.getBroadcast(context, 0, intent, PendingIntent.FLAG_ONE_SHOT
);
		for (String text : smss) {
			manager.sendTextMessage(address, null, text, sentIntent, null);
		}

	}

}
這裡我們需要注意,我們PendingIntent裡面的intent參數 是一個廣播接收者,接收的action屬性。
最後的Flage有如下參數:
FLAG_ONE_SHOT:利用 FLAG_ONE_SHOT獲取的PendingIntent只能使用一次,即使再次利用上面三個方法重新獲取,再使用PendingIntent也將失敗。
FLAG_NO_CREATE:利用FLAG_NO_CREAT獲取的PendingIntent,若描述的Intent不存在則返回NULL值.
FLAG_CANCEL_CURRENT:如果描述的PendingIntent已經存在,則在產生新的Intent之前會先取消掉當前的。你可用使用它去檢索新的Intent,如果你只是想改變Intent中的額外數據的話。通過取消先前的Intent,可用確保只有最新的實體可用啟動它。如果這一保證不是問題,考慮flag_update_current。
FLAG_UPDATE_CURRENT:最經常使用的是FLAG_UPDATE_CURRENT,因為描述的Intent有 更新的時候需要用到這個flag去更新你的描述,否則組件在下次事件發生或時間到達的時候extras永遠是第一次Intent的extras。
使用 FLAG_CANCEL_CURRENT也能做到更新extras,只不過是先把前面的extras清除,另外FLAG_CANCEL_CURRENT和 FLAG_UPDATE_CURRENT的區別在於能否新new一個Intent,FLAG_UPDATE_CURRENT能夠新new一個 Intent,而FLAG_CANCEL_CURRENT則不能,只能使用第一次的Intent。
創建一個廣播接受者去接收這些消息。
public class SmsSendReceiver extends BroadcastReceiver {

	@Override
	public void onReceive(Context context, Intent intent) {
		int code = getResultCode();
		if (code == Activity.RESULT_OK) {
			ToastUtils.showToast(context, "發送成功");
		} else {
			ToastUtils.showToast(context, "發送失敗");

		}

	}

}
public class SmsDao {
	public static void sendSms(String address, String body, Context context) {
		SmsManager manager = SmsManager.getDefault();
		Intent intent = new Intent("com.chen.text.sendsms");
		ArrayList smss = manager.divideMessage(body);
		PendingIntent sentIntent = PendingIntent.getBroadcast(context, 0,
				intent, PendingIntent.FLAG_ONE_SHOT);
		for (String text : smss) {
			// 這個API 只能發送,但是不進入數據庫
			manager.sendTextMessage(address, null, text, sentIntent, null);
			addSms(context, text, address);
		}

	}

	public static void addSms(Context context, String text, String address) {
		ContentValues values = new ContentValues();
		values.put("address", address);
		values.put("body", text);
		values.put("type", ConstantValues.TYPE_SEND);
		context.getContentResolver().insert(ConstantValues.URI_SMS, values);

	}
}
——————————————————————————
新建短信界面:
先創建Activity的布局文件,我們先設置一個框架然後在改。
		case R.id.bt_conversation_newSms:
			Intent intent = new Intent(getActivity(),NewsActivity.class);
			startActivity(intent);
			break;
輸入框自動搜索號碼:
我們在activity先設置的標題欄。和上一天的一樣。
我們為了實現自動搜索:AutoCompleteTextView。使用這個控件,我們就可以實現。
其實這個控件繼承於EditView.所以其實他就是一個 編輯框。
這個組件顯示內容也是使用Adapter來給他設置顯示的內容。
因為我們顯示的數據也是來自於數據庫,所以我們還是使用CursorAdapter。
我們需要給他設置一個條目的布局。
實現顯示搜索框的下拉欄的數據顯示:
		AutoSreachAdapter adapter = new AutoSreachAdapter(this, null);
		//給我們的輸入框設置Adapter,用於輸入框的下拉欄顯示數據。
		actv_newmsg_address.setAdapter(adapter);

		adapter.setFilterQueryProvider(new FilterQueryProvider() {

			//這是一個回調函數。就是當我們在這個輸入框裡面輸入數據的時候就會調用這個方法。用於查詢數據
			@Override
			public Cursor runQuery(CharSequence constraint) {

				return null;
			}
		});
你輸入了之後刪除一個字符他也會調用這個方法。
如果你設置組件是2個字符開始查詢。那麼就會顯示你輸入的字符。
但是你輸入一個字符的時候顯示的是null.
當我們在xml裡面添加這個屬性的時候就會一個字符的時候查詢;
android:completionThreshold="1"
所以我們在輸入框中輸入的是號碼,也就是我們要進行模糊查詢的條件。
我們可以使用官方的提供的 URI
Phone.CONTENT_URI
這個URI可以查詢出很多數據。我們需要的是
display_name:姓名
data1:號碼
contact_id:聯系人的id
我們直接進行模糊查詢,只要包含我們輸入的數字就輸出。
	public void initData() {
		AutoSreachAdapter adapter = new AutoSreachAdapter(this, null);
		// 給我們的輸入框設置Adapter,用於輸入框的下拉欄顯示數據。
		actv_newmsg_address.setAdapter(adapter);

		adapter.setFilterQueryProvider(new FilterQueryProvider() {

			// 這是一個回調函數。就是當我們在這個輸入框裡面輸入數據的時候就會調用這個方法。用於查詢數據
			// constraint當前輸入框的文本。

			@Override
			public Cursor runQuery(CharSequence constraint) {
				String[] projection = { "data1", "display_name", "_id" };
				String selection="data1 like '%"+constraint+"%'";
				Cursor cursor = getContentResolver().query(Phone.CONTENT_URI,
						projection, selection, null, null);


				return cursor;
			}
		});

		initTitleBar();

	}
然後我們就可以去adapter 裡面去設置參數。
public class AutoSreachAdapter extends CursorAdapter {

	public AutoSreachAdapter(Context context, Cursor c) {
		super(context, c);

	}

	@Override
	public View newView(Context context, Cursor cursor, ViewGroup parent) {

		return View.inflate(context, R.layout.item_autotv_sreach, null);
	}

	@Override
	public void bindView(View view, Context context, Cursor cursor) {
		ViewHolder holder = getHolder(view);
		holder.tv_autosreach_name.setText(cursor.getString(cursor.getColumnIndex("display_name")));
		holder.tv_autosreach_address.setText(cursor.getString(cursor.getColumnIndex("data1")));
	}

	public ViewHolder getHolder(View view) {
		ViewHolder holder = (ViewHolder) view.getTag();
		if (holder == null) {
			holder = new ViewHolder(view);
			view.setTag(holder);
		}
		return holder;
	}

	class ViewHolder {
		private TextView tv_autosreach_name;
		private TextView tv_autosreach_address;

		public ViewHolder(View view) {
			tv_autosreach_name = (TextView) view
					.findViewById(R.id.tv_autosreach_name);
			tv_autosreach_address = (TextView) view
					.findViewById(R.id.tv_autosreach_address);
		}

	}

}
這個條目你點擊的時候它默認調用的是。
	@Override
	public CharSequence convertToString(Cursor cursor) {
		// TODO Auto-generated method stub
		return super.convertToString(cursor);
	}
我們還可以去設置下拉欄的背景圖片,間隔之類的。

偏移就是你的下拉欄離你的輸入框的位移量。
_____________________________________________
通過系統提供的Activity選擇聯系人:
我們先查看源碼的聯系人的activity
找到 ContactsListActivity
然後我們找到過濾器。
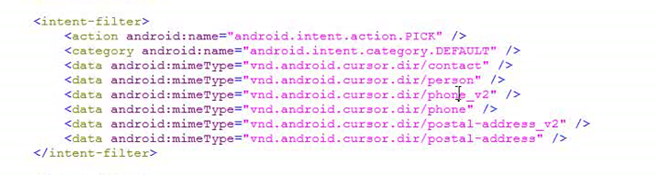
PICK (選擇)
類型我們隨便選擇一個寫即可。
		case R.id.bt_newmsg_send:
			Intent intent = new Intent(Intent.ACTION_PICK);
			intent.setType("vnd.android.cuosor.dir/phone");
			startActivityForResult(intent, 0);
			break;
我們需要在點擊聯系人的時候應該返回他的號碼,到輸入框。所以我們要調用
onActivityResult 方法。
	@Override
	protected void onActivityResult(int requestCode, int resultCode, Intent data) {
		//data中會攜帶一個URi 就是你選擇的聯系人的uri
		Uri uri = data.getData();
		if (uri!=null) {
			CursorUtils.printCursor(getContentResolver().query(uri, null, null, null, null));

		}
		super.onActivityResult(requestCode, resultCode, data);

	}
我們發現通過data返回的是一個uri通過這個uri我們可以查看返回的數據有哪些。
查看後發現,有display_name:聯系人名字
has_phone_number:聯系人是否有電話。
_id:其實就是聯系人的contact_id.
但是沒有我們需要的號碼,所以我們只能通過上面的查詢,再去查詢一次,這一次通過_id去查詢即可。
如果沒有號碼就不會查了
	@Override
	protected void onActivityResult(int requestCode, int resultCode, Intent data) {
		// data中會攜帶一個URi 就是你選擇的聯系人的uri
		Uri uri = data.getData();
		if (uri != null) {
			// 查詢聯系人id和是否有號碼
			String[] projection = { "_id", "has_phone_number" };
			// 不需要查詢條件,因為這個 uri是指定你點擊的聯系人的uri 只有一條。不需要條件。
			Cursor cursor = getContentResolver().query(uri, projection, null,
					null, null);
			cursor.moveToFirst();
			String _id = cursor.getString(0);
			int has_phone_number = cursor.getInt(1);
			if (has_phone_number == 0) {
				ToastUtils.showToast(getApplicationContext(), "沒有號碼");
			} else {
				Cursor query = getContentResolver().query(Phone.CONTENT_URI,
						new String[] { "data1" }, "contact_id=" + _id, null,
						null);
				query.moveToFirst();
				String address = query.getString(0);
				actv_newmsg_address.setText(address);
			}
		}
		super.onActivityResult(requestCode, resultCode, data);

	}
還有一個問題就是我們在選擇完聯系人,號碼會現在輸入框,但是有時候會彈出來自動查詢的列表,這說明我們的焦點還在輸入框裡面。所以我們應該把焦點放在輸入內容的組件裡面。
只需要在下面加上et_newmsg_body.requestFocus();即可
——————————————————
發送短信:
直接調用上面我們寫好的發送方法即可。
		case R.id.bt_newmsg_send:
			String body = et_newmsg_body.getText().toString().trim();
			String address = actv_newmsg_address.getText().toString().trim();
			if (!TextUtils.isEmpty(address)&&!TextUtils.isEmpty(body)) {
				SmsDao.sendSms(address, body, this);
			}
			break;
所以我們需要讓他可以滾動。
包裹其他的內容即可。這裡我們設置一個LinearLayout就是因為我們要裡面的布局為垂直的。
 Android把商品添加到購物車的動畫效果(貝塞爾曲線)
當我們寫商城類的項目的時候,一般都會有加入購物車的功能,加入購物車的時候會有一些拋物線動畫,具體代碼如下:實現效果如圖:思路: 確定動畫的起終點 在起終點之間使用二次
 android AlertDialog的簡單使用實例
當你的應用需要顯示一個進度條或需要用戶對信息進行確認時,可以使用alertDialog來完成。下面來介紹常用的四種AlertDialog。1、普通對話框package c
 Android開發Tips(2)
1. Dagger2的開發順序Module -> Component -> Application首先模塊(Module)創建需要提供的類實例, 其次把模塊添
 Android UI系列-----ScrollView和HorizontalScrollView
本篇隨筆將講解一下Android當中比較常用的兩個布局容器--ScrollView和HorizontalScrollView,從字面意義上來看也是非常的簡單的,Scrol