編輯:關於Android編程
(一)概述
在上一節中我們對Fragment進行了一個初步的了解,學習了概念,生命周期,Fragment管理與 Fragment事務,以及動態與靜態加載Fragment。從本節開始我們會講解一些Fragment在實際開發 中的一些實例!而本節給大家講解的是底部導航欄的實現!而基本的底部導航欄方法有很多種, 比如全用TextView做,或者用RadioButton,又或者使用TabLayout + RadioButton,當然復雜 的情況還是得走外層套布局的方法!本節我們用TextView來做一個底部導航欄的效果,也熟悉 下Fragment的使用!
(二)Fragment——底部導航欄的實現(方法1)
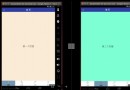
1.要實現的效果圖以及工程目錄結構:
先看看效果圖吧:


2.實現流程:
Step 1:寫下底部選項的一些資源文件
我們從圖上可以看到,我們底部的每一項點擊的時候都有不同的效果是吧! 我們是通過是否selected來判定的!我們要寫的資源文件有:首先是圖片,然後是文字,接著是背景!
圖片Drawable資源:tab_menu_channel.xml
-
-
其他三個照葫蘆畫瓢!
文字資源:tab_menu_text.xml
-
-
背景資源:tab_menu_bg.xml
-
-
Step 2:編寫我們的Activity布局
activity_main.xml:
    <framelayout android:id="@+id/ly_content" android:layout_above="@id/div_tab_bar" android:layout_below="@id/ly_top_bar" android:layout_height="match_parent" android:layout_width="match_parent">

    </framelayout>
代碼解析:
首先定義頂部標題欄的樣式,48dp的LinearLayout中間加上一個TextView作為標題!
接著定義一個大小為56dp的LinerLayout對其底部,在這個裡面加入四個TextView,比例1:1:1:1, 並且設置相關屬性,接著在這個LinearLayout上加一條線段!
最後以標題欄和底部導航欄為邊界,寫一個FrameLayout,寬高match_parent,用做Fragment的容器!
PS:這裡四個TextView屬性是重復的,你也可以自行抽取出來,編寫一個style,設置下~
Step 3:隱藏頂部導航欄
意外發現以前的在Activity中調用requestWindowFeature(Window.FEATURE_NO_TITLE);可以隱藏手機 自帶頂部導航欄,但是寫demo時候發現會報錯,即使這句話寫在了setContentView()之前!可能是因為 繼承的是AppCompatActivity而非Activity類!
當然以前的getSupportActionbar().hide()隱藏掉Actionbar,但是他還是會在界面上! 最後還有一種方法就是自己編寫一個style,然後在AndroidManifest.xml中為Application設置這個Theme:
注: 把 requestWindowFeature(Window.FEATURE_NO_TITLE);放在super.onCreate(savedInstanceState);前面就可以隱藏ActionBar而不報錯。
接著AndroidManifest.xml設置下theme屬性:
android:theme="@style/Theme.AppCompat.NoActionBar"Step 4:創建一個Fragment的簡單布局與類:
fg_content.xml:
MyFragment.java:
public class MyFragment extends Fragment {

    private String content;
    public MyFragment(String content) {
        this.content = content;
    }

    @Override
    public View onCreateView(LayoutInflater inflater, ViewGroup container, Bundle savedInstanceState) {
        View view = inflater.inflate(R.layout.fg_content,container,false);
        TextView txt_content = (TextView) view.findViewById(R.id.txt_content);
        txt_content.setText(content);
        return view;
    }
}
代碼解析:
就是簡單的重寫了一個onCreateView()方法,其他方法可以按需重寫!
Step 5:編寫MainActivity.java
先說說我們要考慮的一些關鍵問題:
    Fragment什麼時候初始化和add到容器中?什麼時候hide和show?
    如何讓TextView被選中?選中一個TextView後,要做一些什麼操作?
    剛進入MainActivity怎麼樣讓一個TextView處於Selected的狀態?
嗯,接下來一一解答上面這些問題:
    我們選中TextView後對對應的Fragment進行判空,如果為空,初始化,並添加到容器中; 而hide的話,我們定義一個方法hide所有的Fragment,每次觸發點擊事件就先調用這個hideAll方法, 講所有Fragment隱藏起來,然後如果TextView對應的Fragment不為空,我們就將這個Fragment顯示出來;
    這個我們通過點擊事件來實現,點擊TextView後先重置所有TextView的選中狀態為false,然後設置點擊的 TextView的選中狀態為true;
    這個更簡單,我們是通過點擊事件來設置選中的,那麼在onCreate()方法裡加個觸發點擊事件的 方法不就可以了嘛~ txt_channel.performClick();
邏輯都弄懂了,直接上代碼咯:
MainActivity.java:
public class MainActivity extends AppCompatActivity implements View.OnClickListener{

    //UI Object
    private TextView txt_topbar;
    private TextView txt_channel;
    private TextView txt_message;
    private TextView txt_better;
    private TextView txt_setting;
    private FrameLayout ly_content;

    //Fragment Object
    private MyFragment fg1,fg2,fg3,fg4;
    private FragmentManager fManager;

    @Override
    protected void onCreate(Bundle savedInstanceState) {
        super.onCreate(savedInstanceState);
        requestWindowFeature(Window.FEATURE_NO_TITLE);
        setContentView(R.layout.activity_main);
        fManager = getFragmentManager();
        bindViews();
        txt_channel.performClick();   //模擬一次點擊,既進去後選擇第一項
    }

    //UI組件初始化與事件綁定
    private void bindViews() {
        txt_topbar = (TextView) findViewById(R.id.txt_topbar);
        txt_channel = (TextView) findViewById(R.id.txt_channel);
        txt_message = (TextView) findViewById(R.id.txt_message);
        txt_better = (TextView) findViewById(R.id.txt_better);
        txt_setting = (TextView) findViewById(R.id.txt_setting);
        ly_content = (FrameLayout) findViewById(R.id.ly_content);

        txt_channel.setOnClickListener(this);
        txt_message.setOnClickListener(this);
        txt_better.setOnClickListener(this);
        txt_setting.setOnClickListener(this);
    }

    //重置所有文本的選中狀態
    private void setSelected(){
        txt_channel.setSelected(false);
        txt_message.setSelected(false);
        txt_better.setSelected(false);
        txt_setting.setSelected(false);
    }

    //隱藏所有Fragment
    private void hideAllFragment(FragmentTransaction fragmentTransaction){
        if(fg1 != null)fragmentTransaction.hide(fg1);
        if(fg2 != null)fragmentTransaction.hide(fg2);
        if(fg3 != null)fragmentTransaction.hide(fg3);
        if(fg4 != null)fragmentTransaction.hide(fg4);
    }


    @Override
    public void onClick(View v) {
        FragmentTransaction fTransaction = fManager.beginTransaction();
        hideAllFragment(fTransaction);
        switch (v.getId()){
            case R.id.txt_channel:
                setSelected();
                txt_channel.setSelected(true);
                if(fg1 == null){
                    fg1 = new MyFragment("第一個Fragment");
                    fTransaction.add(R.id.ly_content,fg1);
                }else{
                    fTransaction.show(fg1);
                }
                break;
            case R.id.txt_message:
                setSelected();
                txt_message.setSelected(true);
                if(fg2 == null){
                    fg2 = new MyFragment("第二個Fragment");
                    fTransaction.add(R.id.ly_content,fg2);
                }else{
                    fTransaction.show(fg2);
                }
                break;
            case R.id.txt_better:
                setSelected();
                txt_better.setSelected(true);
                if(fg3 == null){
                    fg3 = new MyFragment("第三個Fragment");
                    fTransaction.add(R.id.ly_content,fg3);
                }else{
                    fTransaction.show(fg3);
                }
                break;
            case R.id.txt_setting:
                setSelected();
                txt_setting.setSelected(true);
                if(fg4 == null){
                    fg4 = new MyFragment("第四個Fragment");
                    fTransaction.add(R.id.ly_content,fg4);
                }else{
                    fTransaction.show(fg4);
                }
                break;
        }
        fTransaction.commit();
    }
}
<完>
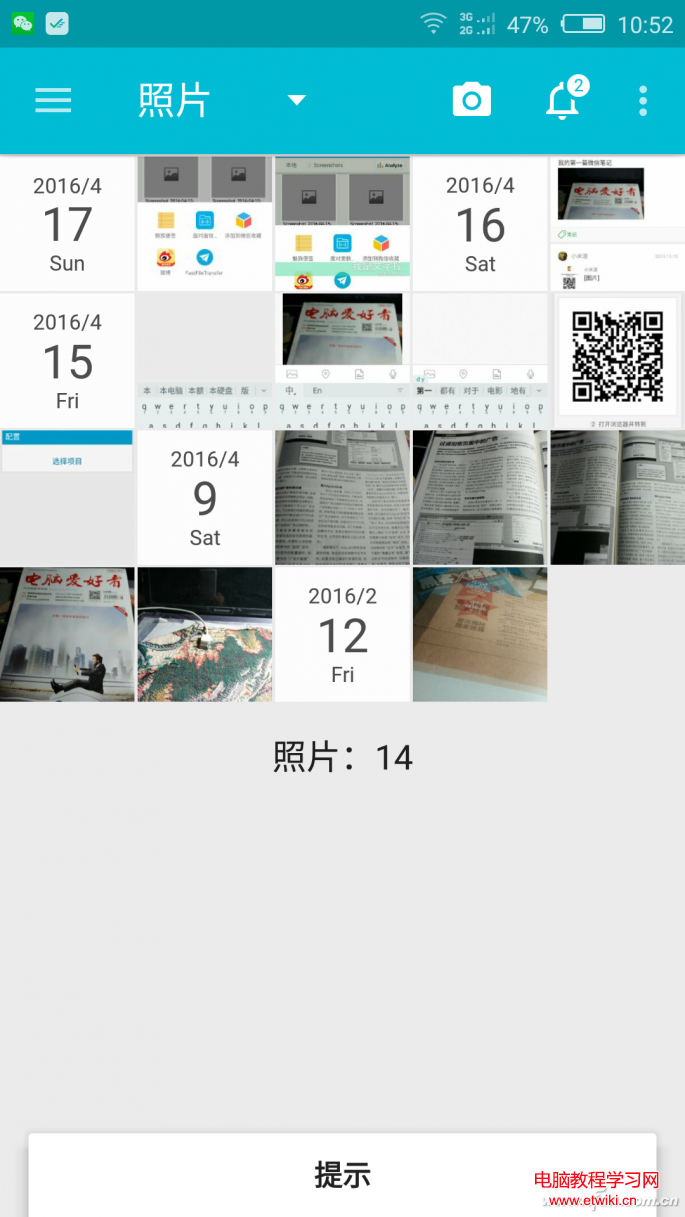 手機相冊太多太亂?利用時間牆管理這些圖片!
如今的人們幾乎每天都會用手機拍攝無數張照片,但是照片一多管理就是一件麻煩事。一般來說,用戶管理照片不是系統的圖庫就是快圖應用,後者雖然浏覽速度快但管理功能卻
 Android使用surfaceView自定義抽獎大轉盤
使用surfaceView自定義抽獎大轉盤話不多說,先上效果圖完整代碼地址歡迎start實現思路以及過程1、首先了解SurfaceView的基本用法,它跟一般的View不
 Android MediaStore檢索視頻並播放
該文章是為了檢索手機上sd卡中的視頻,然後將檢索出來的相應視頻的縮略圖,名稱等視頻信息顯示在ListView上。點擊每個item後播放相應的視頻。 源代碼: 布局文件
 android之幀動畫和補間動畫
寫在前面:為了使用戶的交互更加流暢自然,動畫也就成為了一個應用中必不可少的元素之一。在 Android 中常用的動畫分類無外乎三種,最早的 幀動畫 、補間動畫,以及 3.