編輯:關於Android編程
看過《Android開發藝術探索》View的繪制源碼之後,裡面在講解繪制最開始執行的方法是ViewRootImpl裡面的performTraversals,覺得有點費解,為什麼直接就執行到這個方法呢?這中間一定也存在著執行到performTraversals的過程,本著想要了解清楚的想法,看了看源碼,在此分享一下:
這篇後面部分會用到裡面的知識,如果你對這三個方法不太了解,可以看看上一篇博客;
我們平常會在Activity的onCreate裡面調用setContentView設置Activity的布局文件,那麼很自然應該從這個方法開始分析,因為他才是我們主動調用的,調用之後經過一系列過程把我們的布局文件中的內容顯示到界面上;
首先查看Activity的setContentView:
public void setContentView(int layoutResID) {
        getWindow().setContentView(layoutResID);
        initActionBar();
    }
可以發現他調用的是getWindow()的setContentView方法,那麼這裡getWindow返回值是什麼呢?
Activity#getWindow
public Window getWindow() {
        return mWindow;
    }
可以看到返回值是mWindow,他的類型是:
private Window mWindow;而Window是一個抽象類,我們需要找到mWindow的賦值語句,如下:
mWindow = PolicyManager.makeNewWindow(this);可以看到他的值是PolicyManager的靜態方法makeNewWindow的返回值,查看這個方法:
 public static Window makeNewWindow(Context context) {
        return sPolicy.makeNewWindow(context);
    }
該方法直接調用的是sPolicy的makeNewWindow方法,這裡的sPolicy是IPolicy類型對象,而IPolicy是接口,所以我們還需要找到他的具體實現,在PolicyManager類最開始,我們找到如下代碼:
private static final String POLICY_IMPL_CLASS_NAME =
        "com.android.internal.policy.impl.Policy";

    private static final IPolicy sPolicy;

    static {
        // Pull in the actual implementation of the policy at run-time
        try {
            Class policyClass = Class.forName(POLICY_IMPL_CLASS_NAME);
            sPolicy = (IPolicy)policyClass.newInstance();
        } catch (ClassNotFoundException ex) {
            throw new RuntimeException(
                    POLICY_IMPL_CLASS_NAME + " could not be loaded", ex);
        } catch (InstantiationException ex) {
            throw new RuntimeException(
                    POLICY_IMPL_CLASS_NAME + " could not be instantiated", ex);
        } catch (IllegalAccessException ex) {
            throw new RuntimeException(
                    POLICY_IMPL_CLASS_NAME + " could not be instantiated", ex);
        }
    }
可以發現sPolicy實際上是通過反射的方式創建的Policy對象,也就是sPolicy.makeNewWindow實際上調用的是Policy.makeNewWindow,進入Policy裡面找到makeNewWindow方法:
  public Window makeNewWindow(Context context) {
        return new PhoneWindow(context);
    }
終於找到了,其實就是返回了一個PhoneWindow對象而已了,回到我們的Activity#setContentView,getWindow().setContentView(layoutResID);實際上執行的是PhoneWindow的setContentView方法啦,那麼我們就去PhoneWindow的setContentView裡面看看吧:
@Override
    public void setContentView(int layoutResID) {
        if (mContentParent == null) {
            installDecor();
        } else {
            mContentParent.removeAllViews();
        }
        mLayoutInflater.inflate(layoutResID, mContentParent);
        final Callback cb = getCallback();
        if (cb != null && !isDestroyed()) {
            cb.onContentChanged();
        }
    }
代碼不長,但是內容其實挺多的,首先查看mContentParent是否為空,mContentParent是ViewGroup類型對象,如果你是第一次執行setContentView的話,mContentParent的值當然為null了,為null執行installDecor來初始化一個DecorView對象,不為null的話將mContentParent裡面的View全部移除掉,從這裡也可以看出來setContentView是可以多次調用的,不過第二次調用會移掉第一次已經添加進去的View而已了,因為我們是第一次執行setContentView,那麼就該執行installDecor方法了:
    private void installDecor() {
        if (mDecor == null) {
            mDecor = generateDecor();
            mDecor.setDescendantFocusability(ViewGroup.FOCUS_AFTER_DESCENDANTS);
            mDecor.setIsRootNamespace(true);
            if (!mInvalidatePanelMenuPosted && mInvalidatePanelMenuFeatures != 0) {
                mDecor.postOnAnimation(mInvalidatePanelMenuRunnable);
            }
        }
        if (mContentParent == null) {
            mContentParent = generateLayout(mDecor);
            ...............
            ...............
            ...............
        }
    }
這部分代碼比較長,我省略了非關鍵部分,首先判斷mDecor是否為null,mDecor是DecorView類型對象,這裡我們第一次調用setContentView,那麼mDecor為null,執行第3行代碼,通過generateDecor生成一個DecorView對象並且返回:
  protected DecorView generateDecor() {
        return new DecorView(getContext(), -1);
    }
可以看到這個方法就只是創建一個DecorView對象返回而已;
接著判斷mContentParent為null,執行第11行通過generateLayout生成一個ViewGroup對象返回,這裡會將剛剛創建的DecorView對象傳遞進去,很自然該看看generateLayout的源碼了:
鑒於generateLayout的源碼比較長,我截取了對我們有用的部分用偽代碼的方式來進行分析:
 protected ViewGroup generateLayout(DecorView decor) {
        // Apply data from current theme.
        //1.獲得窗口style屬性
        TypedArray a = getWindowStyle();

        //根據這些style屬性來設置窗口是否顯示標題、是否浮動、是都有動畫等等
        .............
        .............

        //2.獲取feature(風格)屬性,來選擇不同的窗口修飾布局文件
        int layoutResource;
        int features = getLocalFeatures();
        //接下來就是根據不同的features值來給layoutResource賦不同的布局文件id
        .............
        .............
        //3.加載選定好的布局文件,將其添加至DecorView上面,並且指定contentParent的值
        View in = mLayoutInflater.inflate(layoutResource, null);
        decor.addView(in, new ViewGroup.LayoutParams(MATCH_PARENT, MATCH_PARENT));
        ViewGroup contentParent = (ViewGroup)findViewById(ID_ANDROID_CONTENT);
        .............
        .............
        //4.設置一些background、title之類的屬性
 }
generateLayout具體的執行過程在偽代碼裡面已經解釋的比較清楚了,這裡我們補充點知識,在generateLayout裡面第2步中,我們通過getLocalFeatures獲取到了風格屬性,一般來說我們設置窗體風格屬性的方式有兩種:(1):通過requestFeature()指定,相應的獲取方法就是getLocalFeatures了;(2):通過requestWindowFeature或者在Activity的xml配置中設置屬性:android:theme=" ",相應的獲取方法是getWindowStyle;我們來看下其中一個Activity窗口修飾布局文件是R.layout.screen_title,也就是下面這樣子的布局文件:
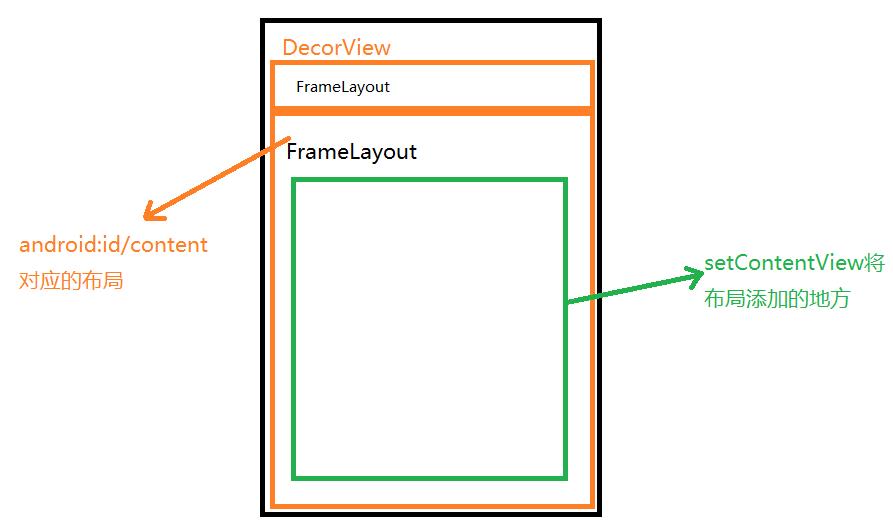
該布局文件是一個LinearLayout裡面嵌套有兩個FrameLayout,第一個FrameLayout就是我們的標題,第2個FrameLayout是內容存放地方,如果你仔細看的話,會發現generateLayout偽代碼裡面的第19行ID_ANDROID_CONTENT的值其實就是第二個FrameLayout的id值,這樣的話,我們的generateLayout代碼分析結束了;<framelayout android:layout_height="?android:attr/windowTitleSize" android:layout_width="match_parent" > </framelayout> <framelayout android:foreground="?android:attr/windowContentOverlay" android:foregroundgravity="fill_horizontal|top" android:id="@android:id/content" android:layout_height="0dip" android:layout_weight="1" android:layout_width="match_parent"> </framelayout>
那麼我們回到PhoneWindow裡面的setContentView方法裡面,發現此時mContentParent的值將等於我們上面布局中的第二個FrameLayout,繼續分析PhoneWindow裡面的setContentView方法,接下來執行的將是mLayoutInflater.inflate(layoutResID, mContentParent);也就是把我們當前的布局添加到了mContentParent裡面,這裡也說明了一點我們平常添加的布局文件其實只是Activity總體布局中第2個FrameLayout部分的子布局而已,這點我將會在這篇博客最後面通過實例來進行驗證,很自然,這裡是通過LayoutInflater的inflate方法將當前布局添加進去的,這也解釋了為什麼說setContentView其實也是通過inflate來進行布局解析並且添加到界面中了;那麼我們就該看看LayoutInflater的inflate的源碼了:
這個方法的具體源碼分析大家可以看我的另外一篇博客android------LayoutInflater的inflate方法詳解,在這裡我只是講解我們用到的部分:
LayoutInflater#inflate
public View inflate(XmlPullParser parser, ViewGroup root, boolean attachToRoot) {
        synchronized (mConstructorArgs) {
            Trace.traceBegin(Trace.TRACE_TAG_VIEW, "inflate");

            final AttributeSet attrs = Xml.asAttributeSet(parser);
            Context lastContext = (Context)mConstructorArgs[0];
            mConstructorArgs[0] = mContext;
            View result = root;

            try {
                // Look for the root node.
                int type;
                while ((type = parser.next()) != XmlPullParser.START_TAG &&
                        type != XmlPullParser.END_DOCUMENT) {
                    // Empty
                }

                if (type != XmlPullParser.START_TAG) {
                    throw new InflateException(parser.getPositionDescription()
                            + ": No start tag found!");
                }

                final String name = parser.getName();

                if (DEBUG) {
                    System.out.println("**************************");
                    System.out.println("Creating root view: "
                            + name);
                    System.out.println("**************************");
                }

                if (TAG_MERGE.equals(name)) {
                    if (root == null || !attachToRoot) {
                        throw new InflateException(" can be used only with a valid "
                                + "ViewGroup root and attachToRoot=true");
                    }

                    rInflate(parser, root, attrs, false);
                } else {
                    // Temp is the root view that was found in the xml
                    View temp;
                    if (TAG_1995.equals(name)) {
                        temp = new BlinkLayout(mContext, attrs);
                    } else {
                        temp = createViewFromTag(root, name, attrs);
                    }

                    ViewGroup.LayoutParams params = null;

                    if (root != null) {
                        if (DEBUG) {
                            System.out.println("Creating params from root: " +
                                    root);
                        }
                        // Create layout params that match root, if supplied
                        params = root.generateLayoutParams(attrs);
                        if (!attachToRoot) {
                            // Set the layout params for temp if we are not
                            // attaching. (If we are, we use addView, below)
                            temp.setLayoutParams(params);
                        }
                    }

                    if (DEBUG) {
                        System.out.println("-----> start inflating children");
                    }
                    // Inflate all children under temp
                    rInflate(parser, temp, attrs, true);
                    if (DEBUG) {
                        System.out.println("-----> done inflating children");
                    }
                    // We are supposed to attach all the views we found (int temp)
                    // to root. Do that now.
                    if (root != null && attachToRoot) {
                        root.addView(temp, params);
                    }

                    // Decide whether to return the root that was passed in or the
                    // top view found in xml.
                    if (root == null || !attachToRoot) {
                        result = temp;
                    }
                }

            } catch (XmlPullParserException e) {
                InflateException ex = new InflateException(e.getMessage());
                ex.initCause(e);
                throw ex;
            } catch (IOException e) {
                InflateException ex = new InflateException(
                        parser.getPositionDescription()
                        + ": " + e.getMessage());
                ex.initCause(e);
                throw ex;
            } finally {
                // Don't retain static reference on context.
                mConstructorArgs[0] = lastContext;
                mConstructorArgs[1] = null;
            }

            Trace.traceEnd(Trace.TRACE_TAG_VIEW);

            return result;
        }
    }
這裡首先解析根布局,在第45行通過createViewFromTag創建出根布局view,具體裡面是采用反射實現的,將根布局view賦值給temp,接著在第68行調用rInflate,將根布局View作為參數傳遞進去,這個方法會循環解析根布局下面的所有子元素,並且將他們添加到根布局中,我們可以看看rInflate這個方法:
LayoutInflater#rInflate
 void rInflate(XmlPullParser parser, View parent, final AttributeSet attrs,
            boolean finishInflate) throws XmlPullParserException, IOException {

        final int depth = parser.getDepth();
        int type;

        while (((type = parser.next()) != XmlPullParser.END_TAG ||
                parser.getDepth() > depth) && type != XmlPullParser.END_DOCUMENT) {

            if (type != XmlPullParser.START_TAG) {
                continue;
            }

            final String name = parser.getName();

            if (TAG_REQUEST_FOCUS.equals(name)) {
                parseRequestFocus(parser, parent);
            } else if (TAG_INCLUDE.equals(name)) {
                if (parser.getDepth() == 0) {
                    throw new InflateException(" cannot be the root element");
                }
                parseInclude(parser, parent, attrs);
            } else if (TAG_MERGE.equals(name)) {
                throw new InflateException(" must be the root element");
            } else if (TAG_1995.equals(name)) {
                final View view = new BlinkLayout(mContext, attrs);
                final ViewGroup viewGroup = (ViewGroup) parent;
                final ViewGroup.LayoutParams params = viewGroup.generateLayoutParams(attrs);
                rInflate(parser, view, attrs, true);
                viewGroup.addView(view, params);
            } else {
                final View view = createViewFromTag(parent, name, attrs);
                final ViewGroup viewGroup = (ViewGroup) parent;
                final ViewGroup.LayoutParams params = viewGroup.generateLayoutParams(attrs);
                rInflate(parser, view, attrs, true);
                viewGroup.addView(view, params);
            }
        }

        if (finishInflate) parent.onFinishInflate();
    }
可以看到第7行是一個while循環,就是用來遍歷根布局view下面子元素的,除了在解析的過程中拋出一些異常之外,我們會發現第30行以及第36行都執行了viewGroup.addView(view,params);這句話,這句話的主要作用就是將當前遍歷到的子元素view添加到vireGroup中,這裡的viewGroup就是我們傳入的參數---根布局view,那麼我們就該看看addView中做了些什麼操作了;
這個方法位於ViewGroup裡面:
ViewGroup#addView
public void addView(View child, int index, LayoutParams params) {
        if (DBG) {
            System.out.println(this + " addView");
        }

        // addViewInner() will call child.requestLayout() when setting the new LayoutParams
        // therefore, we call requestLayout() on ourselves before, so that the child's request
        // will be blocked at our level
        requestLayout();
        invalidate(true);
        addViewInner(child, index, params, false);
    }
看到了我們熟悉的requestLayout以及invalidate,在上一篇博客我已經分析了這兩個方法是怎麼執行到performTraversals的過程,大家可以去上一篇看看;
到這裡的話,我們分析了通過Activity的setContentView執行到了ViewRootImpl裡面的performTraversals的過程,接下來從performTraversals開始就是我們View的繪制過程了,也就是measure、layout、draw過程了,這個部分網上源碼分析很多的,我只會在下篇從偽代碼的角度進行總結;
接下來我通過實例來驗證我在上面說到的平常我們添加的View其實只是添加到DecorView布局裡面第2個Fragment部分:
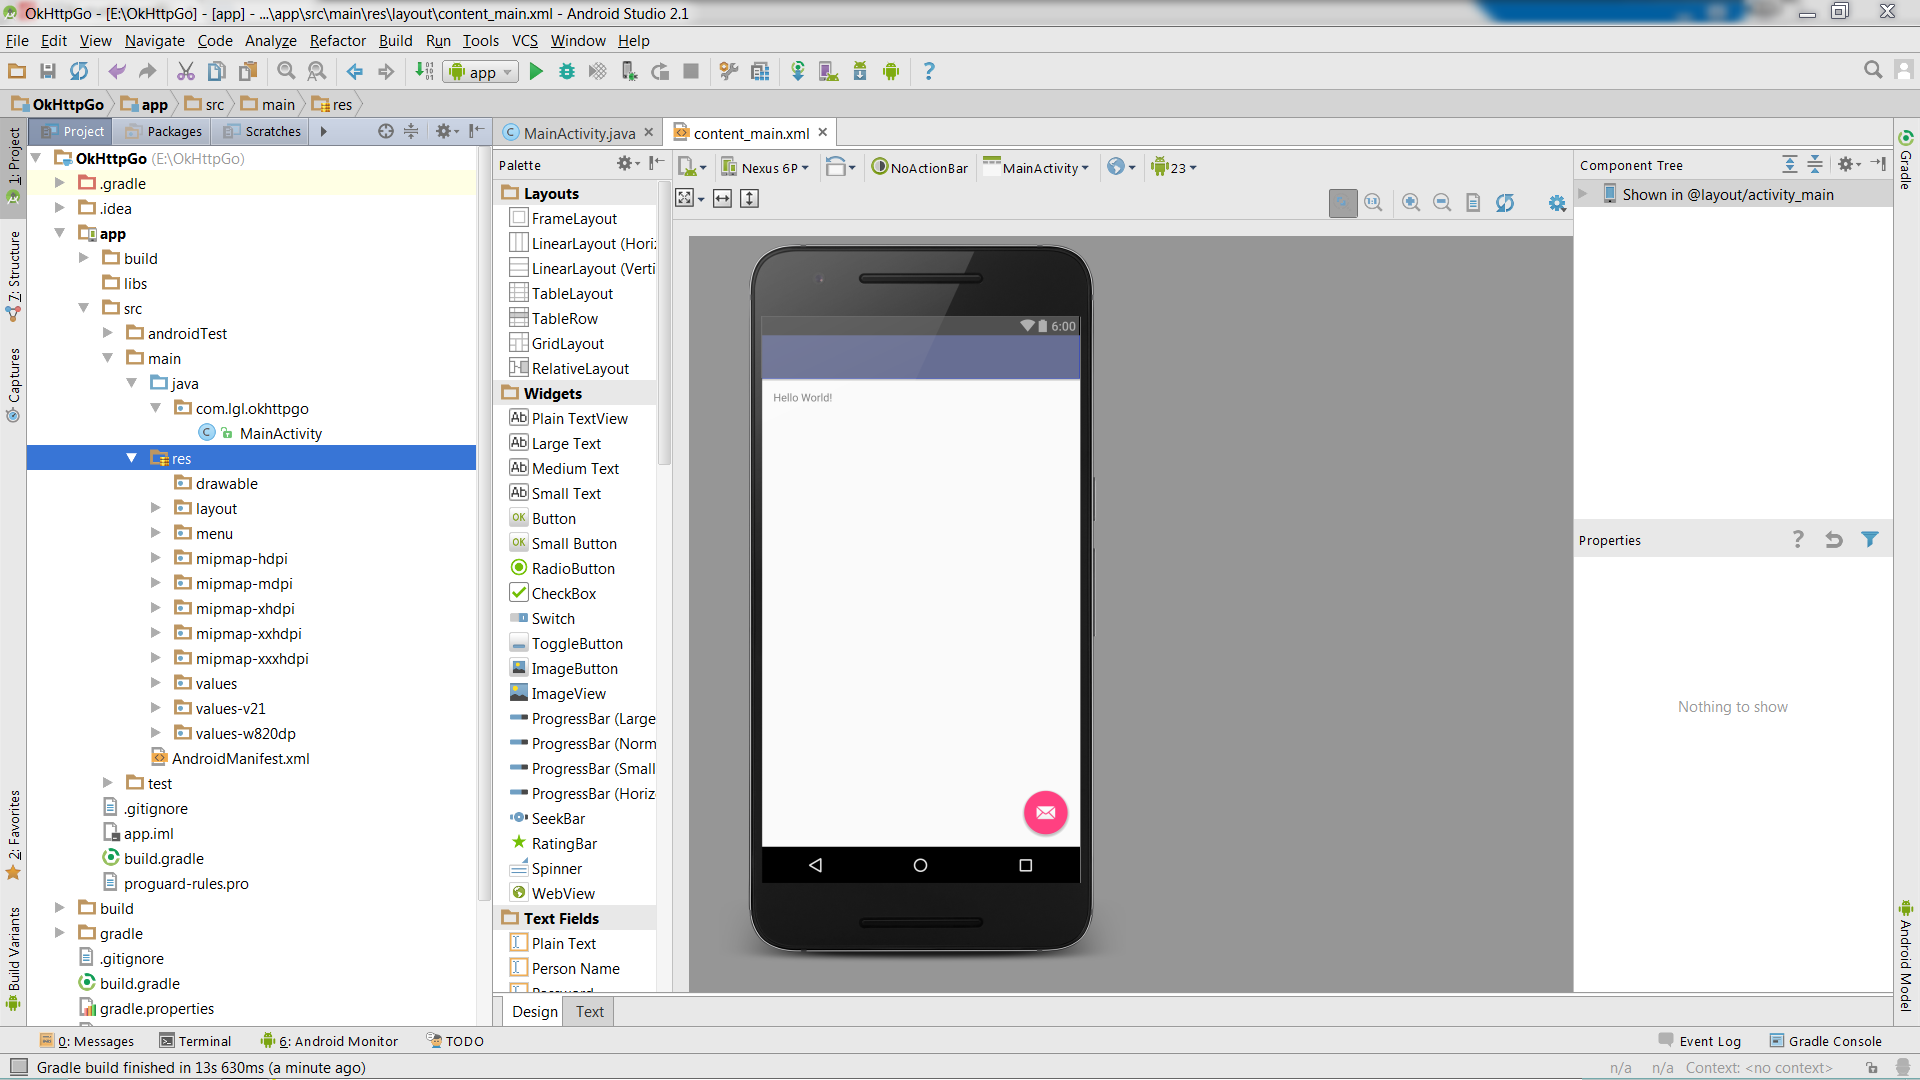
首先來看下布局文件:
接著就是MainActivity了:
public class MainActivity extends Activity {

	public Button mButton;
	public LinearLayout mLinearLayout;
	@Override
	protected void onCreate(Bundle savedInstanceState) {
		super.onCreate(savedInstanceState);
		setContentView(R.layout.activity_main);
		mLinearLayout = (LinearLayout) findViewById(R.id.linearLayout);
		ViewParent parent = mLinearLayout.getParent();
		System.out.println(parent);
		System.out.println(parent.getParent());
	}
}
點擊按鈕查看Logcat輸出:
07-05 05:21:26.618: I/System.out(2586): android.widget.FrameLayout{4175cf98 V.E..... ......I. 0,0-0,0 #1020002 android:id/content}
07-05 05:21:26.648: I/System.out(2586): android.widget.LinearLayout{41756830 V.E..... ......I. 0,0-0,0}
我們獲取到了LinearLayout,隨後通過getParent獲取到他的父布局,同樣調用getParent獲得父布局的父布局,可以看到第一行輸出是FrameLayout,驗證了我們上面說的setContentView只是將參數中的布局添加到FrameLayout裡面,而第二行輸出LinearLayout的原因是我們在Manifest裡面設置Activity的theme主題是:
android:theme="@android:style/Theme"
接下來以一張圖來說明Activity布局格局:
 Android開發--仿微信語音對講錄音
自微信出現以來取得了很好的成績,語音對講的實現更加方便了人與人之間的交流。今天來實踐一下微信的語音對講的錄音實現,這個也比較容易實現。在此,我將該按鈕封裝成為一個控件,並
 OkHttp框架從入門到放棄,解析圖片使用Picasso裁剪,二次封裝OkHttpUtils,Post提交表單數據
我們這片博文就來聊聊這個反響很不錯的OkHttp了,標題是我惡搞的,本篇將著重詳細的分析,探索OkHttp這個框架的使用和封裝一.追其原理 Android系統提供了兩種
 Android QQ新用戶注冊界面繪制
先看看效果圖:問題: 1、下拉列表(因為還沒看到這裡...) 2、標題欄顯示問題 3、按鈕的 Enable 設置 ....
 Android官方開發文檔Training系列課程中文版:多樣屏幕之支持不同的屏幕尺寸
原文地址:http://android.xsoftlab.net/training/multiscreen/index.html引言Android運行於數以百計不同尺寸的