編輯:關於Android編程
osgi中bundle之間的通信,可以使用eventadmin來完成,eventadmin是osgi中的一種基於發布訂閱的方式,一個Bundle進行發布發布一個事件之後,另外一個Bundle訂閱相應主題,從而進行通信,在使用過相同的通信方式中,guava中有一個eventbus可以達到相同的效果,以及mq的發布訂閱均是如此,但是osgi的eventadmin服務,在通信過程中event事件不是持久化的,現在開始我們的osgi之間的event事件通信。
我們在擬定事件的主題之後可以進行相應事件的發布,這使用的還是compedium中的Eventadmin服務,如同上一篇文章中引入的依賴一樣,需要使用到compedium這個包,發布事件相當簡單,獲取到Eventadmin之後就可以進行相應的事件發布,但同時要指定topic,指定主題之後,訂閱者才能根據相應的主題獲取到訂閱事件。發布事件的代碼相當簡單,如下所示:
package cn.com.ds;

import org.osgi.framework.BundleActivator;
import org.osgi.framework.BundleContext;
import org.osgi.framework.ServiceReference;
import org.osgi.service.event.Event;
import org.osgi.service.event.EventAdmin;
import org.osgi.service.event.EventConstants;

import java.util.HashMap;

/**
 * Created by xiaxuan on 16/7/11.
 */
public class Activator implements BundleActivator {

    private BundleContext context;

    boolean flag = true;

    private ServiceReference sr;

    EventAdmin eventAdmin = null;

    HashMap properties = null;

    Event event = null;

    public void start(BundleContext context) throws Exception {
        this.context = context;
        sr = context.getServiceReference(EventAdmin.class.getName());
        if (sr == null) {
            throw new Exception("Failed to obtain EventAdmin service reference!");
        }
        eventAdmin = (EventAdmin) context.getService(sr);
        if (eventAdmin == null) {
            throw new Exception("Failed to obtain EventAdmin service object!");
        }
        while (flag) {
            if (eventAdmin != null) {
                properties = new HashMap();
                properties.put(EventConstants.BUNDLE_SYMBOLICNAME, "est.first");
                //create event topic
                event = new Event("my_osgi_test_event", properties);
                eventAdmin.postEvent(event);        //asynchronous
                System.out.println("Send Event!");
                try {
                    Thread.sleep(5000);
                } catch (Exception e) {}

            }
        }
        System.out.println("ds service registered..");
    }

    public void stop(BundleContext context) throws Exception {
        //flag = false;
        System.out.println("service stoping...");
    }
}
在獲取到EventAdmin服務諸侯就可以進行事件發布了,其中我指定的Event的topic為my_osgi_test,在進行Event初始化的時候指定topic,我在發布事件的時候我使用的是postEvent,這是一種異步發送事件的方式,有一種同步的事件發送為sendEvent,兩者的區別在於,異步發送無論是監聽者是否接收成功都會返回,而同步發送則是會等到監聽者接收成功才會返回,所以在這裡會出現一個問題,就是當監聽的Bundle沒有啟動起來,或者stop之後,當前發送Event的Bundle暫時也會阻塞起來,造成其他的問題。
在Event訂閱者中需要一個EventHandler來處理相應Event,這個EventHandler需要實現EventHandler接口,實現一個handler方法,我在這寫了一個簡單的EventHandler為以下:
package cn.com.event.handler;

import org.osgi.service.event.Event;
import org.osgi.service.event.EventHandler;

/**
 * Created by xiaxuan on 16/7/15.
 */
public class MyEventHandler implements EventHandler {

    public void handleEvent(Event event) {
        System.out.println("test event received..");
        System.out.println("handle event start--" + event);
        try {
            Thread.currentThread().sleep(2000);
        } catch (Exception e) {}
    }
}
在handleEvent方法中,我僅僅只是打出了event監聽到了一些標志以及休息2秒,其實可以從event中拿到一些之前在Event中注入的屬性,以及當前的主題等等。
在訂閱者中,我還是將相應監聽的事件放在了Activator中,這個也是相當簡單,只需將EventHandler進行注冊並指定監聽的topic即可,代碼如下:
package cn.com.example;

import cn.com.event.handler.MyEventHandler;
import org.osgi.framework.BundleActivator;
import org.osgi.framework.BundleContext;
import org.osgi.framework.ServiceReference;
import org.osgi.framework.ServiceRegistration;
import org.osgi.service.event.Event;
import org.osgi.service.event.EventAdmin;
import org.osgi.service.event.EventConstants;
import org.osgi.service.event.EventHandler;

import java.util.Dictionary;
import java.util.HashMap;
import java.util.Hashtable;

/**
 * Created by xiaxuan on 16/7/15.
 */
public class Activator4 implements BundleActivator {

    private ServiceReference sr;

    EventAdmin eventAdmin = null;

    HashMap properties = null;

    Event event = null;

    /**
     * event  topic
     */
    final static String[] topic = {"my_osgi_test_event"};

    ServiceRegistration registration = null;

    public void start(BundleContext context) throws Exception {
        System.out.println("activator4 start");
        Dictionary dict = new Hashtable();
        dict.put(EventConstants.EVENT_TOPIC, topic);
        EventHandler eventHandler = new MyEventHandler();
        //registering the eventHandler
        registration = context.registerService(EventHandler.class.getName(), eventHandler, dict);
        if (registration != null) {
            System.out.println("event handler registered.");
        }
    }

    public void stop(BundleContext context) throws Exception {
        registration.unregister();
        System.out.println("event handler unregistered!");
    }
}
使用EventHandler的方法和之前注冊其他服務的方式相同,都是通過context.registerService的方式,在指定訂閱的topic之後,就可以進行進行Bundle之間的通信了。
在啟動karaf之前,需要改變我們的karaf插件,karaf插件需要再啟動一個feature來支持Eventadmin同性,在karaf插件中增加的如下:
eventadmin
這個寫在configuration中,這樣在karaf啟動時候同樣回家再eventadmin這個feature,如果不加載這個feature,會報空指針異常,這種feature加載的方式並不夠優雅,還有其他方式的加載辦法,但一時沒有找到,日後找到了再提一下.
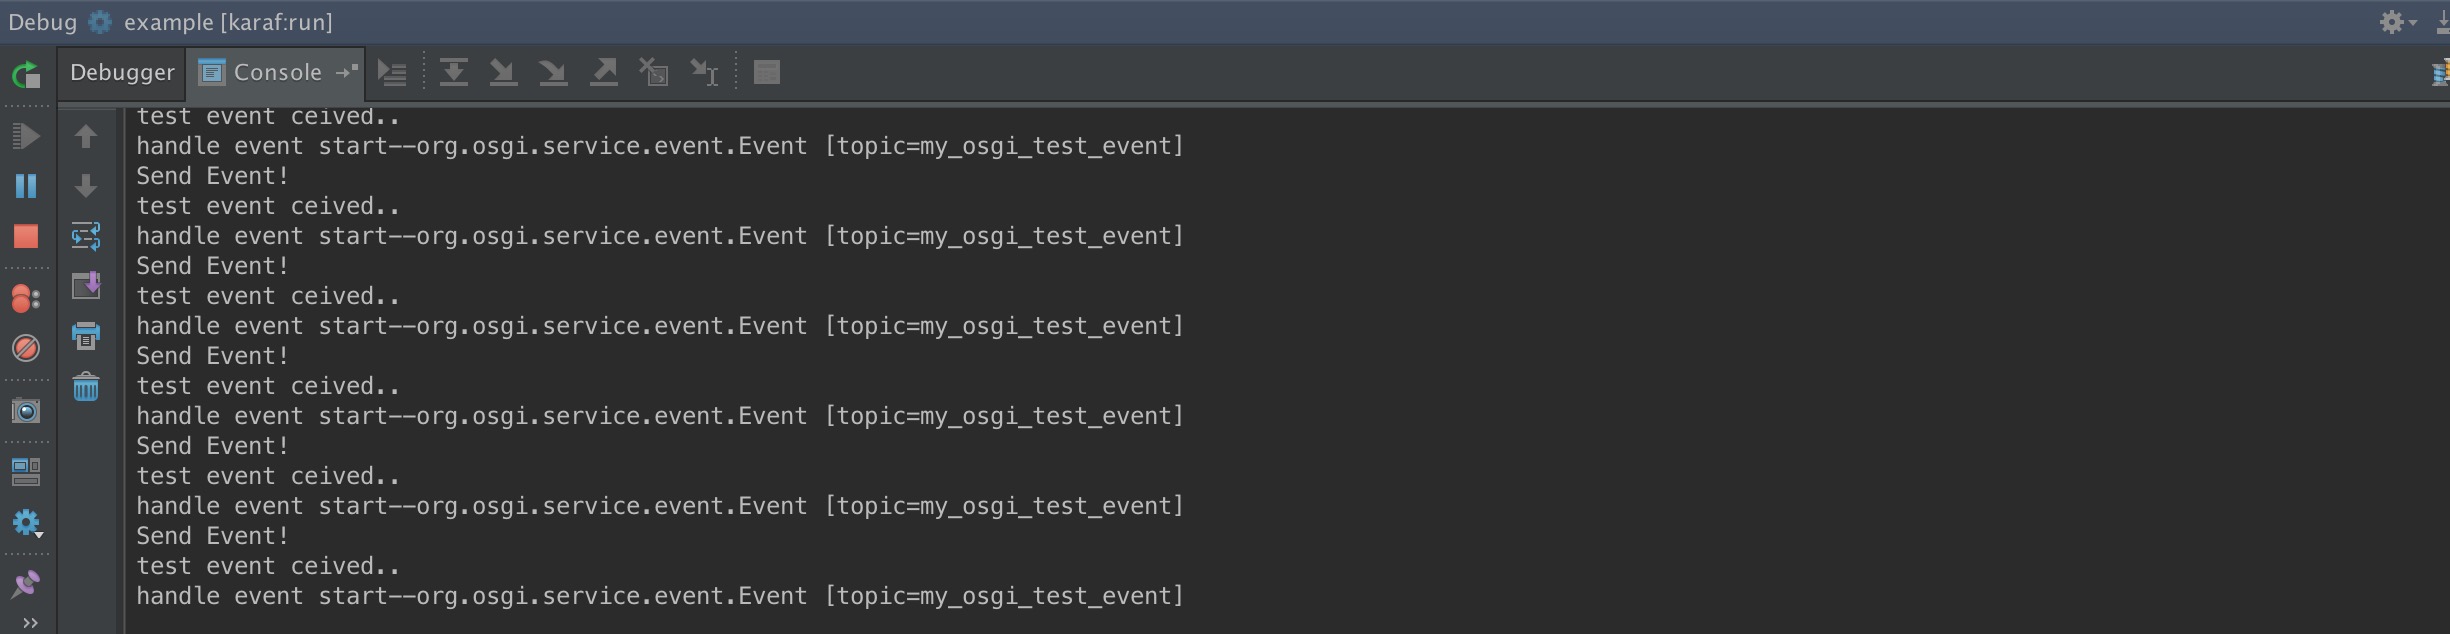
啟動karaf之後,觀察控制台,就能清楚的看到我們的事件的發布和訂閱了,如下:
 vc7Sw8e1xMrCvP61xLeisry2qdTEtrzV/bOjvfjQ0KGjPC9wPg0KPGhyIC8+DQo8aDIgaWQ9"總結">總結
以上中,事件的發布和訂閱中,發布Event的Bundle和訂閱的Bundle之間可以沒有任何的關系它們之間以 Event Admin 服務為中間人 (Broker),以事件 (Event) 為消息載體,進行 Bundle 間的松散協作。
osgi中的Event Admin的事件發布相對與各種消息中間件的發布訂閱來說,功能上還是單薄了許多,而且在發布過程中,事件並不能持久化保存。意味著如果當前Bundle重啟,那麼Event就會全部丟失。
在事件的發布訂閱中,發布事件的Bundle發布事件之後,如果訂閱的Bundle處於未Active狀態的時候,這個時候發布的事件就不會被接收到,並且在隨後也不會被接收到。
據上,在使用Bundle之間的通信的時候,還是更加推薦使用各種開源的消息中間件來進行消息通信更好。
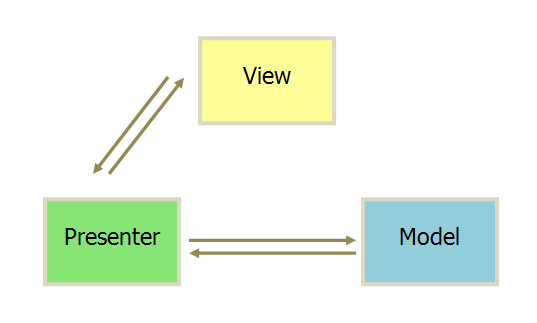 智能廚房重構-MVP架構
上一篇博客,我們介紹了項目分包的結構,這一篇我們重點來介紹一下MVP架構在項目中的應用,MVP可以說是MVC模式的一種升級,在MVP出現之前,一般都是用MVC,但是使用M
 Android 緩存淺談(一)
Android開發本質上就是手機和web服務器之間進行通信,從服務端需要獲取數據,但是當訪問的數據比較大,比較多,並且是重復數據時,會極大影響性能,甚至應用崩潰,手機卡死
 Android ActionBar應用一:ActionBar返回任意頁面和頂部搜索欄實現
Action Bar是app應用頂部的一個方形區域,不一定總會顯示(如全屏Theme時),它屬於窗口的一部分,有點類似於windows的窗口的標題
 AsyncTask 流程解析
為什麼要使用異步任務?Android 單線程模型,多線程的操作系統耗時操作放在非主線程中運行AsyncTask 為何而生?子線程中更新UI封裝簡化異步操作構建AsyncT