編輯:關於Android編程
重寫自定義View的onDraw()代碼:
	oval.left=getMeasuredWidth()/2-radius;                              //左邊
        oval.top=getMeasuredHeight()/2 -radius;                                   //上邊
        oval.right=getMeasuredWidth()/2 +radius;                             //右邊
        oval.bottom=getMeasuredHeight()/2 +radius;
        canvas.drawArc(oval,0,360,true,mPaint);
得到效果圖如下:
這麼做肯定沒問題。
有這麼個疑問:
為什麼我不用getwidth,getheight方法?
大多數情況下,getwidth和getMeasureWidth方法得到的結果都是一樣的。
回到這個getWidth()方法和getMeasureWidth()的區別這個問題上。
網上說法很多,我決定自己一點點從源碼裡面扣。然後舉例說明。
public final int getMeasuredWidth() {
        return mMeasuredWidth & MEASURED_SIZE_MASK;
    }
大概跟一下源碼知道:
平時我們自定義View會重寫onMeasure方法:(什麼情況下寫onMeasure?後續會有解答)
View#onMeasure源碼如下:
protected void onMeasure(int widthMeasureSpec, int heightMeasureSpec) {
        setMeasuredDimension(getDefaultSize(getSuggestedMinimumWidth(), widthMeasureSpec),
                getDefaultSize(getSuggestedMinimumHeight(), heightMeasureSpec));
    }
View#onMeasure方法會調用View#setMeasuredDimension方法:
protected final void setMeasuredDimension(int measuredWidth, int measuredHeight) {
        boolean optical = isLayoutModeOptical(this);
        if (optical != isLayoutModeOptical(mParent)) {
            Insets insets = getOpticalInsets();
            int opticalWidth  = insets.left + insets.right;
            int opticalHeight = insets.top  + insets.bottom;

            measuredWidth  += optical ? opticalWidth  : -opticalWidth;
            measuredHeight += optical ? opticalHeight : -opticalHeight;
        }
        setMeasuredDimensionRaw(measuredWidth, measuredHeight);
    }
View#setMeasuredDimension方法會調用View#setMeasuredDimensionRaw方法:
private void setMeasuredDimensionRaw(int measuredWidth, int measuredHeight) {
        mMeasuredWidth = measuredWidth;
        mMeasuredHeight = measuredHeight;

        mPrivateFlags |= PFLAG_MEASURED_DIMENSION_SET;
    }
看到這個方法代碼第一行第二行有個賦值
mMeasuredWidth = measuredWidth;
mMeasuredHeight = measuredHeight;
這就是我們的getMeasuredWidth()方法的值。
所以當我們重寫onMeasure方法時,如果對setMeasuredDimension()這個方法參數直接自定義,如setMeasuredDimension(200,300),那麼getMeasuredWidth()的值必然就是200,getMeasuredHeight()的值必然就是300。
當然,我們一般情況下,不會使用直接這種方式寫死參數,一般還是對onMeasure(int widthMeasureSpec, int heightMeasureSpec)方法的參數進行處理,再傳入setMeasuredDimension(widthMeasureSpec, heightMeasureSpec);
因為我們自定義view對於屬性為wrap_content這種情況,如果不做處理其實是與match_parent是一樣效果的。原因是什麼呢?參考如下:任玉剛的書中表格:
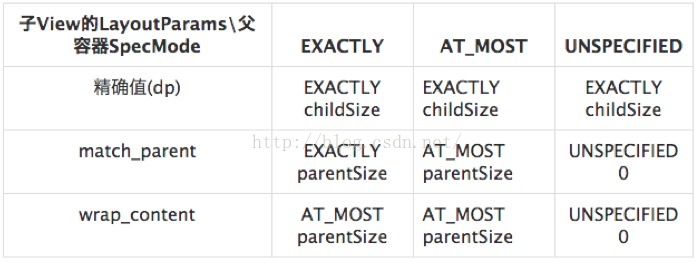
當父容器的specmode為EXACTLY和AT_MOST時子view不管是wrap_content還是match_parent,它的默認大小都是父容器大小parentSize。
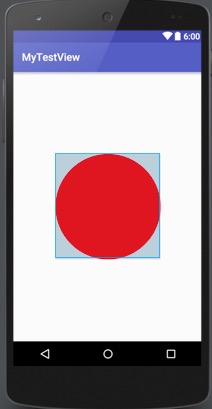
不信?舉個栗子:
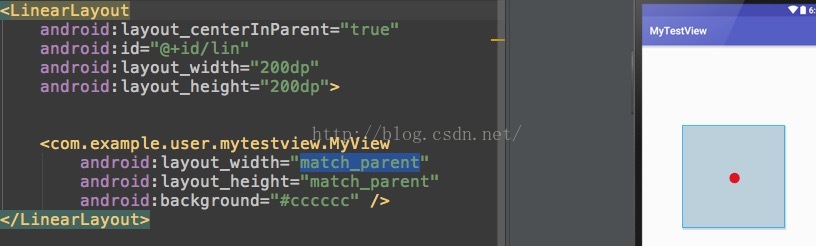
直接先上一個自定義view為match_parent時的效果圖:
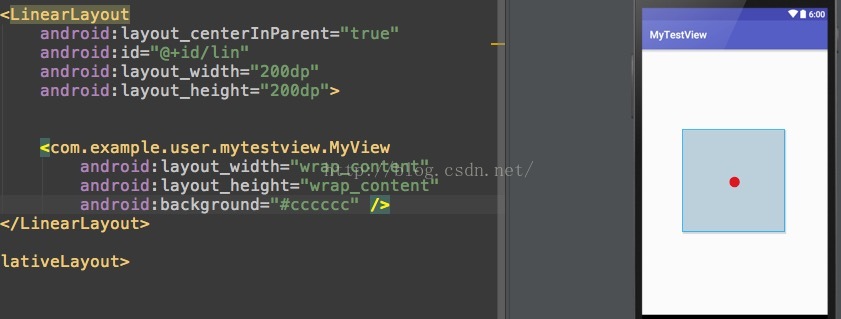
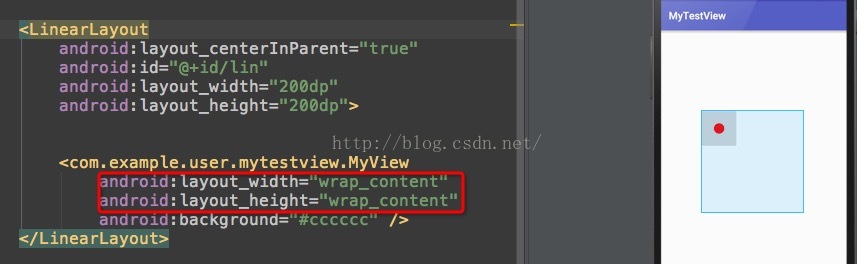
再上一個自定義view為wrap_content時的圖:
好吧,沒有比較就沒有傷害。上一個自定義view為40dp的寬高的圖。
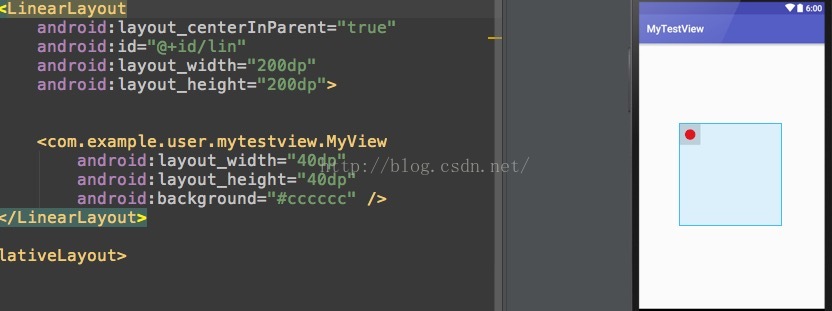
這回效果很明顯了吧。除非是精確值,否則大小都等於父布局的大小。
那麼這我當然不能接受。我wrap_content需要有所變化,需要一個默認值大小200*200。
於是有了
@Override protected void onMeasure(int widthMeasureSpec, int heightMeasureSpec) { int speSize = MeasureSpec.getSize(heightMeasureSpec); int speMode = MeasureSpec.getMode(heightMeasureSpec); Log.d("MyView", "---speSize = " + speSize + ""); Log.d("MyView", "---speMode = " + speMode + ""); if(speMode == MeasureSpec.AT_MOST){ Log.d("MyView", "---AT_MOST---"); } if(speMode == MeasureSpec.EXACTLY){ Log.d("MyView", "---EXACTLY---"); } if(speMode == MeasureSpec.UNSPECIFIED){ Log.d("MyView", "---UNSPECIFIED---"); } if(speMode==MeasureSpec.AT_MOST){ setMeasuredDimension(100, 100); }else{ setMeasuredDimension(widthMeasureSpec, heightMeasureSpec); } }
再看效果圖:
所以由此類推,我們之所以重寫onMeasure也就是為了wrap_content時能自動按照需求改變。回到原本的話題的第二塊:getWidth()方法:
源碼如下
 @ViewDebug.ExportedProperty(category = "layout")
    public final int getWidth() {
        return mRight - mLeft;
    }
這裡的mRight和mLeft到底是什麼呢?其實它是layout過程傳過來的四個參數中的兩個:
public void layout(int l, int t, int r, int b) { if ((mPrivateFlags3 & PFLAG3_MEASURE_NEEDED_BEFORE_LAYOUT) != 0) { onMeasure(mOldWidthMeasureSpec, mOldHeightMeasureSpec); mPrivateFlags3 &= ~PFLAG3_MEASURE_NEEDED_BEFORE_LAYOUT; } int oldL = mLeft; int oldT = mTop; int oldB = mBottom; int oldR = mRight; boolean changed = isLayoutModeOptical(mParent) ? setOpticalFrame(l, t, r, b) : setFrame(l, t, r, b); if (changed || (mPrivateFlags & PFLAG_LAYOUT_REQUIRED) == PFLAG_LAYOUT_REQUIRED) { onLayout(changed, l, t, r, b); mPrivateFlags &= ~PFLAG_LAYOUT_REQUIRED; ListenerInfo li = mListenerInfo; if (li != null && li.mOnLayoutChangeListeners != null) { ArrayList listenersCopy = (ArrayList)li.mOnLayoutChangeListeners.clone(); int numListeners = listenersCopy.size(); for (int i = 0; i < numListeners; ++i) { listenersCopy.get(i).onLayoutChange(this, l, t, r, b, oldL, oldT, oldR, oldB); } } } mPrivateFlags &= ~PFLAG_FORCE_LAYOUT; mPrivateFlags3 |= PFLAG3_IS_LAID_OUT; }
有兩種測量setOpticalFrame、setFrame,最終都會在其中調用了setFrame方法,它的源碼如下:
protected boolean setFrame(int left, int top, int right, int bottom) {
        boolean changed = false;
        if (mLeft != left || mRight != right || mTop != top || mBottom != bottom) {
            changed = true;

           //....

            mLeft = left;
            mTop = top;
            mRight = right;
            mBottom = bottom;

           //......

        }
        return changed;
    }
這樣就有了mLeft和mRight兩個值了。
當然,光知道來處還的會用。我們平時自定義view繼承自view時是不會對onlayout方法重寫的。只有當重寫布局viewGroup時才會對onlayout重寫。
當繼承布局viewGroup時,重寫onlayout方法。對子view的childView.layout(0,0,200,200);
我們平時重寫onlayout()方法主要是為了對子布局自定義,比如瀑布流,比如放不下換行顯示子view這種操作。
舉個栗子:
當繼承布局viewGroup時,重寫onlayout方法,碼如下:
 @Override
    protected void onLayout(boolean changed, int l, int t, int r, int b) {
        int mViewGroupWidth  = getMeasuredWidth();  //當前ViewGroup的總寬度
        int mPainterPosX = l;  //當前繪圖光標橫坐標位置
        int mPainterPosY = t;  //當前繪圖光標縱坐標位置
        int childCount = getChildCount();
        for ( int i = 0; i < childCount; i++ ) {

            View childView = getChildAt(i);

            int width  = childView.getMeasuredWidth();
            int height = childView.getMeasuredHeight();

            //如果剩余的空間不夠,則移到下一行開始位置
            if( mPainterPosX + width > mViewGroupWidth ) {
                mPainterPosX = l;
                mPainterPosY += height;
            }

            //執行ChildView的繪制
//            childView.layout(mPainterPosX,mPainterPosY,mPainterPosX+width, mPainterPosY+height);
            childView.layout(0,0,100, 200);

            //記錄當前已經繪制到的橫坐標位置
            mPainterPosX += width;
        }
    }
這裡對子view布局使用固定值childView.layout(0,0,100, 200);
看下布局文件:
在子view種打個log:發現

現在子 view的getWidth和getMeasuredWidth不一樣了。
由view繪制流程我們知道:順序是:onMeasure()--》onLayout()--》onDraw();(見源碼ViewRootImpl#performTraversals() 方法,下一篇打算講這個內容)
所以再onMeasure之後可以getMeasuredWidth,在Onlayout()之後 可以用getWitdth().
 Android系統的五種數據存儲形式實例(一)
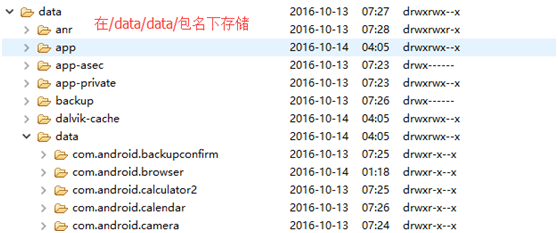
Android系統有五種數據存儲形式,分別是文件存儲、SP存儲、數據庫存儲、contentprovider 內容提供者、網絡存儲。其中,前四個是本地存儲。存儲的類型包括簡
 Android中如何實現清空搜索框的文字
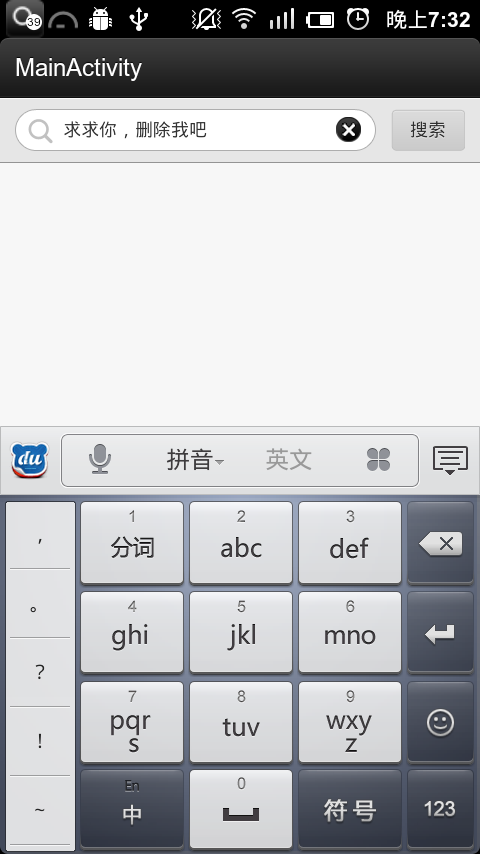
需求:項目中的有關搜索的地方,加上清空文字的功能,目的是為了增加用戶體驗,使用戶刪除文本更加快捷解決過程:開始的時候感覺這個東西不太好實現,主要就是布局的問題,可能是開始
 android camera獲取matrix作用於canvas的研究
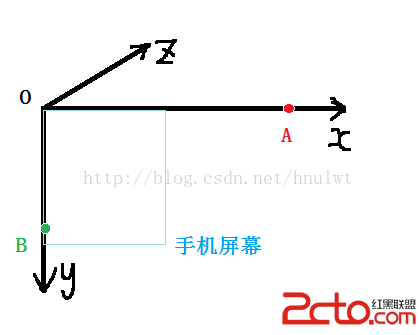
網上查了一下相關的文章,認為自己看懂了,但是實際測試時和網上說的並不一樣(後來研究發現,那個人寫的是錯的!!!),所以,在此提醒大家,要勇於質疑,勇於提出問題。 首先說明
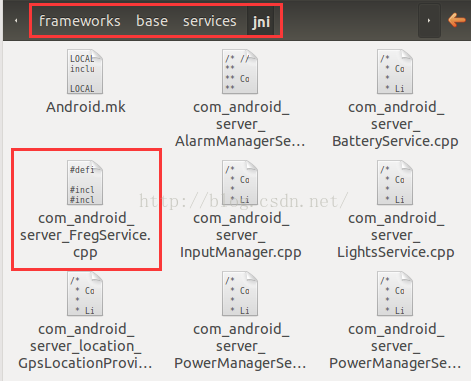 Android系統篇之編寫系統服務
在之前已經介紹了一篇關於如何編寫簡單的驅動以及訪問該驅動的小程序,最後將程序編譯到Android內核源碼中通過程序訪問驅動驗證是可以通過的,那麼本文就繼續這個知識點,把這