編輯:關於Android編程
Android App的圖形用戶界面是由一層層的View和ViewGroup對象建立起來的。View對象一般是UI控件(widgets),例如button 或者 text fields.ViewGoup對象是不可見的View容器,它們決定子view是如何布局,比如在一個grid或者一個垂直的list裡面。
Android 提供了一個XML表格對應了ViewGroup和view的子類,如此你可以在一個XML使用一個層級的UI元素來定義你的UI。
布局(layouts)都是ViewGroup的子類。在這次的練習,你可以使用LinearLayout。
Tips{
選擇性Layouts
Declaring(聲明) your UI layout in XML rather than(而不是) runtime code is useful for several reasons, but it’s especially important so you can create different layouts for(適配不同的屏幕) different screen sizes. For example, you can create two versions of a layout and tell the system to use one on “small” screens and the other on “large” screens. For more information, see the class about Supporting Different Devices.
}
LinearLayout is a view group (a subclass of ViewGroup) that lays out child views in either a
線性布局是一個view group指定了子view是以水平還是垂直方向擺放組件。
vertical or horizontal orientation, as specified by the android:orientation attribute. Each child of a
正如android的orientation 屬性指定的一樣。
LinearLayout appears on the screen in the order in which it appears in the XML.
Two other attributes, android:layout_width and android:layout_height, are required for all views in order to specify(指定) their size.
Because the LinearLayout is the root view in the layout, it should fill the entire(整個) screen area that’s available to the app by setting the width and height to “match_parent”. This value declares that the view should expand its width or height to match the width or height of the parent view.
For more information about layout properties, see the Layout guide.
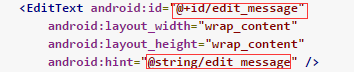
Note: This string resource has the same name as the element ID: edit_message. However, references to resources are always scoped by the resource type (such as id or string), so using the same name does not cause collisions.(字符串id和抽取的string文字的name一樣是OK的)
For text in the user interface, always specify(指定) each string as a resource. String resources allow you to manage all UI text in a single location(單一區域), which makes the text easier to find and update. Externalizing(抽取) the strings also allows you to localize(局部化) your app to different languages by providing alternative definitions(提供可選擇性的定義) for each string resource.
For more information about using string resources to localize your app for other languages, see the Supporting Different Devices class.(更多國際化相關請參見。。。)
Weight value的作用:
This works fine for the button, but not as well for the text field, because the user might type something longer. It would be nice to fill the unused screen width with the text field. You can do this inside a LinearLayout with the weight property, which you can specify using the android:layout_weight attribute.
這樣寫對於button是OK的,但是對於text field就不一樣了,因為用戶可能輸入更多的內容。把未使用的屏幕用text field填充會更好。你可以在一個現象布局使用weight屬性,你可以這樣使用android:layout_weight。
The weight value is a number that specifies the amount of remaining space each view should consume, relative to the amount consumed by sibling views. This works kind of like the amount of ingredients in a drink recipe: “2 parts soda, 1 part syrup” means two-thirds of the drink is soda. For example, if you give one view a weight of 2 and another one a weight of 1, the sum is 3, so the first view fills 2/3 of the remaining space and the second view fills the rest. If you add a third view and give it a weight of 1, then the first view (with weight of 2) now gets 1/2 the remaining space, while the remaining two each get 1/4.
Weight的值是一個數字,它指定了每個控件應該消費的空間。這有點像酒的各個成分:“2份砂,1份糖”意味著2/3的drink是砂。舉個例子,如果你一個view的weight是2,另外一個weight是1,那麼總數是3,因此,第一個控件填充2/3的空白空間,第二個填充剩下的控件,如果你加了第三個控件,weight是1,then 第一個控件(weight=2)現在占總空間的1/2.而剩余的兩個控件各占1/4.
The default weight for all views is 0, so if you specify any weight value greater than 0 to only one view, then that view fills whatever space remains after all views are given the space they require.
所有view的默認weight是0,所以如果你只指定任何比0大的weight值給一個view,那麼當所有其他的view被給足他們應該有的空間空,這個view將填充剩余的空間。
Make the Input Box Fill in the Screen Width
In activity_main.xml, modify the so that the attributes look like this:
讓Input Box填充屏幕寬度
Setting the width to zero (0dp) improves layout performance because using “wrap_content” as the width requires the system to calculate a width that is ultimately irrelevant because the weight value requires another width calculation to fill the remaining space.
設置width熟悉為0改變layout的行為,因為使用 “wrap_content”作為width需要系統計算一個控件的寬度是根本不著邊際的因為weight屬性需要另一個寬度計算來填充剩余空間。(如果想使用weight屬性,先將width置0,個人理解)
========================================================================
Starting Another Activity
Respond to the Send Button
Send按鈕的響應
1 In the file res/layout/activity_main.xml, add the android:onClick
attribute to the < Button > element as shown below:
(增加android:onClick=”sendMessage”)
This attribute tells the system to call the sendMessage() method in your activity whenever a user clicks on the button.
該屬性告訴系統當用戶點擊了button調用在Activity裡的sendMessage方法
2 In the file java/com.example.myfirstapp/MainActivity.java, add the
sendMessage() method stub as shown below:
public class MainActivity extends AppCompatActivity {

@Override

protected void onCreate(Bundle savedInstanceState) {

super.onCreate(savedInstanceState);

setContentView(R.layout.activity_main);

}

/** Called when the user clicks the Send button */

public void sendMessage(View view) {

// Do something in response to button

}

}

(

增加了/* Called when the user clicks the Send button /

public void sendMessage(View view) {

// Do something in response to button

}

)
In order for the system to match this method to the method name given to android:onClick, the signature must be exactly as shown. Specifically, the method must:
為了讓系統匹配android:onClick的方法名,簽名必須精確如下所示。尤其是,這個方法必須:(是public的&&空retrun值&&僅有一個View的參數,這個view就是點擊的view)
Be public Have a void return value Have a View as the only parameter (this will be the View that was
clicked)
Next, you’ll fill in this method to read the contents of the text field and deliver that text to another activity.
Build an Intent
構建一個Intent(意圖)
An Intent is an object that provides runtime binding between separate components (such as two activities). The Intent represents an app’s “intent to do something.” You can use intents for a wide variety of tasks, but in this lesson, your intent starts another activity.
Intent是一個對象,在兩個完全分離的組件之間提供運行時綁定(比如兩個Activity)這個Intent代表一個app想要做什麼。你可以使用Intent去完成各種各樣的任務,但在本次課程,你的Intent啟動另一個Activity
In MainActivity.java, add the code shown below to sendMessage():
sendMessage方法加一些代碼:
public class MainActivity extends AppCompatActivity {

public final static String EXTRA_MESSAGE = "com.example.myfirstapp.MESSAGE";

@Override

protected void onCreate(Bundle savedInstanceState) {

super.onCreate(savedInstanceState);

setContentView(R.layout.activity_main);

}

/** Called when the user clicks the Send button */

public void sendMessage(View view) {

Intent intent = new Intent(this, DisplayMessageActivity.class);

EditText editText = (EditText) findViewById(R.id.edit_message);

String message = editText.getText().toString();

intent.putExtra(EXTRA_MESSAGE, message);

startActivity(intent);

}

}
Note: Android Studio will display Cannot resolve symbol errors because the code references classes like Intent and EditText that have not been imported. To import these classes, you can either 1) use Android Studio’s “import class” functionality by pressing Alt + Enter (Option + Return on Mac) or 2) manually add import statements at the top of the file.
Note:Android Studio將不會解決由於沒有導入相關類(如Intent EditText)的包而引起的符號錯誤。需要導入這些包,你可以1使用使用Android studio導包功能快捷鍵Alt+Enter (Option + Return on Mac) 或者2手動導包
There’s a lot going on in sendMessage(), so let’s explain what’s going on.
解釋下sendMessage做了什麼
The Intent constructor takes two parameters:
Intent的構造方法有兩個參數
A Context as its first parameter (this is used because the Activity class is a subclass of Context)
一個Context(上下文)作為第一個參數(這個被使用是因為Activity類是Context的子類)
The Class of the app component to which the system should deliver the Intent (in this case, the activity that should be started).
系統要開啟的app組件的類名(在目前的情況,是要開啟的Activity)
Note: The reference to DisplayMessageActivity will raise an error in Android Studio because the class doesn’t exist yet. Ignore the error for now; you’ll create the class soon.
Note:指向DisplayMessageActivity的指針將會發出一個error,因為類還沒有存在,先忽略它,等會會創建的。
The putExtra() method adds the EditText’s value to the intent. An Intent can carry data types as key-value pairs called extras. Your key is a public constant EXTRA_MESSAGE because the next activity uses the key to retrive the text value. It’s a good practice to define keys for intent extras using your app’s package name as a prefix. This ensures the keys are unique, in case your app interacts with other apps.
putExtra()方法將EditText的值加到了intent裡面,一個Intent可以攜帶叫做extras的鍵值對形式的數據。你的Key是一個public常量EXTRA_MESSAGE ,下一個Activity將根據這個key獲取text的值。用你的app包名作為Intent extras的前綴是一個很好的習慣。在你的應用程序與其他應用程序交互的情況下,這確保keys是惟一的。
The startActivity() method starts an instance of the DisplayMessageActivity specified by the Intent. Now you need to create the class.
startActivity()方法開啟了一個DisplayMessageActivity 類的實例,現在創建這個類
Create the Second Activity
In the Project window, right-click the app folder and select New >
Activity > Empty Activity. In the Configure Activity window, enter “DisplayMessageActivity” for
Activity Name and click Finish
Android Studio automatically does three things:
Creates the class DisplayMessageActivity.java with an implementation of the required onCreate() method. Creates the corresponding layout file activity_display_message.xml Adds the required element in AndroidManifest.xml.
If you run the app and click the Send button on the first activity, the second activity starts but is empty. This is because the second activity uses the default empty layout provided by the template
Display the Message
Now you will modify the second activity to display the message that was passed by the first activity.
下面定義第二個Activity顯示第一個Activity傳過來的message
In DisplayMessageActivity.java, add the following code to the onCreate() method:
@Override

protected void onCreate(Bundle savedInstanceState) {

super.onCreate(savedInstanceState);

setContentView(R.layout.activity_display_message);

Intent intent = getIntent();

String message = intent.getStringExtra(MainActivity.EXTRA_MESSAGE);

TextView textView = new TextView(this);

textView.setTextSize(40);

textView.setText(message);

ViewGroup layout = (ViewGroup) findViewById(R.id.activity_display_message);

layout.addView(textView);

}
Press Alt + Enter (option + return on Mac) to import missing classes.
There’s a lot going on here, so let’s explain:
按Alt+Enter(Mac 上option + return)導包,解釋下:
The call getIntent() grabs the intent that started the activity.Every Activity is invoked by an Intent, regardless of how the user navigated there. The call getStringExtra() retrieves the data from the first activity. You programmatically create a TextView and set its size and message. You add the TextView to the layout identified by R.id.activity_display_message. You cast the layout to ViewGroup because it is the superclass of all layouts and contains the addView() method.
1.getIntent方法與開啟該Activity的Intent掛鉤。不管用戶如何操作,每個Activity都是有一個Intent開啟的。getStringExtra方法取得了從第一個Activity傳遞來的數據
2.以編碼方式動態添加TextView並設置大小和顯示內容
3.將這個TextView添加到一個id是activity_display_message的layout布局。你把layout轉型為ViewGroup,因為ViewGroup 是所有layout布局的父類包含addView() 方法。
Note: The XML layout generated by previous versions of Android Studio might not include the android:id attribute. The call findViewById() will fail if the layout does not have the android:id attribute. If this is the case, open activity_display_message.xml and add the attribute android:id=”@+id/activity_display_message” to the layout element.
Note:由之前的Android Studio生成的XML文件不包含Android:id屬性,findviewbyid將會報錯因為找不到id是activity_display_message的布局,在這種情況,需要手動在activity_display_message.xml添加android:id=”@+id/activity_display_message”到layout元素裡。
You can now run the app. When it opens, type a message in the text field, and click Send. The second activity replaces the first one on the screen, showing the message you entered in the first activity.
你現在可以運行app。當他打開,在textview裡面輸一些東西,點擊發送。第二個Activity代替第一個Activity顯示出來,並展示第一個activity的message
That’s it, you’ve built your first Android app!
第一個Android app完工!
 Android源代碼倉庫及其管理工具Repo分析
軟件工程由於需要不斷迭代開發,因此要對源代碼進行版本管理。Android源代碼工程(AOSP)也不例外,它采用Git來進行版本管理。AOSP作為一個大型開放源代碼工程,由
 Volley,小並發網絡請求的好幫手
不得不說,當不了解一件事情的時候,就會像當然的認為,其很神秘。但是當真正的接觸到了這些神秘的item,就不會有這種感覺了。作為一個android開發新手的我,剛接觸到了V
 Android根據屏幕寬度,按比例縮放圖片
ImageView有scaleType屬性可以縮放圖片,讓圖片鋪滿屏幕寬度,但是會出現壓縮或裁剪的情況。ImageView的scaleType的屬性分別是ma
 Android 自定義通用的loadingview實現代碼
功能1、顯示加載視圖,加載失敗的時候顯示加載失敗視圖,數據為空時顯示數據為空視圖,支持為失敗視圖設置點擊事件重新加載數據。2、支持個性化設置,自定義設置 加載、失敗、空數