編輯:關於Android編程
前言
在Android應用中,經常有場景會需要使用到設備上存儲的圖片,而直接從路徑中獲取無疑是非常不便利的。所以一般推薦調用系統的Gallery應用,選擇圖片,然後使用它。本篇博客將講解如何在Android中通過系統Gallery獲取圖片。
Gallery應用
Android原生內置了很多App,而Gallery為圖庫,用於操作設備上的圖片,它會在開機的時候主動掃描設備上存儲的圖片,並可以使用Gallery操作它們。既然要使用Gallery,那麼先看看它的AndroidManifest.xml清單文件。
復制代碼 代碼如下:
<activity android:name="com.android.camera.ImageGallery"
android:label="@string/gallery_label"
android:configChanges="orientation|keyboardHidden"
android:icon="@drawable/ic_launcher_gallery">
<intent-filter>
<action android:name="android.intent.action.MAIN" />
<category android:name="android.intent.category.DEFAULT" />
</intent-filter>
<intent-filter>
<action android:name="android.intent.action.VIEW" />
<category android:name="android.intent.category.DEFAULT" />
<data android:mimeType="vnd.android.cursor.dir/image" />
</intent-filter>
<intent-filter>
<action android:name="android.intent.action.VIEW" />
<category android:name="android.intent.category.DEFAULT" />
<data android:mimeType="vnd.android.cursor.dir/video" />
</intent-filter>
<intent-filter>
<action android:name="android.intent.action.GET_CONTENT" />
<category android:name="android.intent.category.OPENABLE" />
<data android:mimeType="vnd.android.cursor.dir/image" />
</intent-filter>
<intent-filter>
<action android:name="android.intent.action.GET_CONTENT" />
<category android:name="android.intent.category.OPENABLE" />
<category android:name="android.intent.category.DEFAULT" />
<data android:mimeType="image/*" />
<data android:mimeType="video/*" />
</intent-filter>
<intent-filter>
<action android:name="android.intent.action.PICK" />
<category android:name="android.intent.category.DEFAULT" />
<data android:mimeType="image/*" />
<data android:mimeType="video/*" />
</intent-filter>
<intent-filter>
<action android:name="android.intent.action.PICK" />
<category android:name="android.intent.category.DEFAULT" />
<data android:mimeType="vnd.android.cursor.dir/image" />
</intent-filter>
</activity>
上面是Gallery的AndroidManifest.xml文件中的部分代碼,展示了ImageGallery,從眾多Intent-filter中可以看出,選取圖片應該使用"android.intent.action.PICK",它有兩個miniType,"image/*"是用來獲取圖片的、"video/*"是用來獲取視頻的。Android中眾多Action的字符串其實被封裝在Intent類中,android.intent.action.PICK也不例外,它是Intent.ACTION_PICK。
既然知道了啟動Gallery的Action,那麼再看看ImageGallery.java的源碼,找找其中選中圖片後的返回值。
復制代碼 代碼如下:
private void launchCropperOrFinish(IImage img) {
Bundle myExtras = getIntent().getExtras();
long size = MenuHelper.getImageFileSize(img);
if (size < 0) {
// Return if the image file is not available.
return;
}
if (size > mVideoSizeLimit) {
DialogInterface.OnClickListener buttonListener =
new DialogInterface.OnClickListener() {
public void onClick(DialogInterface dialog, int which) {
dialog.dismiss();
}
};
new AlertDialog.Builder(this)
.setIcon(android.R.drawable.ic_dialog_info)
.setTitle(R.string.file_info_title)
.setMessage(R.string.video_exceed_mms_limit)
.setNeutralButton(R.string.details_ok, buttonListener)
.show();
return;
}
String cropValue = myExtras != null ? myExtras.getString("crop") : null;
if (cropValue != null) {
Bundle newExtras = new Bundle();
if (cropValue.equals("circle")) {
newExtras.putString("circleCrop", "true");
}
Intent cropIntent = new Intent();
cropIntent.setData(img.fullSizeImageUri());
cropIntent.setClass(this, CropImage.class);
cropIntent.putExtras(newExtras);
/* pass through any extras that were passed in */
cropIntent.putExtras(myExtras);
startActivityForResult(cropIntent, CROP_MSG);
} else {
Intent result = new Intent(null, img.fullSizeImageUri());
if (myExtras != null && myExtras.getBoolean("return-data")) {
// The size of a transaction should be below 100K.
Bitmap bitmap = img.fullSizeBitmap(
IImage.UNCONSTRAINED, 100 * 1024);
if (bitmap != null) {
result.putExtra("data", bitmap);
}
}
setResult(RESULT_OK, result);
finish();
}
}
以上的ImageGallery.java的部分源碼,從setResult()方法可以看出,它返回的Intent包含了選中圖片的Uri,它是一個content://開頭的內容提供者,並且如果傳遞過去的Intent的Extra中,包含一個name為"return-data"並且值為true的時候,還會往Extra中寫入name為"data"的圖片縮略圖。
Gallery獲取圖片Demo
既然已經知道了啟動Gallery的Action,和它如何返回選中的數據,那麼接下來通過一個簡單的Demo來演示一下如何從系統Gallery中獲取圖片,並把獲取到的圖片展示到界面的一個ImageView中。
復制代碼 代碼如下:
package cn.bgxt.sysgallerydemo;
import android.net.Uri;
import android.os.Bundle;
import android.util.Log;
import android.view.View;
import android.view.View.OnClickListener;
import android.widget.Button;
import android.widget.ImageView;
import android.app.Activity;
import android.content.Intent;
public class MainActivity extends Activity {
private Button btn_getImage;
private ImageView iv_image;
private final static String TAG = "main";
@Override
protected void onCreate(Bundle savedInstanceState) {
super.onCreate(savedInstanceState);
setContentView(R.layout.activity_main);
btn_getImage = (Button) findViewById(R.id.btn_getImage);
iv_image = (ImageView) findViewById(R.id.iv_image);
btn_getImage.setOnClickListener(getImage);
}
private View.OnClickListener getImage = new OnClickListener() {
@Override
public void onClick(View v) {
// 設定action和miniType
Intent intent = new Intent();
intent.setAction(Intent.ACTION_PICK);
intent.setType("image/*");
// 以需要返回值的模式開啟一個Activity
startActivityForResult(intent, 0);
}
};
@Override
protected void onActivityResult(int requestCode, int resultCode, Intent data) {
// 如果獲取成功,resultCode為-1
Log.i(TAG, "resultCode:" + resultCode);
if (requestCode == 0 && resultCode == -1) {
// 獲取原圖的Uri,它是一個內容提供者
Uri uri = data.getData();
iv_image.setImageURI(uri);
}
super.onActivityResult(requestCode, resultCode, data);
}
}
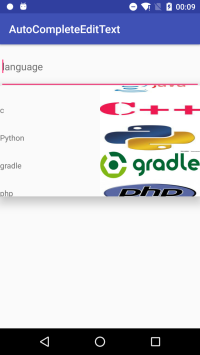
效果展示:

總結
本篇博客到這裡就基本上講解了如何在Android下調用系統Gallery獲取圖片,其實功能實現很簡單,主要是要注意Action和miniType不要寫錯了,並且返回值是一個Uri。雖然現在越來越多需要用到圖片的商業應用,都在自己開發獲取設備圖片的功能,但是使用系統自帶的Gallery來獲取不失為一種快速實現功能的解決辦法。為了方便起見,系統的Gallery源碼,也會一並打包放到源碼中,有需要的可以下載來看看。
 Android自定義View之繼承TextView繪制背景
本文實例為大家分享了TextView繪制背景的方法,供大家參考,具體內容如下效果:實現流程:1.初始化:對畫筆進行設置mPaintIn = new Paint();mPa
 android動畫介紹--Animation 實現loading動畫效果
Animation的使用方法並不難。這裡簡單的介紹一下使用方法。先看效果圖:效果還是不錯的吧。 下面來看看使用方法。動畫效果是通過Animation來實現的,一共有四種,
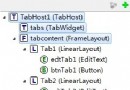 Android入門之TabHost與TabWidget實例解析
本文實例介紹的是Android的Tab控件,Tab控件可以達到分頁的效果,讓一個屏幕的內容盡量豐富,當然也會增加開發的復雜程度,在有必要的時候再使用。Android的Ta
 Java的進化? Kotlin初探與集成Android項目
介紹:Statically typed programming language for the JVM, Android and the browser. 100% i