編輯:關於Android編程
本文實例講述了Android編程獲取圖片和視頻縮略圖的方法。分享給大家供大家參考,具體如下:
從Android 2.2開始系統新增了一個縮略圖ThumbnailUtils類,位於framework的android.media.ThumbnailUtils位 置,可以幫助我們從mediaprovider中獲取系統中的視頻或圖片文件的縮略圖,該類提供了三種靜態方法可以直接調用獲取。
1. createVideoThumbnail
static Bitmap createVideoThumbnail(String filePath, int kind)
//獲取視頻文件的縮略圖
//第一個參數為視頻文件的位置,比如/sdcard/android123.3gp,
//第二個參數可以為MINI_KIND或 MICRO_KIND最終和分辨率有關
2. extractThumbnail
static Bitmap extractThumbnail(Bitmap source, int width, int height, int options)
//直接對Bitmap進行縮略操作
//最後一個參數定義為OPTIONS_RECYCLE_INPUT ,來回收資源
3. extractThumbnail
static Bitmap extractThumbnail(Bitmap source, int width, int height)
// 這個和上面的方法一樣,無options選項
獲取手機裡視頻縮略圖:
public static Bitmap getVideoThumbnail(ContentResolver cr, Uri uri) {
  Bitmap bitmap = null;
  BitmapFactory.Options options = new BitmapFactory.Options();
  options.inDither = false;
  options.inPreferredConfig = Bitmap.Config.ARGB_8888;
  Cursor cursor = cr.query(uri,new String[] { MediaStore.Video.Media._ID }, null, null, null);
  if (cursor == null || cursor.getCount() == 0) {
 return null;
  }
  cursor.moveToFirst();
  String videoId = cursor.getString(cursor.getColumnIndex(MediaStore.Video.Media._ID)); //image id in image table.s
  if (videoId == null) {
  return null;
  }
  cursor.close();
  long videoIdLong = Long.parseLong(videoId);
  bitmap = MediaStore.Video.Thumbnails.getThumbnail(cr, videoIdLong,Images.Thumbnails.MICRO_KIND, options);
  return bitmap;
}
獲得指定目錄sdcard裡的視頻縮略圖:
import java.io.File;
import android.app.Activity;
import android.graphics.Bitmap;
import android.graphics.BitmapFactory;
import android.media.ThumbnailUtils;
import android.os.Bundle;
import android.os.Environment;
import android.provider.MediaStore;
import android.widget.ImageView;
/**
* 獲取圖片和視頻的縮略圖
* 這兩個方法必須在2.2及以上版本使用,因為其中使用了ThumbnailUtils這個類
*/
public class AndroidTestActivity extends Activity {
   private ImageView imageThumbnail;
   private ImageView videoThumbnail;
   /** Called when the activity is first created. */
   @Override
   public void onCreate(Bundle savedInstanceState) {
   super.onCreate(savedInstanceState);
   setContentView(R.layout.main);
   imageThumbnail = (ImageView) findViewById(R.id.image_thumbnail);
   videoThumbnail = (ImageView) findViewById(R.id.video_thumbnail);
   String imagePath = Environment.getExternalStorageDirectory()
    .getAbsolutePath()
    + File.separator
    + "photo"
    + File.separator
    + "yexuan.jpg";
   String videoPath = Environment.getExternalStorageDirectory()
    .getAbsolutePath()
    + File.separator
    + "video"
    + File.separator
    + "醋點燈.avi";
   imageThumbnail.setImageBitmap(getImageThumbnail(imagePath, 60, 60));
   videoThumbnail.setImageBitmap(getVideoThumbnail(videoPath, 60, 60,
    MediaStore.Images.Thumbnails.MICRO_KIND));
   }
   /**
   * 根據指定的圖像路徑和大小來獲取縮略圖
   * 此方法有兩點好處:
   *   1. 使用較小的內存空間,第一次獲取的bitmap實際上為null,只是為了讀取寬度和高度,
   *    第二次讀取的bitmap是根據比例壓縮過的圖像,第三次讀取的bitmap是所要的縮略圖。
   *   2. 縮略圖對於原圖像來講沒有拉伸,這裡使用了2.2版本的新工具ThumbnailUtils,使
   *    用這個工具生成的圖像不會被拉伸。
   * @param imagePath 圖像的路徑
   * @param width 指定輸出圖像的寬度
   * @param height 指定輸出圖像的高度
   * @return 生成的縮略圖
   */
   private Bitmap getImageThumbnail(String imagePath, int width, int height) {
   Bitmap bitmap = null;
   BitmapFactory.Options options = new BitmapFactory.Options();
   options.inJustDecodeBounds = true;
   // 獲取這個圖片的寬和高,注意此處的bitmap為null
   bitmap = BitmapFactory.decodeFile(imagePath, options);
   options.inJustDecodeBounds = false; // 設為 false
   // 計算縮放比
   int h = options.outHeight;
   int w = options.outWidth;
   int beWidth = w / width;
   int beHeight = h / height;
   int be = 1;
   if (beWidth < beHeight) {
    be = beWidth;
   } else {
    be = beHeight;
   }
   if (be <= 0) {
    be = 1;
   }
   options.inSampleSize = be;
   // 重新讀入圖片,讀取縮放後的bitmap,注意這次要把options.inJustDecodeBounds 設為 false
   bitmap = BitmapFactory.decodeFile(imagePath, options);
   // 利用ThumbnailUtils來創建縮略圖,這裡要指定要縮放哪個Bitmap對象
   bitmap = ThumbnailUtils.extractThumbnail(bitmap, width, height,
    ThumbnailUtils.OPTIONS_RECYCLE_INPUT);
   return bitmap;
   }
   /**
   * 獲取視頻的縮略圖
   * 先通過ThumbnailUtils來創建一個視頻的縮略圖,然後再利用ThumbnailUtils來生成指定大小的縮略圖。
   * 如果想要的縮略圖的寬和高都小於MICRO_KIND,則類型要使用MICRO_KIND作為kind的值,這樣會節省內存。
   * @param videoPath 視頻的路徑
   * @param width 指定輸出視頻縮略圖的寬度
   * @param height 指定輸出視頻縮略圖的高度度
   * @param kind 參照MediaStore.Images.Thumbnails類中的常量MINI_KIND和MICRO_KIND。
   *      其中,MINI_KIND: 512 x 384,MICRO_KIND: 96 x 96
   * @return 指定大小的視頻縮略圖
   */
   private Bitmap getVideoThumbnail(String videoPath, int width, int height,
    int kind) {
   Bitmap bitmap = null;
   // 獲取視頻的縮略圖
   bitmap = ThumbnailUtils.createVideoThumbnail(videoPath, kind);
   System.out.println("w"+bitmap.getWidth());
   System.out.println("h"+bitmap.getHeight());
   bitmap = ThumbnailUtils.extractThumbnail(bitmap, width, height,
    ThumbnailUtils.OPTIONS_RECYCLE_INPUT);
   return bitmap;
   }
}
布局:
<?xml version="1.0" encoding="utf-8"?>
<LinearLayout xmlns:android="http://schemas.android.com/apk/res/android"
    android:layout_width="fill_parent"
    android:layout_height="fill_parent"
    android:orientation="vertical" >
    <TextView
      android:layout_width="fill_parent"
      android:layout_height="wrap_content"
      android:text="圖片縮略圖" />
    <ImageView
      android:id="@+id/image_thumbnail"
      android:layout_width="wrap_content"
      android:layout_height="wrap_content" />
    <TextView
      android:layout_width="fill_parent"
      android:layout_height="wrap_content"
      android:text="視頻縮略圖" />
    <ImageView
      android:id="@+id/video_thumbnail"
      android:layout_width="wrap_content"
      android:layout_height="wrap_content" />
</LinearLayout>
更多關於Android相關內容感興趣的讀者可查看本站專題:《Android圖形與圖像處理技巧總結》、《Android開發入門與進階教程》、《Android資源操作技巧匯總》、《Android視圖View技巧總結》及《Android控件用法總結》
希望本文所述對大家Android程序設計有所幫助。
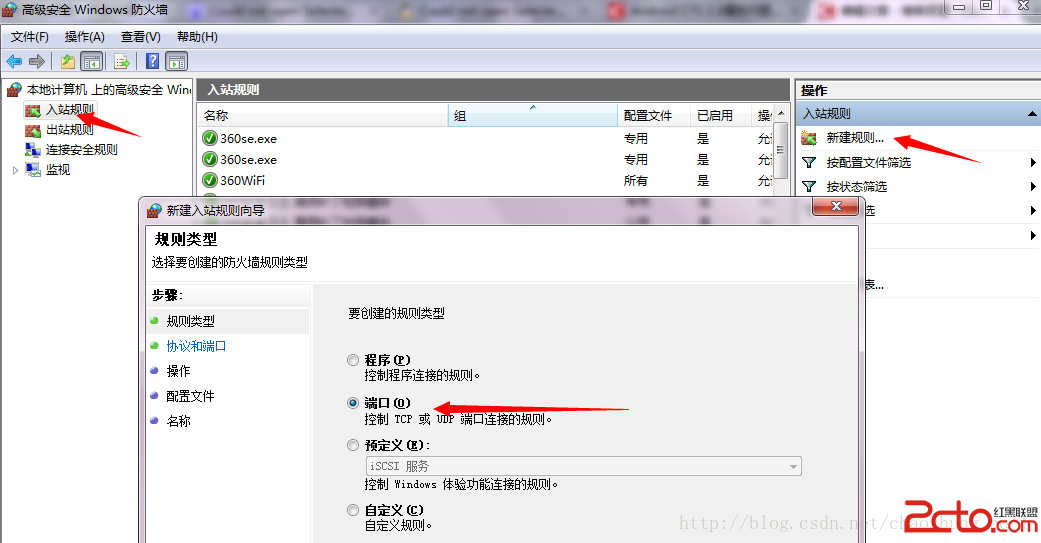
 Android中Permission權限機制的具體使用
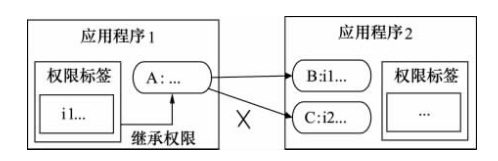
由上篇Android Permission權限機制引子,我們知道Android 通過在每台設備上實施了基於權限的安全策略來處理安全問題,采用權限來限制安裝應用程序的能力。
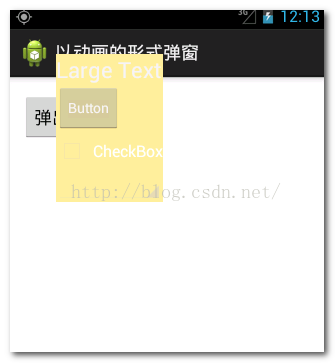 Android初級教程以動畫的形式彈出窗體
這一篇集合動畫知識和彈出窗體知識,綜合起來以動畫的形式彈出窗體。動畫的知識前幾篇已經做過詳細的介紹,可翻閱前面寫的有關動畫博文。先簡單介紹一下彈出窗體效果的方法:首先,需
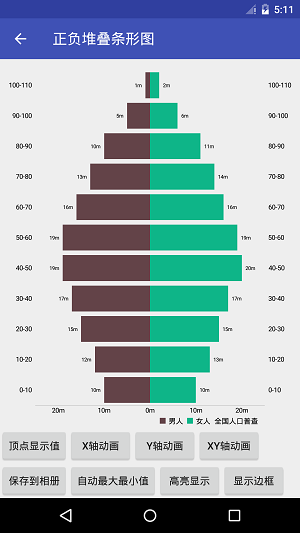 Android圖表庫MPAndroidChart(十二)——正負堆疊條形圖
Android圖表庫MPAndroidChart(十二)——正負堆疊條形圖。接上篇,今天要說的,和上篇的類似,只是方向是有相反的兩面,我們先看下效
 Android開發過程中遇到的問題集合(—)
1. Re-installation failed due to different application signatures. 將原來的軟件包刪除掉,然後重新安裝一