編輯:關於Android編程
animation有四種動畫類型:分別為alpha(透明的漸變)、rotate(旋轉)、scale(尺寸伸縮)、translate(移動),二實現的分發有兩種,一種是javaCode,另外一種是XML,而我今天要說的是XML實現的方法,個人感覺javaCode的實現方法比xml要簡單,所以有需要的可以自己去找找資料看看。
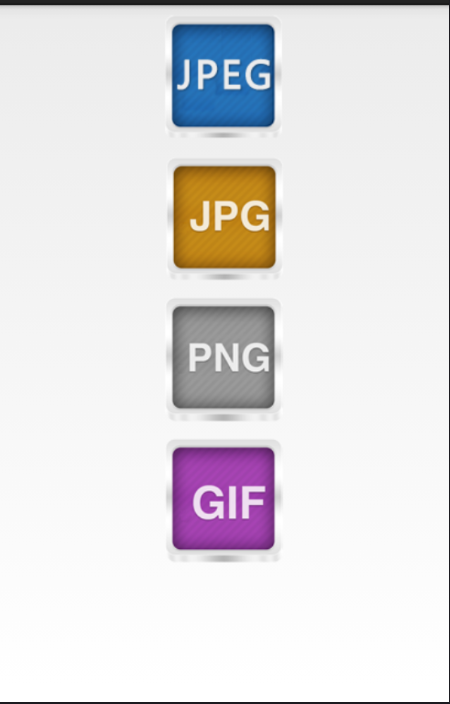
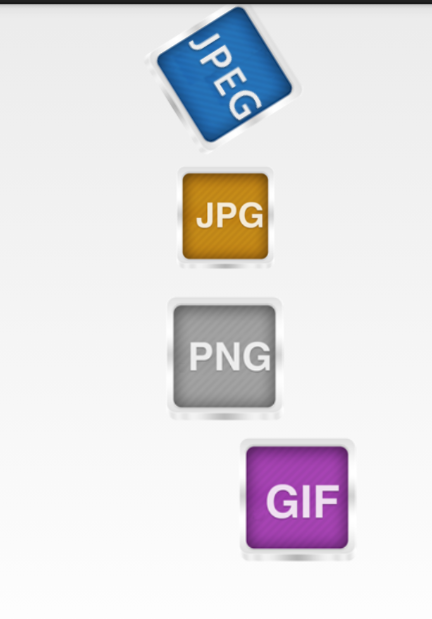
先給大家展示下效果圖,如果大家感覺還不錯,請繼續往下閱讀。
下面是我的四個xml文件,分別代表這四種動畫類型。
alpha.xml
COde:
<?xml version="1.0" encoding="UTF-8"?>
<set xmlns:android="http://schemas.android.com/apk/res/android"
android:interpolator="@android:anim/accelerate_interpolator">
<!-- 漸變透明的動畫效果 -->
<!--fromAlpha 動畫起始透明的 1.0完全不透明
toAlpha 動畫結束時透明的 0.0完全透明
startOffset 設置啟動時間
duration 屬性動畫持續時間
-->
<alpha
android:fromAlpha="1.0"
android:toAlpha="0.0"
android:startOffset="500"
android:duration="5000"
/>
</set>
rotate.xml
<?xml version="1.0" encoding="UTF-8"?>
<set xmlns:android="http://schemas.android.com/apk/res/android"
android:interpolator="@android:anim/accelerate_interpolator">
<!-- 畫面轉移旋轉動畫效果 -->
<!--
fromDegrees開始角度
toDegrees結束角度
pivotX設置旋轉時的X軸坐標
-->
<rotate
android:fromDegrees="0"
android:toDegrees="+360"
android:pivotX="50%"
android:pivotY="50%"
android:duration="5000"
/>
</set>
scale.xml
<?xml version="1.0" encoding="UTF-8"?>
<set xmlns:android="http://schemas.android.com/apk/res/android"
android:interpolator="@android:anim/accelerate_interpolator">
<!-- 漸變尺寸伸縮動畫效果 -->
<!--
fromXScale 起始x軸坐標
toXScale 止x軸坐標
fromYScale 起始y軸坐標
toYScale 止y軸坐標
pivotX 設置旋轉時的X軸坐標
pivotY 設置旋轉時的Y軸坐標
duration 持續時間
-->
<scale
android:fromXScale="1.0"
android:toXScale="0.0"
android:fromYScale="1.0"
android:toYScale="0.0"
android:pivotX="50%"
android:pivotY="50%"
android:duration="5000"
/>
</set>
translate.xml
<?xml version="1.0" encoding="UTF-8"?>
<set xmlns:android="http://schemas.android.com/apk/res/android"
android:interpolator="@android:anim/accelerate_interpolator">
<!-- 畫面轉移位置移動動畫效果 -->
<translate
android:fromXDelta="0%"
android:toXDelta="100%"
android:fromYDelta="0%"
android:toYDelta="0%"
android:duration="5000"
/>
</set>
下面是主界面xml的布局
<?xml version="1.0" encoding="utf-8"?>
<LinearLayout xmlns:android="http://schemas.android.com/apk/res/android"
android:layout_width="match_parent"
android:layout_height="match_parent"
android:orientation="vertical" >
<ImageView
android:id="@+id/image1"
android:layout_width="match_parent"
android:layout_height="200px"
/>
<ImageView
android:id="@+id/image2"
android:layout_width="match_parent"
android:layout_height="200px"
/>
<ImageView
android:id="@+id/image3"
android:layout_width="match_parent"
android:layout_height="200px"
/>
<ImageView
android:id="@+id/image4"
android:layout_width="match_parent"
android:layout_height="200px"
/>
</LinearLayout>
然後是Activity代碼
public class AnimationDemo extends Activity{
private Animation animation,animation1,animation2,animation3;
private ImageView image1,image2,image3,image4;
@Override
protected void onCreate(Bundle savedInstanceState) {
// TODO Auto-generated method stub
super.onCreate(savedInstanceState);
setContentView(R.layout.animation);
initView();
}
public void initView()
{
animation=AnimationUtils.loadAnimation(AnimationDemo.this, R.anim.rotate);
animation1=AnimationUtils.loadAnimation(AnimationDemo.this, R.anim.scale);
animation2=AnimationUtils.loadAnimation(AnimationDemo.this, R.anim.alpha);
animation3=AnimationUtils.loadAnimation(AnimationDemo.this, R.anim.translate);
image1=(ImageView)findViewById(R.id.image1);
image1.setImageResource(R.drawable.jpeg);
image2=(ImageView)findViewById(R.id.image2);
image2.setImageResource(R.drawable.jpg);
image3=(ImageView)findViewById(R.id.image3);
image3.setImageResource(R.drawable.png);
image4=(ImageView)findViewById(R.id.image4);
image4.setImageResource(R.drawable.gif);
image1.startAnimation(animation);
image2.startAnimation(animation1);
image3.startAnimation(animation2);
image4.startAnimation(animation3);
}
}
好了,就這樣就是先了四種動畫效果,另外還有一個知識點,是動畫裡面的速率問題,有需要的可以去上網百度看看吧。
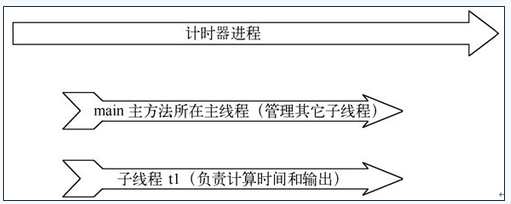 Android Studio--從Java線程到安卓線程
簡述:相信很多學安卓的都是從java入門之後開始進行安卓的學習,而當我們面臨安卓線程的書寫的時候,發現安卓線程並不是我們想象中使用java的線程寫法就可以。java線程的
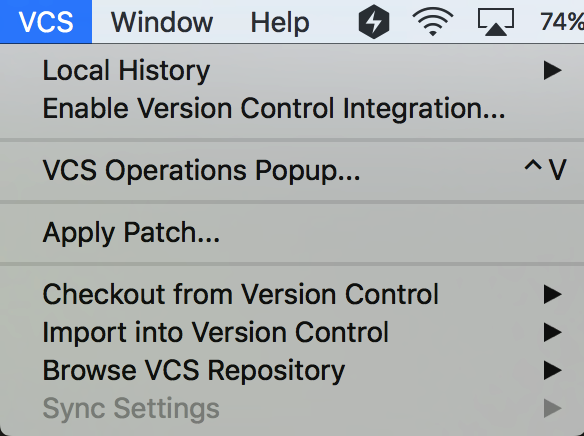 AndroidStudio 控制Git
版本控制是項目開發過程中必不可少的部分,不管是個人還是團隊,靈活的使用版本控制將會使項目開發變得更加輕松。Android Studio集成了版本控制系統,目前支持CVS、
 小米手機usb調試在哪裡 小米5怎麼打開usb調試開關
1.打開手機,點擊程序列表中的“設置”按鈕 2.然後在設置界面中,切換至“全部設置”選項卡,點擊&ldqu
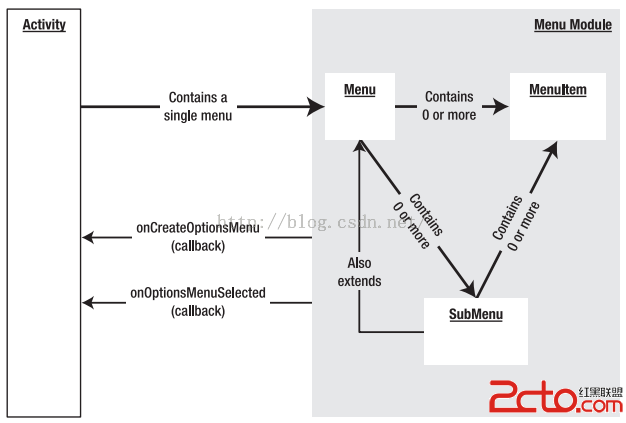 Android開發之Menu:OptionMenu(選項菜單)、ContextMenu(上下文菜單)、SubMenu(子菜單)
菜單的概念,現在已經很普及了。 Windows系統、Mac、桌面版Linux、Java Swing等,都有可視化菜單。 一、Android平台3種菜單 選項菜單(Op