編輯:關於Android編程
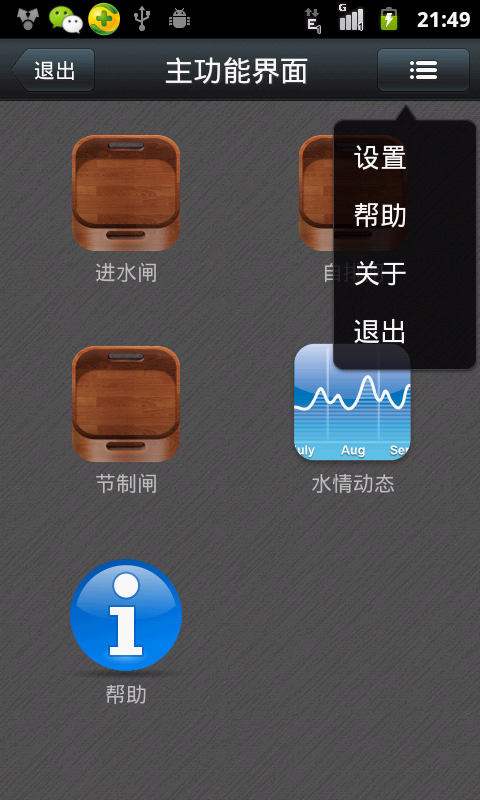
這是個不錯的教程,自己學完了之後就拿出來分享了,本來想一個帖子寫完,但是發現這樣對自己寫博客的效率有點出入,為了讓大家看的舒服點,所以分開來寫,我們先開看下百度壁紙的客戶端是什麼樣子的
我們先來寫個主頁的框架,我們新建一個項目——BaiDuWallPaper
寫個Item
layout_tab_item
<?xml version="1.0" encoding="utf-8"?>
<RelativeLayout xmlns:android="http://schemas.android.com/apk/res/android"
 android:layout_width="match_parent"
 android:layout_height="match_parent">

 <RelativeLayout
 android:layout_width="match_parent"
 android:layout_height="wrap_content"
 android:layout_centerInParent="true">

 <ImageView
 android:id="@+id/tabImg"
 android:layout_width="wrap_content"
 android:layout_height="wrap_content"
 android:layout_centerHorizontal="true" />

 <TextView
 android:id="@+id/tabText"
 android:layout_width="wrap_content"
 android:layout_height="wrap_content"
 android:layout_below="@+id/tabImg"
 android:layout_centerHorizontal="true"
 android:text="@string/app_name"
 android:textColor="@android:color/white"
 android:textSize="16sp" />


 </RelativeLayout>

</RelativeLayout>
然後我們再寫個布局
<?xml version="1.0" encoding="utf-8"?>
<LinearLayout xmlns:android="http://schemas.android.com/apk/res/android"
 android:layout_width="match_parent"
 android:layout_height="70dp"
 android:orientation="horizontal">

 <include
 android:id="@+id/homeLayout"
 layout="@layout/layout_tab_item"
 android:layout_width="match_parent"
 android:layout_height="match_parent"
 android:layout_weight="1" />

 <include
 android:id="@+id/selectLayout"
 layout="@layout/layout_tab_item"
 android:layout_width="match_parent"
 android:layout_height="match_parent"
 android:layout_weight="1" />

 <include
 android:id="@+id/searchLayout"
 layout="@layout/layout_tab_item"
 android:layout_width="match_parent"
 android:layout_height="match_parent"
 android:layout_weight="1" />

 <include
 android:id="@+id/locationLayout"
 layout="@layout/layout_tab_item"
 android:layout_width="match_parent"
 android:layout_height="match_parent"
 android:layout_weight="1" />

 <include
 android:id="@+id/settingLayout"
 layout="@layout/layout_tab_item"
 android:layout_width="match_parent"
 android:layout_height="match_parent"
 android:layout_weight="1" />


</LinearLayout>
這樣我們就可以自定義組合控件了
MyBottomLayout
package com.lgl.baiduwallpaper.view;

import android.content.Context;
import android.graphics.Color;
import android.util.AttributeSet;
import android.view.LayoutInflater;
import android.view.View;
import android.widget.LinearLayout;
import android.widget.RelativeLayout;
import android.widget.TextView;

import com.lgl.baiduwallpaper.R;

/**
 * 底部布局
 * Created by lgl on 16/3/31.
 */
public class MyBottomLayout extends LinearLayout {

 //跟布局是RelativeLayout
 private RelativeLayout homeLayout, selectLayout, searchLayout, locationLayout, settingLayout;
 //布局加載
 private LayoutInflater inflater;

 //構造方法
 public MyBottomLayout(Context context, AttributeSet attrs) {
 super(context, attrs);

 initView();
 }

 /**
 * 初始化
 */
 private void initView() {
 inflater = LayoutInflater.from(getContext());
 View view = inflater.inflate(R.layout.layout_bottom, this);
 findView(view);
 initData();
 setonClick();
 }

 /**
 * 初始化數據
 */
 private void initData() {
 homeLayout.findViewById(R.id.tabImg).setBackgroundResource(R.mipmap.image_tabbar_button_home_down);
 TextView tvHome = (TextView) homeLayout.findViewById(R.id.tabText);
 tvHome.setText("首頁");
 tvHome.setTextColor(Color.BLUE);

 selectLayout.findViewById(R.id.tabImg).setBackgroundResource(R.mipmap.image_tabbar_button_search);
 TextView tvSelect = (TextView) selectLayout.findViewById(R.id.tabText);
 tvSelect.setText("精選");
 tvSelect.setTextColor(Color.WHITE);

 searchLayout.findViewById(R.id.tabImg).setBackgroundResource(R.mipmap.image_tabbar_button_find);
 TextView tvSearch = (TextView) searchLayout.findViewById(R.id.tabText);
 tvSearch.setText("搜索");
 tvSearch.setTextColor(Color.WHITE);

 locationLayout.findViewById(R.id.tabImg).setBackgroundResource(R.mipmap.image_tabbar_button_manage);
 TextView tvLoaction = (TextView) locationLayout.findViewById(R.id.tabText);
 tvLoaction.setText("本地");
 tvLoaction.setTextColor(Color.WHITE);

 settingLayout.findViewById(R.id.tabImg).setBackgroundResource(R.mipmap.image_tabbar_button_more);
 TextView tvSetting = (TextView) settingLayout.findViewById(R.id.tabText);
 tvSetting.setText("設置");
 tvSetting.setTextColor(Color.WHITE);
 }

 /**
 * 找到控件的方法
 *
 * @param view
 */
 private void findView(View view) {
 homeLayout = (RelativeLayout) view.findViewById(R.id.homeLayout);
 selectLayout = (RelativeLayout) view.findViewById(R.id.selectLayout);
 searchLayout = (RelativeLayout) view.findViewById(R.id.searchLayout);
 locationLayout = (RelativeLayout) view.findViewById(R.id.locationLayout);
 settingLayout = (RelativeLayout) view.findViewById(R.id.settingLayout);
 }

 /**
 * 控件的點擊事件
 */
 private void setonClick() {
 homeLayout.setOnClickListener(new lister());
 selectLayout.setOnClickListener(new lister());
 searchLayout.setOnClickListener(new lister());
 locationLayout.setOnClickListener(new lister());
 settingLayout.setOnClickListener(new lister());
 }

 /**
 * 點擊接口
 */
 private class lister implements OnClickListener {

 /**
 * 點擊後改變點擊狀態
 * 切換頁面
 *
 * @param v
 */
 @Override
 public void onClick(View v) {
 switch (v.getId()) {
 case R.id.homeLayout:
  initPix(0);
  break;
 case R.id.selectLayout:
  initPix(1);
  break;
 case R.id.searchLayout:
  initPix(2);
  break;
 case R.id.locationLayout:
  initPix(3);
  break;
 case R.id.settingLayout:
  initPix(4);
  break;
 }
 iCallbackListener.clic(v.getId());
 }
 }

 /**
 * 切換卡的位置
 */
 public void initPix(int i) {
 switch (i) {
 case 0:
 homeLayout.findViewById(R.id.tabImg).setBackgroundResource(R.mipmap.image_tabbar_button_home_down);
 TextView tvHome0 = (TextView) homeLayout.findViewById(R.id.tabText);
 tvHome0.setTextColor(Color.BLUE);

 selectLayout.findViewById(R.id.tabImg).setBackgroundResource(R.mipmap.image_tabbar_button_search);
 TextView tvSelect0 = (TextView) selectLayout.findViewById(R.id.tabText);
 tvSelect0.setTextColor(Color.WHITE);

 searchLayout.findViewById(R.id.tabImg).setBackgroundResource(R.mipmap.image_tabbar_button_find);
 TextView tvSearch0 = (TextView) searchLayout.findViewById(R.id.tabText);
 tvSearch0.setTextColor(Color.WHITE);

 locationLayout.findViewById(R.id.tabImg).setBackgroundResource(R.mipmap.image_tabbar_button_manage);
 TextView tvLocation0 = (TextView) locationLayout.findViewById(R.id.tabText);
 tvLocation0.setTextColor(Color.WHITE);

 settingLayout.findViewById(R.id.tabImg).setBackgroundResource(R.mipmap.image_tabbar_button_more);
 TextView tvSetting0 = (TextView) settingLayout.findViewById(R.id.tabText);
 tvSetting0.setTextColor(Color.WHITE);

 break;
 case 1:

 homeLayout.findViewById(R.id.tabImg).setBackgroundResource(R.mipmap.image_tabbar_button_home);
 TextView tvHome1 = (TextView) homeLayout.findViewById(R.id.tabText);
 tvHome1.setTextColor(Color.WHITE);

 selectLayout.findViewById(R.id.tabImg).setBackgroundResource(R.mipmap.image_tabbar_button_search_down);
 TextView tvSelect1 = (TextView) selectLayout.findViewById(R.id.tabText);
 tvSelect1.setTextColor(Color.BLUE);

 searchLayout.findViewById(R.id.tabImg).setBackgroundResource(R.mipmap.image_tabbar_button_find);
 TextView tvSearch1 = (TextView) searchLayout.findViewById(R.id.tabText);
 tvSearch1.setTextColor(Color.WHITE);

 locationLayout.findViewById(R.id.tabImg).setBackgroundResource(R.mipmap.image_tabbar_button_manage);
 TextView tvLocation1 = (TextView) locationLayout.findViewById(R.id.tabText);
 tvLocation1.setTextColor(Color.WHITE);

 settingLayout.findViewById(R.id.tabImg).setBackgroundResource(R.mipmap.image_tabbar_button_more);
 TextView tvSetting1 = (TextView) settingLayout.findViewById(R.id.tabText);
 tvSetting1.setTextColor(Color.WHITE);

 break;
 case 2:

 homeLayout.findViewById(R.id.tabImg).setBackgroundResource(R.mipmap.image_tabbar_button_home);
 TextView tvHome2 = (TextView) homeLayout.findViewById(R.id.tabText);
 tvHome2.setTextColor(Color.WHITE);

 selectLayout.findViewById(R.id.tabImg).setBackgroundResource(R.mipmap.image_tabbar_button_search);
 TextView tvSelect2 = (TextView) selectLayout.findViewById(R.id.tabText);
 tvSelect2.setTextColor(Color.WHITE);

 searchLayout.findViewById(R.id.tabImg).setBackgroundResource(R.mipmap.image_tabbar_button_find_down);
 TextView tvSearch2 = (TextView) searchLayout.findViewById(R.id.tabText);
 tvSearch2.setTextColor(Color.BLUE);

 locationLayout.findViewById(R.id.tabImg).setBackgroundResource(R.mipmap.image_tabbar_button_manage);
 TextView tvLocation2 = (TextView) locationLayout.findViewById(R.id.tabText);
 tvLocation2.setTextColor(Color.WHITE);

 settingLayout.findViewById(R.id.tabImg).setBackgroundResource(R.mipmap.image_tabbar_button_more);
 TextView tvSetting2 = (TextView) settingLayout.findViewById(R.id.tabText);
 tvSetting2.setTextColor(Color.WHITE);


 break;
 case 3:

 homeLayout.findViewById(R.id.tabImg).setBackgroundResource(R.mipmap.image_tabbar_button_home);
 TextView tvHome3 = (TextView) homeLayout.findViewById(R.id.tabText);
 tvHome3.setTextColor(Color.WHITE);

 selectLayout.findViewById(R.id.tabImg).setBackgroundResource(R.mipmap.image_tabbar_button_search);
 TextView tvSelect3 = (TextView) selectLayout.findViewById(R.id.tabText);
 tvSelect3.setTextColor(Color.WHITE);

 searchLayout.findViewById(R.id.tabImg).setBackgroundResource(R.mipmap.image_tabbar_button_find);
 TextView tvSearch3 = (TextView) searchLayout.findViewById(R.id.tabText);
 tvSearch3.setTextColor(Color.WHITE);

 locationLayout.findViewById(R.id.tabImg).setBackgroundResource(R.mipmap.image_tabbar_button_manage_down);
 TextView tvLocation3 = (TextView) locationLayout.findViewById(R.id.tabText);
 tvLocation3.setTextColor(Color.BLUE);

 settingLayout.findViewById(R.id.tabImg).setBackgroundResource(R.mipmap.image_tabbar_button_more);
 TextView tvSetting3 = (TextView) settingLayout.findViewById(R.id.tabText);
 tvSetting3.setTextColor(Color.WHITE);

 break;
 case 4:

 homeLayout.findViewById(R.id.tabImg).setBackgroundResource(R.mipmap.image_tabbar_button_home);
 TextView tvHome4 = (TextView) homeLayout.findViewById(R.id.tabText);
 tvHome4.setTextColor(Color.WHITE);

 selectLayout.findViewById(R.id.tabImg).setBackgroundResource(R.mipmap.image_tabbar_button_search);
 TextView tvSelect4 = (TextView) selectLayout.findViewById(R.id.tabText);
 tvSelect4.setTextColor(Color.WHITE);

 searchLayout.findViewById(R.id.tabImg).setBackgroundResource(R.mipmap.image_tabbar_button_find);
 TextView tvSearch4 = (TextView) searchLayout.findViewById(R.id.tabText);
 tvSearch4.setTextColor(Color.WHITE);

 locationLayout.findViewById(R.id.tabImg).setBackgroundResource(R.mipmap.image_tabbar_button_manage);
 TextView tvLocation4 = (TextView) locationLayout.findViewById(R.id.tabText);
 tvLocation4.setTextColor(Color.WHITE);

 settingLayout.findViewById(R.id.tabImg).setBackgroundResource(R.mipmap.image_tabbar_button_more_down);
 TextView tvSetting4 = (TextView) settingLayout.findViewById(R.id.tabText);
 tvSetting4.setTextColor(Color.BLUE);

 break;
 }
 }
}
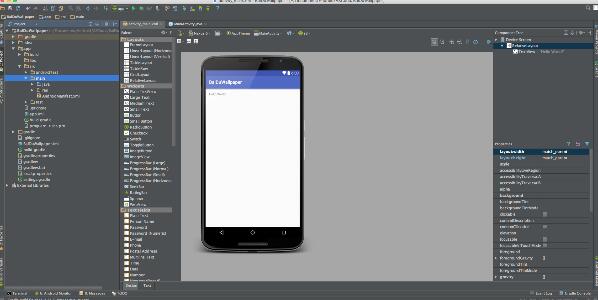
我們運行一下
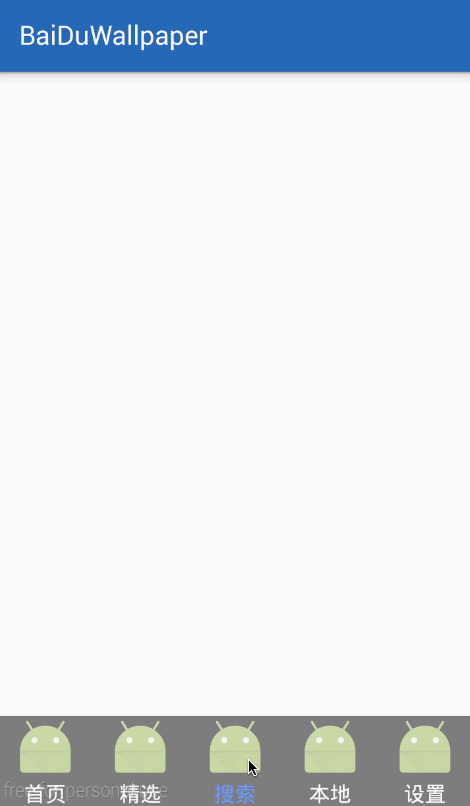
接下來我們讓他可以切換選項卡,我們定義一個接口
 /**
 * 切換頁面的接口
 */
 public interface ICallbackListener {
 public void clic(int id);
 }

 ICallbackListener iCallbackListener = null;

 public void setonCallbackListener(ICallbackListener iCallbackListener) {
 this.iCallbackListener = iCallbackListener;
 }
接著初始化數據
 /**
 * 設置默認的第一頁數據
 */
 private void initPagerContent(android.app.Fragment fragment) {
 FragmentManager manager = getFragmentManager();
 android.app.FragmentTransaction ft = manager.beginTransaction();
 ft.replace(R.id.myContent,fragment);
 ft.commit();
 }
然後我們引用的時候就可以直接new了
 /**
 * 切換接口
 */
 private class MyCallbackListener implements MyBottomLayout.ICallbackListener {

 @Override
 public void clic(int id) {
 switch (id) {
 case R.id.homeLayout:
  initPagerContent(new HomeFragment());

  break;
 case R.id.selectLayout:
  initPagerContent(new SelectFragment());

  break;
 case R.id.searchLayout:
  initPagerContent(new SearchFragment());

  break;
 case R.id.locationLayout:
  initPagerContent(new LoactionFragment());

  break;
 case R.id.settingLayout:
  initPagerContent(new SettingFragment());

  break;

 }
 }
 }
我們在運行一下
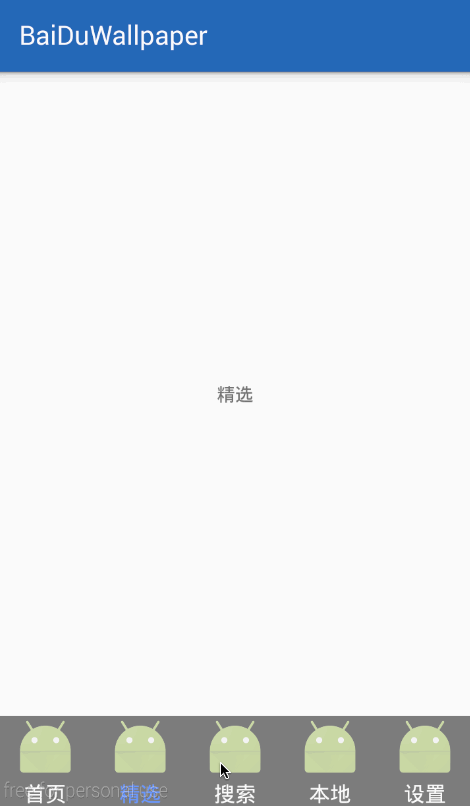
但是有一點我們要知道,我們還要實現滑動,這樣的話,我們就要使用viewpager了
layout_main.xml
<?xml version="1.0" encoding="utf-8"?>
<RelativeLayout xmlns:android="http://schemas.android.com/apk/res/android"
 android:layout_width="match_parent"
 android:layout_height="match_parent">


 <android.support.v4.view.ViewPager
 android:id="@+id/myViewPager"
 android:layout_width="match_parent"
 android:layout_height="match_parent"
 android:layout_above="@+id/myBottomLayout" />

 <com.lgl.baiduwallpaper.view.MyBottomLayout
 android:id="@+id/myBottomLayout"
 android:layout_width="match_parent"
 android:layout_height="wrap_content"
 android:layout_alignParentBottom="true"
 android:background="@mipmap/image_titlebar_background" />
</RelativeLayout>
具體的,我就直接把MainActivity的代碼貼上吧
 package com.lgl.baiduwallpaper;

import android.os.Bundle;
import android.support.v4.app.Fragment;
import android.support.v4.app.FragmentActivity;
import android.support.v4.app.FragmentManager;
import android.support.v4.app.FragmentPagerAdapter;
import android.support.v4.view.ViewPager;

import com.lgl.baiduwallpaper.fragment.HomeFragment;
import com.lgl.baiduwallpaper.fragment.LoactionFragment;
import com.lgl.baiduwallpaper.fragment.SearchFragment;
import com.lgl.baiduwallpaper.fragment.SelectFragment;
import com.lgl.baiduwallpaper.fragment.SettingFragment;
import com.lgl.baiduwallpaper.view.MyBottomLayout;

/**
 * 主界面
 */
public class MainActivity extends FragmentActivity {

 private MyBottomLayout myBottomLayout;
 private ViewPager viewpager;

 @Override
 protected void onCreate(Bundle savedInstanceState) {
 super.onCreate(savedInstanceState);
 setContentView(R.layout.activity_main);

 initView();
 }

 /**
 * 初始化
 */
 private void initView() {
// initPagerContent(new HomeFragment());
 findView();
 setOnclick();
 }

// /**
// * 設置默認的第一頁數據
// */
// private void initPagerContent(android.app.Fragment fragment) {
// FragmentManager manager = getFragmentManager();
// android.app.FragmentTransaction ft = manager.beginTransaction();
// ft.replace(R.id.myContent,fragment);
// ft.commit();
// }

 /**
 * 點擊事件
 */
 private void setOnclick() {
 myBottomLayout.setonCallbackListener(new MyCallbackListener());
 }

 /**
 * 找尋控件
 */
 private void findView() {
 myBottomLayout = (MyBottomLayout) findViewById(R.id.myBottomLayout);

 viewpager = (ViewPager) findViewById(R.id.myViewPager);
 viewpager.setAdapter(new MyFragmentAdapter(getSupportFragmentManager()));
 //頁面監聽
 viewpager.setOnPageChangeListener(new ViewPager.OnPageChangeListener() {
 @Override
 public void onPageScrolled(int position, float positionOffset, int positionOffsetPixels) {

 }

 @Override
 public void onPageSelected(int position) {
 myBottomLayout.initPix(position);
 }

 @Override
 public void onPageScrollStateChanged(int state) {

 }
 });
 }

 /**
 * 切換接口
 */
 private class MyCallbackListener implements MyBottomLayout.ICallbackListener {

 @Override
 public void clic(int id) {
 switch (id) {
 case R.id.homeLayout:
//  initPagerContent(new HomeFragment());
  viewpager.setCurrentItem(0);
  break;
 case R.id.selectLayout:
//  initPagerContent(new SelectFragment());
  viewpager.setCurrentItem(1);
  break;
 case R.id.searchLayout:
//  initPagerContent(new SearchFragment());
  viewpager.setCurrentItem(2);
  break;
 case R.id.locationLayout:
//  initPagerContent(new LoactionFragment());
  viewpager.setCurrentItem(3);
  break;
 case R.id.settingLayout:
//  initPagerContent(new SettingFragment());
  viewpager.setCurrentItem(4);
  break;

 }
 }
 }

 /**
 * viewpager的adapter
 */
 private class MyFragmentAdapter extends FragmentPagerAdapter {

 public MyFragmentAdapter(FragmentManager fm) {
 super(fm);
 }

 @Override
 public Fragment getItem(int position) {
 switch (position) {
 case 0:
  return new HomeFragment();
 case 1:
  return new SelectFragment();
 case 2:
  return new SearchFragment();
 case 3:
  return new LoactionFragment();
 case 4:
  return new SettingFragment();
 }
 return null;
 }

 @Override
 public int getCount() {
 //5個頁面
 return 5;
 }
 }
}
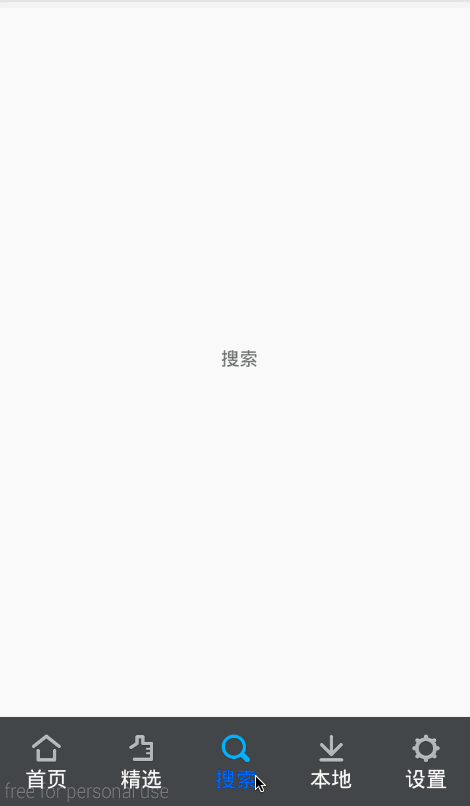
主要是你切換的時候setCurrentItem(id);同時監聽viewpager的滑動,就可以自由切換了,我們運行一下
源碼下載: Android仿百度壁紙客戶端
以上就是本文的全部內容,希望對大家的學習有所幫助,也希望大家多多支持本站。
 Android自定義進度條的圓角橫向進度條實例詳解
1.本文將向你介紹自定義進度條的寫法,比較簡單,但還是有些知識點是需要注意的:invalidate()方法RectF方法的應用onMeasure方法的應用2.原理畫3層圓
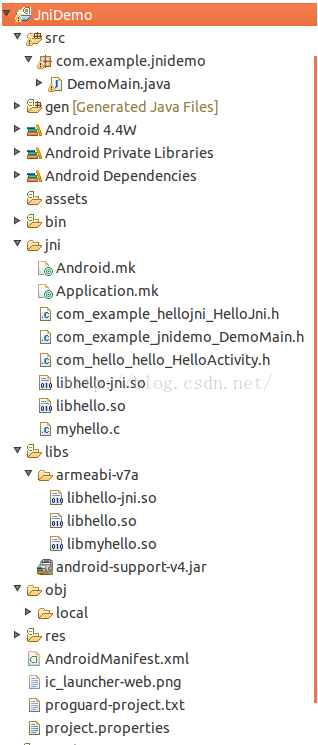 Android平台下JNI調用第三方so庫
在研究了幾天JNI後,在自己生成的so庫中調用第三方so庫時遇到問題,解決之後特意整理、記錄一下。首先說一下在網上查找資料時,對於調用第三方so庫,有人說有兩種方法:1.
 Android獲取和讀取短信驗證碼的實現方法
現如今,驗證碼在Android的客戶端還是非常普遍的.通過手機賬號和驗證碼直接去注冊應用賬戶的信息.很多應用都以這種方式來完成注冊.簡單的介紹一下吧.&nbs
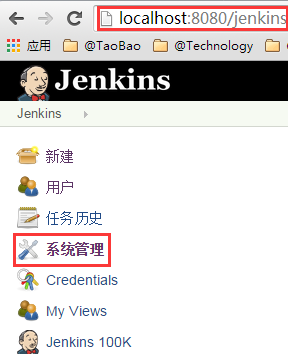 Android開發之Jenkins+Gradle實現持續集成、apk多渠道打包
前言: 首先很高興大家來閱讀王某人這篇文章,我干肯定大部分公司的發版流程是這樣的,android程序員小李打出各渠道包,發給運維小胡,小胡將個渠道包上傳各大應用