編輯:關於Android編程
service有兩種類型:
本地服務(Local Service):用於應用程序內部
遠程服務(Remote Sercie):用於android系統內部的應用程序之間
前者用於實現應用程序自己的一些耗時任務,比如查詢升級信息,並不占用應用程序比如Activity所屬線程,而是單開線程後台執行,這樣用戶體驗比較好。
後者可被其他應用程序復用,比如天氣預報服務,其他應用程序不需要再寫這樣的服務,調用已有的即可。
編寫不需和Activity交互的本地服務示例
本地服務編寫比較簡單。首先,要創建一個Service類,該類繼承android的Service類。這裡寫了一個計數服務的類,每秒鐘為計數器加一。在服務類的內部,還創建了一個線程,用於實現後台執行上述業務邏輯。
Service代碼:
import android.app.Service;
import android.content.Intent;
import android.os.IBinder;
import android.util.Log;


public class CountService extends Service {
private boolean threadDisable;
private int count;
@Override
public IBinder onBind(Intent intent) {
return null;
}
@Override
public void onCreate() {
super.onCreate();
new Thread(new Runnable() {
public void run() {
while (!threadDisable) {
try {
Thread.sleep(1000);
} catch (InterruptedException e) {
}
count++;
System.out.println(" CountService Count is " + count);
}
}
}).start();
}
@Override
public void onDestroy() {
super.onDestroy();
this.threadDisable = true;
Log.v(" CountService ", " on destroy ");
}
}
將該服務注冊到配置文件AndroidManifest.xml中
<service android:name="CountService" />
在Activity中啟動和關閉本地服務
import android.app.Activity;
import android.content.Intent;
import android.os.Bundle;


public class LocalServiceDemoActivity extends Activity {
@Override
public void onCreate(Bundle savedInstanceState) {
super.onCreate(savedInstanceState);
setContentView(R.layout.main);
this.startService(new Intent(this, CountService.class));
}


@Override
protected void onDestroy() {
super.onDestroy();
this.stopService(new Intent(this, CountService.class));
}
}
編寫本地服務和Activity交互的示例
上面的示例是通過startService和stopService啟動關閉服務的。適用於服務和activity之間沒有調用交互的情況。如果之間需要傳遞參數或者方法調用。需要使用bind和unbind方法。
具體做法是,服務類需要增加接口,比如ICountService,另外,服務類需要有一個內部類,這樣可以方便訪問外部類的封裝數據,這個內部類需要繼承Binder類並實現ICountService接口。還有,就是要實現Service的
onBind方法,不能只傳回一個null了。
新建立的接口代碼:
public interface ICountService {
public abstract int getCount();
}

CountService代碼:
import android.app.Service;
import android.content.Intent;
import android.os.Binder;
import android.os.IBinder;
import android.util.Log;


public class CountService extends Service implements ICountService {
private boolean threadDisable;
private int count;
private ServiceBinder serviceBinder = new ServiceBinder();


public class ServiceBinder extends Binder implements ICountService {
// @Override
public int getCount() {
return count;
}
}


@Override
public IBinder onBind(Intent intent) {
return serviceBinder;
}


@Override
public void onCreate() {
super.onCreate();
new Thread(new Runnable() {
// @Override
public void run() {
while (!threadDisable) {
try {
Thread.sleep(1000);
} catch (InterruptedException e) {
}
count++;
System.out.println("CountService Count is " + count);
}
}
}).start();
}


@Override
public void onDestroy() {
super.onDestroy();
this.threadDisable = true;
Log.v(" CountService ", " on destroy ");
}


// @Override
public int getCount() {
return count;
}
}
服務的注冊也要做改動,AndroidManifest.xml文件:
 <service android:name="CountService" >
      <intent-filter>
        <action android:name="com.phone.jiaohuservice.CountService" />
      </intent-filter>
 </service>

Acitity代碼不再通過startSerivce和stopService啟動關閉服務,另外,需要通過ServiceConnection的內部類實現來連接Service和Activity。
import android.app.Activity;
import android.content.ComponentName;
import android.content.Intent;
import android.content.ServiceConnection;
import android.os.Bundle;
import android.os.IBinder;


public class LocalServiceDemoActivity extends Activity {
private ServiceConnection serviceConnection = new ServiceConnection() {
// @Override
public void onServiceConnected(ComponentName name, IBinder service) {
countService = (ICountService) service;
System.out.println(" CountService on serivce connected, count is "
+ countService.getCount());
}


// @Override
public void onServiceDisconnected(ComponentName name) {
countService = null;
}
};


private ICountService countService;


/** Called when the activity is first created. */
@Override
public void onCreate(Bundle savedInstanceState) {
super.onCreate(savedInstanceState);
setContentView(R.layout.main);
this.bindService(new Intent("com.phone.jiaohuservice.CountService"),
this.serviceConnection, BIND_AUTO_CREATE);
}


@Override
protected void onDestroy() {
this.unbindService(serviceConnection);
super.onDestroy(); // 注意先後
}
}
編寫傳遞基本型數據的遠程服務
上面的示例,可以擴展為,讓其他應用程序復用該服務。這樣的服務叫遠程(remote)服務,實際上是進程間通信(RPC)。
這時需要使用android接口描述語言(AIDL)來定義遠程服務的接口,而不是上述那樣簡單的java接口。擴展名為aidl而不是java。可用上面的ICountService改動而成ICountSerivde.aidl,eclipse會自動生成相關的java文件。
遠端代碼:
ICountService.aidl
package com.phone.remoteservice.aidl;
interface ICountService {
int getCount();
}
CountService.java
import com.phone.remoteservice.aidl.ICountService;
import android.app.Service;
import android.content.Intent;
import android.os.IBinder;
import android.os.RemoteException;
import android.util.Log;


public class CountService extends Service {
private boolean threadDisable;
private int count;
private ICountService.Stub serviceBinder = new ICountService.Stub() {
// @Override
public int getCount() throws RemoteException {
return count;
}
};


// @Override
public IBinder onBind(Intent intent) {
return serviceBinder;
}


@Override
public void onCreate() {
super.onCreate();
new Thread(new Runnable() {
// @Override
public void run() {
while (!threadDisable) {
try {
Thread.sleep(1000);
} catch (InterruptedException e) {
}
count++;
Log.i("aa", "---" + count + "---");
}
}
}).start();
}


// @Override
public void onDestroy() {
super.onDestroy();
this.threadDisable = true;
Log.v(" CountService ", " on destroy ");
}

}
配置文件AndroidManifest.xml
<service android:name=".CountService" >
 <intent-filter>
 <action android:name="com.phone.remoteservice.CountService" />
 </intent-filter>
</service>
本地代碼:
拷貝遠端代碼gen:com.phone.remoteservice.aidl包名及內部生成的ICountService.java文件到本地,注意包名不要變,java文件名也不要變。
測試代碼
import com.phone.remoteservice.aidl.ICountService;
import android.os.Bundle;
import android.os.IBinder;
import android.os.RemoteException;
import android.app.Activity;
import android.content.ComponentName;
import android.content.Intent;
import android.content.ServiceConnection;
import android.view.Menu;


public class RemoteServiceTest extends Activity {
private ICountService countService;
private boolean SreviceDisable;
/** Called when the activity is first created. */
@Override
public void onCreate(Bundle savedInstanceState) {
super.onCreate(savedInstanceState);
setContentView(R.layout.main);
bindService(new Intent("com.phone.remoteservice.CountService"),
this.serviceConnection, BIND_AUTO_CREATE);
}


@Override
protected void onDestroy() {
this.unbindService(serviceConnection);
SreviceDisable = true;
super.onDestroy(); // 注意先後
}


private ServiceConnection serviceConnection = new ServiceConnection() {
public void onServiceConnected(ComponentName name, IBinder service) {
countService = ICountService.Stub.asInterface(service);
new Thread(new Runnable() {
// @Override
public void run() {
while (!SreviceDisable) {

try {
System.out
.println(" CountService on serivce connected, count is "
+ countService.getCount());
} catch (RemoteException e) {
e.printStackTrace();
}
try {
Thread.sleep(1000);
} catch (InterruptedException e) {
}
}
}
}).start();
}


public void onServiceDisconnected(ComponentName name) {
countService = null;

}
};
}
在Activity中使用服務的差別不大,只需要對ServiceConnection中的調用遠程服務的方法時,要捕獲RemoteException 異常。
這樣就可以在同一個應用程序中使用遠程服務的方式和自己定義的服務交互了。 如果是另外的應用程序使用遠程服務,需要做的是復制上面的aidl文件和相應的包構到應用程序中,其他調用等都一樣。
編寫傳遞復雜數據類型的遠程服務
遠程服務往往不只是傳遞java基本數據類型。這時需要注意android的一些限制和規定:
1. android支持String和CharSequence
2. 如果需要在aidl中使用其他aidl接口類型,需要import,即使是在相同包結構下;
3. android允許傳遞實現Parcelable接口的類,需要import;
4. android支持集合接口類型List和Map,但是有一些限制,元素必須是基本型或者上述三種情況,不需要import集合接口類,但是需要對元素涉及到的類型import;
5. 非基本數據類型,也不是String和CharSequence類型的,需要有方向指示,包括in、out和inout,in表示由客戶端設置,out表示由服務端設置,inout是兩者均可設置。
這裡將前面的例子中返回的int數據改為復雜數據類型:
import android.os.Parcel;
import android.os.Parcelable;
public class CountBean implements Parcelable {
public static final Parcelable.Creator < CountBean > CREATOR = new Creator < CountBean > () {
@Override
public CountBean createFromParcel(Parcel source) {
CountBean bean = new CountBean();
bean.count = source.readInt();
return bean;
}
@Override
public CountBean[] newArray( int size) {
return new CountBean[size];
}
};
public int count;
@Override
public void writeToParcel(Parcel dest, int flags) {
dest.writeInt( this .count);
}
@Override
public int describeContents() {
return 0 ;
}
}
以上就是小編為大家帶來的Service Activity的三種交互方式(詳解)的全部內容了,希望對大家有所幫助,多多支持本站~
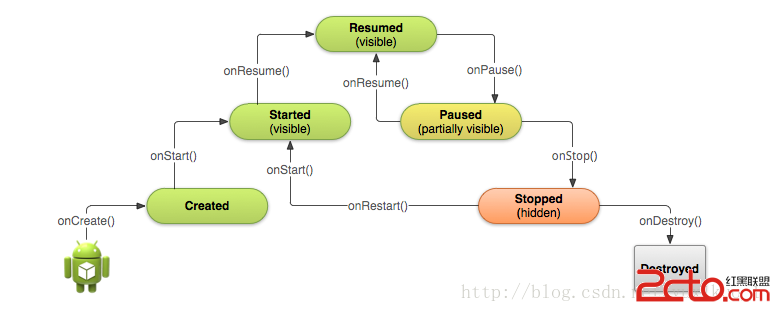 4、Android Activity的生命周期 Activity的生命周期
1、完整生命周期 3、一個新的Activity實例 系統首先調用新Activity的onCreate()方
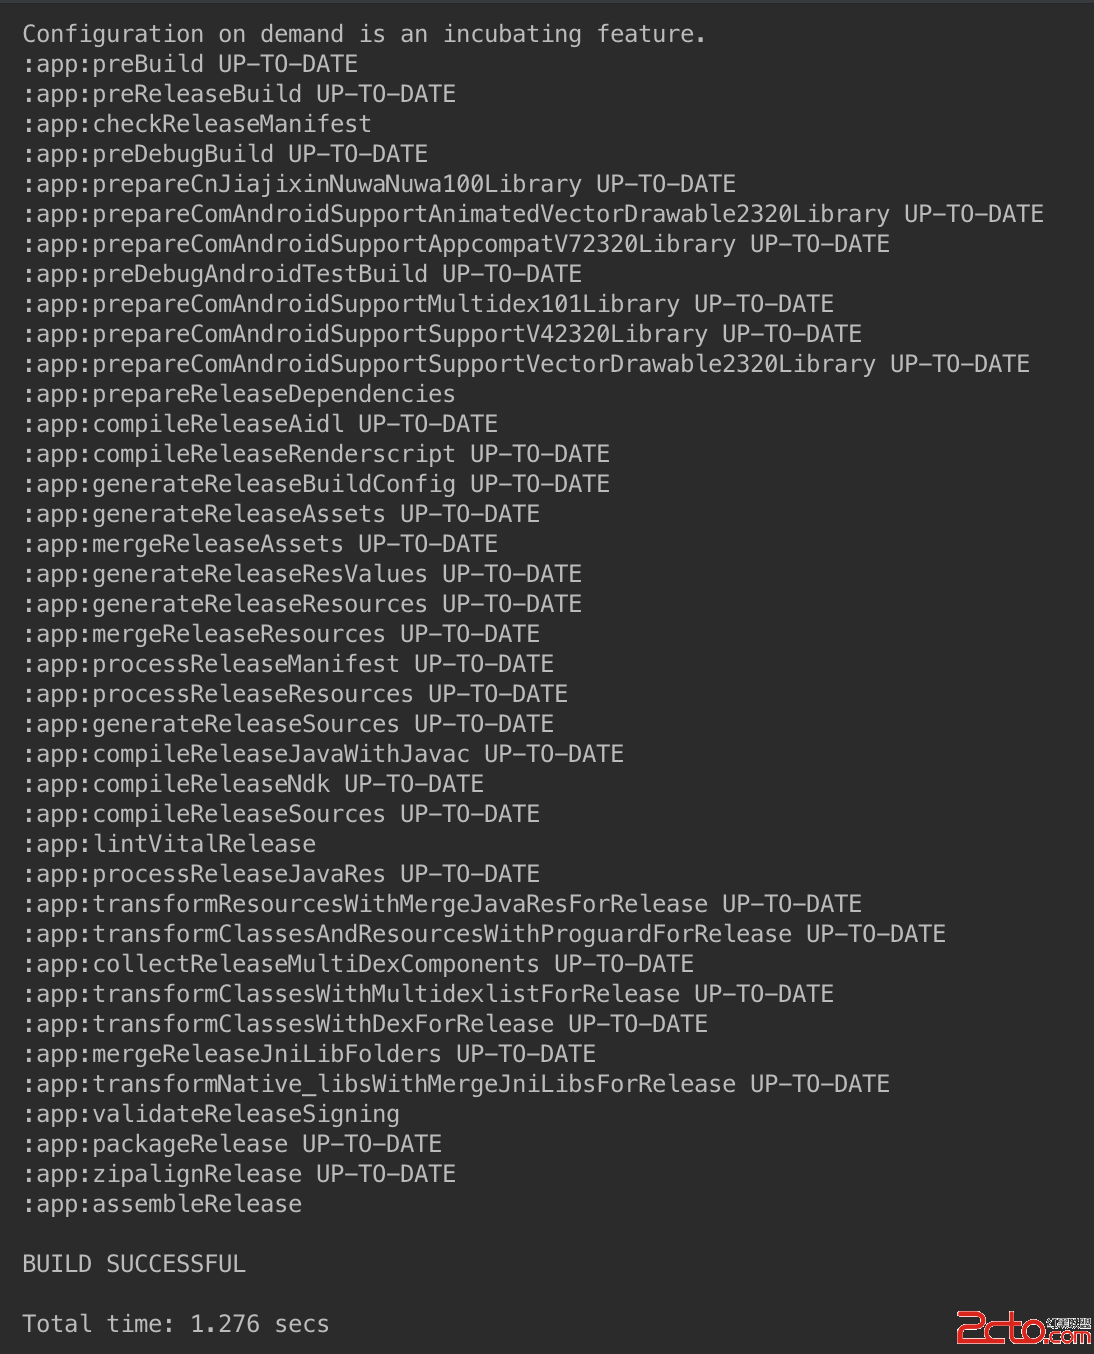 Android 熱修復使用Gradle Plugin1.5改造Nuwa插件
隨著谷歌的Gradle插件版本的不斷升級,Gradle插件現在最新的已經到了2.1.0-beta1,對應的依賴為com.android.tools.build:gradl
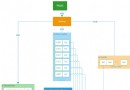
 RecyclerView局部刷新
WeTest導讀安卓開發者都知道,RecyclerView比ListView要靈活的多,但不可否認的裡面的坑也同樣埋了不少人。下面讓我們看看騰訊開發工程師用實例講解自己踩
 Android 應用程序接口指南---第二節:UI---第一章 用戶界面和布局
第1章 用戶界面和布局應用程序的用戶界面就是用戶能看到並可以與它交互的任何東西。Android提供多種預置的UI組件,如結構化布局對象和允許你為應用程序創建圖形用戶界面的