編輯:關於Android編程
在本篇文章中給出了三種實現日間/夜間模式切換的方案,三種方案綜合起來可能導致文章的篇幅過長,請耐心閱讀。
1、使用 setTheme 的方法讓 Activity 重新設置主題;
2、設置 Android Support Library 中的 UiMode 來支持日間/夜間模式的切換;
3、通過資源 id 映射,回調自定義 ThemeChangeListener 接口來處理日間/夜間模式的切換。
一、使用 setTheme 方法
我們先來看看使用 setTheme 方法來實現日間/夜間模式切換的方案。這種方案的思路很簡單,就是在用戶選擇夜間模式時,Activity 設置成夜間模式的主題,之後再讓 Activity 調用 recreate() 方法重新創建一遍就行了。
那就動手吧,在 colors.xml 中定義兩組顏色,分別表示日間和夜間的主題色:
<?xml version="1.0" encoding="utf-8"?>
<resources>
 <color name="colorPrimary">#3F51B5</color>
 <color name="colorPrimaryDark">#303F9F</color>
 <color name="colorAccent">#FF4081</color>

 <color name="nightColorPrimary">#3b3b3b</color>
 <color name="nightColorPrimaryDark">#383838</color>
 <color name="nightColorAccent">#a72b55</color>
</resources>
之後在 styles.xml 中定義兩組主題,也就是日間主題和夜間主題:
<resources>

 <!-- Base application theme. -->
 <style name="AppTheme" parent="Theme.AppCompat.Light.DarkActionBar">
  <!-- Customize your theme here. -->
  <item name="colorPrimary">@color/colorPrimary</item>
  <item name="colorPrimaryDark">@color/colorPrimaryDark</item>
  <item name="colorAccent">@color/colorAccent</item>
  <item name="android:textColor">@android:color/black</item>
  <item name="mainBackground">@android:color/white</item>
 </style>

 <style name="NightAppTheme" parent="Theme.AppCompat.Light.DarkActionBar">
  <!-- Customize your theme here. -->
  <item name="colorPrimary">@color/nightColorPrimary</item>
  <item name="colorPrimaryDark">@color/nightColorPrimaryDark</item>
  <item name="colorAccent">@color/nightColorAccent</item>
  <item name="android:textColor">@android:color/white</item>
  <item name="mainBackground">@color/nightColorPrimaryDark</item>
 </style>

</resources>
在主題中的 mainBackground 屬性是我們自定義的屬性,用來表示背景色:
<?xml version="1.0" encoding="utf-8"?>
<resources>
 <attr name="mainBackground" format="color|reference"></attr>
</resources>
接下來就是看一下布局 activity_main.xml:
<?xml version="1.0" encoding="utf-8"?>
<RelativeLayout xmlns:android="http://schemas.android.com/apk/res/android"
 xmlns:tools="http://schemas.android.com/tools"
 android:layout_width="match_parent"
 android:layout_height="match_parent"
 android:background="?attr/mainBackground"
 android:paddingBottom="@dimen/activity_vertical_margin"
 android:paddingLeft="@dimen/activity_horizontal_margin"
 android:paddingRight="@dimen/activity_horizontal_margin"
 android:paddingTop="@dimen/activity_vertical_margin"
 tools:context="com.yuqirong.themedemo.MainActivity">

 <Button
  android:id="@+id/btn_theme"
  android:layout_width="match_parent"
  android:layout_height="wrap_content"
  android:text="切換日/夜間模式" />

 <TextView
  android:id="@+id/tv"
  android:layout_below="@id/btn_theme"
  android:layout_width="match_parent"
  android:layout_height="wrap_content"
  android:gravity="center_horizontal"
  android:text="通過setTheme()的方法" />

</RelativeLayout>
在 <RelativeLayout> 的 android:background 屬性中,我們使用 "?attr/mainBackground" 來表示,這樣就代表著 RelativeLayout 的背景色會去引用在主題中事先定義好的 mainBackground 屬性的值。這樣就實現了日間/夜間模式切換的換色了。
最後就是 MainActivity 的代碼:
public class MainActivity extends AppCompatActivity {

 // 默認是日間模式
 private int theme = R.style.AppTheme;

 @Override
 protected void onCreate(Bundle savedInstanceState) {
  super.onCreate(savedInstanceState);
 // 判斷是否有主題存儲
  if(savedInstanceState != null){
   theme = savedInstanceState.getInt("theme");
   setTheme(theme);
  }
  setContentView(R.layout.activity_main);

  Button btn_theme = (Button) findViewById(R.id.btn_theme);
  btn_theme.setOnClickListener(new View.OnClickListener() {
   @Override
   public void onClick(View v) {
    theme = (theme == R.style.AppTheme) ? R.style.NightAppTheme : R.style.AppTheme;
    MainActivity.this.recreate();
   }
  });
 }

 @Override
 protected void onSaveInstanceState(Bundle outState) {
  super.onSaveInstanceState(outState);
  outState.putInt("theme", theme);
 }

 @Override
 protected void onRestoreInstanceState(Bundle savedInstanceState) {
  super.onRestoreInstanceState(savedInstanceState);
  theme = savedInstanceState.getInt("theme");
 }
}
在 MainActivity 中有幾點要注意一下:
1、調用 recreate() 方法後 Activity 的生命周期會調用 onSaveInstanceState(Bundle outState) 來備份相關的數據,之後也會調用 onRestoreInstanceState(Bundle savedInstanceState) 來還原相關的數據,因此我們把 theme 的值保存進去,以便 Activity 重新創建後使用。
2、我們在 onCreate(Bundle savedInstanceState) 方法中還原得到了 theme 值後,setTheme() 方法一定要在 setContentView() 方法之前調用,否則的話就看不到效果了。
3、recreate() 方法是在 API 11 中添加進來的,所以在 Android 2.X 中使用會拋異常。
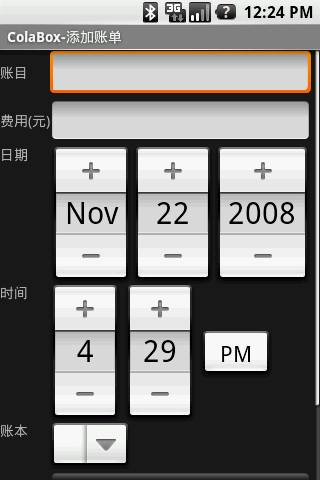
貼完上面的代碼之後,我們來看一下該方案實現的效果圖:

二、使用 Android Support Library 中的 UiMode 方法
使用 UiMode 的方法也很簡單,我們需要把 colors.xml 定義為日間/夜間兩種。之後根據不同的模式會去選擇不同的 colors.xml 。在 Activity 調用 recreate() 之後,就實現了切換日/夜間模式的功能。
說了這麼多,直接上代碼。下面是 values/colors.xml :
<?xml version="1.0" encoding="utf-8"?>
<resources>
 <color name="colorPrimary">#3F51B5</color>
 <color name="colorPrimaryDark">#303F9F</color>
 <color name="colorAccent">#FF4081</color>
 <color name="textColor">#FF000000</color>
 <color name="backgroundColor">#FFFFFF</color>
</resources>
除了 values/colors.xml 之外,我們還要創建一個 values-night/colors.xml 文件,用來設置夜間模式的顏色,其中 <color> 的 name 必須要和 values/colors.xml 中的相對應:
<?xml version="1.0" encoding="utf-8"?>
<resources>
 <color name="colorPrimary">#3b3b3b</color>
 <color name="colorPrimaryDark">#383838</color>
 <color name="colorAccent">#a72b55</color>
 <color name="textColor">#FFFFFF</color>
 <color name="backgroundColor">#3b3b3b</color>
</resources>
在 styles.xml 中去引用我們在 colors.xml 中定義好的顏色:
<resources>

 <!-- Base application theme. -->
 <style name="AppTheme" parent="Theme.AppCompat.Light.DarkActionBar">
  <!-- Customize your theme here. -->
  <item name="colorPrimary">@color/colorPrimary</item>
  <item name="colorPrimaryDark">@color/colorPrimaryDark</item>
  <item name="colorAccent">@color/colorAccent</item>
  <item name="android:textColor">@color/textColor</item>
  <item name="mainBackground">@color/backgroundColor</item>
 </style>

</resources>
activity_main.xml 布局的內容和上面 setTheme() 方法中的相差無幾,這裡就不貼出來了。之後的事情就變得很簡單了,在 MyApplication 中先選擇一個默認的 Mode :
public class MyApplication extends Application {

 @Override
 public void onCreate() {
  super.onCreate();
  // 默認設置為日間模式
  AppCompatDelegate.setDefaultNightMode(
    AppCompatDelegate.MODE_NIGHT_NO);
 }

}
要注意的是,這裡的 Mode 有四種類型可以選擇:
1、MODE_NIGHT_NO: 使用亮色(light)主題,不使用夜間模式;
2、MODE_NIGHT_YES:使用暗色(dark)主題,使用夜間模式;
3、MODE_NIGHT_AUTO:根據當前時間自動切換 亮色(light)/暗色(dark)主題;
4、MODE_NIGHT_FOLLOW_SYSTEM(默認選項):設置為跟隨系統,通常為 MODE_NIGHT_NO
當用戶點擊按鈕切換日/夜間時,重新去設置相應的 Mode :
public class MainActivity extends AppCompatActivity {

 @Override
 protected void onCreate(Bundle savedInstanceState) {
  super.onCreate(savedInstanceState);
  setContentView(R.layout.activity_main);

  Button btn_theme = (Button) findViewById(R.id.btn_theme);
  btn_theme.setOnClickListener(new View.OnClickListener() {
   @Override
   public void onClick(View v) {
    int currentNightMode = getResources().getConfiguration().uiMode & Configuration.UI_MODE_NIGHT_MASK;
    getDelegate().setLocalNightMode(currentNightMode == Configuration.UI_MODE_NIGHT_NO
      ? AppCompatDelegate.MODE_NIGHT_YES : AppCompatDelegate.MODE_NIGHT_NO);
    // 同樣需要調用recreate方法使之生效
    recreate();
   }
  });
 }

}
我們來看一下 UiMode 方案實現的效果圖:

就前兩種方法而言,配置比較簡單,最後的實現效果也都基本上是一樣的。但是缺點就是需要調用 recreate() 使之生效。而讓 Activity 重新創建就必須涉及到一些狀態的保存。這就增加了一些難度。所以,我們一起來看看第三種解決方法。
通過資源 id 映射,回調接口
第三種方法的思路就是根據設置的主題去動態地獲取資源 id 的映射,然後使用回調接口的方式讓 UI 去設置相關的屬性值。我們在這裡先規定一下:夜間模式的資源在命名上都要加上後綴 “_night” ,比如日間模式的背景色命名為 color_background ,那麼相對應的夜間模式的背景資源就要命名為 color_background_night 。好了,下面就是我們的 Demo 所需要用到的 colors.xml :
<?xml version="1.0" encoding="utf-8"?>
<resources>

 <color name="colorPrimary">#3F51B5</color>
 <color name="colorPrimary_night">#3b3b3b</color>
 <color name="colorPrimaryDark">#303F9F</color>
 <color name="colorPrimaryDark_night">#383838</color>
 <color name="colorAccent">#FF4081</color>
 <color name="colorAccent_night">#a72b55</color>
 <color name="textColor">#FF000000</color>
 <color name="textColor_night">#FFFFFF</color>
 <color name="backgroundColor">#FFFFFF</color>
 <color name="backgroundColor_night">#3b3b3b</color>

</resources>
可以看到每一項 color 都會有對應的 “_night” 與之匹配。
看到這裡,肯定有人會問,為什麼要設置對應的 “_night” ?到底是通過什麼方式來設置日/夜間模式的呢?下面就由 ThemeManager 來為你解答:
public class ThemeManager {

 // 默認是日間模式
 private static ThemeMode mThemeMode = ThemeMode.DAY;
 // 主題模式監聽器
 private static List<OnThemeChangeListener> mThemeChangeListenerList = new LinkedList<>();
 // 夜間資源的緩存,key : 資源類型, 值<key:資源名稱, value:int值>
 private static HashMap<String, HashMap<String, Integer>> sCachedNightResrouces = new HashMap<>();
 // 夜間模式資源的後綴,比如日件模式資源名為:R.color.activity_bg, 那麼夜間模式就為 :R.color.activity_bg_night
 private static final String RESOURCE_SUFFIX = "_night";

 /**
  * 主題模式,分為日間模式和夜間模式
  */
 public enum ThemeMode {
  DAY, NIGHT
 }

 /**
  * 設置主題模式
  *
  * @param themeMode
  */
 public static void setThemeMode(ThemeMode themeMode) {
  if (mThemeMode != themeMode) {
   mThemeMode = themeMode;
   if (mThemeChangeListenerList.size() > 0) {
    for (OnThemeChangeListener listener : mThemeChangeListenerList) {
     listener.onThemeChanged();
    }
   }
  }
 }

 /**
  * 根據傳入的日間模式的resId得到相應主題的resId,注意:必須是日間模式的resId
  *
  * @param dayResId 日間模式的resId
  * @return 相應主題的resId,若為日間模式,則得到dayResId;反之夜間模式得到nightResId
  */
 public static int getCurrentThemeRes(Context context, int dayResId) {
  if (getThemeMode() == ThemeMode.DAY) {
   return dayResId;
  }
  // 資源名
  String entryName = context.getResources().getResourceEntryName(dayResId);
  // 資源類型
  String typeName = context.getResources().getResourceTypeName(dayResId);
  HashMap<String, Integer> cachedRes = sCachedNightResrouces.get(typeName);
  // 先從緩存中去取,如果有直接返回該id
  if (cachedRes == null) {
   cachedRes = new HashMap<>();
  }
  Integer resId = cachedRes.get(entryName + RESOURCE_SUFFIX);
  if (resId != null && resId != 0) {
   return resId;
  } else {
   //如果緩存中沒有再根據資源id去動態獲取
   try {
    // 通過資源名,資源類型,包名得到資源int值
    int nightResId = context.getResources().getIdentifier(entryName + RESOURCE_SUFFIX, typeName, context.getPackageName());
    // 放入緩存中
    cachedRes.put(entryName + RESOURCE_SUFFIX, nightResId);
    sCachedNightResrouces.put(typeName, cachedRes);
    return nightResId;
   } catch (Resources.NotFoundException e) {
    e.printStackTrace();
   }
  }
  return 0;
 }

 /**
  * 注冊ThemeChangeListener
  *
  * @param listener
  */
 public static void registerThemeChangeListener(OnThemeChangeListener listener) {
  if (!mThemeChangeListenerList.contains(listener)) {
   mThemeChangeListenerList.add(listener);
  }
 }

 /**
  * 反注冊ThemeChangeListener
  *
  * @param listener
  */
 public static void unregisterThemeChangeListener(OnThemeChangeListener listener) {
  if (mThemeChangeListenerList.contains(listener)) {
   mThemeChangeListenerList.remove(listener);
  }
 }

 /**
  * 得到主題模式
  *
  * @return
  */
 public static ThemeMode getThemeMode() {
  return mThemeMode;
 }

 /**
  * 主題模式切換監聽器
  */
 public interface OnThemeChangeListener {
  /**
   * 主題切換時回調
   */
  void onThemeChanged();
 }
}
上面 ThemeManager 的代碼基本上都有注釋,想要看懂並不困難。其中最核心的就是 getCurrentThemeRes 方法了。在這裡解釋一下 getCurrentThemeRes 的邏輯。參數中的 dayResId 是日間模式的資源id,如果當前主題是日間模式的話,就直接返回 dayResId 。反之當前主題為夜間模式的話,先根據 dayResId 得到資源名稱和資源類型。比如現在有一個資源為 R.color.colorPrimary ,那麼資源名稱就是 colorPrimary ,資源類型就是 color 。然後根據資源類型和資源名稱去獲取緩存。如果沒有緩存,那麼就要動態獲取資源了。這裡使用方法的是
context.getResources().getIdentifier(String name, String defType, String defPackage)
name 參數就是資源名稱,不過要注意的是這裡的資源名稱還要加上後綴 “_night” ,也就是上面在 colors.xml 中定義的名稱;
defType 參數就是資源的類型了。比如 color,drawable等;
defPackage 就是資源文件的包名,也就是當前 APP 的包名。
有了上面的這個方法,就可以通過 R.color.colorPrimary 資源找到對應的 R.color.colorPrimary_night 資源了。最後還要把找到的夜間模式資源加入到緩存中。這樣的話以後就直接去緩存中讀取,而不用再次去動態查找資源 id 了。
ThemeManager 中剩下的代碼應該都是比較簡單的,相信大家都可以看得懂了。
現在我們來看看 MainActivity 的代碼:
public class MainActivity extends AppCompatActivity implements ThemeManager.OnThemeChangeListener {

 private TextView tv;
 private Button btn_theme;
 private RelativeLayout relativeLayout;
 private ActionBar supportActionBar;

 @Override
 protected void onCreate(Bundle savedInstanceState) {
  super.onCreate(savedInstanceState);
  setContentView(R.layout.activity_main);
  ThemeManager.registerThemeChangeListener(this);
  supportActionBar = getSupportActionBar();
  btn_theme = (Button) findViewById(R.id.btn_theme);
  relativeLayout = (RelativeLayout) findViewById(R.id.relativeLayout);
  tv = (TextView) findViewById(R.id.tv);
  btn_theme.setOnClickListener(new View.OnClickListener() {
   @Override
   public void onClick(View v) {
    ThemeManager.setThemeMode(ThemeManager.getThemeMode() == ThemeManager.ThemeMode.DAY
      ? ThemeManager.ThemeMode.NIGHT : ThemeManager.ThemeMode.DAY);
   }
  });
 }

 public void initTheme() {
  tv.setTextColor(getResources().getColor(ThemeManager.getCurrentThemeRes(MainActivity.this, R.color.textColor)));
  btn_theme.setTextColor(getResources().getColor(ThemeManager.getCurrentThemeRes(MainActivity.this, R.color.textColor)));
  relativeLayout.setBackgroundColor(getResources().getColor(ThemeManager.getCurrentThemeRes(MainActivity.this, R.color.backgroundColor)));
  // 設置標題欄顏色
  if(supportActionBar != null){
   supportActionBar.setBackgroundDrawable(new ColorDrawable(getResources().getColor(ThemeManager.getCurrentThemeRes(MainActivity.this, R.color.colorPrimary))));
  }
  // 設置狀態欄顏色
  if (Build.VERSION.SDK_INT >= Build.VERSION_CODES.LOLLIPOP) {
   Window window = getWindow();
   window.setStatusBarColor(getResources().getColor(ThemeManager.getCurrentThemeRes(MainActivity.this, R.color.colorPrimary)));
  }
 }

 @Override
 public void onThemeChanged() {
  initTheme();
 }

 @Override
 protected void onDestroy() {
  super.onDestroy();
  ThemeManager.unregisterThemeChangeListener(this);
 }

}
在 MainActivity 中實現了 OnThemeChangeListener 接口,這樣就可以在主題改變的時候執行回調方法。然後在 initTheme() 中去重新設置 UI 的相關顏色屬性值。還有別忘了要在 onDestroy() 中移除 ThemeChangeListener 。
最後就來看看第三種方法的效果吧:

也許有人會說和前兩種方法的效果沒什麼差異啊,但是仔細看就會發現前面兩種方法在切換模式的瞬間會有短暫黑屏現象存在,而第三種方法沒有。這是因為前兩種方法都要調用 recreate() 。而第三種方法不需要 Activity 重新創建,使用回調的方法來實現。
三個方法對比
到了這裡,按照套路應該是要總結的時候了。那麼就根據上面給的三種方法來一個簡單的對比吧:
setTheme 方法:可以配置多套主題,比較容易上手。除了日/夜間模式之外,還可以有其他五顏六色的主題。但是需要調用 recreate() ,切換瞬間會有黑屏閃現的現象;
UiMode 方法:優點就是 Android Support Library 中已經支持,簡單規范。但是也需要調用 recreate() ,存在黑屏閃現的現象;
動態獲取資源 id ,回調接口:該方法使用起來比前兩個方法復雜,另外在回調的方法中需要設置每一項 UI 相關的屬性值。但是不需要調用 recreate() ,沒有黑屏閃現的現象。
總結
以上就是這篇文章的全部內容了,希望能對各位Android開發者們有所幫助。
 Android中自定義View和自定義動畫
Android FrameWork 層給我們提供了很多界面組件,但是在實際的商業開發中這些組件往往並不能完全滿足我們的需求,這時候我們就需要自定義我們自己的視圖和動畫。
 Android學習筆記十二之Android基礎UI三
ScrollView滾動視圖ScrollView是繼承於FrameLayout,也是一個顯示容器,由於手機屏幕是有限的,當需要組件安排多組信息的時候,ScrollView
 Android入門——Drawable與對應的資源xml的應用
引言Android 中的Drawable是一個抽象的概念,換言之所有能被畫出來的都可以定義成Drawable(A Drawable is a general abstra
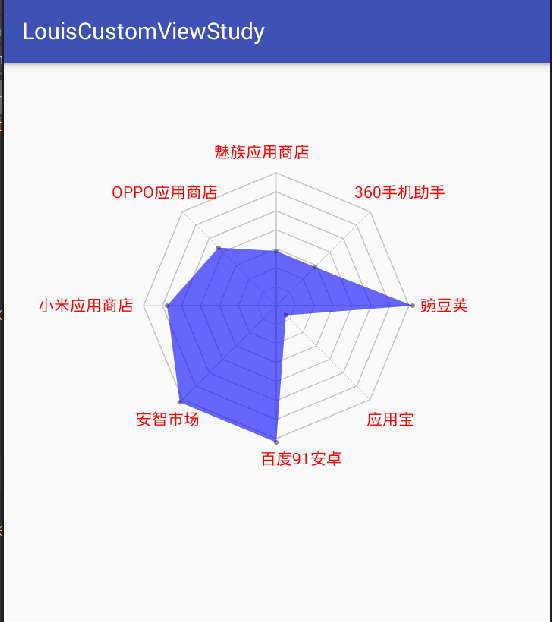 Android 自定義View練習:雷達圖(比重)繪制
code:package com.louisgeek.louiscustomviewstudy;import android.content.Context;import