編輯:關於Android編程
本文介紹了如何使用緩存來提高UI的載入輸入和滑動的流暢性。使用內存緩存、使用磁盤緩存、處理配置改變事件等方法將會有效的解決這個問題。
在您的UI中顯示單個圖片是非常簡單的,如果您需要一次顯示很多圖片就有點復雜了。在很多情況下(例如使用 ListView, GridView 或者 ViewPager控件),顯示在屏幕上的圖片以及即將顯示在屏幕上的圖片數量是非常大的(例如在圖庫中浏覽大量圖片)。
在這些控件中,當一個子控件不顯示的時候,系統會重用該控件來循環顯示 以便減少對內存的消耗。同時垃圾回收機制還會釋放那些已經載入內存中的Bitmap資源(假設您沒有強引用這些Bitmap)。一般來說這樣都是不錯的,但是在用戶來回滑動屏幕的時候,為了保證UI的流暢性和載入圖片的效率,您需要避免重復的處理這些需要顯示的圖片。 使用內存緩存和磁盤緩存可以解決這個問題,使用緩存可以讓控件快速的加載已經處理過的圖片。
本文介紹如何使用緩存來提高UI的載入輸入和滑動的流暢性。
使用內存緩存
內存緩存提高了訪問圖片的速度,但是要占用不少內存。 LruCache
類(在API 4之前可以使用Support Library 中的類 )特別適合緩存Bitmap, 把最近使用到的
Bitmap對象用強引用保存起來(保存到LinkedHashMap中),當緩存數量達到預定的值的時候,把
不經常使用的對象刪除。
注意: 過去,實現內存緩存的常用做法是使用
SoftReference 或者
WeakReference bitmap 緩存,
但是不推薦使用這種方式。從Android 2.3 (API Level 9) 開始,垃圾回收開始強制的回收掉 soft/weak 引用 從而導致這些緩存沒有任何效率的提升。
另外,在 Android 3.0 (API Level 11)之前,這些緩存的Bitmap數據保存在底層內存(native memory)中,並且達到預定條件後也不會釋放這些對象,從而可能導致
程序超過內存限制並崩潰。
在使用 LruCache 的時候,需要考慮如下一些因素來選擇一個合適的緩存數量參數:
1.程序中還有多少內存可用
2.同時在屏幕上顯示多少圖片?要先緩存多少圖片用來顯示到即將看到的屏幕上?
3.設備的屏幕尺寸和屏幕密度是多少?超高的屏幕密度(xhdpi 例如 Galaxy Nexus)
4.設備顯示同樣的圖片要比低屏幕密度(hdpi 例如 Nexus S)設備需要更多的內存。
5.圖片的尺寸和格式決定了每個圖片需要占用多少內存
6.圖片訪問的頻率如何?一些圖片的訪問頻率要比其他圖片高很多?如果是這樣的話,您可能需要把這些經常訪問的圖片放到內存中。
7.在質量和數量上如何平衡?有些情況下保存大量的低質量的圖片是非常有用的,當需要的情況下使用後台線程來加入一個高質量版本的圖片。
這裡沒有萬能配方可以適合所有的程序,您需要分析您的使用情況並在指定自己的緩存策略。使用太小的緩存並不能起到應有的效果,而使用太大的緩存會消耗更多
的內存從而有可能導致 java.lang.OutOfMemory 異常或者留下很少的內存供您的程序其他功能使用。
下面是一個使用 LruCache 緩存的示例:
復制代碼 代碼如下:
private LruCache<string, bitmap=""> mMemoryCache;
@Override
protected void onCreate(Bundle savedInstanceState) {
...
// Get memory class of this device, exceeding this amount will throw an
// OutOfMemory exception.
final int memClass = ((ActivityManager) context.getSystemService(
Context.ACTIVITY_SERVICE)).getMemoryClass();
// Use 1/8th of the available memory for this memory cache.
final int cacheSize = 1024 * 1024 * memClass / 8;
mMemoryCache = new LruCache<string, bitmap="">(cacheSize) {
@Override
protected int sizeOf(String key, Bitmap bitmap) {
// The cache size will be measured in bytes rather than number of items.
return bitmap.getByteCount();
}
};
...
}
public void addBitmapToMemoryCache(String key, Bitmap bitmap) {
if (getBitmapFromMemCache(key) == null) {
mMemoryCache.put(key, bitmap);
}
}
public Bitmap getBitmapFromMemCache(String key) {
return mMemoryCache.get(key);
}
注意: 在這個示例中,該程序的1/8內存都用來做緩存用了。在一個normal/hdpi設備中,這至少有4MB(32/8)內存。
在一個分辨率為 800×480的設備中,滿屏的GridView全部填充上圖片將會使用差不多1.5MB(800*480*4 bytes)
的內存,所以這樣差不多在內存中緩存了2.5頁的圖片。
當在 ImageView 中顯示圖片的時候,
先檢查LruCache 中是否存在。如果存在就使用緩存後的圖片,如果不存在就啟動後台線程去載入圖片並緩存:
復制代碼 代碼如下:
public void loadBitmap(int resId, ImageView imageView) {
final String imageKey = String.valueOf(resId);
final Bitmap bitmap = getBitmapFromMemCache(imageKey);
if (bitmap != null) {
mImageView.setImageBitmap(bitmap);
} else {
mImageView.setImageResource(R.drawable.image_placeholder);
BitmapWorkerTask task = new BitmapWorkerTask(mImageView);
task.execute(resId);
}
}
BitmapWorkerTask 需要把新的圖片添加到緩存中:
復制代碼 代碼如下:
class BitmapWorkerTask extends AsyncTask<integer, void,="" bitmap=""> {
...
// Decode image in background.
@Override
protected Bitmap doInBackground(Integer... params) {
final Bitmap bitmap = decodeSampledBitmapFromResource(
getResources(), params[0], 100, 100));
addBitmapToMemoryCache(String.valueOf(params[0]), bitmap);
return bitmap;
}
...
}
下頁將為您介紹其它兩種方法使用磁盤緩存和處理配置改變事件
使用磁盤緩存
在訪問最近使用過的圖片中,內存緩存速度很快,但是您無法確定圖片是否在緩存中存在。像
GridView 這種控件可能具有很多圖片需要顯示,很快圖片數據就填滿了緩存容量。
同時您的程序還可能被其他任務打斷,比如打進的電話 — 當您的程序位於後台的時候,系統可能會清楚到這些圖片緩存。一旦用戶恢復使用您的程序,您還需要重新處理這些圖片。
在這種情況下,可以使用磁盤緩存來保存這些已經處理過的圖片,當這些圖片在內存緩存中不可用的時候,可以從磁盤緩存中加載從而省略了圖片處理過程。
當然, 從磁盤載入圖片要比從內存讀取慢很多,並且應該在非UI線程中載入磁盤圖片。
注意: 如果緩存的圖片經常被使用的話,可以考慮使用
ContentProvider ,例如在圖庫程序中就是這樣干滴。
在示例代碼中有個簡單的 DiskLruCache 實現。然後,在Android 4.0中包含了一個更加可靠和推薦使用的DiskLruCache(libcore/luni/src/main/java/libcore/io/DiskLruCache.java)
。您可以很容易的把這個實現移植到4.0之前的版本中使用(來 href=”http://www.google.com/search?q=disklrucache”>Google一下 看看其他人是否已經這樣干了!)。
這裡是一個更新版本的 DiskLruCache :
復制代碼 代碼如下:
private DiskLruCache mDiskCache;
private static final int DISK_CACHE_SIZE = 1024 * 1024 * 10; // 10MB
private static final String DISK_CACHE_SUBDIR = "thumbnails";
@Override
protected void onCreate(Bundle savedInstanceState) {
...
// Initialize memory cache
...
File cacheDir = getCacheDir(this, DISK_CACHE_SUBDIR);
mDiskCache = DiskLruCache.openCache(this, cacheDir, DISK_CACHE_SIZE);
...
}
class BitmapWorkerTask extends AsyncTask<integer, void,="" bitmap=""> {
...
// Decode image in background.
@Override
protected Bitmap doInBackground(Integer... params) {
final String imageKey = String.valueOf(params[0]);
// Check disk cache in background thread
Bitmap bitmap = getBitmapFromDiskCache(imageKey);
if (bitmap == null) { // Not found in disk cache
// Process as normal
final Bitmap bitmap = decodeSampledBitmapFromResource(
getResources(), params[0], 100, 100));
}
// Add final bitmap to caches
addBitmapToCache(String.valueOf(imageKey, bitmap);
return bitmap;
}
...
}
public void addBitmapToCache(String key, Bitmap bitmap) {
// Add to memory cache as before
if (getBitmapFromMemCache(key) == null) {
mMemoryCache.put(key, bitmap);
}
// Also add to disk cache
if (!mDiskCache.containsKey(key)) {
mDiskCache.put(key, bitmap);
}
}
public Bitmap getBitmapFromDiskCache(String key) {
return mDiskCache.get(key);
}
// Creates a unique subdirectory of the designated app cache directory. Tries to use external
// but if not mounted, falls back on internal storage.
public static File getCacheDir(Context context, String uniqueName) {
// Check if media is mounted or storage is built-in, if so, try and use external cache dir
// otherwise use internal cache dir
final String cachePath = Environment.getExternalStorageState() == Environment.MEDIA_MOUNTED
|| !Environment.isExternalStorageRemovable() ?
context.getExternalCacheDir().getPath() : context.getCacheDir().getPath();
return new File(cachePath + File.separator + uniqueName);
}
在UI線程中檢測內存緩存,在後台線程中檢測磁盤緩存。磁盤操作從來不應該在UI線程中實現。當圖片處理完畢後,最終的結果會同時添加到
內存緩存和磁盤緩存中以便將來使用。
處理配置改變事件
運行時的配置變更 — 例如 屏幕方向改變 — 導致Android摧毀正在運行的Activity,然後使用
新的配置從新啟動該Activity (詳情,參考這裡 Handling Runtime Changes)。
您需要注意避免在配置改變的時候導致重新處理所有的圖片,從而提高用戶體驗。
幸運的是,您在 使用內存緩存 部分已經有一個很好的圖片緩存了。該緩存可以通過
Fragment (Fragment會通過setRetainInstance(true)函數保存起來)來傳遞給新的Activity
當Activity重新啟動 後,Fragment 被重新附加到Activity中,您可以通過該Fragment來獲取緩存對象。
下面是一個在 Fragment中保存緩存的示例:
復制代碼 代碼如下:
private LruCache<string, bitmap=""> mMemoryCache;
@Override
protected void onCreate(Bundle savedInstanceState) {
...
RetainFragment mRetainFragment = RetainFragment.findOrCreateRetainFragment(getFragmentManager());
mMemoryCache = RetainFragment.mRetainedCache;
if (mMemoryCache == null) {
mMemoryCache = new LruCache<string, bitmap="">(cacheSize) {
... // Initialize cache here as usual
}
mRetainFragment.mRetainedCache = mMemoryCache;
}
...
}
class RetainFragment extends Fragment {
private static final String TAG = "RetainFragment";
public LruCache<string, bitmap=""> mRetainedCache;
public RetainFragment() {}
public static RetainFragment findOrCreateRetainFragment(FragmentManager fm) {
RetainFragment fragment = (RetainFragment) fm.findFragmentByTag(TAG);
if (fragment == null) {
fragment = new RetainFragment();
}
return fragment;
}
@Override
public void onCreate(Bundle savedInstanceState) {
super.onCreate(savedInstanceState);
<strong>setRetainInstance(true);</strong>
}
}
此外您可以嘗試分別使用和不使用Fragment來旋轉設備的屏幕方向來查看具體的圖片載入情況。
 Android編程顯示網絡上的圖片實例詳解
本文實例講述了Android編程顯示網絡上的圖片的方法。分享給大家供大家參考,具體如下:在Android中顯示網絡上的圖片,需要先根據url找到圖片地址,然後把該圖片轉化
 Android面試中的一個常見問題:Layout_weight的用法
今天在公司第一次去當了回面試官,挺帶勁的啦,發現那位面試的小伙做的卷子裡有道關於layout_weight的問題,感覺答得不是很好,遂想寫個博客(其實是想要記錄下這有意思
 Android實戰之PreferenceActivity使用詳解
一、寫作前面 當我們做應用的時候,需要用戶配置一些信息,而這就是通常所說的應用設置。 對於Android系統來說,系統本身的設置帶來的用戶體驗和習慣已經深入人心,在我們
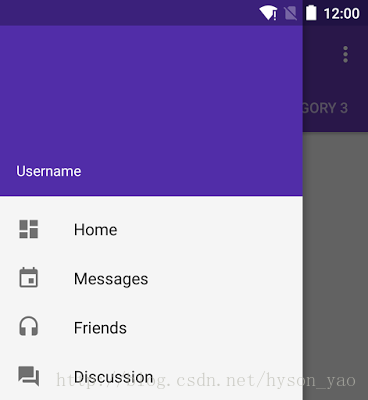 【Android】Android Design Support Library 的使用
Android 5.0 Lollipop 推出了 Material Design 安卓界面風格的設計理念並且給出了一個 Material Design 的兼容庫,庫中包含