編輯:關於Android編程
前面為大家講過計時器的順時針的兩種方法,在錄制視頻等操作中頗有使用,今天就給大家帶來倒計時實現的兩種方式。
雖然最近寫的都比較簡單和基礎,不過簡單不代表熟悉,基礎不代表就會,大牛繞過,哈,中牛小牛也可以繞過,這個是寫給初學者的。
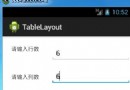
先搞個效果圖。
代碼實現方式也超級簡單啦,這裡首推第一種實現方式,而且也是比較適合大家的,就是通過直接繼承CountDownTimer來實現。
對於CountDownTimer這個類很簡單,繼承它的時候必須重寫構造方法和實現其虛擬方法。
構造方法的兩個參數分別是(倒計時開始時間,間隔時間)
另外兩個方法分別是onTick(現在還剩的時間),計時結束後你想做的時間可以在onFinish()中做。
值的注意的是,所有的時間都是以毫秒形式來做的,所以在你使用的時候要記得整除1000取商。
不過由於我使用的是私有內部類的方式對外部類存在引用,為了防止內存洩漏,在Activity銷毀的時候應該注意對其置空,同樣我們也應該避免重復創建對象。
另外一種方式還是使用我們常用的Handler + Thread的方式來實現。不過實現的時候同樣要非常小心內存洩漏,因為如果用戶在銷毀Activity的時候應該注意讓其計時子線程不再循環,這個可以通過設置一個tag標簽對其判斷。
這樣在銷毀的時候把這個tag標簽置為false,結束線程的執行!
下面是實現代碼:
package com.example.nanchen.timerdemo;

import android.os.Bundle;
import android.os.CountDownTimer;
import android.os.Handler;
import android.os.Message;
import android.support.v7.app.AppCompatActivity;
import android.view.View;
import android.view.View.OnClickListener;
import android.widget.Button;

public class MainActivity extends AppCompatActivity {

 private Button mBtnGetCode;
 private TimeCount mTimeCount;
 private Button mBtnGetCode2;
 private boolean timeFlag = true;

 @Override
 protected void onCreate(Bundle savedInstanceState) {
 super.onCreate(savedInstanceState);
 setContentView(R.layout.activity_main);

 mBtnGetCode = (Button) findViewById(R.id.main_btn_get_code);
 mBtnGetCode.setOnClickListener(new OnClickListener() {
  @Override
  public void onClick(View v) {
  mTimeCount = null;
  mTimeCount = new TimeCount(60 * 1000, 1000);
  mTimeCount.start();
  }
 });

 mBtnGetCode2 = (Button) findViewById(R.id.main_btn_get_code_2);
 mBtnGetCode2.setOnClickListener(new OnClickListener() {
  @Override
  public void onClick(View v) {
  mBtnGetCode2.setClickable(false);
  mBtnGetCode2.setBackgroundColor(getResources().getColor(R.color.btn_unable));
  timeFlag = true;
  new Thread() {
   @Override
   public void run() {
   super.run();
   for (int i = 59; i >= 0 && timeFlag; i--) {
    try {
    sleep(1000);
    Message msg = Message.obtain();
    msg.what = i;
    mHandler.sendMessage(msg);
    } catch (InterruptedException e) {
    e.printStackTrace();
    }
   }
   }
  }.start();
  }
 });
 }

 private Handler mHandler = new Handler() {
 @Override
 public void handleMessage(Message msg) {
  super.handleMessage(msg);
  if (msg.what > 0) {
  mBtnGetCode2.setText("(" + msg.what + ")秒後重試");
  } else {
  mBtnGetCode2.setText("獲取驗證碼");
  mBtnGetCode2.setClickable(true);
  mBtnGetCode2.setBackgroundColor(getResources().getColor(R.color.colorAccent));
  }
 }


 };


 /**
 * Activity 銷毀的時候注意把所有引用置為空,防止內存洩漏
 */
 @Override
 protected void onDestroy() {
 super.onDestroy();
 mTimeCount = null;
 timeFlag = false;
 }

 /**
 * 實現倒計時的類
 */
 private class TimeCount extends CountDownTimer {

 /**
  * @param millisInFuture The number of millis in the future from the call
  *    to {@link #start()} until the countdown is done and {@link #onFinish()}
  *    is called.
  * @param countDownInterval The interval along the way to receive
  *    {@link #onTick(long)} callbacks.
  */
 public TimeCount(long millisInFuture, long countDownInterval) {
  super(millisInFuture, countDownInterval);
 }

 /**
  * 計時過程顯示 按鈕不可用 設置為灰色
  *
  * @param millisUntilFinished
  */
 @Override
 public void onTick(long millisUntilFinished) {
  mBtnGetCode.setClickable(false);
  mBtnGetCode.setBackgroundColor(getResources().getColor(R.color.btn_unable));
  mBtnGetCode.setText("(" + millisUntilFinished / 1000 + ")秒後重試");
 }

 /**
  * 計時結束調用
  */
 @Override
 public void onFinish() {
  mBtnGetCode.setClickable(true);
  mBtnGetCode.setText("獲取驗證碼方式1");
  mBtnGetCode.setBackgroundColor(getResources().getColor(R.color.colorPrimaryDark));
 }
 }


}
簡單看一下xml文件
<?xml version="1.0" encoding="utf-8"?>
<RelativeLayout
 xmlns:android="http://schemas.android.com/apk/res/android"
 xmlns:tools="http://schemas.android.com/tools"
 android:id="@+id/activity_main"
 android:layout_width="match_parent"
 android:layout_height="match_parent"
 tools:context="com.example.nanchen.timerdemo.MainActivity">

 <Button
 android:layout_marginTop="10dp"
 android:layout_width="match_parent"
 android:layout_height="wrap_content"
 android:id="@+id/main_btn_get_code"
 android:text="獲取驗證碼方式1"
 android:background="@color/colorPrimaryDark"/>

 <TextView
 android:layout_width="match_parent"
 android:layout_height="1dp"
 android:id="@+id/main_line1"
 android:background="@color/btn_unable"
 android:layout_below="@+id/main_btn_get_code"
 android:layout_marginTop="10dp"/>

 <Button
 android:layout_width="match_parent"
 android:layout_height="wrap_content"
 android:layout_below="@+id/main_line1"
 android:layout_marginTop="10dp"
 android:text="獲取驗證碼方式2"
 android:id="@+id/main_btn_get_code_2"
 android:background="@color/colorAccent"/>

</RelativeLayout>
寫在最後:雖然代碼和實現都非常簡單,你可能不費吹灰之力,不過倘若轉載的話,還是留個本文鏈接吧~thank you!
github鏈接:https://github.com/nanchen2251/TimerDemo
以上就是本文的全部內容,希望對大家的學習有所幫助,也希望大家多多支持本站。
 Android - Handler is abstract, cannot be instantiated.
Android使用Handler進行實例化(new)時, 如: private Handler handler = new Handler(); 會報錯Ha
 Android成長之路(7)——關於隱式Intent的用法
Android其中最重要的特性之一,就是一個應用可以基於“action”來切換到另一個應用。比如,你的應用想要查找地方,在地圖上顯示。但是不一定要
 unity的 斷言 Unity 5.1 Assertion Library
當你建立Unity 的手機游戲你最可能渴望設置Script Call Optimization為Fast But No Exceptions,只要你相信你能做到。Fast
 Android酷炫實用的開源框架(UI框架)
前言忙碌的工作終於可以停息一段時間了,最近突然有一個想法,就是自己寫一個app,所以找了一些合適開源控件,這樣更加省時,再此分享給大家,希望能對大家有幫助,此博文介紹的都