編輯:關於Android編程
2015年Google IO大會分布了DataBinding庫,能夠更快捷便利的實現MVVM結構模式。但是,通過對DataBinding的學習,其中踩過得坑,今天要在這裡記錄一下。對於DataBinding一些比較基礎的使用,在這裡就不在記錄了,畢竟現在Google一下,出來很多的教程,而且,android developer官網中,也已經對其基本使用方法做了詳細介紹,有英語基礎的童鞋,還是去看比較官方的文章。如果英文基礎不太好的,https://realm.io/cn/news/data-binding-android-boyar-mount/推薦這個博客,會有很大收獲的,同時,謝謝棉花糖的這篇文章,解決了很多的疑惑。
關於配置環境:
2.0以上的 Android Studio 已經內置了對 Android Data Binding 框架的支持,配置起來也很簡單,只需要在 app 的 build.gradle 文件中添加下面的內容就好了
dataBinding{
enabled = true
}
但是,gradle的版本,至少得是1.5.0以上,否則配置會很麻煩。因為本人使用的Android studio版本是2.1.3,gradle也更改成了2.1.3,所以,不需要做過多的設置。但是有一點,Android studio對DataBinding的支持還不是完全的兼容,有些地方確實有點坑。
關於使用:
最近,把之前寫的一個小項目,更改成了DataBinding的架構模式。感覺Android studio2.1.3版本已經很新了,但是對於一些屬性的提示還不是很好,並不是完全支持的。比較基礎的使用方法,在這裡就不在提了,主要是寫一下對ListView以及GridView的使用,還有就是對adapter的寫法,以及點擊跳轉的事件。
首先,先是寫一個ListView或者GridView的xml文件,代碼如下:
<?xml version="1.0" encoding="utf-8"?>
<layout
xmlns:android="http://schemas.android.com/apk/res/android"
xmlns:app="http://schemas.android.com/apk/res-auto">
<data>
<variable
name="adapter"
type="android.widget.BaseAdapter"/>
</data>
<LinearLayout
android:layout_width="match_parent"
android:layout_height="match_parent"
android:orientation="vertical">
<ListView
android:id="@+id/list_view"
android:layout_width="match_parent"
android:layout_height="match_parent"
app:adapter="@{adapter}"/>
</LinearLayout>
</layout>
重點在app:adapter="@{adapter}"這句話中,主要是自定義一個adapter,來對ListView或者GridView進行數據的綁定。
然後,最主要的,其實就是適配器的寫法。在以往的寫法中,BaseAdapter肯定需要ViewHolder來進行視圖的綁定,並且做緩存。那麼,在DataBinding中,完全不需要ViewHolder,而且,針對單布局的話,完全可以寫個通用的adapter,針對一般的小項目,這個adapter完全的夠用,那麼,現在先來隨便寫一個adapter的item的xml文件,代碼如下:
<?xml version="1.0" encoding="utf-8"?>
<layout xmlns:android="http://schemas.android.com/apk/res/android"
xmlns:app="http://schemas.android.com/apk/res-auto">
<data>
<variable
name="userbean"
type="com.lqy.newtestdemo.UserBean"/>
</data>
<RelativeLayout
android:layout_width="match_parent"
android:layout_height="match_parent"
android:padding="10dp">
<ImageView
android:id="@+id/image"
android:layout_width="150dp"
android:layout_height="100dp"
android:layout_marginRight="5dp"
app:imageUrl="@{userbean.picUrl}"/>
<LinearLayout
android:layout_width="wrap_content"
android:layout_height="wrap_content"
android:layout_toRightOf="@id/image"
android:orientation="vertical">
<TextView
android:layout_width="wrap_content"
android:layout_height="wrap_content"
android:text="@{userbean.title}"
android:textColor="@android:color/black"
android:textSize="20sp"/>
<TextView
android:layout_width="wrap_content"
android:layout_height="wrap_content"
android:layout_marginTop="5dp"
android:text="@{userbean.ctime}"/>
<TextView
android:layout_width="wrap_content"
android:layout_height="wrap_content"
android:layout_marginTop="5dp"
android:text="@{userbean.description}"/>
</LinearLayout>
</RelativeLayout>
</layout>
可以看到,布局中,主要是通過data中的variable屬性來標識一個變量名,在控件中,只需要android:text="@{userbean.title}",就能進行變量的賦值,這個在基礎用法中都有說明,這裡就不在論述。下面就是重點了,關於BaseAdapter的寫法,廢話不多說,直接上代碼:
package com.lqy.newtestdemo;
import android.content.Context;
import android.databinding.DataBindingUtil;
import android.databinding.ViewDataBinding;
import android.view.LayoutInflater;
import android.view.View;
import android.view.ViewGroup;
import android.widget.BaseAdapter;
import java.util.List;
/**
* 通用的adapter
* Created by LQY on 2016/10/10.
*/
public class ListAdapter<T> extends BaseAdapter {
private Context context;
private List<T> list;
private int layoutId;//單布局
private int variableId;
public ListAdapter(Context context, List<T> list, int layoutId, int variableId) {
this.context = context;
this.list = list;
this.layoutId = layoutId;
this.variableId = variableId;
}
@Override
public int getCount() {
return list.size();
}
@Override
public Object getItem(int position) {
return list.get(position);
}
@Override
public long getItemId(int position) {
return position;
}
@Override
public View getView(int position, View convertView, ViewGroup parent) {
ViewDataBinding binding = null;
if (convertView == null){
binding =DataBindingUtil.inflate(LayoutInflater.from(context),layoutId,parent,false);
} else {
binding = DataBindingUtil.getBinding(convertView);
}
binding.setVariable(variableId,list.get(position));
return binding.getRoot();
}
}
在這裡可以看到,完全看不到ViewHolder的蹤跡,而且,只需幾行的代碼,就能將適配器寫好,並且,可以用到多個ListView或者GridView中,adapter設置好以後,只需要在Activity中加入這樣兩句話就可以:
ListAdapter<UserBean> adapter = new ListAdapter<>(MainActivity.this, list, R.layout.item, BR.userbean);
binding.setAdapter(adapter);
binding怎麼來的,這裡就不在論述,請大家去看基礎使用方法。那麼,在寫一個通用的adapter的時候,我們可以看到ListAdapter的泛型所代表的,其實就是一個Bean文件,是你需要賦值的那個文件。list代表的是一個List的列表值,這個列表可以是你在Json解析出來得列表值,也可以是你通過list.add所附的值,這些就要看你項目的需要了。最坑的地方在BR上,BR說起來就跟項目本身會產生的R文件是一個道理,只不過,BR是DataBinding所產生的一個R文件,也需要導入一個BR的包,當然,如果項目沒什麼問題的,Android studio會提醒這個BR值導包的。我踩到的坑是,明明代碼中沒有任何問題,也沒有錯出現,第一次運行成功了,第二次在運行的時候,就提示BR文件找不到,包刪了重新導都導不進去,clean一下不管用,包還是導不進去,Rebuild一下,提示找不到BR包,怎麼都過不去。最後我只能把整個Android studio關掉在重新打開,發現BR包導進去了,然後也沒BUG了,運行也成功了。。。所以,如果你也遇到這種情況了,就請關閉Android studio並且重新打開一下,如果還沒好,就證明你的程序其實是有錯誤的,仔細找找就好。差不多就這個樣子吧。
下面還有一個問題,那就是關於點擊跳轉的問題。在其他的一些教程裡面,可能只寫到了onClick事件的綁定,其中能實現的,就是改變當前數值或者字段。但是,還沒一些教程來講如何進行跳轉。現在我就來講一下跳轉如何實現,先看代碼:
binding.listView.setOnItemClickListener(new AdapterView.OnItemClickListener() {
@Override
public void onItemClick(AdapterView<?> parent, View view, int position, long id) {
Intent intent = new Intent(MainActivity.this, WebActivity.class);
intent.putExtra("url", list.get(position).getUrl());
startActivity(intent);
}
});
在Activity頁面,還可以使用setOnItemClickListener方法。之前在調用setOnItemClickListener方法的時候,先是定義一個ListView的變量名,然後findByViewId來關聯上xml文件的ListView的ID值,然後才能調用其方法。用了DataBinding以後,只要用binding.listView就可以直接調用點擊事件,完全不需要在findByViewId,而listView其實就是xml裡面的ID值,而這個變形的ID值其實是DataBinding根據ID值自動生成的,你只需要記得你起的名字是什麼,根據大概的規律來找到自己定義的ID就好,這裡並沒有什麼難度。不光ListView可以這樣用,這個同樣適用於GridView。我在項目中也用到了GridView,親測這個ListAdapter同樣適用於GridView。並且,在我的項目裡,是一個頁面用到了兩個GridView,只需要在data中定義兩個不同的variable值,並且name的定義名稱要定義不同的名字,這樣就可以同時使用一個ListAdapter了,後期我會將源碼放上來,這裡只是記錄一下我使用的方法,以及需要注意的地方。
以上所述是小編給大家介紹的Android 開發之dataBinding與ListView及事件,希望對大家有所幫助,如果大家有任何疑問歡迎給我留言,小編會及時回復大家的!
 android 百度地圖定位輔助教程
這裡使用講解的是androidStudio下開發android應用,實現百度地圖定位功能的輔助教程。登入百度地圖API官方網站http://lbsyun.baidu.co
 Android loading界面的一種加載動態圖片的方式
效果圖:(方框從左到右進行顯示)圖片資源: 原理介紹:第一步:將三張圖片按位置放好。此時圖片資源是全部顯示。(目的是堅持位置的正確性)第二步:編寫 shader
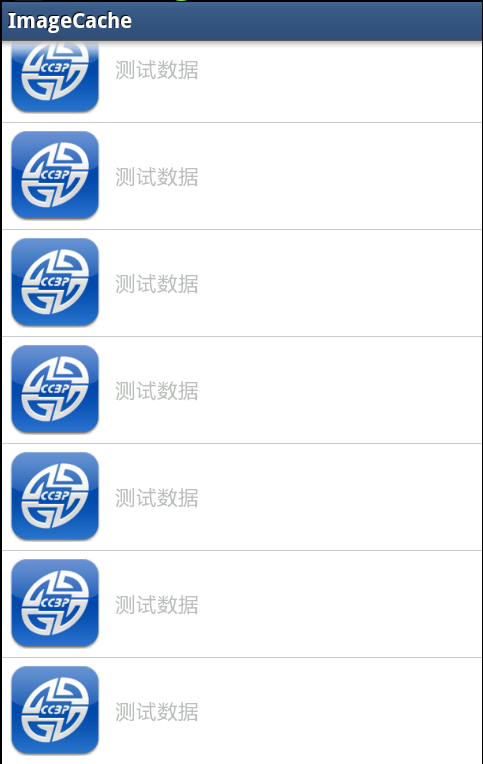 Android實現圖片異步加載及本地緩存
在android項目中訪問網絡圖片是非常普遍性的事情,如果我們每次請求都要訪問網絡來獲取圖片,會非常耗費流量,而且圖片占用內存空間也比較大,圖片過多且不釋放的話很容易造成
 [Android] 開心消消樂代碼(寫的比較簡單)
突然想要在android上寫一個消消樂的代碼,在此之前沒有系統地學過java的面向對象,也沒有任何android相關知識,不過還是會一點C++。8月初開始搭建環境,在這上