編輯:關於Android編程
本文實例講述了Android實現為Notification加上一個進度條的方法。分享給大家供大家參考,具體如下:
package com.notification;
import android.app.Activity;
import android.app.Notification;
import android.app.NotificationManager;
import android.app.PendingIntent;
import android.content.Intent;
import android.os.Bundle;
import android.os.Handler;
import android.os.Message;
import android.view.View;
import android.view.View.OnClickListener;
import android.widget.Button;
import android.widget.RemoteViews;
import android.widget.Toast;
public class nofificationActivity extends Activity implements OnClickListener {
  private static final int NOTIFICATION_ID = 0x12;
  private Notification notification = null;
  private NotificationManager manager = null;
  public Handler handler;
  private int _progress = 0;
  private Thread thread = null;
  private boolean isStop = false;
  // 當界面處理停止的狀態 時,設置讓進度條取消
  @Override
  protected void onPause() {
    // TODO Auto-generated method stub
    isStop = false;
    manager.cancel(NOTIFICATION_ID);
    super.onPause();
  }
  /** Called when the activity is first created. */
  @Override
  public void onCreate(Bundle savedInstanceState) {
    super.onCreate(savedInstanceState);
    setContentView(R.layout.main);
    Button btn = (Button) findViewById(R.id.Button01);
    btn.setOnClickListener(this);
    notification = new Notification(R.drawable.icon, "帶進條的提醒", System
        .currentTimeMillis());
    notification.icon = R.drawable.icon;
    // 通過RemoteViews 設置notification中View 的屬性
    notification.contentView = new RemoteViews(getApplication()
        .getPackageName(), R.layout.custom_dialog);
    notification.contentView.setProgressBar(R.id.pb, 100, 0, false);
    notification.contentView.setTextViewText(R.id.tv, "進度" + _progress
        + "%");
    // 通過PendingIntetn
    // 設置要跳往的Activity,這裡也可以設置發送一個服務或者廣播,
    // 不過在這裡的操作都必須是用戶點擊notification之後才觸發的
    notification.contentIntent = PendingIntent.getActivity(this, 0,
        new Intent(this, remoteView.class), 0);
    // 獲得一個NotificationManger 對象,此對象可以對notification做統一管理,只需要知道ID
    manager = (NotificationManager) getSystemService(NOTIFICATION_SERVICE);
  }
  @Override
  public void onClick(View v) {
    // TODO Auto-generated method stub
    isStop = true;
    manager.notify(NOTIFICATION_ID, notification);
    thread = new Thread(new Runnable() {
      @Override
      public void run() {
        Thread.currentThread();
        // TODO Auto-generated method stub
        while (isStop) {
          _progress += 10;
          Message msg = handler.obtainMessage();
          msg.arg1 = _progress;
          msg.sendToTarget();
          try {
            Thread.sleep(500);
          } catch (InterruptedException e) {
            // TODO Auto-generated catch block
            e.printStackTrace();
          }
        }
      }
    });
    thread.start();
    handler = new Handler() {
      @Override
      public void handleMessage(Message msg) {
        // TODO Auto-generated method stub
        notification.contentView.setProgressBar(R.id.pb, 100, msg.arg1,
            false);
        notification.contentView.setTextViewText(R.id.tv, "進度"
            + msg.arg1 + "%");
        manager.notify(NOTIFICATION_ID, notification);
        if (msg.arg1 == 100) {
          _progress = 0;
          manager.cancel(NOTIFICATION_ID);
          isStop = false;
          Toast.makeText(nofificationActivity.this, "下載完畢", 1000)
              .show();
        }
        super.handleMessage(msg);
      }
    };
  }
}
更多關於Android相關內容感興趣的讀者可查看本站專題:《Android基本組件用法總結》、《Android視圖View技巧總結》、《Android資源操作技巧匯總》、《Android文件操作技巧匯總》、《Android操作SQLite數據庫技巧總結》、《Android操作json格式數據技巧總結》、《Android數據庫操作技巧總結》、《Android編程開發之SD卡操作方法匯總》、《Android開發入門與進階教程》、《Android編程之activity操作技巧總結》及《Android控件用法總結》
希望本文所述對大家Android程序設計有所幫助。
 AIDL
AIDL
官網地址詳解分析:http://developer.android.com/guide/components/aidl.html一)什麼是AIDL –》 應用
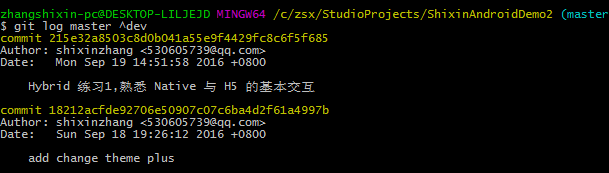 git 對比兩個分支差異
比如我們有 2 個分支:master, dev,現在想查看這兩個 branch 的區別,有以下幾種方式:1.查看 dev 有,而 master 中沒有的:git log
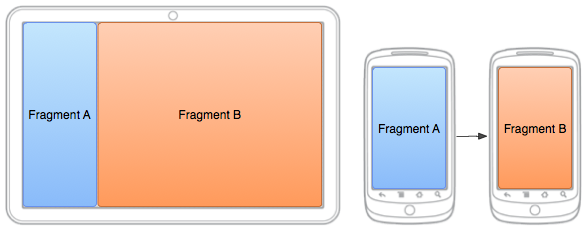
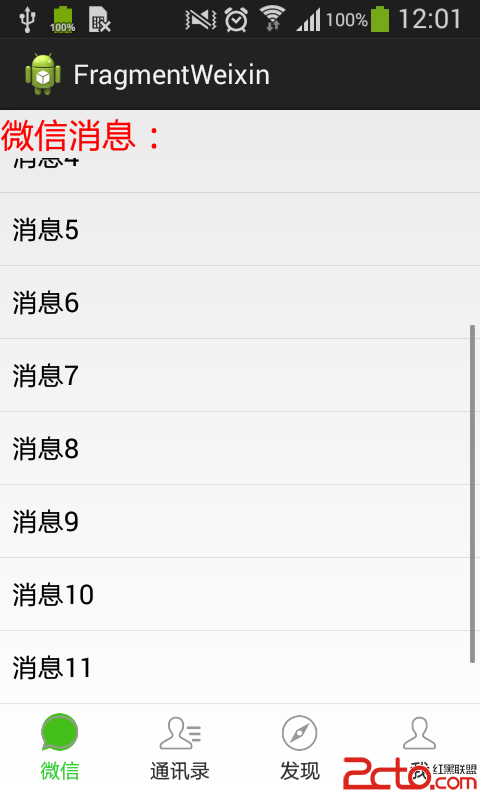 Android組件:Fragment切換後保存狀態
之前寫的第一篇Fragment實例,和大多數人一開始學的一樣,都是通過FragmentTransaction的replace方法來實現,replace方法相
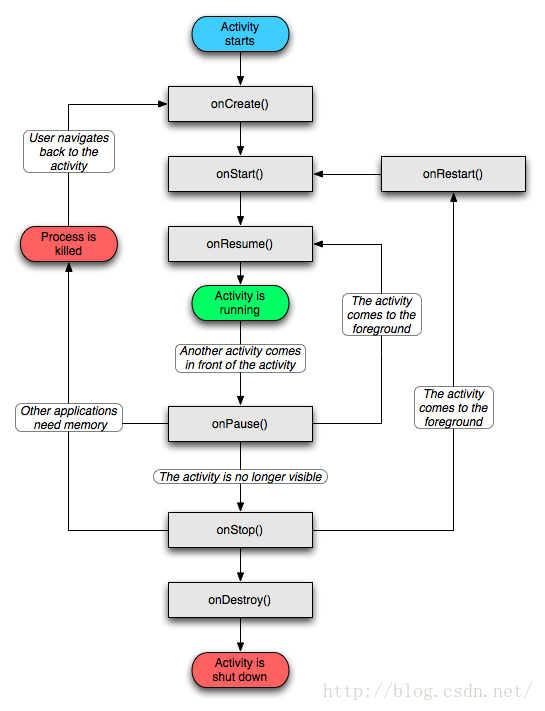 Android中Activity生命周期和啟動模式詳解
Activity生命周期經典圖解:按鍵對生命周期的影響:BACK鍵: 當我們按BACK鍵時,我們這個應用程序將結束,這時候我們將先後調用onPause()->on