編輯:關於Android編程
Android DownloadProvider 源碼分析:
Download的源碼編譯分為兩個部分,一個是DownloadProvider.apk, 一個是DownloadProviderUi.apk.
這兩個apk的源碼分別位於
packages/providers/DownloadProvider/ui/src
packages/providers/DownloadProvider/src
其中,DownloadProvider的部分是下載邏輯的實現,而DownloadProviderUi是界面部分的實現。
然後DownloadProvider裡面的下載雖然主要是通過DownloadService進行的操作,但是由於涉及到Notification的更新,下載進度的展示,下載的管理等。
所以還是有不少其它的類來分別進行操作。
DownloadProvider -- 數據庫操作的封裝,繼承自ContentProvider;
DownloadManager -- 大部分邏輯是進一步封裝數據操作,供外部調用;
DownloadService -- 封裝文件download,delete等操作,並且操縱下載的norification;繼承自Service;
DownloadNotifier -- 狀態欄Notification邏輯;
DownloadReceiver -- 配合DownloadNotifier進行文件的操作及其Notification;
DownloadList -- Download app主界面,文件界面交互;
下載一般是從Browser裡面點擊鏈接開始,我們先來看一下Browser中的代碼
在browser的src/com/Android/browser/DownloadHandler.Java函數中,我們可以看到一個很完整的Download的調用,我們在寫自己的app的時候,也可以對這一段進行參考:
public static void startingDownload(Activity activity,
    String url, String userAgent, String contentDisposition,
    String mimetype, String referer, boolean privateBrowsing, long contentLength,
    String filename, String downloadPath) {
  // java.net.URI is a lot stricter than KURL so we have to encode some
  // extra characters. Fix for b 2538060 and b 1634719
  WebAddress webAddress;
  try {
    webAddress = new WebAddress(url);
    webAddress.setPath(encodePath(webAddress.getPath()));
  } catch (Exception e) {
    // This only happens for very bad urls, we want to chatch the
    // exception here
    Log.e(LOGTAG, "Exception trying to parse url:" + url);
    return;
  }

  String addressString = webAddress.toString();
  Uri uri = Uri.parse(addressString);
  final DownloadManager.Request request;
  try {
    request = new DownloadManager.Request(uri);
  } catch (IllegalArgumentException e) {
    Toast.makeText(activity, R.string.cannot_download, Toast.LENGTH_SHORT).show();
    return;
  }
  request.setMimeType(mimetype);
  // set downloaded file destination to /sdcard/Download.
  // or, should it be set to one of several Environment.DIRECTORY* dirs
  // depending on mimetype?
  try {
    setDestinationDir(downloadPath, filename, request);
  } catch (Exception e) {
    showNoEnoughMemoryDialog(activity);
    return;
  }
  // let this downloaded file be scanned by MediaScanner - so that it can
  // show up in Gallery app, for example.
  request.allowScanningByMediaScanner();
  request.setDescription(webAddress.getHost());
  // XXX: Have to use the old url since the cookies were stored using the
  // old percent-encoded url.
  String cookies = CookieManager.getInstance().getCookie(url, privateBrowsing);
  request.addRequestHeader("cookie", cookies);
  request.addRequestHeader("User-Agent", userAgent);
  request.addRequestHeader("Referer", referer);
  request.setNotificationVisibility(
      DownloadManager.Request.VISIBILITY_VISIBLE_NOTIFY_COMPLETED);
  final DownloadManager manager = (DownloadManager) activity
      .getSystemService(Context.DOWNLOAD_SERVICE);
  new Thread("Browser download") {
    public void run() {
      manager.enqueue(request);
    }
  }.start();
  showStartDownloadToast(activity);
}
在這個操作中,我們看到添加了request的各種參數,然後最後調用了DownloadManager的enqueue進行下載,並且在開始後,彈出了開始下載的這個toast。manager是一個DownloadManager的實例,DownloadManager是存在與frameworks/base/core/java/android/app/DownloadManager.java。可以看到enqueue的實現為:
public long enqueue(Request request) {
  ContentValues values = request.toContentValues(mPackageName);
  Uri downloadUri = mResolver.insert(Downloads.Impl.CONTENT_URI, values);
  long id = Long.parseLong(downloadUri.getLastPathSegment());
  return id;
enqueue函數主要是將Rquest實例分解組成一個ContentValues實例,並且添加到數據庫中,函數返回插入的這條數據返回的ID;ContentResolver.insert函數會調用到DownloadProvider實現的ContentProvider的insert函數中去,如果我們去查看insert的code的話,我們可以看到操作是很多的。但是我們只需要關注幾個關鍵的部分:
......
//將相關的請求參數,配置等插入到downloads數據庫;
long rowID = db.insert(DB_TABLE, null, filteredValues);
......
//將相關的請求參數,配置等插入到request_headers數據庫中;
insertRequestHeaders(db, rowID, values);
......
if (values.getAsInteger(Downloads.Impl.COLUMN_DESTINATION) ==
        Downloads.Impl.DESTINATION_NON_DOWNLOADMANAGER_DOWNLOAD) {
      // When notification is requested, kick off service to process all
      // relevant downloads.
//啟動DownloadService進行下載及其它工作
      if (Downloads.Impl.isNotificationToBeDisplayed(vis)) {
        context.startService(new Intent(context, DownloadService.class));
      }
    } else {
      context.startService(new Intent(context, DownloadService.class));
    }
    notifyContentChanged(uri, match);
    return ContentUris.withAppendedId(Downloads.Impl.CONTENT_URI, rowID);
在這邊,我們就可以看到下載的DownloadService的調用了。因為是一個startService的方法,所以我們在DownloadService裡面,是要去走oncreate的方法的。
@Override
public void onCreate() {
  super.onCreate();
  if (Constants.LOGVV) {
    Log.v(Constants.TAG, "Service onCreate");
  }

  if (mSystemFacade == null) {
    mSystemFacade = new RealSystemFacade(this);
  }

  mAlarmManager = (AlarmManager) getSystemService(Context.ALARM_SERVICE);
  mStorageManager = new StorageManager(this);

  mUpdateThread = new HandlerThread(TAG + "-UpdateThread");
  mUpdateThread.start();
  mUpdateHandler = new Handler(mUpdateThread.getLooper(), mUpdateCallback);
  mScanner = new DownloadScanner(this);
  mNotifier = new DownloadNotifier(this);
  mNotifier.cancelAll();

  mObserver = new DownloadManagerContentObserver();
  getContentResolver().registerContentObserver(Downloads.Impl.ALL_DOWNLOADS_CONTENT_URI,
      true, mObserver);
}
這邊的話,我們可以看到先去啟動了一個handler去接收callback的處理
mUpdateThread = new HandlerThread(TAG + "-UpdateThread");
 mUpdateThread.start();
 mUpdateHandler = new Handler(mUpdateThread.getLooper(), mUpdateCallback);
然後去
getContentResolver().registerContentObserver(Downloads.Impl.ALL_DOWNLOADS_CONTENT_URI,
        true, mObserver)
是去注冊監聽Downloads.Impl.ALL_DOWNLOADS_CONTENT_URI的Observer。
而oncreate之後,就會去調用onStartCommand方法.
@Override
ublic int onStartCommand(Intent intent, int flags, int startId) {
  int returnValue = super.onStartCommand(intent, flags, startId);
  if (Constants.LOGVV) {
    Log.v(Constants.TAG, "Service onStart");
  }
  mLastStartId = startId;
  enqueueUpdate();
  return returnValue;
}
在enqueueUpdate的函數中,我們會向mUpdateHandler發送一個MSG_UPDATE Message,
private void enqueueUpdate() {
  mUpdateHandler.removeMessages(MSG_UPDATE);
  mUpdateHandler.obtainMessage(MSG_UPDATE, mLastStartId, -1).sendToTarget();
}
mUpdateCallback中接收到並且處理:
private Handler.Callback mUpdateCallback = new Handler.Callback() {
    @Override
    public boolean handleMessage(Message msg) {
      Process.setThreadPriority(Process.THREAD_PRIORITY_BACKGROUND);
      final int startId = msg.arg1;
      final boolean isActive;
      synchronized (mDownloads) {
        isActive = updateLocked();
      }
      ......
      if (isActive) {
//如果Active,則會在Delayed 5×60000ms後發送MSG_FINAL_UPDATE Message,主要是為了“any finished operations that didn't trigger an update pass.”
        enqueueFinalUpdate();
      } else {
//如果沒有Active的任務正在進行,就會停止Service以及其它
        if (stopSelfResult(startId)) {
          if (DEBUG_LIFECYCLE) Log.v(TAG, "Nothing left; stopped");
          getContentResolver().unregisterContentObserver(mObserver);
          mScanner.shutdown();
          mUpdateThread.quit();
        }
      }
      return true;
    }
  };
這邊的重點是updateLocked()函數
  private boolean updateLocked() {
    final long now = mSystemFacade.currentTimeMillis();

    boolean isActive = false;
    long nextActionMillis = Long.MAX_VALUE;
//mDownloads初始化是一個空的Map<Long, DownloadInfo>
    final Set<Long> staleIds = Sets.newHashSet(mDownloads.keySet());

    final ContentResolver resolver = getContentResolver();
//獲取所有的DOWNLOADS任務
    final Cursor cursor = resolver.query(Downloads.Impl.ALL_DOWNLOADS_CONTENT_URI,
        null, null, null, null);
    try {
      final DownloadInfo.Reader reader = new DownloadInfo.Reader(resolver, cursor);
      final int idColumn = cursor.getColumnIndexOrThrow(Downloads.Impl._ID);
//迭代Download Cusor
      while (cursor.moveToNext()) {
        final long id = cursor.getLong(idColumn);
        staleIds.remove(id);

        DownloadInfo info = mDownloads.get(id);
//開始時,mDownloads是沒有任何內容的,info==null
        if (info != null) {
//從數據庫更新最新的Download info信息,來監聽數據庫的改變並且反應到界面上
          updateDownload(reader, info, now);
        } else {
//添加新下載的Dwonload info到mDownloads,並且從數據庫讀取新的Dwonload info
          info = insertDownloadLocked(reader, now);
        }
//這裡的mDeleted參數表示的是當我刪除了正在或者已經下載的內容時,首先數據庫會update這個info.mDeleted為true,而不是直接刪除文件
        if (info.mDeleted) {
//不詳細解釋delete函數,主要是刪除數據庫內容和現在文件內容
          if (!TextUtils.isEmpty(info.mMediaProviderUri)) {
        resolver.delete(Uri.parse(info.mMediaProviderUri), null, null);
          }
          deleteFileIfExists(info.mFileName);
          resolver.delete(info.getAllDownloadsUri(), null, null);

        } else {
          // 開始下載文件
          final boolean activeDownload = info.startDownloadIfReady(mExecutor);

          // 開始media scanner
          final boolean activeScan = info.startScanIfReady(mScanner);
          isActive |= activeDownload;
          isActive |= activeScan;
        }

        // Keep track of nearest next action
        nextActionMillis = Math.min(info.nextActionMillis(now), nextActionMillis);
      }
    } finally {
      cursor.close();
    }
    // Clean up stale downloads that disappeared
    for (Long id : staleIds) {
      deleteDownloadLocked(id);
    }
    // Update notifications visible to user
    mNotifier.updateWith(mDownloads.values());
    if (nextActionMillis > 0 && nextActionMillis < Long.MAX_VALUE) {
      final Intent intent = new Intent(Constants.ACTION_RETRY);
      intent.setClass(this, DownloadReceiver.class);
      mAlarmManager.set(AlarmManager.RTC_WAKEUP, now + nextActionMillis,
          PendingIntent.getBroadcast(this, 0, intent, PendingIntent.FLAG_ONE_SHOT));
    }
    return isActive;
  }
重點來看看文件的下載,startDownloadIfReady函數:
 public boolean startDownloadIfReady(ExecutorService executor) {
    synchronized (this) {
      final boolean isReady = isReadyToDownload();
      final boolean isActive = mSubmittedTask != null && !mSubmittedTask.isDone();
      if (isReady && !isActive) {
//更新數據庫的任務狀態為STATUS_RUNNING
        if (mStatus != Impl.STATUS_RUNNING) {
          mStatus = Impl.STATUS_RUNNING;
          ContentValues values = new ContentValues();
          values.put(Impl.COLUMN_STATUS, mStatus);
          mContext.getContentResolver().update(getAllDownloadsUri(), values, null, null);
        }
//開始下載任務
        mTask = new DownloadThread(
            mContext, mSystemFacade, this, mStorageManager, mNotifier);
        mSubmittedTask = executor.submit(mTask);
      }
      return isReady;
    }
  }
在DownloadThread的處理中,如果HTTP的狀態是ok的話,會去進行transferDate的處理。
private void transferData(State state, HttpURLConnection conn) throws StopRequestException {
......
in = conn.getInputStream();
......
//獲取InputStream和OutPutStream
if (DownloadDrmHelper.isDrmConvertNeeded(state.mMimeType)) {
          drmClient = new DrmManagerClient(mContext);
          final RandomAccessFile file = new RandomAccessFile(
              new File(state.mFilename), "rw");
          out = new DrmOutputStream(drmClient, file, state.mMimeType);
          outFd = file.getFD();
        } else {
          out = new FileOutputStream(state.mFilename, true);
          outFd = ((FileOutputStream) out).getFD();
        }
......
// Start streaming data, periodically watch for pause/cancel
      // commands and checking disk space as needed.
      transferData(state, in, out);
......
}
------
private void transferData(State state, InputStream in, OutputStream out)
      throws StopRequestException {
    final byte data[] = new byte[Constants.BUFFER_SIZE];
    for (;;) {
//從InputStream中讀取內容信息,“in.read(data)”,並且對數據庫中文件下載大小進行更新
      int bytesRead = readFromResponse(state, data, in);
      if (bytesRead == -1) { // success, end of stream already reached
        handleEndOfStream(state);
        return;
      }
      state.mGotData = true;
//利用OutPutStream寫入讀取的InputStream,"out.write(data, 0, bytesRead)"
      writeDataToDestination(state, data, bytesRead, out);
      state.mCurrentBytes += bytesRead;
      reportProgress(state);
      }
      checkPausedOrCanceled(state);
    }
  }
至此,下載文件的流程就說完了,繼續回到DownloadService的updateLocked()函數中來;重點來分析DownloadNotifier的updateWith()函數,這個方法用來更新Notification
//這段代碼是根據不同的狀態設置不同的Notification的icon
 if (type == TYPE_ACTIVE) {
        builder.setSmallIcon(android.R.drawable.stat_sys_download);
      } else if (type == TYPE_WAITING) {
        builder.setSmallIcon(android.R.drawable.stat_sys_warning);
      } else if (type == TYPE_COMPLETE) {
        builder.setSmallIcon(android.R.drawable.stat_sys_download_done);
      }
//這段代碼是根據不同的狀態來設置不同的notification Intent
// Build action intents
      if (type == TYPE_ACTIVE || type == TYPE_WAITING) {
        // build a synthetic uri for intent identification purposes
        final Uri uri = new Uri.Builder().scheme("active-dl").appendPath(tag).build();
        final Intent intent = new Intent(Constants.ACTION_LIST,
            uri, mContext, DownloadReceiver.class);
        intent.putExtra(DownloadManager.EXTRA_NOTIFICATION_CLICK_DOWNLOAD_IDS,
            getDownloadIds(cluster));
        builder.setContentIntent(PendingIntent.getBroadcast(mContext,
            0, intent, PendingIntent.FLAG_UPDATE_CURRENT));
        builder.setOngoing(true);

      } else if (type == TYPE_COMPLETE) {
        final DownloadInfo info = cluster.iterator().next();
        final Uri uri = ContentUris.withAppendedId(
            Downloads.Impl.ALL_DOWNLOADS_CONTENT_URI, info.mId);
        builder.setAutoCancel(true);

        final String action;
        if (Downloads.Impl.isStatusError(info.mStatus)) {
          action = Constants.ACTION_LIST;
        } else {
          if (info.mDestination != Downloads.Impl.DESTINATION_SYSTEMCACHE_PARTITION) {
            action = Constants.ACTION_OPEN;
          } else {
            action = Constants.ACTION_LIST;
          }
        }

        final Intent intent = new Intent(action, uri, mContext, DownloadReceiver.class);
        intent.putExtra(DownloadManager.EXTRA_NOTIFICATION_CLICK_DOWNLOAD_IDS,
            getDownloadIds(cluster));
        builder.setContentIntent(PendingIntent.getBroadcast(mContext,
            0, intent, PendingIntent.FLAG_UPDATE_CURRENT));

        final Intent hideIntent = new Intent(Constants.ACTION_HIDE,
            uri, mContext, DownloadReceiver.class);
        builder.setDeleteIntent(PendingIntent.getBroadcast(mContext, 0, hideIntent, 0));
      }
//這段代碼是更新下載的Progress
if (total > 0) {
          final int percent = (int) ((current * 100) / total);
          percentText = res.getString(R.string.download_percent, percent);

          if (speed > 0) {
            final long remainingMillis = ((total - current) * 1000) / speed;
            remainingText = res.getString(R.string.download_remaining,
                DateUtils.formatDuration(remainingMillis));
          }

          builder.setProgress(100, percent, false);
        } else {
          builder.setProgress(100, 0, true);
        }
最後調用mNotifManager.notify(tag, 0, notif);根據不同的狀態來設置不同的Notification的title和description
感謝閱讀,希望能幫助到大家,謝謝大家對本站的支持!
 Android開發:自定義Spinner適配器
一.大致效果~別嫌它丑二.關鍵代碼在注釋中講重點吧。(1)Spinner的布局: car_brand_spinner.xml即為彈出來的下拉列表的布局啦,後面的那個布局就
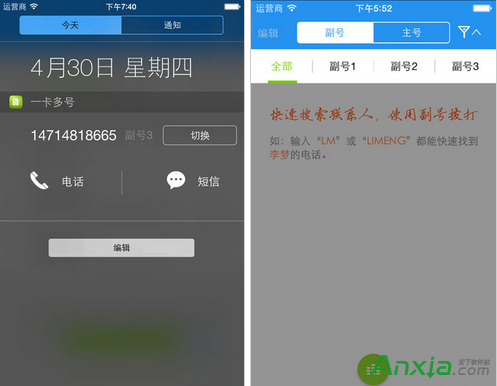 移動一卡多號業務開通/價錢/APP使用指南
中國移動推出的一卡多號業務可以在已有移動手機號上增加1-3個副號,不用換機、換卡。特別適合想擁有多個手機號碼的用戶或需要保護隱私的用戶服務。在不增加手機、不
 Android -- 跨應用綁定service(AIDL)
之前一章記錄了跨應用啟動service,之前學習過startService於bindService的區別及用法。使用bindService方法,activity需要ser
 android跳動的小球動畫
平時對牛逼動畫,高級UI,都深入的不多!近日,某頭條,推了一個android技術類視頻(平時在頭條關注技術比較多),講的是加載動畫效果,是動腦學院講的公開課,160分鐘,