編輯:關於Android編程
前面已學習了一種自定義控件的實現,是Andriod 自定義控件之音頻條,還沒學習的同學可以學習下,學習了的同學也要去溫習下,一定要自己完全的掌握了,再繼續學習,貪多嚼不爛可不是好的學習方法,我們爭取學習了一種技術就會一種技術,而且不光看了就算了,最好的方法就是看完我自己再練習下,再擴展下,在原來的基礎上在添加一些東西,比如,增加一些功能實現等等。
今天我們打算學習下另外一種自定義控件,就是創建可重復使用的組合控件,那麼問題來了:
什麼是可重復使用?
就是在應用中,可以在多個地方共同使用一套代碼。這樣不僅能減少我們的工作量,而且還能保持應用風格的一致,這種應用最多最直接的體現就是統一風格樣式的標題欄。
那什麼又是組合控件呢?
組合控件,顧名思義就是多個控件組合在一起,相互協作共同完成某些特定的功能。
下面我們就針對app應用中風格統一的標題欄來開始我們的學習。
首先,既然是一組組合的控件,那就必須有一個可以來包含這些控件的容器,我們所接觸的可以存放控件的容器很多,比如LinearLayout、RelativeLayout等等多種Layout,今天我們就選擇RelativeLayout來做我們的容器。和以前一樣,我們先定義一個CompositeViews類來繼承RelativeLayout類,並重寫它的構造方法,代碼如下:
public class CompositeViews extends RelativeLayout{

 public CompositeViews(Context context) {
  this(context,null);
 }
 public CompositeViews(Context context, AttributeSet attrs) {
  this(context, attrs,0);
 }
 public CompositeViews(Context context, AttributeSet attrs, int defStyleAttr) {
  super(context, attrs, defStyleAttr);
 }
 }
接下來,我們再定義三個TextView控件,分別是mLefeText,mRightText,textTitle用來顯示“返回”,“搜索”以及“標題”並且使用LayoutParams規定它們在容器裡面的對齊方式。請看代碼:
public class CompositeViews extends RelativeLayout{
 private TextView mLefeText;
 private TextView mRightText;
 private TextView textTitle;
 private LayoutParams leftLayoutParams;
 private LayoutParams ridhtLayoutParams;
 private LayoutParams titleLayoutParams;

 public CompositeViews(Context context) {
  this(context,null);
 }
 public CompositeViews(Context context, AttributeSet attrs) {
  this(context, attrs,0);
 }
 public CompositeViews(Context context, AttributeSet attrs, int defStyleAttr) {
  super(context, attrs, defStyleAttr);
  initView(context);
 }
initView(context)方法中是用來初始化三個組合控件的,請看:
 private void initView(Context context) {
  mLefeText = new TextView(context);
  mRightText = new TextView(context);
  textTitle = new TextView(context);
  /*
   * 左按鈕位置
   */
  leftLayoutParams = new LayoutParams(LayoutParams.WRAP_CONTENT, LayoutParams.WRAP_CONTENT);
  leftLayoutParams.addRule(RelativeLayout.ALIGN_PARENT_LEFT,TRUE);
  mLefeText.setText("返回");
  mLefeText.setTextSize(22);
  /*
   * 右按鈕位置
   */
  ridhtLayoutParams = new LayoutParams(LayoutParams.WRAP_CONTENT, LayoutParams.WRAP_CONTENT);
  ridhtLayoutParams.addRule(RelativeLayout.ALIGN_PARENT_RIGHT,TRUE);
  mRightText.setText("搜索");
  mRightText.setTextSize(22);
  /*
   * 中間標題位置
   */
  titleLayoutParams = new LayoutParams(LayoutParams.WRAP_CONTENT, LayoutParams.WRAP_CONTENT);
  titleLayoutParams.addRule(RelativeLayout.CENTER_IN_PARENT,TRUE);
  textTitle.setText("這是一個標題");
  textTitle.setTextSize(22);
 }
ok,以上的代碼已經實現了組合控件的顯示和對齊方式,我們把定義的View添加到布局文件中並在Activity加載吧
activity_main.xml文件
<?xml version="1.0" encoding="utf-8"?>
<LinearLayout xmlns:android="http://schemas.android.com/apk/res/android"
 xmlns:custom="http://schemas.android.com/apk/res-auto"
 android:layout_width="match_parent"
 android:background="#999999"
 android:layout_height="wrap_content"
 android:orientation="vertical">

 <com.sanhuimusic.mycustomview.view.CompositeViews
  android:id="@+id/topBar"
  android:layout_width="wrap_content"
  android:layout_height="wrap_content"
  />
</LinearLayout>
MainActivity:
public class MainActivity extends AppCompatActivity{
 @Override
 protected void onCreate(Bundle savedInstanceState) {
  super.onCreate(savedInstanceState);
  setContentView(R.layout.activity_main);
 }
}
我們先來運行看下結果

ok,已顯示出來了,但是相信大家也看出來了,這上面的代碼中,各個控件中的屬性是都是我們固定寫死的,既然我們是創建可服用的控件,固定寫死的東西肯定是不可取的,那麼我們怎麼可以靈活地獲取控件的屬性,以至於能達到復用呢?
這就必須要接觸另外一種技術了,就是自定義屬性。用我們自定義的屬於可以在每次使用我們定義的控件時為其分配屬性即可。下面我們來學習下自定義屬性。
自定義屬性其實也是相當的簡單,首先,我們現在資源文件res下values目錄下新建一個attrs.xml文件(eclipse自帶,as自建),新建的attrs.xml是一個包含如下代碼的文件:
<?xml version="1.0" encoding="utf-8"?>
<resources>

</resources>
在resources中有各種屬性供我們使用,同學們可以自己看下。根據我們現在的需求,我們選擇使用declare-styleable來聲明我們的屬性集,然後為其定義特有的name屬性,這個name是供我們在使用自定義屬性時,通過它可以查找到裡面的所有屬性。請看如下代碼:
<?xml version="1.0" encoding="utf-8"?>
<resources>
 <declare-styleable name="CompositeViews">
  <attr name="titleText" format="string"/>
  <attr name="titleTextSize" format="dimension"/>
  <attr name="titleColor" format="color"/>
  <attr name="titleBackground" format="color|reference"/>

  <attr name="leftTextColor" format="color"/>
  <attr name="leftBackground" format="color|reference"/>
  <attr name="leftText" format="string"/>
  <attr name="leftTextSize" format="dimension"/>

  <attr name="rightTextColor" format="color"/>
  <attr name="rightBackground" format="color|reference"/>
  <attr name="rightText" format="string"/>
  <attr name="rightTextSize" format="dimension"/>
 </declare-styleable>

</resources>
單獨拿一行屬性來解析下它所代表的含義:如
好了,自定義屬性我們已學習完畢,那麼該怎麼使用我們自己定義的屬性呢?其實也很簡單,在我們的activity_main.xml文件中直接使用我們定義的屬性就可以了,但是在使用是之前必須在指定引用第三方控件的命名空間,在跟布局文件中添加如下一行代碼:
xmlns:custom="http://schemas.android.com/apk/res-auto"
custom是我們第三方命名空間的名字,可以任意命名,我們在使用自定義屬性時必須以它開頭。請看代碼:
<?xml version="1.0" encoding="utf-8"?>
<LinearLayout xmlns:android="http://schemas.android.com/apk/res/android"
 xmlns:custom="http://schemas.android.com/apk/res-auto"
 android:layout_width="match_parent"
 android:background="#999999"
 android:layout_height="wrap_content"
 android:orientation="vertical">

 <com.sanhuimusic.mycustomview.view.CompositeViews
  android:id="@+id/topBar"
  android:layout_width="wrap_content"
  android:layout_height="wrap_content"

  custom:titleText="@string/titleText"
  custom:titleColor="#000000"
  custom:titleTextSize="@dimen/titleTextSize"
  custom:titleBackground="#999999"
  custom:leftText="@string/leftText"
  custom:leftTextColor="#FFFFFF"
  custom:leftBackground="#666666"
  custom:leftTextSize="@dimen/leftTextSize"
  custom:rightText="@string/rightText"
  custom:rightTextColor="#FFFFFF"
  custom:rightBackground="#666666"
  custom:rightTextSize="@dimen/rightTextSize"
  />

</LinearLayout>
我們是使用custom加上我們自定義屬性裡面< attr name="titleText" format="string"/>裡的name值來動態設置屬性值的,如:custom:titleText="@string/titleText"。
ok,在我們xml文件中已設定好屬性值,那麼該怎麼顯示出來呢?這個是需要通過一個類型組TypedArray來獲取的,它裡面包含各種從AttributeSet屬性集中獲取屬性的方法,所以我們修改上面的構造方法和initView(context)方法,如下所示:
 private void initView(Context context, AttributeSet attrs) {
  mLefeText = new TextView(context);
  mRightText = new TextView(context);
  textTitle = new TextView(context);

  /**
   * 獲取自定義屬性
   */
  TypedArray typedArray = context.obtainStyledAttributes(attrs, R.styleable.CompositeViews);
  String titleText = typedArray.getString(R.styleable.CompositeViews_titleText);
  float titleTextSize = typedArray.getDimension(R.styleable.CompositeViews_titleTextSize, 16);
  int titleColor = typedArray.getColor(R.styleable.CompositeViews_titleColor,0);
  Drawable titleBackground = typedArray.getDrawable(R.styleable.CompositeViews_titleBackground);

  String leftText = typedArray.getString(R.styleable.CompositeViews_leftText);
  int leftTextColor = typedArray.getColor(R.styleable.CompositeViews_leftTextColor, 0);
  float leftTextSize = typedArray.getDimension(R.styleable.CompositeViews_leftTextSize, 16);
  Drawable leftBackground = typedArray.getDrawable(R.styleable.CompositeViews_leftBackground);

  String rightText = typedArray.getString(R.styleable.CompositeViews_rightText);
  int rightTextColor = typedArray.getColor(R.styleable.CompositeViews_rightTextColor, 0);
  float rightTextSize = typedArray.getDimension(R.styleable.CompositeViews_rightTextSize, 16);
  Drawable rightBackground = typedArray.getDrawable(R.styleable.CompositeViews_rightBackground);
  typedArray.recycle();
  /*
   * 左按鈕位置
   */
  leftLayoutParams = new LayoutParams(LayoutParams.WRAP_CONTENT, LayoutParams.WRAP_CONTENT);
  leftLayoutParams.addRule(RelativeLayout.ALIGN_PARENT_LEFT,TRUE);
  mLefeText.setText(leftText);
  mLefeText.setTextColor(leftTextColor);
  mLefeText.setTextSize(leftTextSize);
  mLefeText.setBackground(leftBackground);
  addView(this.mLefeText,leftLayoutParams);
   /*
   * 右按鈕位置
   */
  ridhtLayoutParams = new LayoutParams(LayoutParams.WRAP_CONTENT, LayoutParams.WRAP_CONTENT);
  ridhtLayoutParams.addRule(RelativeLayout.ALIGN_PARENT_RIGHT,TRUE);
  mRightText.setText(rightText);
  mRightText.setTextColor(rightTextColor);
  mRightText.setTextSize(rightTextSize);
  mRightText.setBackground(rightBackground);
  addView(mRightText,ridhtLayoutParams);
  /*
   * 中間標題位置
   */
  titleLayoutParams = new LayoutParams(LayoutParams.WRAP_CONTENT, LayoutParams.WRAP_CONTENT);
  titleLayoutParams.addRule(RelativeLayout.CENTER_IN_PARENT,TRUE);
  textTitle.setText(titleText);
  textTitle.setTextSize(titleTextSize);
  textTitle.setTextColor(titleColor);
  textTitle.setBackground(titleBackground);
  addView(textTitle,titleLayoutParams);
 }
代碼解釋:首先通過上下文context獲取到屬性存放到TypedArray 中,然後通過TypedArray 裡封裝好的各種方法獲取對應的屬性值,然後再分別為我們的控件設置屬性。這樣就完成了,自定義屬性的使用,並且復用度高,每當需要使用標題欄是都只需要在xml中添加我們定義的View控件,為其配置屬性即可使用,節約了開發時間,提高了效率,並且還保持的app風格的一致。
好,到這裡感覺已經講完了整個過程吧,其實還有一個重要的實現還沒有講。我們的控件已經可以呈現出來了,但是怎麼完成裡面控件的作用呢?
這裡比較常見的做法是利用回調機制來實現功能的開發,首先我們先定義一個接口,創建兩個方法,用於左右控件的點擊事件。
 public interface TopBarClickListener{
   void leftClickListener();
   void rightClickListener();
 }
然後在構造方法中為左右控件添加點擊事件,但不實現功能,等待調用者自己實現:
private void setListener() {
  mLefeText.setOnClickListener(new OnClickListener() {
   @Override
   public void onClick(View v) {
    mTopBarClickListener.leftClickListener();
   }
  });
  mRightText.setOnClickListener(new OnClickListener() {
   @Override
   public void onClick(View v) {
    mTopBarClickListener.rightClickListener();
   }
  });
 }
再者,把定義好的接口暴露給調用者:
 public void setOnTopBarClickListener(TopBarClickListener topBarClickListener){
  mTopBarClickListener = topBarClickListener;
 }
最後,誰調用,誰實現。這就完成了不同界面復用控件實現不同的功能的便利。在這裡我們只在MainActivity中打印Toast就可以了。
public class MainActivity extends AppCompatActivity {
 private CompositeViews topBar;
 @Override
 protected void onCreate(Bundle savedInstanceState) {
  super.onCreate(savedInstanceState);
  setContentView(R.layout.activity_main);
  topBar = (CompositeViews) findViewById(R.id.topBar);
  topBar.setOnTopBarClickListener(new CompositeViews.TopBarClickListener(){
   @Override
   public void leftClickListener() {
    ToastUtil.makeText(MainActivity.this,"您點擊了返回鍵",Toast.LENGTH_SHORT).show();
   }
   @Override
   public void rightClickListener() {
    ToastUtil.makeText(MainActivity.this,"您點擊了搜索鍵",Toast.LENGTH_SHORT).show();
   }
  });
 }
}
OK,看看結果吧

好,已經可以實現我們的需求了,是不是學會很多呢。
今天主要講了android自定義View中另一種的實現,並且還學習了自定義屬性,同學們下去好好消化下,並自己動手現實一兩個例子吧,好了,今天就講到這裡,謝謝大家。
以上就是本文的全部內容,希望對大家的學習有所幫助,也希望大家多多支持本站。
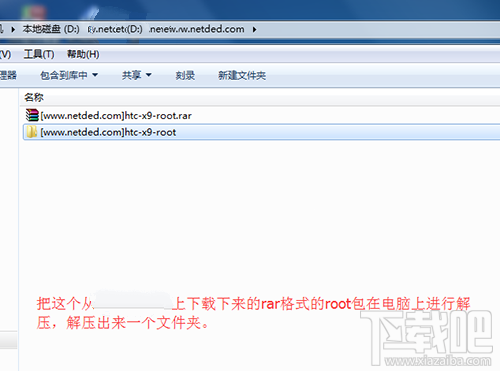 HTC One X9一鍵root教程|HTC One X9獲取root權限的方法
有關HTC One X9手機的root教程還沒有給大家分享呢,接下來就來給大家說說有關這個手機的root教程了,這個root教程是利用卡刷的方式進行root
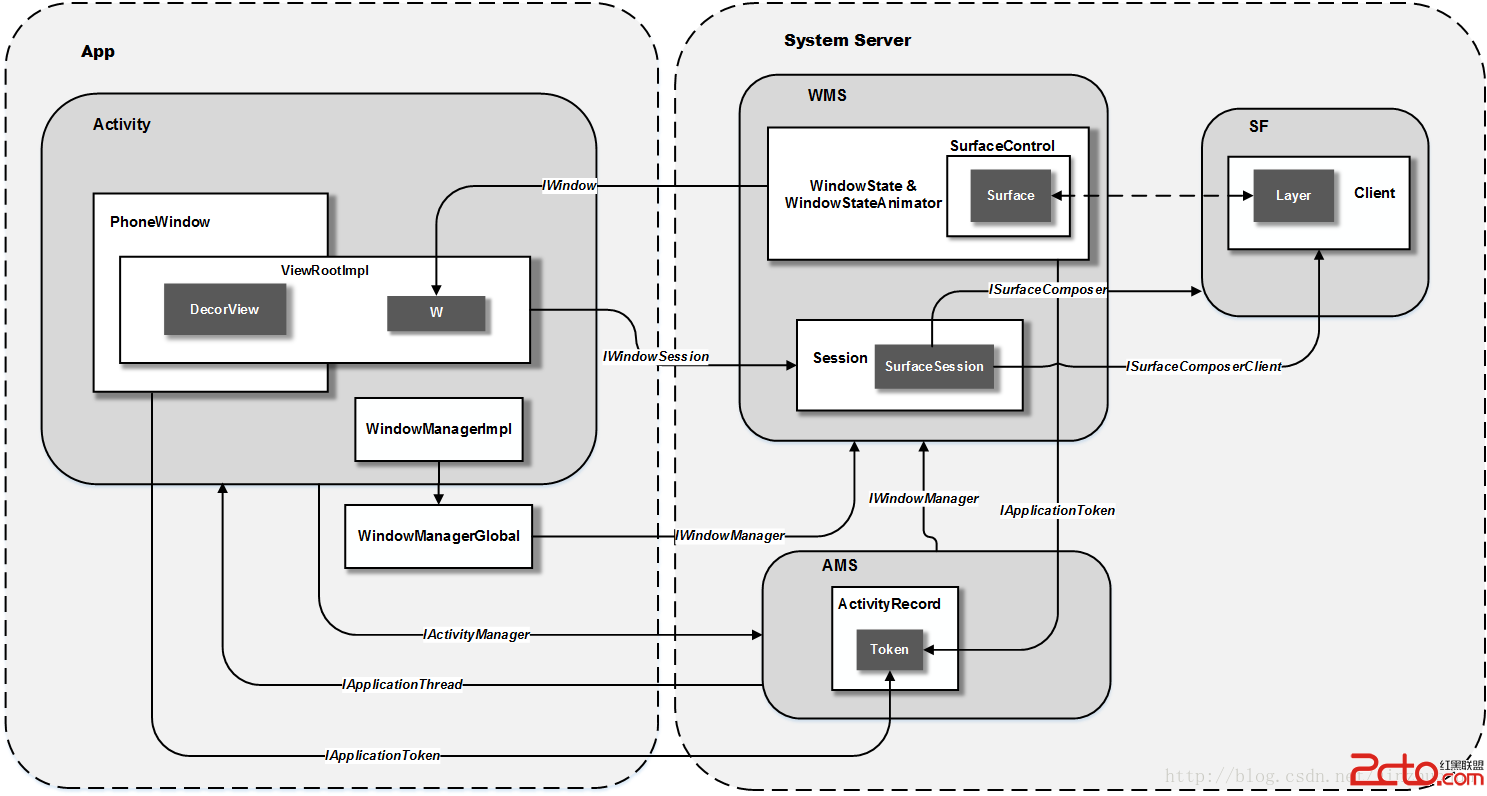 Android 4.4(KitKat)窗口管理子系統 - 體系框架
窗口管理系統是Android中的主要子系統之一,它涉及到App中組件的管理,系統和應用窗口的管理和繪制等工作。由於其涉及模塊眾多,且與用戶體驗密切相關,所以它也是Andr
 Android4.4 framework分析——廣播的注冊(BroadcastReceiver)和發送(sendbroadcast)過程分析
在Android應用程序框架中,Activity和Service類都繼承了ContextWrapper類,因此,我們可以在Activity或者Service的子類中調用r
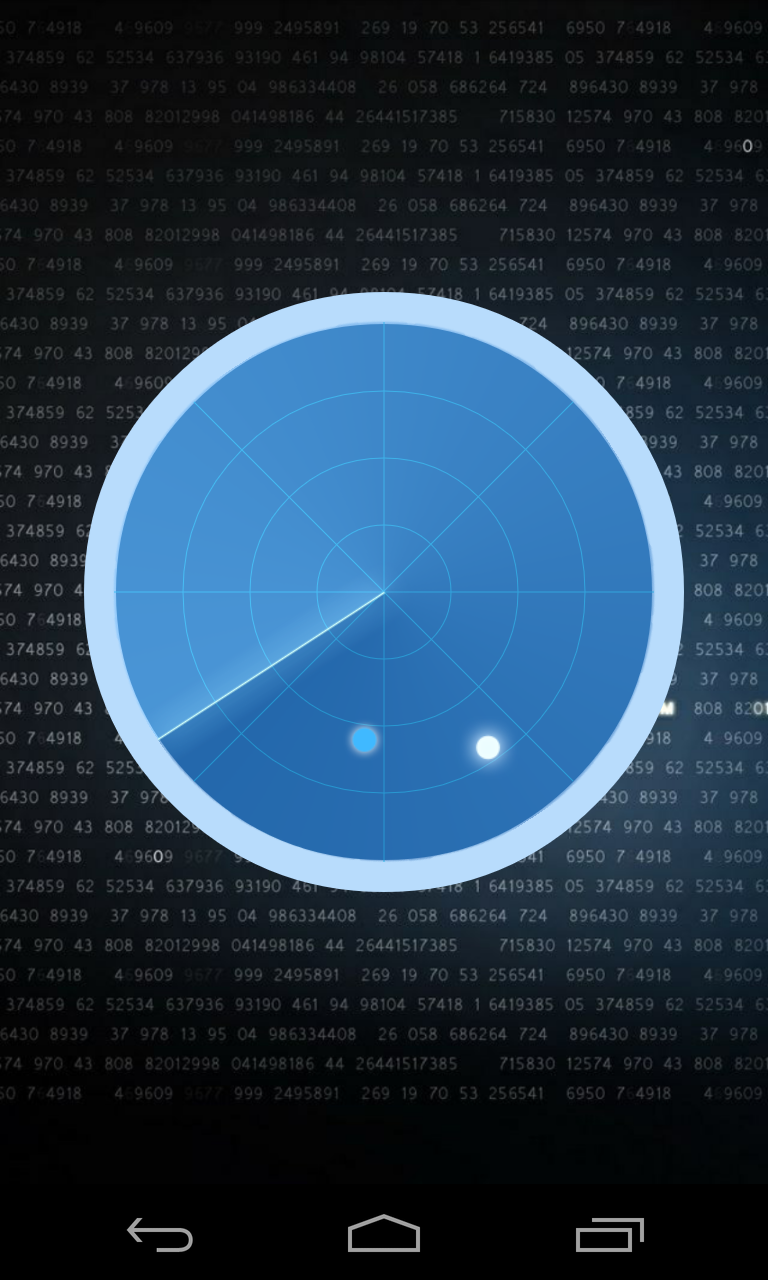 Android--雷達掃描動態界面
效果圖:源碼:package com.zihao.radar;import android.app.Activity;import android.os.Bundle;i