編輯:Android開發實例
本文結合源代碼和實例來說明TabHost的用法。
使用TabHost 可以在一個屏幕間進行不同版面的切換,例如android自帶的撥號應用,截圖:
查看tabhost的源代碼,主要實例變量有:
private TabWidget mTabWidget;
private FrameLayout mTabContent;
private List<TabSpec> mTabSpecs
也就是說我們的tabhost必須有這三個東西,所以我們的.xml文件就會有規定:繼續查看源代碼:
if (mTabWidget == null) {
throw new RuntimeException(
"Your TabHost must have a TabWidget whose id attribute is 'android.R.id.tabs'");
}
mTabContent = (FrameLayout) findViewById(com.android.internal.R.id.tabcontent);
if (mTabContent == null) {
throw new RuntimeException(
"Your TabHost must have a FrameLayout whose id attribute is 'android.R.id.tabcontent'");
} 也就是說我們的.xml文件需要TabWidget和FrameLayout標簽。
接下來構建我們自己的tab實例:
有兩種方式可以實現:
一種是繼承TabActivity 類,可以使用android的自己內部定義好的.xml資源文件作容器文件。也就是在我們的代碼中使用getTabHost(); , 而相應的後台源碼是這樣的:
this.setContentView(com.android.internal.R.layout.tab_content);
在系統的資源文件中可以看見這個layout
有了容器,然後我們就需要我們為每個tab分配內容,當然要可以是如何類型的標簽:
例如我們構建一下.xml文件
首先tab1.xml 是一個LinearLayout布局
<?xml version="1.0" encoding="utf-8"?>
<LinearLayout xmlns:android="http://schemas.android.com/apk/res/android"
android:id="@+id/LinearLayout01" android:layout_width="wrap_content"
android:layout_height="wrap_content">
<TextView android:text="tab1 with linear layout"
android:id="@+id/TextView01" android:layout_width="wrap_content"
android:layout_height="wrap_content">
</TextView>
</LinearLayout>
然後是tab2.xml是一個FrameLayout布局
?xml version="1.0" encoding="utf-8"?>
<FrameLayout xmlns:android="http://schemas.android.com/apk/res/android"
android:id="@+id/FrameLayout02"
android:layout_width="wrap_content"
android:layout_height="wrap_content">
<LinearLayout android:id="@+id/LinearLayout02"
android:layout_width="wrap_content"
android:layout_height="wrap_content">
<TextView android:text="tab2"
android:id="@+id/TextView01" android:layout_width="wrap_content"
android:layout_height="wrap_content">
</TextView>
</LinearLayout>
</FrameLayout>
接著要注冊這兩個FrameLayout為tabhost的Content,也就是接下來的代碼:
還有一種就是定義我們自己的tabhost:不用繼承TabActivity
首先建立我們自己的.xml文件,當然要包含Tabhost,TabWidget,FrameLayout,著3個標簽:
LayoutInflater inflater_tab1 = LayoutInflater.from(this);
inflater_tab1.inflate(R.layout.tab1, mTabHost.getTabContentView());
inflater_tab1.inflate(R.layout.tab2, mTabHost.getTabContentView());
然後需要構建前面說的tabhost的第三個實例變量對應得內容,源代碼中是這樣的:
private List<TabSpec> mTabSpecs = new ArrayList<TabSpec>(2); 初始化是兩個tab的空間然後會自動擴展:
好 我們構建我們的tabspec:
mTabHost.addTab(mTabHost.newTabSpec("tab_test1").setIndicator("TAB 11").setContent(R.id.LinearLayout01));
mTabHost.addTab(mTabHost.newTabSpec("tab_test1").setIndicator("TAB 11").setContent(R.id.FrameLayout02));
也就是把我們的2個layout作為他的content,當然FrameLayout中可以有其他的布局,來放我的組件。
我們不需要在代碼裡面設置setContentView();因為getTabHost(); 這個方法調用後就已經設置了,源代碼:
也就是把系統的tab_content當做view設置。
運行後如下:
完整代碼:
if (mTabHost == null) {
this.setContentView(com.android.internal.R.layout.tab_content);
}
TabHost mTabHost = getTabHost();
LayoutInflater inflater_tab1 = LayoutInflater.from(this);
inflater_tab1.inflate(R.layout.tab1, mTabHost.getTabContentView());
inflater_tab1.inflate(R.layout.tab2, mTabHost.getTabContentView());
mTabHost.addTab(mTabHost.newTabSpec("tab_test1").setIndicator("TAB 11").setContent(R.id.LinearLayout01));
mTabHost.addTab(mTabHost.newTabSpec("tab_test1").setIndicator("TAB 11").setContent(R.id.FrameLayout02));
<?xml version="1.0" encoding="utf-8"?>
<TabHost xmlns:android="http://schemas.android.com/apk/res/android"
android:id="@+id/tabhost"
android:layout_width="fill_parent"
android:layout_height="fill_parent">
<LinearLayout
android:orientation="vertical"
android:layout_width="fill_parent"
android:layout_height="fill_parent">
<TabWidget
android:id="@android:id/tabs"
android:layout_width="fill_parent"
android:layout_height="wrap_content" />
<FrameLayout
android:id="@android:id/tabcontent"
android:layout_width="fill_parent"
android:layout_height="fill_parent">
</FrameLayout>
</LinearLayout>
</TabHost>
注意的是:除了tabhost的id可以自定義外,其他的必須使用系統的id,為什麼後面說,
當然我們可以在FrameLayout裡面添加view來作為tab的內容只需要在create tabspce時候添加就可以了,我們為了把每個tab的內容分開我們依然使用前面用到的兩個tab xml文件
java代碼:
獲取TabHost 通過findviewbyid,
setContentView(R.layout.main);
TabHost mTabHost = (TabHost)findViewById(R.id.tabhost);
接下來很重要的一步是要使用TabHost.setup();
作用是來初始化我們的TabHost容器:
源代碼是這樣說的:
<p>Call setup() before adding tabs if loading TabHost using findViewById(). <i><b>However</i></b>: You do
* not need to call setup() after getTabHost() in [email protected] android.app.TabActivity TabActivity}.
也就是說通過findviewbyid,方法獲得tabhost必須setup 而通過getTabHost則不用。
setup干什麼呢:源代碼
mTabWidget = (TabWidget) findViewById(com.android.internal.R.id.tabs);
if (mTabWidget == null) {
throw new RuntimeException(
"Your TabHost must have a TabWidget whose id attribute is 'android.R.id.tabs'");
}
mTabContent = (FrameLayout) findViewById(com.android.internal.R.id.tabcontent);
if (mTabContent == null) {
throw new RuntimeException(
"Your TabHost must have a FrameLayout whose id attribute is 'android.R.id.tabcontent'");
} 他主要是初始化了tabhost的兩個實例變量,這裡也回答了為什麼我們的id必須使用系統定義的id的原因
接下來工作就和前面相同了:
LayoutInflater inflater_tab1 = LayoutInflater.from(this);
inflater_tab1.inflate(R.layout.tab1, mTabHost.getTabContentView());
inflater_tab1.inflate(R.layout.tab2, mTabHost.getTabContentView());
mTabHost.addTab(mTabHost.newTabSpec("tab_test1").setIndicator("TAB a").setContent(R.id.LinearLayout01));
mTabHost.addTab(mTabHost.newTabSpec("tab_test2").setIndicator("TAB b").setContent(R.id.FrameLayout02));
完整代碼:
setContentView(R.layout.main);
TabHost mTabHost = (TabHost)findViewById(R.id.tabhost);
mTabHost.setup();
LayoutInflater inflater_tab1 = LayoutInflater.from(this);
inflater_tab1.inflate(R.layout.tab1, mTabHost.getTabContentView());
inflater_tab1.inflate(R.layout.tab2, mTabHost.getTabContentView());
mTabHost.addTab(mTabHost.newTabSpec("tab_test1").setIndicator("TAB a").setContent(R.id.LinearLayout01));
mTabHost.addTab(mTabHost.newTabSpec("tab_test2").setIndicator("TAB b").setContent(R.id.FrameLayout02));
運行結果同上。 如有問題歡迎提出。
加上源代碼
轉自:http://www.blogjava.net/freeman1984/archive/2009/11/18/302803.html
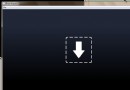
 Android加載Spinner
可以顯示在的Android任務,通過加載進度條的進展。進度條有兩種形狀。加載欄和加載微調(spinner)。在本章中,我們將討論微調(spinner)。Spinner 用
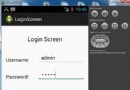
 Android登錄實例
登錄應用程序的屏幕,詢問憑據登錄到一些特定的應用。可能需要登錄到Facebook,微博等本章介紹了,如何創建一個登錄界面,以及如何管理安全問題和錯誤嘗試。首先,必須定義兩
 Android登錄實例
登錄應用程序的屏幕,詢問憑據登錄到一些特定的應用。可能需要登錄到Facebook,微博等本章介紹了,如何創建一個登錄界面,以及如何管理安全問題和錯誤嘗試。首先,必須定義兩
 android 9PNG圖片制作過程(圖文介紹)
在android開發的過程中我們經常因為沒有好的美工圖片失真,這樣使界面看起來要遜色很多,有的時候可能我們會想在drawable-hdpi,ldpi,mdpi下放