編輯:Android開發實例
關於andriod上實現條碼識別,我前面已經講了一些簡單的應用,上篇講過的應用zxing時必需多安裝其組件這是不能接受的,
我想大家都已經想到解決的方法了吧,呵呵,其實正真學習一個東西,從其最基本的東東開始--大家都知道就是源碼了。
OK,我們要深入條碼的識別的話自然就要去讀zxing的源碼,你讀完之後就不只是懂得其源碼了,
你會發現你其實收獲到的不僅僅只有這點,還有更多的東西,比如你更深入學習android的又一個應用示例對Android的開發多了了解。
官網源碼提供免費下載,但幫助文檔不是很全,最近有在讀它的源碼,去調試運行它的源碼對你去理解了解其結構是很有幫助的。
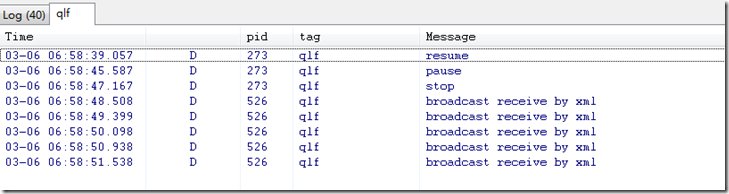
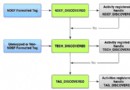
官網上只提供源碼的下載,並沒有提供編譯好的開發包,也就是說你自己下過來後還要自己編譯,不然把下下來的源碼程序導入到myeclipse中會報錯。
如圖:
對於新手可能有些不知下手,這裡我就講下zxing的編譯,為後面的開發做好一個最基本的准備!
第一步:准備包
http://code.google.com/p/zxing/ 下載
編譯zxing
下載ant 地址http://ant.apache.org/
下載proguard 地址http://proguard.sourceforge.net/index.html#/downloads.html
解壓:zxing-1.6
目錄結構下:
zxing-1.6
-android
android-integration
core
build.properties
build.xml
........
第二步:配置環境變量。
打開build.properties
修改proguard 為你下載的proguard下的lib文件夾下的proguard.jar指向
android-home你的 sdk目錄
proguard-jar=../proguard4.5.1/lib/proguard.jar 版本為4.4以上
android-home=../Android/android-sdk-windows
配置ant環境變量
ANT_HOME
E:\MyLiB\java\ANT\apache-ant-1.8.1
PATH
E:\MyLiB\java\ANT\apache-ant-1.8.1\bin
cmd 中ant回車出現
Buildfile: build.xml does not exist!
Build failed
表現成功!
第三步:開始編譯
cd 到core目錄 然後ant!
BUILD SUCCESSFUL
Total time: * second
表示成功編譯!
然後編譯android
cd ../android
ant
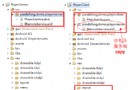
好了!有了核心包後我們可以就可以導入到項目工程裡去了,現在是不是就不報錯了!而且還可以直接運行的!
如圖:
ZXingTestActivity為其zxing運用的例子,這是學習zxing的一個很好的幫助!這個例子運行前提也是必需先安裝BarcodeScanner3.5.apk
android 目錄則是前篇我博客講調用時必需安裝的一個組件BarcodeScanner3.5.apk的源碼。呵呵,我想大家就知道了,對了,
想不安裝我們可以直接在源碼上進行修改並進行編譯,就ok了。
希望我的這幾篇文章可以給大家有些幫助,也算引個方向,最後更深入學習代碼,就只能看自己了!
大家肯定比我聰明,會很快讀懂源碼並很快應用起來,如有什麼問題希望大家一起探討學習,不斷進步!
下幾篇博客我想可以寫一些基於 zxing條碼識別自己的運用程序示例了!如果大家有興趣我會和大家一起分享!好了,今天就寫到這裡了!
另附編譯說明:
官網引用詳細參見:
# Download and install the latest public Android SDK.
# Edit build.properties at the top level of the project, and change the android-home property to point to the SDK install location
# Download Proguard, version 4.4 minimum, and install it where you like.
# Edit build.properties and set proguard-jar to the full path (including the filename) of the ProGuard library.
# Build core; Note that core must be built without debug symbols to avoid an incompatibility between proguard and the Android tool chain:
cd core
ant clean build-no-debug
# Build android:
cd ../android
ant
 Android系統NFC開發之實例講解
很多Android設備已經支持NFC(近距離無線通訊技術)了。本文就以實例的方
 Android加載Spinner
可以顯示在的Android任務,通過加載進度條的進展。進度條有兩種形狀。加載欄和加載微調(spinner)。在本章中,我們將討論微調(spinner)。Spinner 用
 Android MediaPlayer(多媒體播放)
Android提供了許多方法來控制播放的音頻/視頻文件和流。其中該方法是通過一類稱為MediaPlayer。Android是提供MediaPlayer類訪問內置的媒體播放
 Android JSON解析器
JSON代表JavaScript對象符號。它是一個獨立的數據交換格式,是XML的最佳替代品。本章介紹了如何解析JSON文件,並從中提取所需的信息。Android提供了四個