編輯:Android開發實例
項目中有時候需要獲取網絡上的圖片,並下載下來到手機客戶端顯示。怎麼做呢?
實現思路是:
1:在UI線程中啟動一個線程,讓這個線程去下載圖片。
2:圖片完成下載後發送一個消息去通知UI線程
2:UI線程獲取到消息後,更新UI。
這裡的UI線程就是主線程。
這兩個步驟涉及到一些知識點,即是:ProgressDialog,Handler,Thread/Runnable,URL,HttpURLConnection等等一系列東東的使用。
現在讓我們開始來實現這個功能吧!
第一步:新建項目。
第二步:設計好UI,如下所示
<?xml version="1.0" encoding="utf-8"?>
<LinearLayout xmlns:android="http://schemas.android.com/apk/res/android"
    android:orientation="vertical"
    android:layout_width="fill_parent"
    android:layout_height="fill_parent"
    >
    <Button
      android:id="@+id/btnFirst"
      android:layout_width="fill_parent"
      android:layout_height="wrap_content"
      android:text="異步下載方式一"
     >
    </Button>

    <Button
      android:id="@+id/btnSecond"
      android:layout_width="fill_parent"
      android:layout_height="wrap_content"
      android:text="異步下載方式二"
     >
    </Button>

    <FrameLayout
     android:layout_width="fill_parent"
     android:layout_height="match_parent"
     android:id="@+id/frameLayout"
    >

   <ImageView
    android:id="@+id/image"
    android:layout_width="match_parent"
    android:layout_height="match_parent"
    android:scaleType="centerInside"
    android:padding="2dp"
    >
   </ImageView>

    <ProgressBar
     android:id="@+id/progress"
     android:layout_width="wrap_content"
     android:layout_height="wrap_content"
     android:layout_gravity="center">
  </ProgressBar>

  </FrameLayout>
</LinearLayout>
第三步:獲取UI相應View組件,並添加事件監聽。
public class DownLoaderActivity extends Activity implements OnClickListener{
    private static final String params="http://upload.wikimedia.org/wikipedia/commons/thumb/e/ea/Hukou_Waterfall.jpg/800px-Hukou_Waterfall.jpg";
    private Button btnFirst,btnSecond;
    private ProgressBar progress;
    private FrameLayout frameLayout;
    private Bitmap bitmap=null;
    ProgressDialog dialog=null;


    @Override
    public void onCreate(Bundle savedInstanceState) {
        super.onCreate(savedInstanceState);
        setContentView(R.layout.main);

        btnFirst=(Button)this.findViewById(R.id.btnFirst);
        btnSecond=(Button)this.findViewById(R.id.btnSecond);
        progress=(ProgressBar)this.findViewById(R.id.progress);
        progress.setVisibility(View.GONE);
        frameLayout=(FrameLayout)this.findViewById(R.id.frameLayout);

        btnFirst.setOnClickListener(this);
        btnSecond.setOnClickListener(this);
    }
第四步:在監聽事件中處理我們的邏輯,即是下載服務器端圖片數據。
這裡我們需要講解一下了。
通常的我們把一些耗時的工作用另外一個線程來操作,比如,下載上傳圖片,讀取大批量XML數據,讀取大批量sqlite數據信息。為什麼呢?答案大家都明白,用戶體驗問題。
在這裡,首先我構造一個進度條對話框,用來顯示下載進度,然後開辟一個線程去下載圖片數據,下載數據完畢後,通知主UI線程去更新顯示我們的圖片。
Handler是溝通Activity 與Thread/runnable的橋梁。而Handler是運行在主UI線程中的,它與子線程可以通過Message對象來傳遞數據。具體代碼如下:
 /**這裡重寫handleMessage方法,接受到子線程數據後更新UI**/
    private Handler handler=new Handler(){
        @Override
        public void handleMessage(Message msg){
            switch(msg.what){
            case 1:
                //關閉
                ImageView view=(ImageView)frameLayout.findViewById(R.id.image);
                view.setImageBitmap(bitmap);
                dialog.dismiss();
                break;
            }
        }
    };
我們在這裡彈出進度對話框,使用HTTP協議來獲取數據。
//前台ui線程在顯示ProgressDialog,
    //後台線程在下載數據,數據下載完畢,關閉進度框
    @Override
    public void onClick(View view) {
        switch(view.getId()){
        case R.id.btnFirst:
            dialog = ProgressDialog.show(this, "",
                    "下載數據,請稍等 …", true, true);
            //啟動一個後台線程
            handler.post(new Runnable(){
                @Override
                public void run() {
                     //這裡下載數據
                    try{
                        URL  url = new URL(params);
                        HttpURLConnection conn  = (HttpURLConnection)url.openConnection();
                        conn.setDoInput(true);
                        conn.connect();
                        InputStream inputStream=conn.getInputStream();
                        bitmap = BitmapFactory.decodeStream(inputStream);
                        Message msg=new Message();
                        msg.what=1;
                        handler.sendMessage(msg);

                    } catch (MalformedURLException e1) {
                        e1.printStackTrace();
                    } catch (IOException e) {
                        // TODO Auto-generated catch block
                        e.printStackTrace();
                    }
                }
            });
            break;
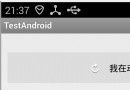
如此以來,你會發現很好的完成了我們的下載目標了,你可以把它應用到其他方面去,舉一反三。
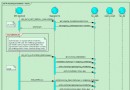
運行截圖如下:
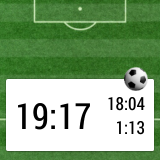 Android Wear計時器開發
記得在2013年12月的時候,有系列文章是介紹怎麼開發一個智能手表的App,讓用戶可以在足球比賽中記錄停表時間。隨著Android Wear的問世,在可穿戴設備中
 Android編程中TextView寬度過大導致Drawable無法居中問題解決方法
本文實例講述了Android編程中TextView寬度過大導致Drawable無法居中問題解決方法。分享給大家供大家參考,具體如下: 在做項目的時候,很多時候我們
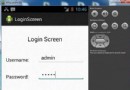 Android登錄實例
登錄應用程序的屏幕,詢問憑據登錄到一些特定的應用。可能需要登錄到Facebook,微博等本章介紹了,如何創建一個登錄界面,以及如何管理安全問題和錯誤嘗試。首先,必須定義兩
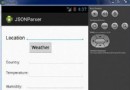
 Android JSON解析器
JSON代表JavaScript對象符號。它是一個獨立的數據交換格式,是XML的最佳替代品。本章介紹了如何解析JSON文件,並從中提取所需的信息。Android提供了四個