編輯:Android開發實例
使用ArrayAdapter定制To-Do List
這個例子將擴展To-Do List工程,以一個ToDoItem對象來儲存每一個項目,包含每個項目的創建日期。
你將擴展ArrayAdapter類來綁定一組ToDoItem對象到ListView上,並定制用於顯示每一個ListView項目的layout。
1. 返回到To-Do List工程。創建一個新的ToDoItem類來保存任務和任務的創建日期。重寫toString方法來返回一個項目數據的概要。
package com.paad.todolist;
import java.text.SimpleDateFormat;
import java.util.Date;
public class ToDoItem {
String task;
Date created;
public String getTask() {
return task;
}
public Date getCreated() {
return created;
}
public ToDoItem(String _task) {
this(_task, new Date(java.lang.System.currentTimeMillis()));
}
public ToDoItem(String _task, Date _created) {
task = _task;
created = _created;
}
@Override
public String toString() {
SimpleDateFormat sdf = new SimpleDateFormat(“dd/MM/yy”);
String dateString = sdf.format(created);
return “(“ + dateString + “) “ + task;
}
}
2. 打開ToDoList Activity,修改ArrayList和ArrayAdapter變量的類型,儲存ToDoItem對象而不是字符串。然後,你將修改onCreate方法來更新相應的變量初始化。你還需要更新onKeyListener處理函數來支持ToDoItem對象。
private ArrayList<ToDoItem> todoItems;
private ListView myListView;
private EditText myEditText;
private ArrayAdapter<ToDoItem> aa;
@Override
public void onCreate(Bundle icicle) {
super.onCreate(icicle);
// Inflate your view
setContentView(R.layout.main);
// Get references to UI widgets
myListView = (ListView)findViewById(R.id.myListView);
myEditText = (EditText)findViewById(R.id.myEditText);
todoItems = new ArrayList<ToDoItem>();
int resID = R.layout.todolist_item;
aa = new ArrayAdapter<ToDoItem>(this, resID, todoItems);
myListView.setAdapter(aa);
myEditText.setOnKeyListener(new OnKeyListener() {
public boolean onKey(View v, int keyCode, KeyEvent event)
{
if (event.getAction() == KeyEvent.ACTION_DOWN)
if (keyCode == KeyEvent.KEYCODE_DPAD_CENTER)
{
ToDoItem newItem;
newItem = new ToDoItem(myEditText.getText().toString());
todoItems.add(0, newItem);
myEditText.setText(“”);
aa.notifyDataSetChanged();
cancelAdd();
return true;
}
return false;
}
});
registerForContextMenu(myListView);
}
3. 如果你運行Activity,它將顯示每個to-do項目,如圖5-3所示。
圖5-3
4. 現在,你可以創建一個自定義的layout來顯示每一個to-do項目。修改在第4章中創建的自定義layout,包含另外一個TextView,它將用於顯示每個to-do項目的創建日期。
<?xml version=”1.0” encoding=”utf-8”?>
<RelativeLayout xmlns:android=”http://schemas.android.com/apk/res/android”
android:layout_width=”fill_parent”
android:layout_height=”fill_parent”
android:background=”@color/notepad_paper”>
<TextView
android:id=”@+id/rowDate”
android:layout_width=”wrap_content”
android:layout_height=”fill_parent”
android:padding=”10dp”
android:scrollbars=”vertical”
android:fadingEdge=”vertical”
android:textColor=”@color/notepad_text”
android:layout_alignParentRight=”true”
/>
<TextView
android:id=”@+id/row”
android:layout_width=”fill_parent”
android:layout_height=”fill_parent”
android:padding=”10dp”
android:scrollbars=”vertical”
android:fadingEdge=”vertical”
android:textColor=”@color/notepad_text”
android:layout_alignParentLeft=”@+id/rowDate”
/>
</RelativeLayout>
5. 創建一個新的類(ToDoItemAdapter),使用指定的ToDoItem變量來擴展一個ArrayAdapter。重寫getView方法來將ToDoItem對象中的task和date屬性指定給第4步創建的layout中的View。
import java.text.SimpleDateFormat;
import android.content.Context;
import java.util.*;
import android.view.*;
import android.widget.*;
public class ToDoItemAdapter extends ArrayAdapter<ToDoItem> {
int resource;
public ToDoItemAdapter(Context _context,int _resource, List<ToDoItem> _items) {
super(_context, _resource, _items);
resource = _resource;
}
@Override
public View getView(int position, View convertView, ViewGroup parent)
{
LinearLayout todoView;
ToDoItem item = getItem(position);
String taskString = item.getTask();
Date createdDate = item.getCreated();
SimpleDateFormat sdf = new SimpleDateFormat(“dd/MM/yy”);
String dateString = sdf.format(createdDate);
if (convertView == null)
{
todoView = new LinearLayout(getContext());
String inflater = Context.LAYOUT_INFLATER_SERVICE;
LayoutInflater vi;
vi = (LayoutInflater)getContext().getSystemService(inflater);
vi.inflate(resource, todoView, true);
}
else
{
todoView = (LinearLayout) convertView;
}
TextView dateView = (TextView)todoView.findViewById(R.id.rowDate);
TextView taskView = (TextView)todoView.findViewById(R.id.row);
dateView.setText(dateString);
taskView.setText(taskString);
return todoView;
}
}
6. 最後,用ToDoItemAdapter替換ArrayAdapter的定義。
private ToDoItemAdapter aa;
在onCreate中,使用new ToDoItemAdapter來替換ArrayAdapter<String>的實例化。
aa = new ToDoItemAdapter(this, resID, todoItems);
7. 如果你運行Activity,它看起來如圖5-4的截圖。
圖5-4
使用SimpleCursorAdapter
SimpleCursorAdapter允許你綁定一個游標的列到ListView上,並使用自定義的layout顯示每個項目。
SimpleCursorAdapter的創建,需要傳入當前的上下文、一個layout資源,一個游標和兩個數組:一個包含使用的列的名字,另一個(相同大小)數組包含View中的資源ID,用於顯示相應列的數據值。
下面的框架代碼顯示了如何構造一個SimpleCursorAdapter來顯示聯系人信息:
String uriString = “content://contacts/people/”;
Cursor myCursor = managedQuery(Uri.parse(uriString), null, null, null, null);
String[] fromColumns = new String[] {People.NUMBER, People.NAME};
int[] toLayoutIDs = new int[] { R.id.nameTextView, R.id.numberTextView};
SimpleCursorAdapter myAdapter;
myAdapter = new SimpleCursorAdapter(this,R.layout.simplecursorlayout,myCursor,fromColumns,toLayoutIDs);
myListView.setAdapter(myAdapter);
SimpleCursorAdapter在本章前面的創建選擇聯系人的例子中使用過。你將在第6章學習到更多關於Content Provider和Cursor的內容,那裡你也將找到更多SimpleCursorAdapter的例子。
 Android本地化
Android應用程序可以在許多不同地區的許多設備上運行。為了使應用程序更具交互性,應用程序應該處理以適合應用程序將要使用的語言環境方面的文字,數字,文件等。在本章中,我
 Android開發技巧之像QQ一樣輸入文字和表情圖像
EditText和TextView一樣,也可以進行圖文混排。所不同的是,TextView只用於顯示圖文混排效果,而EditText不僅可顯示,也可混合輸入文字和圖
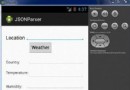 Android JSON解析器
JSON代表JavaScript對象符號。它是一個獨立的數據交換格式,是XML的最佳替代品。本章介紹了如何解析JSON文件,並從中提取所需的信息。Android提供了四個
 Android加載Spinner
可以顯示在的Android任務,通過加載進度條的進展。進度條有兩種形狀。加載欄和加載微調(spinner)。在本章中,我們將討論微調(spinner)。Spinner 用