編輯:Android開發實例
無意間看到Alarm 這個類 覺得挺有意思 這個用法應該會比較常用到 看了一些介紹 然後自己寫了一個demo
Alarm是在預定的時間上觸發Intent的一種獨立的方法。
Alarm超出了應用程序的作用域,所以它們可以用於觸發應用程序事件或動作,甚至在應用程序關閉之後,與Broadcast Receiver結合,它們可以變得尤其的強大,可以通過設置Alarm來啟動應用程序或者執行動作,而應用程序不需要打開或者處於活躍狀態。
舉個例子,你可以使用Alarm來實現一個鬧鐘程序,執行正常的網絡查詢,或者在“非高峰”時間安排耗時或有代價的操作。
對於僅在應用程序生命周期內發生的定時操作,Handler類與Timer和Thread類的結合是一個更好的選擇,它允許Android更好地控制系統資源。
Android中的Alarm在設備處於睡眠模式時仍保持活躍,它可以設置來喚醒設備;然而,所有的Alarm在設備重啟時都會被取消。
Alarm的操作通過AlarmManager來處理,通過getSystemService可以獲得其系統服務,如下所示:
AlarmManager alarms = (AlarmManager)getSystemService(Context.ALARM_SERVICE);
為了創建一個新的Alarm,使用set方法並指定一個Alarm類型、觸發時間和在Alarm觸發時要調用的Intent。如果你設定的Alarm發生在過去,那麼,它將立即觸發。
這裡有4種Alarm類型。你的選擇將決定你在set方法中傳遞的時間值代表什麼,是特定的時間或者是時間流逝:
❑ RTC_WAKEUP
在指定的時刻(設置Alarm的時候),喚醒設備來觸發Intent。
❑ RTC
在一個顯式的時間觸發Intent,但不喚醒設備。
❑ ELAPSED_REALTIME
從設備啟動後,如果流逝的時間達到總時間,那麼觸發Intent,但不喚醒設備。流逝的時間包括設備睡眠的任何時間。注意一點的是,時間流逝的計算點是自從它最後一次啟動算起。
❑ ELAPSED_REALTIME_WAKEUP
從設備啟動後,達到流逝的總時間後,如果需要將喚醒設備並觸發Intent。
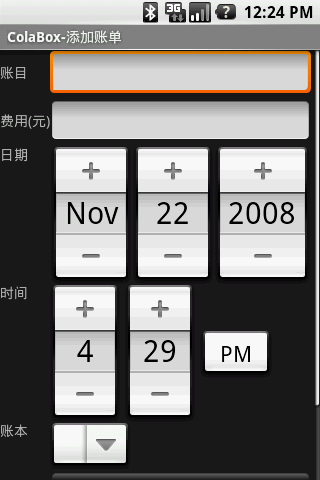
效果圖如下:
下面看代碼
- public class AlarmSettingActivity extends Activity {
- private Button setbutton;
- private Button canclebutton;
- private TextView mTextView;
- private Calendar calendar;
- private AlarmManager am;
- @Override
- public void onCreate(Bundle savedInstanceState) {
- super.onCreate(savedInstanceState);
- setContentView(R.layout.main);
- //獲得Alarm管理實例
- am = (AlarmManager) getSystemService(ALARM_SERVICE);
- calendar = Calendar.getInstance();
- mTextView = (TextView) findViewById(R.id.textinfo);
- setbutton = (Button) findViewById(R.id.setbutton);
- canclebutton = (Button) findViewById(R.id.canclebutton);
- setbutton.setOnClickListener(new View.OnClickListener() {
- public void onClick(View v) {
- calendar.setTimeInMillis(System.currentTimeMillis());
- int mHour = calendar.get(Calendar.HOUR_OF_DAY);
- int mMinute = calendar.get(Calendar.MINUTE);
- new TimePickerDialog(AlarmSettingActivity.this,
- new TimePickerDialog.OnTimeSetListener() {
- public void onTimeSet(TimePicker view,
- int hourOfDay, int minute) {
- calendar.setTimeInMillis(System
- .currentTimeMillis());
- calendar.set(Calendar.HOUR_OF_DAY, hourOfDay);
- calendar.set(Calendar.MINUTE, minute);
- calendar.set(Calendar.SECOND, 0);
- calendar.set(Calendar.MILLISECOND, 0);
- Intent intent = new Intent(AlarmSettingActivity.this, AlarmBroadCastReceiver.class);
- //這裡可以傳遞消息,譬如提醒信息
- Bundle bundle = new Bundle();
- bundle.putString("info", "該起床啦 ~~~~~");
- bundle.putInt("id", new Random().nextInt(100));
- intent.putExtras(bundle);
- //獲得一個可以掛起的Intent
- PendingIntent pendingIntent = PendingIntent.getBroadcast(AlarmSettingActivity.this, 0,intent, 0);
- /* 設置鬧鐘 */
- am.set(AlarmManager.RTC_WAKEUP, calendar
- .getTimeInMillis(), pendingIntent);
- /* 設置周期鬧 */
- am.setRepeating(AlarmManager.RTC_WAKEUP, System
- .currentTimeMillis()
- + (10 * 1000), (24 * 60 * 60 * 1000),
- pendingIntent);
- String tmpS = "設置鬧鐘時間為" + format(hourOfDay)
- + ":" + format(minute);
- mTextView.setText(tmpS);
- }
- }, mHour, mMinute, true).show();
- }
- });
- canclebutton.setOnClickListener(new View.OnClickListener() {
- public void onClick(View v) {
- Intent intent = new Intent(AlarmSettingActivity.this, AlarmBroadCastReceiver.class);
- PendingIntent pendingIntent = PendingIntent.getBroadcast(
- AlarmSettingActivity.this, 0, intent, 0);
- //取消該Intent
- am.cancel(pendingIntent);
- mTextView.setText("鬧鐘已取消!");
- }
- });
- }
- //格式化字符串 不滿兩位 前面補0
- private String format(int x) {
- String s = "" + x;
- if (s.length() == 1)
- s = "0" + s;
- return s;
- }
- }
這裡用到了一個類 PendingIntent
pending是掛起的意思 它的功能跟Intent差不多 也是用來進行傳遞數據 它的內部也有Intent的引用 這裡的主要區別還是生命周期
因為Alarm具有了不依賴應用程序的功能,Intent是依賴應用的,所以Intent就不能滿足這種需求,
PendingIntent的生命周期,由系統管理,創建他的應用被Kill了,該PendingIntent可以照樣存在,在別的進程中照樣可以使用
下面就是通過BroadcastReceiver 來接收消息
- public class AlarmBroadCastReceiver extends BroadcastReceiver{
- private int id;
- @Override
- public void onReceive(Context context, Intent intent) {
- //獲取傳遞的信息
- Bundle bundle = intent.getExtras();
- String info = bundle.getString("info");
- id = bundle.getInt("id",1);
- NotificationManager notiManager = (NotificationManager) context.getSystemService(Context.NOTIFICATION_SERVICE);
- Notification notification = new Notification(R.drawable.alarm, info, System.currentTimeMillis());
- //設置提示框的狀態
- notification.flags = Notification.FLAG_AUTO_CANCEL;
- Intent intentTarget = new Intent(context, AlarmSettingActivity.class);
- intent.setFlags(Intent.FLAG_ACTIVITY_CLEAR_TOP | Intent.FLAG_ACTIVITY_NEW_TASK);
- PendingIntent contentIntent = PendingIntent.getActivity(context, id,intentTarget, PendingIntent.FLAG_UPDATE_CURRENT);
- notification.setLatestEventInfo(context, "鬧鐘"+id, info,
- contentIntent);
- notiManager.notify(id, notification);
- Toast.makeText(context, "時間到了!!!!", Toast.LENGTH_LONG).show();
- }
- }
這裡接收到得消息是以通知的方式顯示
Notification 就是用來在屏幕頂端顯示通知信息的
它主要的功能是創建一個狀態條圖標、在擴展的狀態條窗口中顯示額外的信息(和啟動一個Intent)、還有聲音震動等
提示信息
可以通過Id來取消通知
- notiManager.cancel(id);
另外還有一些其他的設置:
- //創建一個NotificationManager的引用
- String ns = Context.NOTIFICATION_SERVICE;
- NotificationManager mNotificationManager = (NotificationManager)getSystemService(ns);
- //定義Notification的各種屬性
- int icon = R.drawable.icon; //通知圖標
- CharSequence tickerText = "Hello"; //狀態欄顯示的通知文本提示
- long when = System.currentTimeMillis(); //通知產生的時間,會在通知信息裡顯示
- //用上面的屬性初始化Nofification
- Notification notification = new Notification(icon,tickerText,when);
- /*
- * 添加聲音
- * notification.defaults |=Notification.DEFAULT_SOUND;
- * 或者使用以下幾種方式
- * notification.sound = Uri.parse("file:///sdcard/notification/ringer.mp3");
- * notification.sound = Uri.withAppendedPath(Audio.Media.INTERNAL_CONTENT_URI, "6");
- * 如果想要讓聲音持續重復直到用戶對通知做出反應,則可以在notification的flags字段增加"FLAG_INSISTENT"
- * 如果notification的defaults字段包括了"DEFAULT_SOUND"屬性,則這個屬性將覆蓋sound字段中定義的聲音
- */
- /*
- * 添加振動
- * notification.defaults |= Notification.DEFAULT_VIBRATE;
- * 或者可以定義自己的振動模式:
- * long[] vibrate = {0,100,200,300}; //0毫秒後開始振動,振動100毫秒後停止,再過200毫秒後再次振動300毫秒
- * notification.vibrate = vibrate;
- * long數組可以定義成想要的任何長度
- * 如果notification的defaults字段包括了"DEFAULT_VIBRATE",則這個屬性將覆蓋vibrate字段中定義的振動
- */
- /*
- * 添加LED燈提醒
- * notification.defaults |= Notification.DEFAULT_LIGHTS;
- * 或者可以自己的LED提醒模式:
- * notification.ledARGB = 0xff00ff00;
- * notification.ledOnMS = 300; //亮的時間
- * notification.ledOffMS = 1000; //滅的時間
- * notification.flags |= Notification.FLAG_SHOW_LIGHTS;
- */
- /*
- * 更多的特征屬性
- * notification.flags |= FLAG_AUTO_CANCEL; //在通知欄上點擊此通知後自動清除此通知
- * notification.flags |= FLAG_INSISTENT; //重復發出聲音,直到用戶響應此通知
- * notification.flags |= FLAG_ONGOING_EVENT; //將此通知放到通知欄的"Ongoing"即"正在運行"組中
- * notification.flags |= FLAG_NO_CLEAR; //表明在點擊了通知欄中的"清除通知"後,此通知不清除,
- * //經常與FLAG_ONGOING_EVENT一起使用
- * notification.number = 1; //number字段表示此通知代表的當前事件數量,它將覆蓋在狀態欄圖標的頂部
- * //如果要使用此字段,必須從1開始
- * notification.iconLevel = ; //
- */
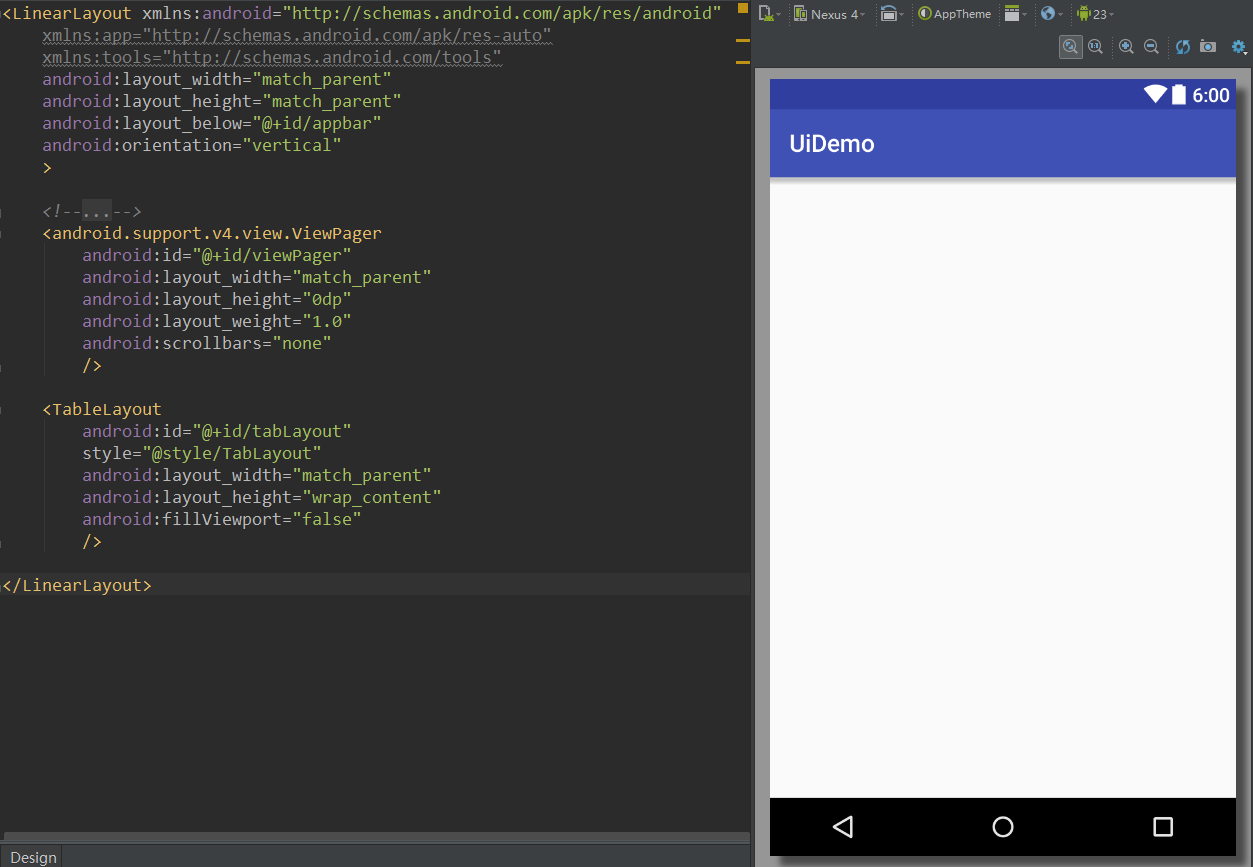 Android UI實時預覽和編寫的各種技巧
一、啰嗦 之前有讀者反饋說,你搞這個所謂的最佳實踐,每篇文章最後就給了一個庫,感覺不是很高大上。其實,我在寫這個系列之初就有想過這個問題。我的目的是:給出最實用
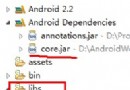 android導入第三方jar包報錯 如何正確導入jar包
在android上導入zxing.jar包,總是報錯: Could not find class com.google.zxing.MultiFormatWrit
 android顯示TextView文字的倒影效果實現代碼
今天記錄一下TextView的倒影效果,顯示一串文字,然後在文字的下方顯示出它的倒影,先上效果圖: 最重要的就是View中getDrawingCache()方法
 Android本地化
Android應用程序可以在許多不同地區的許多設備上運行。為了使應用程序更具交互性,應用程序應該處理以適合應用程序將要使用的語言環境方面的文字,數字,文件等。在本章中,我