編輯:Android開發實例
屏幕切換指的是在同一個Activity內屏幕見的切換,最長見的情況就是在一個FrameLayout內有多個頁面,比如一個系統設置頁面;一個個性化設置頁面。
很簡單,在Layout定義中指定動畫的相關屬性就可以了,通過persistentDrawingCache指定緩存策略;flipInterval指定每個View動畫之間的時間間隔;inAnimation和outAnimation分別指定View進出使用的動畫效果。動畫效果定義如下:
- <?xml version="1.0" encoding="utf-8"?>
- <LinearLayout
- xmlns:android="http://schemas.android.com/apk/res/android"
- android:orientation="vertical"
- android:layout_width="fill_parent"
- android:layout_height="fill_parent">
- <ViewFlipper android:id="@+id/details"
- android:layout_width="fill_parent"
- android:layout_height="fill_parent"
- android:persistentDrawingCache="animation"
- android:flipInterval="1000"
- android:inAnimation="@anim/push_left_in"
- android:outAnimation="@anim/push_left_out"
- >
- <LinearLayout
- android:orientation="vertical"
- android:layout_width="fill_parent"
- android:layout_height="fill_parent">
- <Button
- android:text="Next"
- android:id="@+id/Button_next1"
- android:layout_width="fill_parent"
- android:layout_height="wrap_content">
- </Button>
- <ImageView
- android:id="@+id/image1"
- android:src="@drawable/dell1"
- android:layout_width="fill_parent"
- android:layout_height="wrap_content">
- </ImageView>
- </LinearLayout>
- <LinearLayout
- android:orientation="vertical"
- android:layout_width="fill_parent"
- android:layout_height="fill_parent">
- <Button
- android:text="Next"
- android:id="@+id/Button_next2"
- android:layout_width="fill_parent"
- android:layout_height="wrap_content">
- </Button>
- <ImageView
- android:id="@+id/image2"
- android:src="@drawable/lg"
- android:layout_width="fill_parent"
- android:layout_height="wrap_content">
- </ImageView>
- </LinearLayout>
- <LinearLayout
- android:orientation="vertical"
- android:layout_width="fill_parent"
- android:layout_height="fill_parent">
- <Button
- android:text="Next"
- android:id="@+id/Button_next3"
- android:layout_width="fill_parent"
- android:layout_height="wrap_content">
- </Button>
- <ImageView
- android:id="@+id/image3"
- android:src="@drawable/lenovo"
- android:layout_width="fill_parent"
- android:layout_height="wrap_content">
- </ImageView>
- </LinearLayout>
- </ViewFlipper>
- </LinearLayout>
- res\anim\push_left_in.xml
- <?xml version="1.0" encoding="utf-8"?>
- <set xmlns:android="http://schemas.android.com/apk/res/android">
- <translate
- android:fromXDelta="100%p"
- android:toXDelta="0"
- android:duration="500"/>
- <alpha
- android:fromAlpha="0.0"
- android:toAlpha="1.0"
- android:duration="500" />
- </set>
- res\anim\push_left_out.xml
- <?xml version="1.0" encoding="utf-8"?>
- <set xmlns:android="http://schemas.android.com/apk/res/android">
- <translate
- android:fromXDelta="0"
- android:toXDelta="-100%p"
- android:duration="500"/>
- <alpha
- android:fromAlpha="1.0"
- android:toAlpha="0.0"
- android:duration="500" />
- </set>
Activity代碼如下(src\cc\c\TestActivity.java):
通過手勢移動屏幕 上面是通過屏幕上的按鈕來在屏幕間切換的,這看起來多少有點不符合OPhone的風格,如果要是能通過手勢的左右滑動來實現屏幕的切換就比較優雅了。 通過android.view.GestureDetector類可以檢測各種手勢事件,該類有兩個回調接口分別用來通知具體的事件: GestureDetector.OnDoubleTapListener:用來通知DoubleTap事件,類似於鼠標的雙擊事件,該接口有如下三個回調函數: 1. onDoubleTap(MotionEvent e):通知DoubleTap手勢, 2. onDoubleTapEvent(MotionEvent e):通知DoubleTap手勢中的事件,包含down、up和move事件(這裡指的是在雙擊之間發生的事件,例如在同一個地方雙擊會產生DoubleTap手勢,而在DoubleTap手勢裡面還會發生down和up事件,這兩個事件由該函數通知); 3. onSingleTapConfirmed(MotionEvent e):用來判定該次點擊是SingleTap而不是DoubleTap,如果連續點擊兩次就是DoubleTap手勢,如果只點擊一次,OPhone系統等待一段時間後沒有收到第二次點擊則判定該次點擊為SingleTap而不是DoubleTap,然後觸發SingleTapConfirmed事件。 GestureDetector.OnGestureListener:用來通知普通的手勢事件,該接口有如下六個回調函數: 1. onDown(MotionEvent e):down事件; 2. onSingleTapUp(MotionEvent e):一次點擊up事件; 3. onShowPress(MotionEvent e):down事件發生而move或則up還沒發生前觸發該事件; 4. onLongPress(MotionEvent e):長按事件; 5. onFling(MotionEvent e1, MotionEvent e2, float velocityX, float velocityY):滑動手勢事件; 6. onScroll(MotionEvent e1, MotionEvent e2, float distanceX, float distanceY):在屏幕上拖動事件。 這些事件有些定義的不太容易理解,在示例項目中實現了所有的回調函數,在每個函數中輸出相關的日志,對這些事件不理解的可以運行項目,通過不同的操作來觸發事件,然後觀看logcat輸出日志可有助於對這些事件的理解。 在上述事件中,如果在程序中處理的該事件就返回true否則返回false,在GestureDetector中也定義了一個SimpleOnGestureListener類,這是個助手類,實現了上述的所有函數並且都返回false。如果在項目中只需要監聽某個事件繼承這個類可以少些幾個空回調函數。 要走上面的程序中添加滑動手勢來實現屏幕切換的話,首先需要定義一個GestureDetector: private GestureDetector mGestureDetector; 並在onCreate函數中初始化: mGestureDetector = new GestureDetector(this); 參數是OnGestureListener,然後讓TestActivity實現 OnGestureListener 和OnDoubleTapListener接口:
- public class TestActivity extends Activity {
- private ViewFlipper mViewFlipper;
- @Override
- public void onCreate(Bundle savedInstanceState) {
- super.onCreate(savedInstanceState);
- setContentView(R.layout.main);
- Button buttonNext1 = (Button) findViewById(R.id.Button_next1);
- mViewFlipper = (ViewFlipper) findViewById(R.id.flipper);
- buttonNext1.setOnClickListener(new View.OnClickListener() {
- public void onClick(View view) {
- //在layout中定義的屬性,也可以在代碼中指定
- // mViewFlipper.setInAnimation(getApplicationContext(), R.anim.push_left_in);
- // mViewFlipper.setOutAnimation(getApplicationContext(), R.anim.push_left_out);
- // mViewFlipper.setPersistentDrawingCache(ViewGroup.PERSISTENT_ALL_CACHES);
- // mViewFlipper.setFlipInterval(1000);
- mViewFlipper.showNext();
- //調用下面的函數將會循環顯示mViewFlipper內的所有View。
- // mViewFlipper.startFlipping();
- }
- });
- Button buttonNext2 = (Button) findViewById(R.id.Button_next2);
- buttonNext2.setOnClickListener(new View.OnClickListener() {
- public void onClick(View view) {
- mViewFlipper.showNext();
- }
- });
- Button buttonNext3 = (Button) findViewById(R.id.Button_next3);
- buttonNext3.setOnClickListener(new View.OnClickListener() {
- public void onClick(View view) {
- mViewFlipper.showNext();
- }
- });
- }
- }
- public GestureDetector(Context context, OnGestureListener listener, Handler handler) {
- if (handler != null) {
- mHandler = new GestureHandler(handler);
- } else {
- mHandler = new GestureHandler();
- }
- mListener = listener;
- if (listener instanceof OnDoubleTapListener) {
- setOnDoubleTapListener((OnDoubleTapListener) listener);
- }
- init(context);
 Android登錄實例
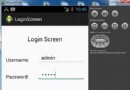
登錄應用程序的屏幕,詢問憑據登錄到一些特定的應用。可能需要登錄到Facebook,微博等本章介紹了,如何創建一個登錄界面,以及如何管理安全問題和錯誤嘗試。首先,必須定義兩
 Android登錄實例
登錄應用程序的屏幕,詢問憑據登錄到一些特定的應用。可能需要登錄到Facebook,微博等本章介紹了,如何創建一個登錄界面,以及如何管理安全問題和錯誤嘗試。首先,必須定義兩
 Android獲取app應用程序大小的方法
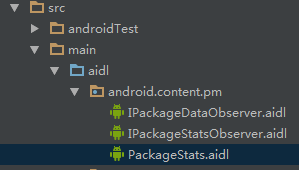
Android對這種方法進行了封裝,我們沒有權限去調用這個方法,所以我們只能通過AIDL,然後利用Java的反射機制去調用系統級的方法。 下面上代碼:(注釋比較詳
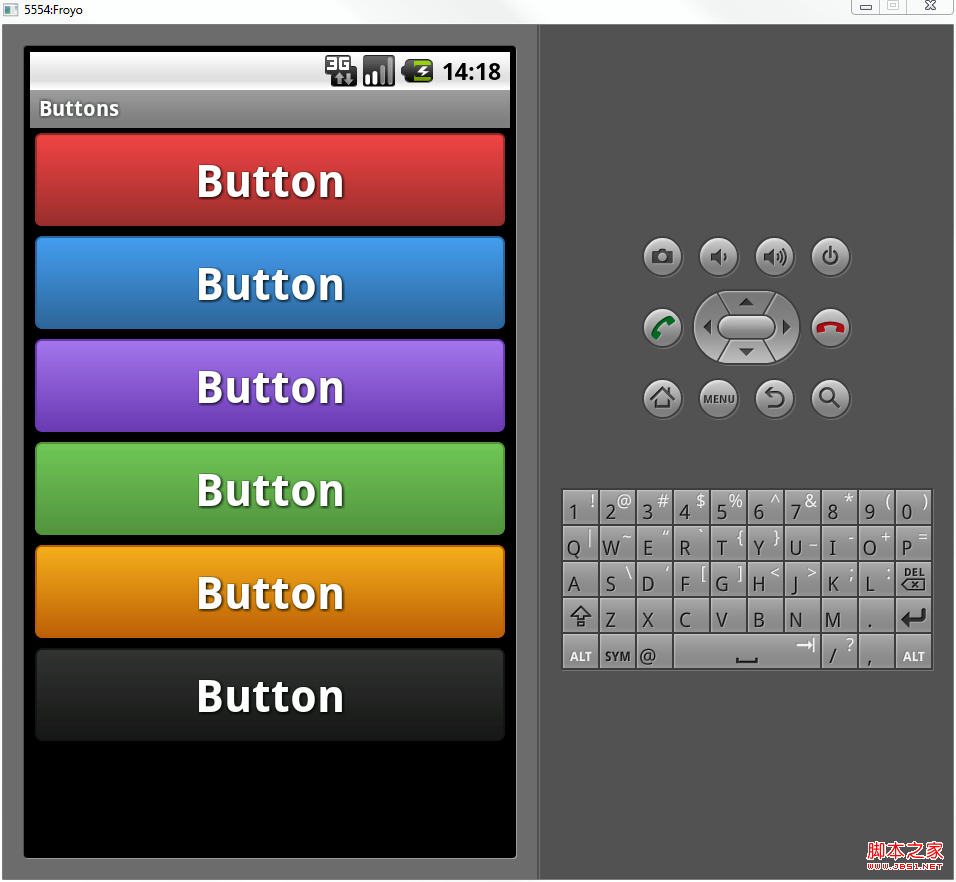 Android自定義格式顯示Button的布局思路
先把來源貼上 http://zrgiu.com/blog/2011/01/making-your-android-app-look-better/http://w