編輯:Android開發實例
在上一篇文章中,我們學習了Camera的基本用法,並借助它們編寫了一個例子,實現了類似於API Demos裡的圖片中軸旋轉功能。不過那個例子的核心代碼是來自於API Demos中帶有的Rotate3dAnimation這個類,是它幫助我們完成了所有的三維旋轉操作,所有Matrix和Camera相關的代碼也是封裝在這個類中。
這樣說來的話,大家心裡會不會癢癢的呢?雖然學習了Camera的用法,但卻沒有按照自己的理解來實現一套非常炫酷的3D效果。不要著急,今天我就帶著大家一起來實現一種3D推拉門式的滑動菜單,而且完全不會借助任何API Demos裡面的代碼。
當然如果你還不是很了解Camera的使用方式,可以先去閱讀我的上一篇文章 http://www.fengfly.com/plus/view-215100-1.html 。
關於滑動菜單的文章我也已經寫過好幾篇了,相信看過的朋友對滑動菜單的實現方式應該都已經比較熟悉了,那麼本篇文章的重點就在於,如何在傳統滑動菜單的基礎上加入推拉門式的立體效果。還不了解滑動菜單如何實現的朋友,可以去翻一翻我之前的文章。
下面還是回到正題,首先來講一下這次的實現原理吧,其實傳統的滑動菜單功能就是把菜單部分放在了下面,主布局放在了上面,然後根據手指滑動的距離來偏移主布局,讓菜單部分得以顯示出來就行了。不過我們這次既然要做推拉門式的立體效果,就需要將傳統的思維稍微轉變一下,可以先讓菜單部分隱藏掉,但卻復制一個菜單的鏡像並生成一張圖片,然後在手指滑動的時候對這張圖片進行三維操作,讓它產生推拉門式的效果,等滑動操作結束的時候,才讓真正的菜單顯示出來,然後將這個圖片隱藏。原理示意圖如下所示:
那麼下面我們就開始動手實現吧,首先新建一個Android項目,起名叫做ThreeDSlidingLayoutDemo。
然後新建一個Image3dView類繼承自View,用於生成鏡像圖片,以及完成三維操作,代碼如下所示:
- public class Image3dView extends View {
- /**
- * 源視圖,用於生成圖片對象。
- */
- private View sourceView;
- /**
- * 根據傳入的源視圖生成的圖片對象。
- */
- private Bitmap sourceBitmap;
- /**
- * 源視圖的寬度。
- */
- private float sourceWidth;
- /**
- * Matrix對象,用於對圖片進行矩陣操作。
- */
- private Matrix matrix = new Matrix();
- /**
- * Camera對象,用於對圖片進行三維操作。
- */
- private Camera camera = new Camera();
- /**
- * Image3dView的構造函數
- *
- * @param context
- * @param attrs
- */
- public Image3dView(Context context, AttributeSet attrs) {
- super(context, attrs);
- }
- /**
- * 提供外部接口,允許向Image3dView傳入源視圖。
- *
- * @param view
- * 傳入的源視圖
- */
- public void setSourceView(View view) {
- sourceView = view;
- sourceWidth = sourceView.getWidth();
- }
- /**
- * 清除掉緩存的圖片對象。
- */
- public void clearSourceBitmap() {
- if (sourceBitmap != null) {
- sourceBitmap = null;
- }
- }
- @Override
- protected void onDraw(Canvas canvas) {
- super.onDraw(canvas);
- if (sourceBitmap == null) {
- getSourceBitmap();
- }
- // 計算圖片需要旋轉的角度
- float degree = 90 - (90 / sourceWidth) * getWidth();
- camera.save();
- camera.rotateY(degree);
- camera.getMatrix(matrix);
- camera.restore();
- // 將旋轉的中心點移動到屏幕左邊緣的中間位置
- matrix.preTranslate(0, -getHeight() / 2);
- matrix.postTranslate(0, getHeight() / 2);
- canvas.drawBitmap(sourceBitmap, matrix, null);
- }
- /**
- * 獲取源視圖對應的圖片對象。
- */
- private void getSourceBitmap() {
- if (sourceView != null) {
- sourceView.setDrawingCacheEnabled(true);
- sourceView.layout(0, 0, sourceView.getWidth(), sourceView.getHeight());
- sourceView.buildDrawingCache();
- sourceBitmap = sourceView.getDrawingCache();
- }
- }
- }
可以看到,Image3dView中提供了一個setSourceView()方法,用於傳遞源視圖進來,我們稍後復制鏡像就是對它進行復制。然後在onDraw()方法裡對sourceBitmap進行判斷,如果為空,則去調用getSourceBitmap()方法來生成一張鏡像圖片,getSourceBitmap()方法的細節大家自己去看。在獲得了鏡像圖片之後,接下來就是要計算圖片的旋轉角度了,這裡根據Image3dView當前的寬度和源視圖的總寬度進行對比,按比例算出旋轉的角度。然後調用Camera的rotateY()方法,讓圖片團練Y軸進行旋轉,並將旋轉的中心點移動到屏幕左邊緣的中間位置,這幾行代碼我們在上篇文章中已經見過了,算是挺熟悉了吧!最後調用Canvas的drawBitmap()方法把圖片繪制出來。
完成了Image3dView之後,接著我們要開始編寫滑動菜單部分的代碼,其實這次的代碼和之前的滑動菜單代碼大同小異,看過我前面文章的朋友,這次理解起來一定會輕而易舉。新建ThreeDSlidingLayout類,代碼如下所示:
- public class ThreeDSlidingLayout extends RelativeLayout implements OnTouchListener {
- /**
- * 滾動顯示和隱藏左側布局時,手指滑動需要達到的速度。
- */
- public static final int SNAP_VELOCITY = 200;
- /**
- * 滑動狀態的一種,表示未進行任何滑動。
- */
- public static final int DO_NOTHING = 0;
- /**
- * 滑動狀態的一種,表示正在滑出左側菜單。
- */
- public static final int SHOW_MENU = 1;
- /**
- * 滑動狀態的一種,表示正在隱藏左側菜單。
- */
- public static final int HIDE_MENU = 2;
- /**
- * 記錄當前的滑動狀態
- */
- private int slideState;
- /**
- * 屏幕寬度值。
- */
- private int screenWidth;
- /**
- * 右側布局最多可以滑動到的左邊緣。
- */
- private int leftEdge = 0;
- /**
- * 右側布局最多可以滑動到的右邊緣。
- */
- private int rightEdge = 0;
- /**
- * 在被判定為滾動之前用戶手指可以移動的最大值。
- */
- private int touchSlop;
- /**
- * 記錄手指按下時的橫坐標。
- */
- private float xDown;
- /**
- * 記錄手指按下時的縱坐標。
- */
- private float yDown;
- /**
- * 記錄手指移動時的橫坐標。
- */
- private float xMove;
- /**
- * 記錄手指移動時的縱坐標。
- */
- private float yMove;
- /**
- * 記錄手機抬起時的橫坐標。
- */
- private float xUp;
- /**
- * 左側布局當前是顯示還是隱藏。只有完全顯示或隱藏時才會更改此值,滑動過程中此值無效。
- */
- private boolean isLeftLayoutVisible;
- /**
- * 是否正在滑動。
- */
- private boolean isSliding;
- /**
- * 是否已加載過一次layout,這裡onLayout中的初始化只需加載一次
- */
- private boolean loadOnce;
- /**
- * 左側布局對象。
- */
- private View leftLayout;
- /**
- * 右側布局對象。
- */
- private View rightLayout;
- /**
- * 在滑動過程中展示的3D視圖
- */
- private Image3dView image3dView;
- /**
- * 用於監聽側滑事件的View。
- */
- private View mBindView;
- /**
- * 左側布局的參數,通過此參數來重新確定左側布局的寬度,以及更改leftMargin的值。
- */
- private MarginLayoutParams leftLayoutParams;
- /**
- * 右側布局的參數,通過此參數來重新確定右側布局的寬度。
- */
- private MarginLayoutParams rightLayoutParams;
- /**
- * 3D視圖的參數,通過此參數來重新確定3D視圖的寬度。
- */
- private ViewGroup.LayoutParams image3dViewParams;
- /**
- * 用於計算手指滑動的速度。
- */
- private VelocityTracker mVelocityTracker;
- /**
- * 重寫SlidingLayout的構造函數,其中獲取了屏幕的寬度。
- *
- * @param context
- * @param attrs
- */
- public ThreeDSlidingLayout(Context context, AttributeSet attrs) {
- super(context, attrs);
- WindowManager wm = (WindowManager) context.getSystemService(Context.WINDOW_SERVICE);
- screenWidth = wm.getDefaultDisplay().getWidth();
- touchSlop = ViewConfiguration.get(context).getScaledTouchSlop();
- }
- /**
- * 綁定監聽側滑事件的View,即在綁定的View進行滑動才可以顯示和隱藏左側布局。
- *
- * @param bindView
- * 需要綁定的View對象。
- */
- public void setScrollEvent(View bindView) {
- mBindView = bindView;
- mBindView.setOnTouchListener(this);
- }
- /**
- * 將屏幕滾動到左側布局界面,滾動速度設定為10.
- */
- public void scrollToLeftLayout() {
- image3dView.clearSourceBitmap();
- new ScrollTask().execute(-10);
- }
- /**
- * 將屏幕滾動到右側布局界面,滾動速度設定為-10.
- */
- public void scrollToRightLayout() {
- image3dView.clearSourceBitmap();
- new ScrollTask().execute(10);
- }
- /**
- * 左側布局是否完全顯示出來,或完全隱藏,滑動過程中此值無效。
- *
- * @return 左側布局完全顯示返回true,完全隱藏返回false。
- */
- public boolean isLeftLayoutVisible() {
- return isLeftLayoutVisible;
- }
- /**
- * 在onLayout中重新設定左側布局和右側布局的參數。
- */
- @Override
- protected void onLayout(boolean changed, int l, int t, int r, int b) {
- super.onLayout(changed, l, t, r, b);
- if (changed && !loadOnce) {
- // 獲取左側布局對象
- leftLayout = findViewById(R.id.menu);
- leftLayoutParams = (MarginLayoutParams) leftLayout.getLayoutParams();
- rightEdge = -leftLayoutParams.width;
- // 獲取右側布局對象
- rightLayout = findViewById(R.id.content);
- rightLayoutParams = (MarginLayoutParams) rightLayout.getLayoutParams();
- rightLayoutParams.width = screenWidth;
- rightLayout.setLayoutParams(rightLayoutParams);
- // 獲取3D視圖對象
- image3dView = (Image3dView) findViewById(R.id.image_3d_view);
- // 將左側布局傳入3D視圖中作為生成源
- image3dView.setSourceView(leftLayout);
- loadOnce = true;
- }
- }
- @Override
- public boolean onTouch(View v, MotionEvent event) {
- createVelocityTracker(event);
- switch (event.getAction()) {
- case MotionEvent.ACTION_DOWN:
- // 手指按下時,記錄按下時的橫坐標
- xDown = event.getRawX();
- yDown = event.getRawY();
- slideState = DO_NOTHING;
- break;
- case MotionEvent.ACTION_MOVE:
- // 手指移動時,對比按下時的橫坐標,計算出移動的距離,來調整右側布局的leftMargin值,從而顯示和隱藏左側布局
- xMove = event.getRawX();
- yMove = event.getRawY();
- int moveDistanceX = (int) (xMove - xDown);
- int moveDistanceY = (int) (yMove - yDown);
- checkSlideState(moveDistanceX, moveDistanceY);
- switch (slideState) {
- case SHOW_MENU:
- rightLayoutParams.rightMargin = -moveDistanceX;
- onSlide();
- break;
- case HIDE_MENU:
- rightLayoutParams.rightMargin = rightEdge - moveDistanceX;
- onSlide();
- break;
- default:
- break;
- }
- break;
- case MotionEvent.ACTION_UP:
- xUp = event.getRawX();
- int upDistanceX = (int) (xUp - xDown);
- if (isSliding) {
- // 手指抬起時,進行判斷當前手勢的意圖
- switch (slideState) {
- case SHOW_MENU:
- if (shouldScrollToLeftLayout()) {
- scrollToLeftLayout();
- } else {
- scrollToRightLayout();
- }
- break;
- case HIDE_MENU:
- if (shouldScrollToRightLayout()) {
- scrollToRightLayout();
- } else {
- scrollToLeftLayout();
- }
- break;
- default:
- break;
- }
- } else if (upDistanceX < touchSlop && isLeftLayoutVisible) {
- scrollToRightLayout();
- }
- recycleVelocityTracker();
- break;
- }
- if (v.isEnabled()) {
- if (isSliding) {
- unFocusBindView();
- return true;
- }
- if (isLeftLayoutVisible) {
- return true;
- }
- return false;
- }
- return true;
- }
- /**
- * 執行滑動過程中的邏輯操作,如邊界檢查,改變偏移值,可見性檢查等。
- */
- private void onSlide() {
- checkSlideBorder();
- rightLayout.setLayoutParams(rightLayoutParams);
- image3dView.clearSourceBitmap();
- image3dViewParams = image3dView.getLayoutParams();
- image3dViewParams.width = -rightLayoutParams.rightMargin;
- // 滑動的同時改變3D視圖的大小
- image3dView.setLayoutParams(image3dViewParams);
- // 保證在滑動過程中3D視圖可見,左側布局不可見
- showImage3dView();
- }
- /**
- * 根據手指移動的距離,判斷當前用戶的滑動意圖,然後給slideState賦值成相應的滑動狀態值。
- *
- * @param moveDistanceX
- * 橫向移動的距離
- * @param moveDistanceY
- * 縱向移動的距離
- */
- private void checkSlideState(int moveDistanceX, int moveDistanceY) {
- if (isLeftLayoutVisible) {
- if (!isSliding && Math.abs(moveDistanceX) >= touchSlop && moveDistanceX < 0) {
- isSliding = true;
- slideState = HIDE_MENU;
- }
- } else if (!isSliding && Math.abs(moveDistanceX) >= touchSlop && moveDistanceX > 0
- && Math.abs(moveDistanceY) < touchSlop) {
- isSliding = true;
- slideState = SHOW_MENU;
- }
- }
- /**
- * 在滑動過程中檢查左側菜單的邊界值,防止綁定布局滑出屏幕。
- */
- private void checkSlideBorder() {
- if (rightLayoutParams.rightMargin > leftEdge) {
- rightLayoutParams.rightMargin = leftEdge;
- } else if (rightLayoutParams.rightMargin < rightEdge) {
- rightLayoutParams.rightMargin = rightEdge;
- }
- }
- /**
- * 判斷是否應該滾動將左側布局展示出來。如果手指移動距離大於屏幕的1/2,或者手指移動速度大於SNAP_VELOCITY,
- * 就認為應該滾動將左側布局展示出來。
- *
- * @return 如果應該滾動將左側布局展示出來返回true,否則返回false。
- */
- private boolean shouldScrollToLeftLayout() {
- return xUp - xDown > leftLayoutParams.width / 2 || getScrollVelocity() > SNAP_VELOCITY;
- }
- /**
- * 判斷是否應該滾動將右側布局展示出來。如果手指移動距離加上leftLayoutPadding大於屏幕的1/2,
- * 或者手指移動速度大於SNAP_VELOCITY, 就認為應該滾動將右側布局展示出來。
- *
- * @return 如果應該滾動將右側布局展示出來返回true,否則返回false。
- */
- private boolean shouldScrollToRightLayout() {
- return xDown - xUp > leftLayoutParams.width / 2 || getScrollVelocity() > SNAP_VELOCITY;
- }
- /**
- * 創建VelocityTracker對象,並將觸摸事件加入到VelocityTracker當中。
- *
- * @param event
- * 右側布局監聽控件的滑動事件
- */
- private void createVelocityTracker(MotionEvent event) {
- if (mVelocityTracker == null) {
- mVelocityTracker = VelocityTracker.obtain();
- }
- mVelocityTracker.addMovement(event);
- }
- /**
- * 獲取手指在右側布局的監聽View上的滑動速度。
- *
- * @return 滑動速度,以每秒鐘移動了多少像素值為單位。
- */
- private int getScrollVelocity() {
- mVelocityTracker.computeCurrentVelocity(1000);
- int velocity = (int) mVelocityTracker.getXVelocity();
- return Math.abs(velocity);
- }
- /**
- * 回收VelocityTracker對象。
- */
- private void recycleVelocityTracker() {
- mVelocityTracker.recycle();
- mVelocityTracker = null;
- }
- /**
- * 使用可以獲得焦點的控件在滑動的時候失去焦點。
- */
- private void unFocusBindView() {
- if (mBindView != null) {
- mBindView.setPressed(false);
- mBindView.setFocusable(false);
- mBindView.setFocusableInTouchMode(false);
- }
- }
- /**
- * 保證此時讓左側布局不可見,3D視圖可見,從而讓滑動過程中產生3D的效果。
- */
- private void showImage3dView() {
- if (image3dView.getVisibility() != View.VISIBLE) {
- image3dView.setVisibility(View.VISIBLE);
- }
- if (leftLayout.getVisibility() != View.INVISIBLE) {
- leftLayout.setVisibility(View.INVISIBLE);
- }
- }
- class ScrollTask extends AsyncTask<Integer, Integer, Integer> {
- @Override
- protected Integer doInBackground(Integer... speed) {
- int rightMargin = rightLayoutParams.rightMargin;
- // 根據傳入的速度來滾動界面,當滾動到達左邊界或右邊界時,跳出循環。
- while (true) {
- rightMargin = rightMargin + speed[0];
- if (rightMargin < rightEdge) {
- rightMargin = rightEdge;
- break;
- }
- if (rightMargin > leftEdge) {
- rightMargin = leftEdge;
- break;
- }
- publishProgress(rightMargin);
- // 為了要有滾動效果產生,每次循環使線程睡眠5毫秒,這樣肉眼才能夠看到滾動動畫。
- sleep(5);
- }
- if (speed[0] > 0) {
- isLeftLayoutVisible = false;
- } else {
- isLeftLayoutVisible = true;
- }
- isSliding = false;
- return rightMargin;
- }
- @Override
- protected void onProgressUpdate(Integer... rightMargin) {
- rightLayoutParams.rightMargin = rightMargin[0];
- rightLayout.setLayoutParams(rightLayoutParams);
- image3dViewParams = image3dView.getLayoutParams();
- image3dViewParams.width = -rightLayoutParams.rightMargin;
- image3dView.setLayoutParams(image3dViewParams);
- showImage3dView();
- unFocusBindView();
- }
- @Override
- protected void onPostExecute(Integer rightMargin) {
- rightLayoutParams.rightMargin = rightMargin;
- rightLayout.setLayoutParams(rightLayoutParams);
- image3dViewParams = image3dView.getLayoutParams();
- image3dViewParams.width = -rightLayoutParams.rightMargin;
- image3dView.setLayoutParams(image3dViewParams);
- if (isLeftLayoutVisible) {
- // 保證在滑動結束後左側布局可見,3D視圖不可見。
- image3dView.setVisibility(View.INVISIBLE);
- leftLayout.setVisibility(View.VISIBLE);
- }
- }
- }
- /**
- * 使當前線程睡眠指定的毫秒數。
- *
- * @param millis
- * 指定當前線程睡眠多久,以毫秒為單位
- */
- private void sleep(long millis) {
- try {
- Thread.sleep(millis);
- } catch (InterruptedException e) {
- e.printStackTrace();
- }
- }
- }
代碼比較長,我還是帶著大家來理一下思路。首先在onLayout方法中,我們分別初始化了左側布局對象、右側布局對象和Image3dView對象,這三個對象稍後都要配置到Activity布局裡面的。在onLayout()方法的最後,調用了Image3dView的setSourceView()方法,並將左側布局對象傳了進去,說明我們後面就要對它進行鏡像復制。
當手指在界面上拖動來顯示左側布局的時候,就會進入到onTouch()方法中,這裡會調用checkSlideState()方法來檢查滑動的狀態,以判斷用戶是想要顯示左側布局還是隱藏左側布局,然後根據手指滑動的距離對右側布局進行偏移,就可以實現基本的滑動效果了。接下來是重點內容,這裡會根據右側布局的偏移量來改變Image3dView的寬度,當Image3dView大小發生改變時,當然會調用onDraw()方法來進行重繪,此時我們編寫的三維旋轉邏輯就可以得到執行了,於是就會產生立體的推拉門式效果。注意,在整個的滑動過程中,真正的左側布局一直都是不可見的,我們所看到的只是它的一張鏡像圖片。
當手指離開屏幕後,會根據當前的移動距離來決定是顯示左側布局還是隱藏左側布局,並會調用scrollToLeftLayout()方法或scrollToRightLayout()方法來完成後續的滾動操作。當整個滾動操作完成之後,才會將真正的左側布局顯示出來,再把鏡像圖片隱藏掉,這樣用戶就可以點擊左側布局上按鈕之類的東西了。
接著我們需要在Activity的布局文件當中去引用這個三維滑動菜單框架,打開或新建activity_main.xml作為程序的主布局文件,代碼如下所示:
- <com.example.slidinglayout3d.ThreeDSlidingLayout xmlns:android="http://schemas.android.com/apk/res/android"
- xmlns:tools="http://schemas.android.com/tools"
- android:id="@+id/slidingLayout"
- android:layout_width="fill_parent"
- android:layout_height="fill_parent" >
- <RelativeLayout
- android:id="@+id/menu"
- android:layout_width="270dip"
- android:layout_height="fill_parent"
- android:layout_alignParentLeft="true"
- android:background="#00ccff"
- android:visibility="invisible" >
- <LinearLayout
- android:layout_width="match_parent"
- android:layout_height="wrap_content"
- android:layout_centerInParent="true"
- android:orientation="vertical" >
- <TextView
- android:layout_width="wrap_content"
- android:layout_height="wrap_content"
- android:layout_gravity="center_horizontal"
- android:text="This is menu"
- android:textColor="#000000"
- android:textSize="28sp" />
- <Button
- android:layout_width="wrap_content"
- android:layout_height="wrap_content"
- android:layout_gravity="center_horizontal"
- android:text="Test Button" />
- </LinearLayout>
- </RelativeLayout>
- <LinearLayout
- android:id="@+id/content"
- android:layout_width="320dip"
- android:layout_height="fill_parent"
- android:layout_alignParentRight="true"
- android:background="#e9e9e9"
- android:orientation="vertical"
- android:visibility="visible" >
- <Button
- android:id="@+id/menuButton"
- android:layout_width="wrap_content"
- android:layout_height="wrap_content"
- android:text="Menu" />
- <ListView
- android:id="@+id/contentList"
- android:layout_width="fill_parent"
- android:layout_height="fill_parent"
- android:cacheColorHint="#00000000" >
- </ListView>
- </LinearLayout>
- <com.example.slidinglayout3d.Image3dView
- android:id="@+id/image_3d_view"
- android:layout_width="wrap_content"
- android:layout_height="wrap_content"
- android:layout_alignParentLeft="true"
- android:visibility="invisible" />
- </com.example.slidinglayout3d.ThreeDSlidingLayout>
可以看到,在最外層的ThreeDSlidingLayout布局裡面,我們放入了三個直接子布局,第一個RelativeLayout也就是左側布局了,裡面簡單地放了一個TextView和一個按鈕。第二個LinearLayout是右側布局,裡面放入了一個按鈕和一個ListView,都是用於顯示左側布局而准備的。第三個是Image3dView,當然是用於在滑動過程中顯示左側布局的鏡像圖片了。
最後,打開或新建MainActivity作為程序的主Activity,在裡面加入如下代碼:
- public class MainActivity extends Activity {
- /**
- * 側滑布局對象,用於通過手指滑動將左側的菜單布局進行顯示或隱藏。
- */
- private ThreeDSlidingLayout slidingLayout;
- /**
- * menu按鈕,點擊按鈕展示左側布局,再點擊一次隱藏左側布局。
- */
- private Button menuButton;
- /**
- * 放在content布局中的ListView。
- */
- private ListView contentListView;
- /**
- * 作用於contentListView的適配器。
- */
- private ArrayAdapter<String> contentListAdapter;
- /**
- * 用於填充contentListAdapter的數據源。
- */
- private String[] contentItems = { "Content Item 1", "Content Item 2", "Content Item 3",
- "Content Item 4", "Content Item 5", "Content Item 6", "Content Item 7",
- "Content Item 8", "Content Item 9", "Content Item 10", "Content Item 11",
- "Content Item 12", "Content Item 13", "Content Item 14", "Content Item 15",
- "Content Item 16" };
- @Override
- protected void onCreate(Bundle savedInstanceState) {
- super.onCreate(savedInstanceState);
- setContentView(R.layout.activity_main);
- slidingLayout = (ThreeDSlidingLayout) findViewById(R.id.slidingLayout);
- menuButton = (Button) findViewById(R.id.menuButton);
- contentListView = (ListView) findViewById(R.id.contentList);
- contentListAdapter = new ArrayAdapter<String>(this, android.R.layout.simple_list_item_1,
- contentItems);
- contentListView.setAdapter(contentListAdapter);
- // 將監聽滑動事件綁定在contentListView上
- slidingLayout.setScrollEvent(contentListView);
- menuButton.setOnClickListener(new OnClickListener() {
- @Override
- public void onClick(View v) {
- if (slidingLayout.isLeftLayoutVisible()) {
- slidingLayout.scrollToRightLayout();
- } else {
- slidingLayout.scrollToLeftLayout();
- }
- }
- });
- contentListView.setOnItemClickListener(new OnItemClickListener() {
- @Override
- public void onItemClick(AdapterView<?> parent, View view, int position, long id) {
- String text = contentItems[position];
- Toast.makeText(MainActivity.this, text, Toast.LENGTH_SHORT).show();
- }
- });
- }
- }
這些代碼應該都非常簡單和眼熟了吧,和以前滑動菜單中的代碼完全一樣,調用ThreeDSlidingLayout的setScrollEvent方法,將ListView作為綁定布局傳入,這樣就可以通過拖動ListView來顯示或隱藏左側布局。並且在按鈕的點擊事件裡也加入了顯示和隱藏左側布局的邏輯。
好了,這樣所有的編碼工作就已經完成了,讓我們來運行一下吧,效果如下圖所示:
怎麼樣?效果非常炫麗吧!其實只要對Camera進行巧妙地運用,還可以編寫出很多非常精彩的特效,就看你敢不敢去發揮你的想象力了。
源碼下載,請點擊這裡
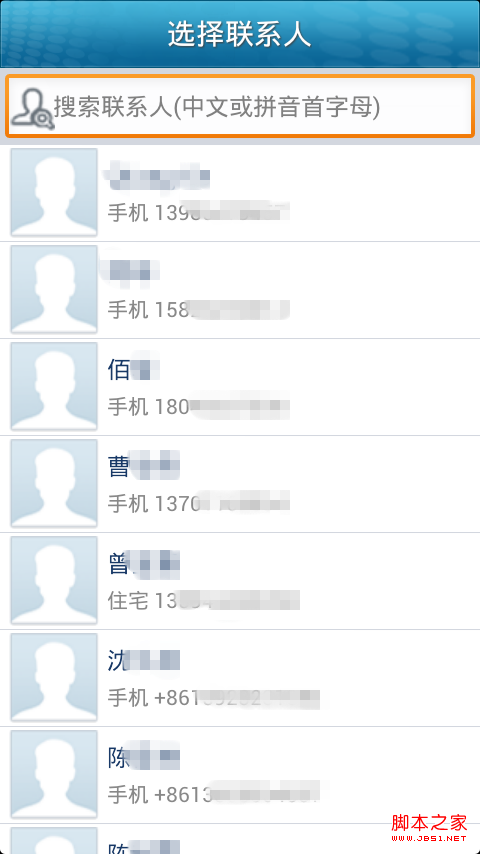 android 加載本地聯系人實現方法
首先先建布局文件,界面很簡單,就是一個搜索框和下面的聯系人列表: 代碼如下: <?xml version=1.0 encoding=utf-8?
 Android加載Spinner
可以顯示在的Android任務,通過加載進度條的進展。進度條有兩種形狀。加載欄和加載微調(spinner)。在本章中,我們將討論微調(spinner)。Spinner 用
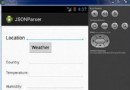 Android JSON解析器
JSON代表JavaScript對象符號。它是一個獨立的數據交換格式,是XML的最佳替代品。本章介紹了如何解析JSON文件,並從中提取所需的信息。Android提供了四個
 帶你實現開發者頭條(五) RecyclerView下拉刷新上拉加載
一 、前言 1.我們的目標 把RecyclerView下拉刷新上拉加載更多加入到我們的開發者頭條APP中。 2.效果圖 3.實現步驟 &b