編輯:Android開發實例
大致上,我們發現,下拉刷新的列表和一般列表的區別是,當滾動條在頂端的時候,再往下拉動就會把整個列表拉下來,顯示出松開刷新的提示。由此可以看出,在構建這個下拉刷新的組件的時候,只用繼承ListView,然後重寫onTouchEvent就能實現。還有就是要能在xml布局文件中引用,還需要一個參數為Context,AttributeSet的構造函數。
表面上的功能大概就這些了。另一方面,刷新的行為似乎還沒有定義,在刷新前做什麼,刷新時要做什麼,刷新完成後要做什麼,這些行為寫入一個接口中,然後讓組件去實現。
在整個組件的實現中,主體部分自然是onTouchEvent的部分。這裡需要做一些說明,在ListView中,數據的滾動和ListView.scrollTo的行為是不一樣的。數據的滾動是大概適配器的事。所以在不滿足下拉整個列表的條件下,onTouchEvent 應該返回super.onTouchEvent(ev),讓ListView組件原本的OnTouchEvent去處理。
考慮到組件的id和表頭的布局需要事先定義,同時我想把這個組件應用於多個項目裡,所以就把這個組件作為一個Library去實現。
下面就是具體的實現代碼。
首先來看一下表頭的布局文件chenzong_push_refresh_header.xml:
代碼如下:
<?xml version="1.0" encoding="utf-8"?>
<RelativeLayout xmlns:android="http://schemas.android.com/apk/res/android"
android:layout_width="match_parent"
android:layout_height="40dip"
>
<ImageView
android:layout_width="30dip"
android:layout_height="40dip"
android:background="@drawable/arrow_down"
android:layout_alignParentLeft="true"
android:id="@+id/push_refresh_header_img"
android:layout_marginLeft="10dip"
/>
<ProgressBar
android:layout_width="40dip"
android:layout_height="40dip"
android:layout_alignParentLeft="true"
android:layout_marginLeft="10dip"
android:id="@+id/push_refresh_header_pb"
android:visibility="gone"/>
<LinearLayout
android:layout_width="wrap_content"
android:layout_height="wrap_content"
android:layout_centerInParent="true"
android:orientation="vertical"
>
<TextView
android:layout_width="wrap_content"
android:layout_height="wrap_content"
android:text="最近一次更新在:"
android:textColor="#000000"
/>
<TextView
android:layout_height="wrap_content"
android:layout_width="wrap_content"
android:id="@+id/push_refresh_header_date"
android:textColor="#000000"
android:text="2013-03-04 08:03:38"/>
</LinearLayout>
</RelativeLayout>
箭頭、processBar和最近的一次刷新時間,表頭文件就這三個元素。
刷新的行為接口RefreshOperation的代碼:
代碼如下:
public interface RefreshOperation {
public void OnRefreshStart();
public void OnRefreshing();
public void OnRefreshEnd();
}
列表拉下來時,箭頭翻轉的動畫arrow_rotate.xml:
代碼如下:
<?xml version="1.0" encoding="utf-8"?>
<rotate
xmlns:android="http://schemas.android.com/apk/res/android"
android:interpolator="@android:anim/linear_interpolator"
android:fromDegrees="0"
android:toDegrees="180"
android:duration="300"
android:pivotX="50%"
android:pivotY="50%"
android:fillAfter="true"
android:repeatCount="0">
</rotate>
這些文件和一些資源文件備齊了之後,接下來就是下拉刷新列表PushRefreshList的具體實現:
代碼如下:
package com.chenzong;
import java.util.Calendar;
import com.doall.pushrefreshlist.R;
import android.content.Context;
import android.os.Handler;
import android.os.Message;
import android.util.AttributeSet;
import android.view.LayoutInflater;
import android.view.MotionEvent;
import android.view.View;
import android.view.animation.Animation;
import android.view.animation.AnimationUtils;
import android.widget.ListView;
import android.widget.TextView;
public class PushRefreshList extends ListView implements RefreshOperation{
private int header_layout=R.layout.chenzong_push_refresh_header;
//表頭文件
private int arrow_down=R.drawable.arrow_down;
//箭頭往下的資源
private int arrow_up=R.drawable.arrow_up;
//箭頭往上的資源
private int img=R.id.push_refresh_header_img;
//顯示箭頭的控件id
private int pb=R.id.push_refresh_header_pb;
//刷新時的進度條
private int startPoint=0;
//觸摸的起始點
private RefreshOperation refresh;
//刷新行為的對象
private Animation animation=null;
private Context context;
private View headerView;
private int minPushHeight;
private final String TAG="pushRefresh";
public PushRefreshList(Context cotext, AttributeSet attrs) {
super(context, attrs);
View empty=new View(context);
//判斷是否到列表的頂端,通常要用到this.getFirstVisiblePosition(),這裡創建一個高度的為零View,加到headerView和數據之間
this.addHeaderView(empty);
LayoutInflater inflater=LayoutInflater.from(context);
headerView=inflater.inflate(header_layout, null);
this.addHeaderView(headerView);
this.setRefreshOperation(this);
this.context=context;
}
@Override
protected void onLayout(boolean changed, int l, int t, int r, int b) {
this.minPushHeight=headerView.getMeasuredHeight();
//獲取下拉刷新的觸發高度
super.onLayout(changed, l, t, r, b);
}
private boolean canHandleEvent(int dy)
{
return (dy<0&&this.getFirstVisiblePosition()==0&&!isPbVisible());
}
@Override
public boolean onTouchEvent(MotionEvent ev) {
int action=ev.getAction();
switch(action)
{
case MotionEvent.ACTION_DOWN:
startPoint=(int)ev.getY();
break;
case MotionEvent.ACTION_MOVE:
int dy=startPoint-(int)ev.getY();
if(canHandleEvent(dy))
{
if(animation==null)
{
if(Math.abs(this.getScrollY())>=this.minPushHeight)
{
animation=AnimationUtils.loadAnimation(context, R.anim.arrow_rotate);
View mView=headerView.findViewById(img);
mView.startAnimation(animation);
this.setScrollbarFadingEnabled(true);
}
}
this.scrollTo(0,dy/2);
return true;
}
break;
case MotionEvent.ACTION_UP:
this.setScrollbarFadingEnabled(false);
if(animation!=null)
{
setImgBackgroundUp();
switchCompent(View.INVISIBLE,View.VISIBLE);
this.scrollTo(0,-minPushHeight);
PushRefreshList.this.refresh.OnRefreshStart();
new Thread(mRunnable).start();
animation=null;
}
else
this.scrollTo(0,0);
break;
}
return super.onTouchEvent(ev);
}
private Runnable mRunnable=new Runnable()
{
@Override
public void run() {
PushRefreshList.this.refresh.OnRefreshing();
mHandler.obtainMessage().sendToTarget();
}
};
private Handler mHandler=new Handler()
{
@Override
public void handleMessage(Message msg) {
PushRefreshList.this.refresh.OnRefreshEnd();
PushRefreshList.this.scrollTo(0, 0);
PushRefreshList.this.setImgBackgroundDown();
PushRefreshList.this.switchCompent(View.VISIBLE, View.GONE);
TextView tv=(TextView)headerView.findViewById(R.id.push_refresh_header_date);
tv.setText(this.getDateStr());
}
private String getDateStr()
{
Calendar ca=Calendar.getInstance();
int year=ca.get(Calendar.YEAR);
int month=ca.get(Calendar.MONTH);
int date=ca.get(Calendar.DATE);
int hour=ca.get(Calendar.HOUR);
int mintes=ca.get(Calendar.MINUTE);
int second=ca.get(Calendar.SECOND);
return year+"-"+(month+1)+"-"+date+" "+hour+":"+mintes+":"+second;
}
};
private void switchCompent(int imgStatus,int pbStatus)
{
View img=headerView.findViewById(R.id.push_refresh_header_img);
img.clearAnimation();
//執行了動畫的控件如果不調用clearAnimation,setVisibility(View.GONE)會失效
img.setVisibility(imgStatus);
headerView.findViewById(R.id.push_refresh_header_pb).setVisibility(pbStatus);
}
private boolean isPbVisible()
{
return View.VISIBLE==headerView.findViewById(R.id.push_refresh_header_pb).getVisibility();
}
private void setImgBackgroundUp()
{
View mView=headerView.findViewById(this.img);
mView.setBackgroundResource(arrow_up);
}
private void setImgBackgroundDown()
{
View mView=headerView.findViewById(this.img);
mView.setBackgroundResource(arrow_down);
}
public void setRefreshOperation(RefreshOperation refresh)
{
this.refresh=refresh;
}
@Override
public void OnRefreshStart() {
}
@Override
public void OnRefreshing() {
}
@Override
public void OnRefreshEnd() {
}
 代碼分析Android實現側滑菜單
Android 側滑菜單的實現,參考網上的代碼,實現側滑菜單。最重要的是這個動畫類UgcAnimations,如何使用動畫類來側滑的封裝FlipperLayout
 Android MediaPlayer(多媒體播放)
Android提供了許多方法來控制播放的音頻/視頻文件和流。其中該方法是通過一類稱為MediaPlayer。Android是提供MediaPlayer類訪問內置的媒體播放
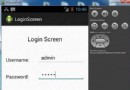 Android登錄實例
登錄應用程序的屏幕,詢問憑據登錄到一些特定的應用。可能需要登錄到Facebook,微博等本章介紹了,如何創建一個登錄界面,以及如何管理安全問題和錯誤嘗試。首先,必須定義兩
 Android中自定義進度條詳解
Android原生控件只有橫向進度條一種,而且沒法變換樣式,比如原生rom的樣子 很丑是吧,當偉大的產品設計要求更換前背景,甚至縱向,甚至圓弧狀的,咋辦,比如: