編輯:Android開發實例
通常來說,在進行Android項目開發的時候可以通過MediaRecorder和AudioRecord這兩個工具來實現錄音的功能,MediaRecorder直接把麥克風的數據存到文件,並且能夠直接進行編碼(如AMR,MP3等),而AudioRecord則是讀取麥克風的音頻流。本文使用AudioRecord讀取音頻流,使用AudioTrack播放音頻流,通過“邊讀邊播放”以及增大音量的方式來實現一個簡單的助聽器程序。
此處需要注意:由於目前的Android模擬器還不支持AudioRecord,因此本程序需要編譯之後放到真機運行。
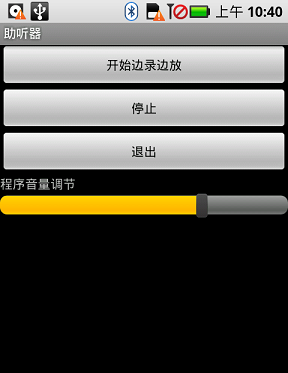
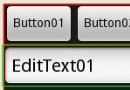
先貼出本文程序運行截圖:
另外還要注意:在本程序音量調節只是程序內部調節音量而已,要調到最大音量還需要手動設置系統音量。
使用AudioRecord必須要申請許可,在AndroidManifest.xml裡面添加這句:
<uses-permission android:name="android.permission.RECORD_AUDIO"></uses-permission>
main.xml的源碼如下:
<?xml version="1.0" encoding="utf-8"?>
<LinearLayout xmlns:android="http://schemas.android.com/apk/res/android"
 android:orientation="vertical" android:layout_width="fill_parent"
 android:layout_height="fill_parent">

 <Button android:layout_height="wrap_content" android:id="@+id/btnRecord"
 android:layout_width="fill_parent" android:text="開始邊錄邊放"></Button>
 <Button android:layout_height="wrap_content"
 android:layout_width="fill_parent" android:text="停止" android:id="@+id/btnStop"></Button>
 <Button android:layout_height="wrap_content" android:id="@+id/btnExit"
 android:layout_width="fill_parent" android:text="退出"></Button>
 <TextView android:id="@+id/TextView01" android:layout_height="wrap_content"
 android:text="程序音量調節" android:layout_width="fill_parent"></TextView>
 <SeekBar android:layout_height="wrap_content" android:id="@+id/skbVolume"
 android:layout_width="fill_parent"></SeekBar>

</LinearLayout>
testRecord.java的源碼如下:
package com.testRecord;
import android.app.Activity;
import android.media.AudioFormat;
import android.media.AudioManager;
import android.media.AudioRecord;
import android.media.AudioTrack;
import android.media.MediaRecorder;
import android.os.Bundle;
import android.view.View;
import android.widget.Button;
import android.widget.SeekBar;
import android.widget.Toast;
public class testRecord extends Activity {
 /** Called when the activity is first created. */
 Button btnRecord, btnStop, btnExit;
 SeekBar skbVolume;//調節音量
 boolean isRecording = false;//是否錄放的標記
 static final int frequency = 44100;
 static final int channelConfiguration = AudioFormat.CHANNEL_CONFIGURATION_MONO;
 static final int audioEncoding = AudioFormat.ENCODING_PCM_16BIT;
 int recBufSize,playBufSize;
 AudioRecord audioRecord;
 AudioTrack audioTrack;
 @Override
 public void onCreate(Bundle savedInstanceState) {
 super.onCreate(savedInstanceState);
 setContentView(R.layout.main);
 setTitle("助聽器");
 recBufSize = AudioRecord.getMinBufferSize(frequency,
  channelConfiguration, audioEncoding);

 playBufSize=AudioTrack.getMinBufferSize(frequency,
  channelConfiguration, audioEncoding);
 // -----------------------------------------
 audioRecord = new AudioRecord(MediaRecorder.AudioSource.MIC, frequency,
  channelConfiguration, audioEncoding, recBufSize);

 audioTrack = new AudioTrack(AudioManager.STREAM_MUSIC, frequency,
  channelConfiguration, audioEncoding,
  playBufSize, AudioTrack.MODE_STREAM);
 //------------------------------------------
 btnRecord = (Button) this.findViewById(R.id.btnRecord);
 btnRecord.setOnClickListener(new ClickEvent());
 btnStop = (Button) this.findViewById(R.id.btnStop);
 btnStop.setOnClickListener(new ClickEvent());
 btnExit = (Button) this.findViewById(R.id.btnExit);
 btnExit.setOnClickListener(new ClickEvent());
 skbVolume=(SeekBar)this.findViewById(R.id.skbVolume);
 skbVolume.setMax(100);//音量調節的極限
 skbVolume.setProgress(70);//設置seekbar的位置值
 audioTrack.setStereoVolume(0.7f, 0.7f);//設置當前音量大小
 skbVolume.setOnSeekBarChangeListener(new SeekBar.OnSeekBarChangeListener() {
  @Override
  public void onStopTrackingTouch(SeekBar seekBar) {
  float vol=(float)(seekBar.getProgress())/(float)(seekBar.getMax());
  audioTrack.setStereoVolume(vol, vol);//設置音量
  }

  @Override
  public void onStartTrackingTouch(SeekBar seekBar) {
  // TODO Auto-generated method stub
  }

  @Override
  public void onProgressChanged(SeekBar seekBar, int progress,
   boolean fromUser) {
  // TODO Auto-generated method stub
  }
 });
 }
 @Override
 protected void onDestroy() {
 super.onDestroy();
 android.os.Process.killProcess(android.os.Process.myPid());
 }
 class ClickEvent implements View.OnClickListener {

 @Override
 public void onClick(View v) {
  if (v == btnRecord) {
  isRecording = true;
  new RecordPlayThread().start();// 開一條線程邊錄邊放
  } else if (v == btnStop) {
  isRecording = false;
  } else if (v == btnExit) {
  isRecording = false;
  testRecord.this.finish();
  }
 }
 }
 class RecordPlayThread extends Thread {
 public void run() {
  try {
  byte[] buffer = new byte[recBufSize];
  audioRecord.startRecording();//開始錄制
  audioTrack.play();//開始播放
  while (isRecording) {
   //從MIC保存數據到緩沖區
   int bufferReadResult = audioRecord.read(buffer, 0,
    recBufSize);

   byte[] tmpBuf = new byte[bufferReadResult];
   System.arraycopy(buffer, 0, tmpBuf, 0, bufferReadResult);
   //寫入數據即播放
   audioTrack.write(tmpBuf, 0, tmpBuf.length);
  }
  audioTrack.stop();
  audioRecord.stop();
  } catch (Throwable t) {
  Toast.makeText(testRecord.this, t.getMessage(), 1000);
  }
 }
 };
}
希望本文所述實例對大家的Android項目開發有一定的借鑒價值。
 Android開發筆記 TableLayout常用的屬性介紹
TableLayout經常用到的屬性有: android:collapseColumns:以第0行為序,隱藏指定的列: android:collapseColum
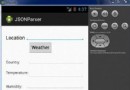
 Android JSON解析器
JSON代表JavaScript對象符號。它是一個獨立的數據交換格式,是XML的最佳替代品。本章介紹了如何解析JSON文件,並從中提取所需的信息。Android提供了四個
 Android使用WebView播放flash的方法
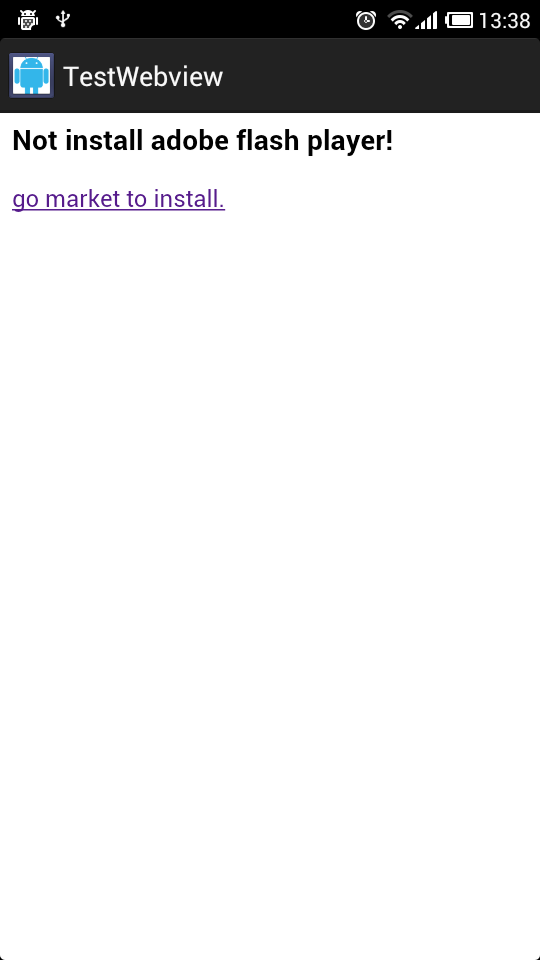
本文實例講述了Android使用WebView播放flash及判斷是否安裝flash插件的方法。分享給大家供大家參考。具體實現方法如下: 一、問題: 最近幫一個同
 android notification 的總結分析
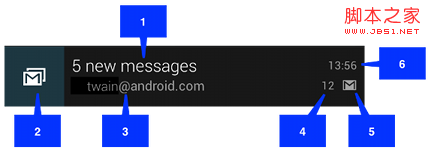
分類 notification有以下幾種: 1>普通notification 1.內容標題 2.大圖標 3.內